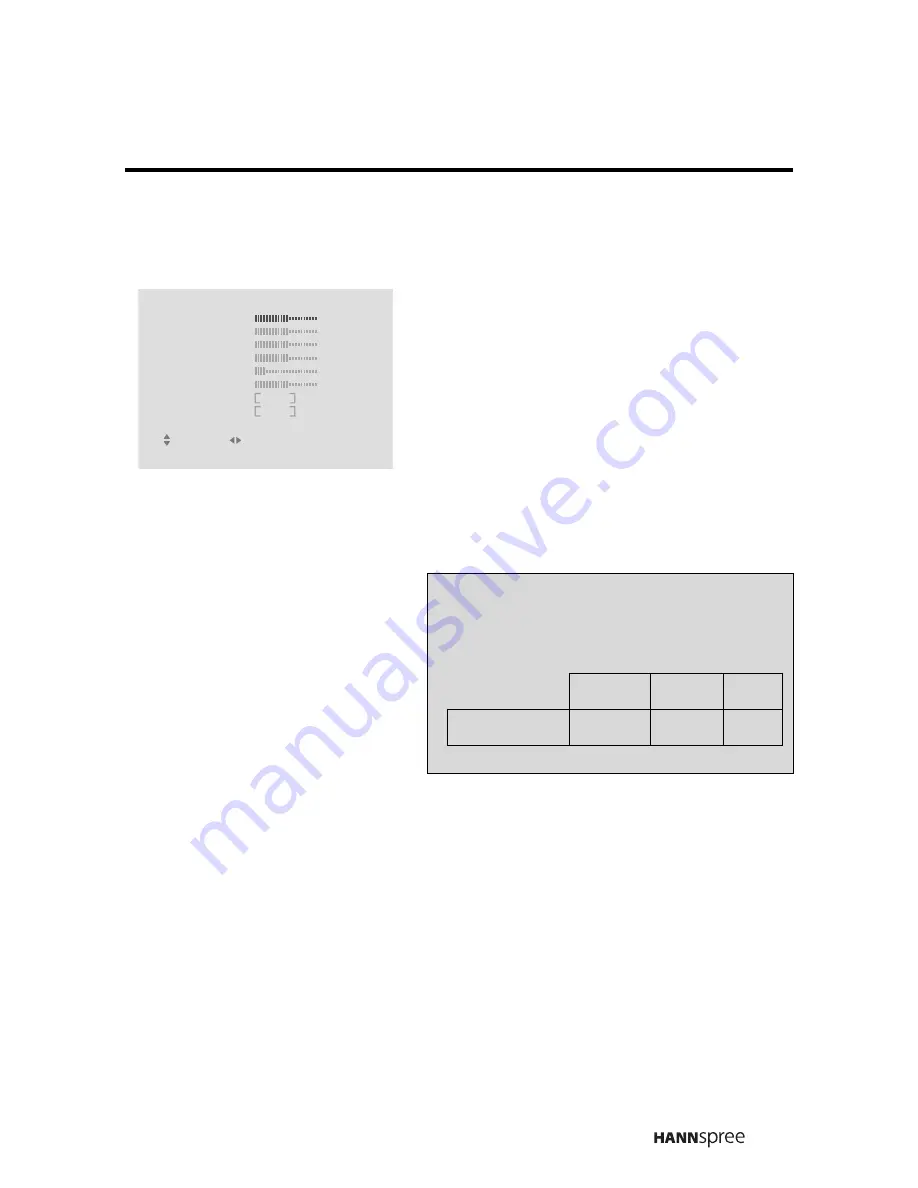
background image


41

Brightness

1

Press the CHANNEL 

S


or 

T


button to select BRIGHTNESS. 
The slider bar shows the current 
setting.

2

Press the VOLUME 

S

 button to 

increase the brightness.

3

Press the VOLUME 

T

 button to 

decrease the brightness.


PICTURE

RETURN

MENU : CLOSE

: SELECT

: ADJUST

COLOR TEMP

STD

PRESET

OFF

BRIGHTNESS

50

CONTRAST

50

HUE

50

BLACK LEVEL

50

SATURATION

50

SHARPNESS

1

Note:

The new setting is confirmed automat-
ically when the OSD times out.

MIN

MID

MAX

BRIGHTNESS

0

50

100

Summary of Contents for LT13-23A1

Page 1: ... 001226 User s Manual 23 Liquid Crystal Display Television LT13 23A1 2F No 362 Ruei Guang Rd Neihu District Taipei City 114 Taiwan R O C TEL 886 2 87520000 FAX 886 2 87527092 www hannspree com POWER VOLUME SOURCE CHANNEL ...

Page 2: ...g Connections 25 Connecting to an Antenna or Cable TV 26 Connecting to AV Devices 27 Connecting to a VCR VCD or DVD Player using component video 27 Connecting to a Video Camera using S Video 28 Connecting to a VCR VCD or DVD Player using composite video 29 Connecting Earphone 30 Connecting an Amplifier or Speakers 31 Connecting to a PC 32 Connecting the Power Adapter 33 10 Using the TV 34 Using th...

Page 3: ... Sharpness 46 Black Level 47 Color Temperature 48 Preset 49 Audio Settings 50 Treble 51 Bass 52 Balance 53 BBE TruSurround and EALA 53 Earphone 54 Preset 55 TV Settings 56 TV CATV 57 MTS 58 Auto Scan 59 Channel Add Erase 60 Favorite Channel 61 PC Settings 62 Phase 63 Clock 64 Auto Adjustment 65 DOS Mode 65 Horizontal Position 66 Vertical Position 67 Miscellaneous Settings 68 ...

Page 4: ...Table of Contents 3 Wide 69 Language 69 Sleeper 70 Time 71 12 Taking Care of Your TV 72 13 Troubleshooting 73 14 Specifications 75 PIP Operation Mode 76 Computer Compatibility Chart 77 15 Glossary 78 ...

Page 5: ...nced technology The Hannspree TV is warranted for one year limited service from the date the product is received as shown on the Warranty and Service Manual please refer to the Warranty and Service Manual for the detailed warranty information Hannspree provides complete service information in the included Warranty and Service Manual or directly from the Hannspree cus tomer service center Our servi...

Page 6: ...ing their use copying and distribution No part of this documentation may be reproduced in any form by any means without prior written authorization of Hannspree Inc and its licensors if any BBE SRS EALA Statement Manufactured under license from BBE Sound Inc Licensed by BBE Sound Inc under USP4638258 5510752 and 5736897 BBE and BBE symbol are registered trademarks of BBE Sound Inc BBE High Definit...

Page 7: ...stalling operating and cleaning the product In addition read the following Safety Notices on page 7 carefully before using the product to ensure that your TV s safety Warning This symbol is used to remind users to pay attention to important descriptions regard ing usage and maintenance repair or additional impor tant information related to this product Caution This symbol is used to remind users t...

Page 8: ...or mainte nance 4 To avoid fire or electric shocks do not overload electric power outlets Installation Safety Notes Antenna We suggest that you use an outdoor antenna to get the best signal possible unless you have cable TV or a centralized indoor antenna system You may however use an antenna indoors if it is placed in a location free from interference Location Avoid allowing the TV to get prolong...

Page 9: ... Follow the product and warning label instructions 4 Any changes or modifications that do not follow the instructions in this manual will void this product s warranty Warning To reduce the risk of fire or electric shock do not expose this product to rain or moisture Power To avoid danger of fires or electric shock make sure that you use a proper adapter The TV is compatible with the following adap...

Page 10: ...9 Optimal Viewing Distance 250 cm POWER VOLUME SOURCE CHANNEL ...

Page 11: ... near any heat sources such as radiators heat registers stoves or other appa ratus including amplifiers that produce heat Do not defeat the safety purpose of the polarized or grounding type plug A polarized plug has two blades with one wider than the other A ground ing type plug has two blades and a third ground ing prong The wide blade or the third prong are provided for your safety If the provid...

Page 12: ... combination to avoid injury from tip over Only use attachments accessories specified by the manufacturer Unplug this apparatus during lightning storms or when unused for long periods of time Refer all servicing to qualified service personnel Servicing is required when the apparatus has been damaged in any way such as if the power supply cord or plug is damaged liquid has been spilled or objects h...

Page 13: ...ire If the TV is dropped falls down or is otherwise damaged unplug the power cord immediately and notify a qualified service technician If any fluid is sprayed or dropped into the TV remove the power plug immediately and notify a qualified service technician The screen of the TV is made of glass be care ful to avoid hitting or scraping it If the screen is broken avoid cutting yourself on the broke...

Page 14: ...ace the TV on a bed sofa carpet or in a sealed cabinet to avoid blocking the product s vents Install the outdoor antenna far from power trans mission lines to avoid possible danger Remove the power cord and antenna connector when there is a storm or when the TV is not in use for a long period to avoid electric shock from lightning ...

Page 15: ...ce techni cian if you cannot plug it in correctly If there is any problem that cannot be resolved according to the instructions given in this man ual notify a qualified service technician immedi ately Do not attempt any methods not covered in this manual Do not attempt to repair the TV by yourself Notify a qualified service technician Ask the ser vice technician to complete a safety inspection bef...

Page 16: ...interference to radio communications However there is no guarantee that interference will not occur in a particular installation If this equipment does cause harmful interference to radio or television reception which can be deter mined by turning the equipment off and on the user is encouraged to try to correct the interference by one or more of the following measures Reorient or relocate the rec...

Page 17: ...th Canada ICES 003 Class B CE Conformity Statement2 This device complies with the requirements set out in the Council Direc tive on the approximation of the Laws of the Member States relating to Electromagnetic Compatibility 89 336 EEC and the Amendment Direc tive 92 31 EEC Low Voltage Directive 73 23 EEC and the Amend ment Directive 93 68 EEC 1 applies only to products purchased in Canada 2 appli...

Page 18: ...VBS and S Video input ports located at the rear and front of the unit You can also use the TV as a monitor for your PC by connecting it through the DVI port Convenient control buttons located on the front panel let you change channels adjust the volume and change display settings through an easy to use on screen menu system The TV speakers provide full rich stereo sound and a convenient audio outp...

Page 19: ...te video inputs Component video input S Video inputs 3 5 mm stereo earphone output DVI input On screen display OSD menu system Multi channel Television Sound MTS with SAP Built in 7 5W 7 5W stereo audio amplifier PIP POP Image Enhancement Technology 3 2 pull down DCDi 3 D Y C comb filter Noise Reduction De interlace Edge Enhancement ...

Page 20: ...ediately if anything is missing or damaged TV User s Manual Quick Start Guide Warranty and Service Manual Cables Power Cord Power Adapter POWER VOLUME SOURCE CHANNEL User s Manual Quick Start Guide Warranty and service manual GWA18 300V 80C V W 1 E 7 7 8 7 4 Checking Package Contents 7 ...

Page 21: ... In PC mode amber light indicates sleep status 2 Adjust volume Press the S button to increase the volume Press the T button to decrease the volume These buttons are also used to navigate OSD menus POWER VOLUME SOURCE CHANNEL S video R L Video MENU MUTE POWER VOLUME SOURCE CHANNEL 3 4 2 5 1 6 7 8 8 Getting to Know Your TV 8 ...

Page 22: ... navigate OSD menus 5 Source Selects the input source to be displayed TV AV1 AV2 AV3 AV4 or PC 6 Menu Turns the on screen display OSD menus on and off 7 Mute Press this button to disable sound Press this button again or press the volume adjust buttons directly to restore sound In PC mode press this button to automatically adjust the screen for your PC s display adapter 8 Speakers Produce high qual...

Page 23: ...external device such as a VCR or a VCD DVD player Audio Input L R white and red audio cables Video Input S Video or Video yellow video or S Video cable 2 Earphone line out Connects to earphone POWER VOLUME SOURCE CHANNEL S video R L Video MENU MUTE S video Video L R MENU MUTE 2 1 ...

Page 24: ...iption Function 1 DVI Connects to a PC s DVI port 2 Line in Connects to a PC s line audio out port 3 Line out Connects to external amplifier or speakers DVI LINE IN R L R L R L V S Y PR PB LINE OUT AV 1 AV 2 R L V ANT DC IN AV 3 1 2 3 4 5 6 7 8 ...

Page 25: ... a VCR or a VCD DVD player Audio Input R L white and red audio cables Video Input S or V yellow video or S Video cable 6 AV3 Use the AV3 input to connect an external device such as a VCR or a VCD DVD player with a composite output Audio Input R L white and red audio cables Video Input V yellow video cable 7 Antenna cable TV line in Connects to an antenna or CATV cable television line 8 DC IN Conne...

Page 26: ...king Connections Open the back cover as shown in the following illustration to get access to the input and output ports 1 Rotate the cover in the direction of the arrow 2 Pull the cover out Getting Started 9 ...

Page 27: ...ther end of the VHF UHF Antenna or CATV cable to the Antenna or CATV socket Note If you cannot receive channels after connecting to an antenna or cable TV line try scanning for channels See Auto Scan on page 59 DVI LINE IN R L R L R L V S Y PR PB LINE OUT AV 1 AV 2 R L V ANT DC IN AV 3 Antenna CATV socket Antenna ANT jack Antenna CATV coaxial cable VHF UHF IN jack ...

Page 28: ...ion presented here shows how to connect your TV to a VCR VCD or DVD player using the AV1 component video port Actual connections may vary according to the make and model of your device Refer to the user s manual included with the AV device for more detailed instructions DVI LINE IN R L R L R L V S Y PR PB LINE OUT AV 1 AV 2 R L V ANT DC IN AV 3 Y Pb Pr R L Cables and connectors are color coded red...

Page 29: ...efer to the user s manual included with the camcorder for more detailed instructions DVI LINE IN R L R L R L V S Y PR PB LINE OUT AV 1 AV 2 R L V ANT DC IN AV 3 R S VIDEO L WB S Audio cable S Video Cables and connectors are color coded red white yellow AV2 connector Note When connecting the S Video connector and AV connectors at the same time the priority is given to the S Video connector Video ca...

Page 30: ... the AV3 composite video port Actual connections may vary according to the make and model of your device Refer to the user s manual included with the AV device for more detailed instructions R VIDEO L DVI LINE IN R L R L R L V S Y PR PB LINE OUT AV 1 AV 2 R L V ANT DC IN AV 3 Cables and connectors are color coded red white yellow VCR DVD VCD AV3 A V cable ...

Page 31: ... use earphone to listen to the TV instead of using the built in speakers Connect earphone to the earphone line out port as illustrated Note Earphone is not included with the product POWER VOLUME SOURCE CHANNEL Earphone Earphone port ...

Page 32: ...onnect an external amplifier or speakers to the line out port to provide better sound quality Refer to the following illustration DVI LINE IN R L R L R L V S Y PR PB LINE OUT AV 1 AV 2 R L V ANT DC IN AV 3 R L Line out Amplifier and speakers ...

Page 33: ... the DVI output of the PC Connect the line out port of the PC to the line in port of your TV to listen to audio from the PC DVI LINE IN R L R L R L V S Y PR PB LINE OUT AV 1 AV 2 R L V ANT DC IN AV 3 PC Line in DVI port Note When changing from TV mode to PC mode the Power LED changes to amber indicating that the pc is in sleep status ...

Page 34: ...lug the power adapter connector into the DC IN on the rear panel of the TV 3 Plug the three pronged plug at the other end of the power cord into a power outlet DVI LINE IN R L R L R L V S Y PR PB LINE OUT AV 1 AV 2 R L V ANT DC IN AV 3 Power cord DC IN Power outlet Power adapter Three pronged plug ...

Page 35: ...ote control within a distance of 6 meters 20 feet from the front of the TV s signal sensor Do not exceed an angle of 30 degrees when pointing at the signal sensor Refer to the following illustration 4m 30 4m 6m 30 POWER VOLUME SOURCE CHANNEL Using the TV 10 ...

Page 36: ...ecting Channels 1 Press the CH S button to increase the channel number by one 2 Press the CH T button to decrease the channel number by one 3 Enter the specific channel number by pressing the number buttons on the remote control The channel is displayed on the screen POWER VOLUME SOURCE CHANNEL S video R L Video MENU MUTE POWER VOLUME SOURCE CHANNEL MAIN CATV CH 033 Power button and LED POWER VOLU...

Page 37: ...ce The selected source TV AV1 AV2 AV3 AV4 and PC appear on the top left corner of the screen in that order Note The TV supports S Video input in addition to normal video and audio signals The TV detects the signal type automatically and gives priority to S video when two signals are detected at the same time S video R L Video MENU MUTE POWER VOLUME SOURCE CHANNEL S video R L Video MENU MUTE POWER ...

Page 38: ...picture in picture window appears on the display using the last selected source signal for the PIP Note Refer to PIP Operation Mode on page 76 for information on which sources are compatible with each other in PIP and POP mode 3 Press the SWAP button on the remote control to switch the focus from the PIP to the main source The PIP identification line disappears and the PIP window border disappears...

Page 39: ...P window to one of the four corners of the screen as shown 5 Press the PIP button to switch to POP mode The two signals are displayed side by side 6 Press the PIP button again The screen displays the main source signal again MAIN TV CH 007 POP TV CH 002 MAIN TV CH 007 ...

Page 40: ...enus using the front panel control Notes Press the MENU button to open and close the OSD menu at any time Alternatively select the CLOSE option in the menu to return to the previous menu Button Descriptions Front Panel Control Menu MENU CH Up S CH Down T VOL Up S VOL Down T OSD Setting Menus Press MENU to enter the OSD Main Menu screen The Main Menu appears S video R L Video MENU MUTE POWER VOLUME...

Page 41: ... mode have different menu items PC picture mode includes a Backlight adjustment Press MENU to enter the OSD Main Menu screen 1 Press CHANNEL S or T to select PICTURE 2 Press VOLUME S or T to enter the PICTURE Menu S video R L Video MENU MUTE POWER VOLUME SOURCE CHANNEL MAIN MENU MENU CLOSE SELECT ENTER EXIT PICTURE AUDIO TV MISCELLANEOUS ...

Page 42: ...button to increase the brightness 3 Press the VOLUME T button to decrease the brightness PICTURE RETURN MENU CLOSE SELECT ADJUST COLOR TEMP STD PRESET OFF BRIGHTNESS 50 CONTRAST 50 HUE 50 BLACK LEVEL 50 SATURATION 50 SHARPNESS 1 Note The new setting is confirmed automat ically when the OSD times out MIN MID MAX BRIGHTNESS 0 50 100 ...

Page 43: ... button to increase the contrast 3 Press the VOLUME T button to decrease the contrast PICTURE RETURN MENU CLOSE SELECT ADJUST COLOR TEMP STD PRESET OFF BRIGHTNESS 50 CONTRAST 50 HUE 50 BLACK LEVEL 50 SATURATION 50 SHARPNESS 1 Note The new setting is confirmed automati cally when the OSD times out MIN MID MAX CONTRAST 0 50 100 ...

Page 44: ...g 2 Press the VOLUME S button to increase the backlight intensity 3 Press the VOLUME T button to decrease the backlight intensity PICTURE RETURN MENU CLOSE SELECT ADJUST COLOR TEMP STD PRESET OFF BRIGHTNESS 50 CONTRAST 50 BACKLIGHT 100 Note The new setting is confirmed automati cally MIN MID MAX BACKLIGHT 0 50 100 ...

Page 45: ...E S button to increase the hue 3 Press the VOLUME T button to decrease the hue PICTURE RETURN MENU CLOSE SELECT ADJUST COLOR TEMP STD PRESET OFF BRIGHTNESS 50 CONTRAST 50 BLACK LEVEL 50 HUE 50 SATURATION 50 SHARPNESS 1 Note The new setting is confirmed automati cally when the OSD times out MIN MID MAX HUE 0 50 100 ...

Page 46: ...button to increase the saturation 3 Press the VOLUME T button to decrease the saturation PICTURE RETURN MENU CLOSE SELECT ADJUST COLOR TEMP STD PRESET OFF BRIGHTNESS 50 CONTRAST 50 HUE 50 BLACK LEVEL 50 SATURATION 50 SHARPNESS 1 Note The new setting is confirmed automati cally when the OSD times out MIN MID MAX SATURATION 0 50 100 ...

Page 47: ...S button to increase the sharpness 3 Press the VOLUME T button to decrease the sharpness PICTURE RETURN MENU CLOSE SELECT ADJUST COLOR TEMP STD PRESET OFF BRIGHTNESS 50 CONTRAST 50 HUE 50 BLACK LEVEL 50 SATURATION 50 SHARPNESS 1 Note The new setting is confirmed automati cally when the OSD times out MIN MID MAX SHARPNESS 0 1 7 ...

Page 48: ...button to increase the black level 3 Press the VOLUME T button to decrease the black level PICTURE RETURN MENU CLOSE SELECT ADJUST COLOR TEMP STD PRESET OFF BRIGHTNESS 50 CONTRAST 50 HUE 50 BLACK LEVEL 50 SATURATION 50 SHARPNESS 1 Note The new setting is confirmed automati cally when the OSD times out MIN MID MAX BLACK LEVEL 0 50 100 ...

Page 49: ...ble STD Color for standard color settings WARM Color for color set tings with red as the dominant color COLD Color for color set tings with blue as the dominant color PICTURE RETURN MENU CLOSE SELECT ADJUST COLOR TEMP STD PRESET OFF BRIGHTNESS 50 CONTRAST 50 HUE 50 BLACK LEVEL 50 SATURATION 50 SHARPNESS 1 Notes The new setting is confirmed automatically when the OSD times out The default color tem...

Page 50: ...appears in the brackets All picture settings are returned to the factory set default values PICTURE RETURN MENU CLOSE SELECT ADJUST COLOR TEMP STD PRESET OFF BRIGHTNESS 50 CONTRAST 50 HUE 50 BLACK LEVEL 50 SATURATION 50 SHARPNESS 1 Note The preset function erases all of your custom picture settings ...

Page 51: ...r the front panel control Press MENU to enter the OSD Main Menu screen 1 Press CHANNEL S or T to select AUDIO 2 Press VOLUME S or T to enter the AUDIO Menu S video R L Video MENU MUTE POWER VOLUME SOURCE CHANNEL MAIN MENU MENU CLOSE SELECT ENTER EXIT PICTURE AUDIO TV MISCELLANEOUS ...

Page 52: ...e VOLUME S button to increase the treble 3 Press the VOLUME T button to decrease the treble AUDIO MENU CLOSE SELECT ADJUST PRESET OFF RETURN TREBLE 108 BASS 108 EARPHONE 20 BALANCE ON TruSurround OFF EALA OFF BBE Note The new setting is confirmed automati cally when the OSD times out MIN MID MAX TREBLE 0 108 216 ...

Page 53: ...he VOLUME S button to increase the bass 3 Press the VOLUME T button to decrease the bass AUDIO MENU CLOSE SELECT ADJUST PRESET OFF RETURN TREBLE 108 BASS 108 EARPHONE 20 BALANCE ON OFF EALA OFF BBE TruSurround Note The new setting is confirmed automati cally when the OSD times out MIN MID MAX BASS 0 108 216 ...

Page 54: ...BBE TruSurround or EALA 2 Press the VOLUME S or T button to select a setting for each effect BBE off high low TruSurround on off EALA on off AUDIO MENU CLOSE SELECT ADJUST PRESET OFF RETURN TREBLE 108 BASS 108 EARPHONE 20 BALANCE ON OFF EALA OFF BBE TruSurround Note The new setting is confirmed automati cally when the OSD times out AUDIO MENU CLOSE SELECT ADJUST PRESET OFF RETURN TREBLE 108 BASS 1...

Page 55: ...E S button to increase the earphone volume 3 Press the VOLUME T button to decrease the earphone volume AUDIO MENU CLOSE SELECT ADJUST PRESET OFF RETURN TREBLE 108 BASS 108 EARPHONE 20 BALANCE ON TruSurround OFF EALA OFF BBE Note The new setting is confirmed automati cally when the OSD times out MIN MID MAX EARPHONE 0 20 50 ...

Page 56: ... button ON appears in the brackets All audio settings are returned to the factory set default values AUDIO MENU CLOSE SELECT ADJUST PRESET OFF RETURN TREBLE 108 BASS 108 EARPHONE 20 BALANCE ON TruSurround OFF EALA OFF BBE Note The preset function erases all of your custom audio settings ...

Page 57: ...OSD menu is not available if the input source is not TV Press MENU to enter the OSD Main Menu screen 1 Press CHANNEL S or T to select TV 2 Press VOLUME S or T to enter the TV Menu S video R L Video MENU MUTE POWER VOLUME SOURCE CHANNEL MAIN MENU MENU CLOSE SELECT ENTER EXIT PICTURE AUDIO TV MISCELLANEOUS ...

Page 58: ...ets 2 Press the VOLUME S button to select CATV in order to receive cable TV signals 3 Press the VOLUME T button to select TV in order to receive broadcast TV signals TV MENU CLOSE SELECT ADJUST CATV MAIN OFF ADD TV CATV MTS AUTO SCAN CH ADD ERASE RETURN FAV CHANNEL Note The default TV setting is CATV ...

Page 59: ... primary signal is output through the speakers The secondary signal is output through the earphone EX DUAL exchange the primary and external sec ondary audio signals for speakers and earphone i e the primary signal is output through the ear phones and the secondary signal is output through the speaker TV MENU CLOSE SELECT ADJUST TV MAIN OFF ADD TV CATV MTS AUTO SCAN CH ADD ERASE FAV CHANNEL RETURN...

Page 60: ...LUME S button to enable auto scanning ON is displayed in brackets and the TV starts scanning automatically for TV channels TV MENU CLOSE SELECT ADJUST TV MAIN OFF ADD TV CATV MTS AUTO SCAN CH ADD ERASE FAV CHANNEL RETURN Note The TV screen displays the current channel that is successfully tuned after scanning is completed ...

Page 61: ...dd the current channel 3 Press the VOLUME T button to delete the current channel TV MENU CLOSE SELECT ADJUST TV MAIN OFF ADD TV CATV MTS AUTO SCAN CH ADD ERASE FAV CHANNEL RETURN Note You can still access the erased channel by entering the channel number using the number buttons on the remote control Add the channel again if it was erased accidentally ...

Page 62: ...e VOLUME S or T button to choose a channel to assign to the favorite channel number you selected in step 3 TV MENU CLOSE SELECT ADJUST TV MAIN OFF ADD TV CATV MTS AUTO SCAN CH ADD ERASE RETURN FAV CHANNEL FAV CHANNEL SETTING MENU CLOSE SELECT ADJUST CHANNEL 1 XX XX CHANNEL 2 XX CHANNEL 3 XX CHANNEL 4 RETURN Note Assigning a channel to one of the four favorite channel numbers replaces a previously ...

Page 63: ...PC OSD menu is not available if the input source is not PC Press MENU to enter the OSD Main Menu screen 1 Press CHANNEL S or T to select TV 2 Press VOLUME S or T to enter the TV Menu S video R L Video MENU MUTE POWER VOLUME SOURCE CHANNEL PC MENU CLOSE SELECT ENTER EXIT PICTURE AUDIO PC MISCELLANEOUS ...

Page 64: ...ent setting 2 Press the VOLUME S button to increase the phase 3 Press the VOLUME T button to decrease the phase PC MENU CLOSE SELECT ADJUST RETURN PHASE 15 CLOCK 50 V POSITION 15 OFF AUTO ADJ GRAPHIC DOS MODE 50 H POSITION Note The new setting is confirmed automati cally MIN MAX PHASE 0 31 ...

Page 65: ...nt setting 2 Press the VOLUME S button to increase the clock 3 Press the VOLUME T button to decrease the clock PC MENU CLOSE SELECT ADJUST RETURN PHASE 15 CLOCK 50 V POSITION 15 OFF AUTO ADJ GRAPHIC DOS MODE 50 H POSITION Note The new setting is confirmed automati cally MIN MAX CLOCK 0 100 ...

Page 66: ...DOS MODE The current setting is shown in brackets 2 Press the VOLUME S or T button to toggle the setting between TEXT and GRAPHIC TEXT select this option when using DOS at the command line GRAPHIC select this option when using DOS based graphi cal programs PC MENU CLOSE SELECT ADJUST RETURN PHASE 15 CLOCK 50 V POSITION 15 OFF AUTO ADJ GRAPHIC DOS MODE 50 H POSITION PC MENU CLOSE SELECT ADJUST RETU...

Page 67: ...ing 2 Press the VOLUME S button to move the display to the right 3 Press the VOLUME T button to move the display to the left PC MENU CLOSE SELECT ADJUST RETURN PHASE 15 CLOCK 50 V POSITION 15 OFF AUTO ADJ GRAPHIC DOS MODE 50 H POSITION Note The new setting is confirmed automati cally MIN MID MAX H POSITION 0 50 100 ...

Page 68: ...setting 2 Press the VOLUME S button to move the display upward 3 Press the VOLUME T button to move the display downward PC MENU CLOSE SELECT ADJUST RETURN PHASE 15 CLOCK 50 V POSITION 15 OFF AUTO ADJ GRAPHIC DOS MODE 50 H POSITION Note The new setting is confirmed automati cally MIN MID MAX V POSITION 0 15 30 ...

Page 69: ...ont panel control Press MENU to enter the OSD Main Menu screen 1 Press CHANNEL S or T to select MISCELLANEOUS 2 Press VOLUME S or T to enter the MISCELLANEOUS Menu S video R L Video MENU MUTE POWER VOLUME SOURCE CHANNEL MAIN MENU MENU CLOSE SELECT ENTER EXIT PICTURE AUDIO TV MISCELLANEOUS ...

Page 70: ...HANNEL S or T button to select LANGUAGE The current setting is shown in brackets 2 Press the VOLUME S or T button to select the language from the following English Traditional Chinese MISCELLANEOUS MENU CLOSE SELECT ADJUST 16 9 ENGLISH OFF WIDE LANGUAGE SLEEPER TIME RETURN MISCELLANEOUS MENU CLOSE SELECT ADJUST 16 9 ENGLISH OFF WIDE LANGUAGE SLEEPER TIME RETURN Note The default language setting is...

Page 71: ...OLUME S or T button to select a sleep timer value from the following OFF 30 60 90 or 120 minutes You can also press SLEEP on the remote control to select OFF 30 60 90 or 120 minutes Press display the setting appears on the TV screen The remaining time is updated every 1 minute on the display MISCELLANEOUS MENU CLOSE SELECT ADJUST 16 9 ENGLISH OFF WIDE LANGUAGE SLEEPER TIME RETURN ...

Page 72: ...NNEL S or T button to select HOUR Press the VOLUME S or T button to increase or decrease the hour 4 Press the CHANNEL S or T button to select MINUTE Press the VOLUME S or T button to increase or decrease the minutes MISCELLANEOUS MENU CLOSE SELECT ADJUST 16 9 ENGLISH OFF WIDE LANGUAGE SLEEPER TIME RETURN TIME SETTING MENU CLOSE SELECT ADJUST 2 12 MINUTE HOUR RETURN ...

Page 73: ...a dry soft cloth and use neutral cleaning fluids If your TV model has leather components wipe the leather parts with a dry cloth and keep the area dry Place the TV far from sources of steam to avoid making the leather wet Be careful to remove the power plug correctly Hold the plug instead of pulling the power cord Arrange the power cord with other cords to avoid knotting or bending which may cause...

Page 74: ...n in the OSD menus See Sharpness on page 46 Picture is OK no sound Press the VOLUME UP button on the control panel or remote control Make sure the MTS option is set to MAIN One of the speakers has no sound Adjust the balance in the OSD menus See Balance on page 53 Can t receive some TV channels using cable TV Try the Auto Program function in the TV Set tings menu See Auto Scan on page 59 Want to r...

Page 75: ...video signal cable is connected properly Snow appears on the screen Adjust the location of the antenna placing it as far as possible from roads or sources of inter ference Check the antenna and the video signal line connections Blurred or overlapped images Readjust the sharpness setting Choose programs with high quality signals Adjust the direction of the antenna or change the video signal cable S...

Page 76: ...jack AV4 Composite Video RCA jack yellow S Video Component Format 480i 480p 576i 576p 720p 1080i Audio System AV1 AV2 AV3 AV4 L R RCA jacks audio input 8 mm line in jack audio input 3 5 mm earphone and L R line out jacks audio output Built in stereo audio amplifier 7 5W 7 5W Power Supply 100 240V 50 60 Hz 20V DC Power Consumption 150W Weight including base 16 35 KG Dimensions including base 515 mm...

Page 77: ...and POP sources Main Source PIP Source POP Source AV1 YPbPr or YCbCr AV2 AV3 AV4 TV2 AV2 S or CVBS AV2 AV2 AV3 AV3 AV4 AV4 TV2 TV2 AV3 CVBS AV2 AV2 AV3 AV3 AV4 AV4 TV2 TV2 AV4 S or CVBS Front AV2 AV2 AV3 AV3 AV4 AV4 TV2 TV2 TV AV2 AV2 AV3 AV3 AV4 AV4 TV2 TV2 PC AV2 AV2 AV3 AV3 AV4 AV4 TV2 TV2 ...

Page 78: ...ing table shows resolution and frequency values supported by the TV Resolution Frequency Remarks 640 X 400 70 Hz 640 X 480 60 Hz 67 Hz Mac 72 Hz 75 Hz 800 X 600 56 Hz 60 Hz 72 Hz 75 Hz 832 X 624 75 Hz Mac 1024 X 768 60 Hz 70 Hz 75 Hz 75 Hz Mac ...

Page 79: ...nt color LCD Liquid Crystal Display A display technology that uses rod shaped molecules liquid crystals that flow like liquid and bend light MTS Multi channel Television Sound Enables reception of audio other than the primary MAIN audio signal DUAL enables reception of a stereo audio signal while SAP Second Audio Program enables reception of a separate channel that may be a different language or c...

Page 80: ...MEMO ...

Page 81: ...MEMO ...

Reviews: