background image

11 Using your Digital Photo Frame

• Press 

 and 

 to adjust the playback volume

• Press 

 to mute the sound.

Playing Photos and Music

Select 

Photo + Music 

on the main menu and press 

 to enter. The unit 

automatically detects any storage device and starts playing stored music.

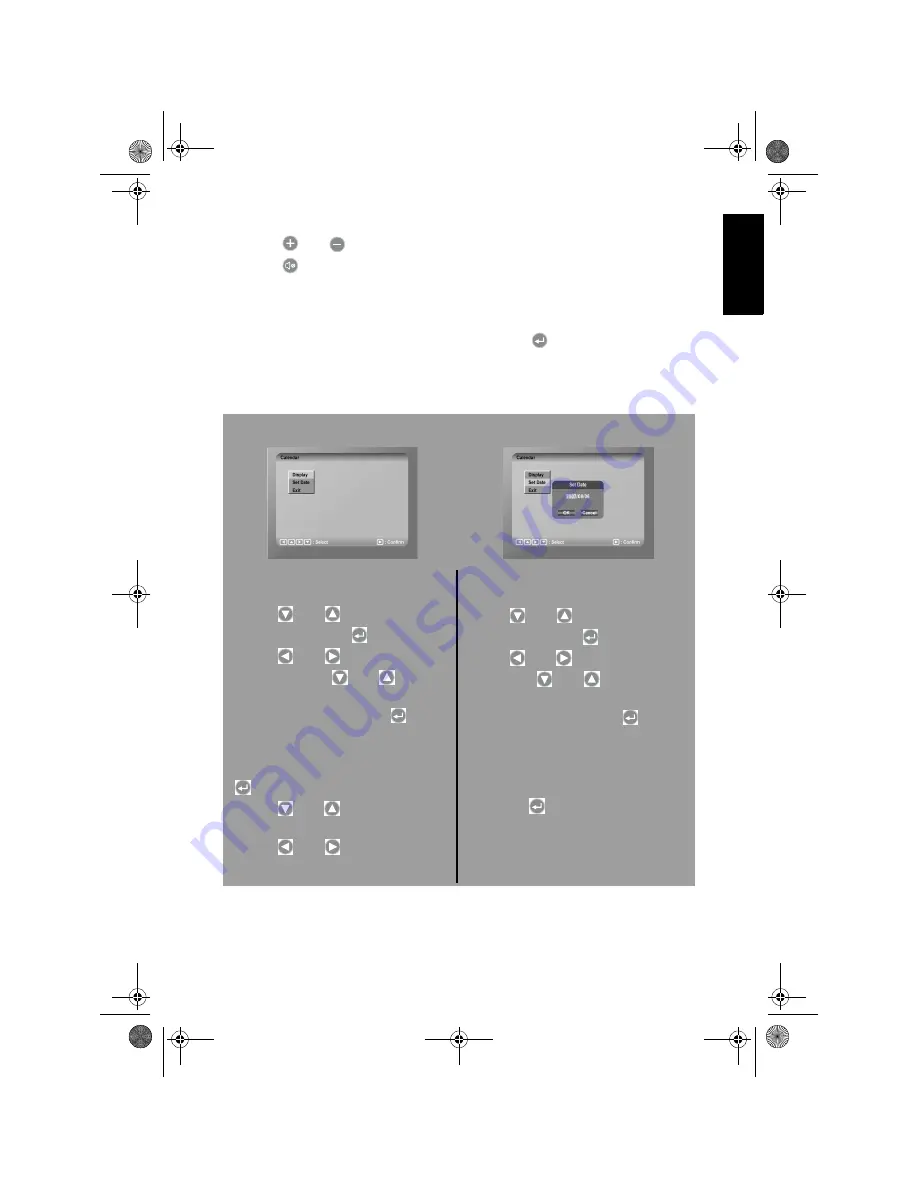
Setting the Date & Time

Select 

Calendar

 from the main 

screen.
1. Use 

 and 

 to highlight 

Set 

Date

 and press 

2. Use 

 and 

 to select each 

field and use 

 and 

 to 

change values. 

3. Highlight 

OK

 and press 

 to 

confirm.

You can also view a full calendar in 
this mode. Select 

Display

 and press 

1. Use 

 and 

 to change the dis-

played month. 

2. Use 

 and 

 to change the 

year.

Select 

Clock

 from the main screen.

1. Use 

 and 

 to highlight 

Set 

Time

 and press 

2. Use 

 and 

 to select each field 

and use 

 and 

 to change val-

ues. 

3. Highlight 

OK

 and press 

 to con-

firm.

You can also view a full clock and 
calendar in this mode. Select 

Display

highlight

 Clock 

or

 Clock & Calendar


and press 

.

Setting the Date

Setting the Time

En

glis

h

Hanspree_DPF_UM_EN.book  Page 11  Friday, September 7, 2007  7:12 PM

Summary of Contents for Joy.D9

Page 1: ......

Page 2: ...Camera 5 Turning On 5 Using your Digital Photo Frame 6 Navigating the OSD On Screen Display 6 Setting the Language 6 Configuring Photo Settings 7 Viewing your photos 8 Copying Deleting Photos 9 Playi...

Page 3: ...Reorient or relocate the receiving antenna Increase the separation between the equipment and receiver Connect the equipment into an outlet on a circuit different from that to which the receiver is co...

Page 4: ...s warranty CAUTION RISK OF ELECTRIC SHOCK DO NOT OPEN WARNING This symbol is used to alert users to pay attention to important descriptions regarding usage maintenance repair and addi tional importan...

Page 5: ...e plug has two blades and a third grounding prong The wide blade or the third prong are pro vided for your safety If the provided plug does not fit into your outlet consult an electrician for replacem...

Page 6: ...close to the cover Do not use force when pulling the remote control cover open you may damage the hinge 12 Use only with the cart stand tripod bracket or table specified by the manufacturer or sold w...

Page 7: ...ior written authorization of Hannspree or of other third parties The Hannspree logos presented herein are trademarks of Hannspree All other product names trademarks or logos mentioned herein are used...

Page 8: ...rmation in this manual has been carefully checked for accuracy however no guarantee is given to the correctness of the contents The information in this manual is subject to change without notice To th...

Page 9: ...Stop Exit 3 Volume Up Direction key up 4 Volume Down Direc tion key down 5 Previous Direction key left 6 Next Direction key right 7 Play Pause Enter 1 Power jack 2 Earphone jack 3 FM radio antenna ja...

Page 10: ...Power On Off 2 Stop Exit 3 Volume Up 4 Volume Down 5 Previous 6 Next 7 Play 8 Pause 9 Fast Rewind 10 Fast Forward 11 Function key 12 Direction key Up 13 Direction key Down 14 Direction key Left 15 Dir...

Page 11: ...1 The stand can adjustable two position 0 and 90 degree Figure 1 2 To avoid collapse of your DPF place it firmly on the desk with the stand extended at an angle of 20 degrees This allows you to view...

Page 12: ...Igital camera to the USB port on your Digital Photo Frame as shown 3X OPTICAL ZOOMLEN S f 5 7 16 3mm F 2 6 4 9 Note Some cameras does not support the PnP function To use this connection make sure that...

Page 13: ...s functions Setting the Language FUNC 1 Select Setup from the main screen and use and to select Custom Setup and press to enter the menu 2 Use and to highlight OSD Language and press to enter the sub...

Page 14: ...to highlight the transi tion effect you want and press to select 3 Press twice to return to the main setup menu 4 Use and to highlight Exit and press to exit to the main screen Browse mode There are t...

Page 15: ...ockwise press to rotate the image 90 degrees clockwise press to mirror the image and press to flip and invert the image Slide show mode On entering the photo function photographs are automatically dis...

Page 16: ...m the main screen 1 Use and to select Delete and press 2 Use to highlight Delete Press to enter the Delete mode 3 Use and to select the photo and press to delete it 4 Use to highlight Delete All Press...

Page 17: ...he playback volume Press to mute the sound Playing Music Press to stop playback return to the File Manager Press to pause playback Press to fast forward Press to rewind Press to skip to the next track...

Page 18: ...se and to change values 3 Highlight OK and press to confirm You can also view a full calendar in this mode Select Display and press 1 Use and to change the dis played month 2 Use and to change the yea...

Page 19: ...1 Use and to highlight Power On Enable and press 2 Use and to select On or Off and press 3 Use and to select Set Time and press 4 Use and to select Power On and press 5 Use and to select each field an...

Page 20: ...ed as shown above When a storage device has been connected to the Digital Photo Frame the system will analyze the multimedia formats of the files stored in the device You can then use the File Manager...

Page 21: ...ss to enter the submenus Use and to highlight the value you require and press to confirm Brightness Adjust the screen brightness Contrast Adjust the screen contrast Saturation Adjust the screen color...

Page 22: ...emory card is not inserted correctly No photo music or video file on the memory card Incompatible file format Verify if the way you inserted the card is correct Make sure the front label of the memory...

Page 23: ...pported resolution of a photo or video is 640 x 480 Use the Zoom button on the remote control to enlarge it Black bands appear around the picture This is normal since different digital cameras take pi...

Page 24: ......

Reviews: