User’s Manual
MAKING CONNECTIONS
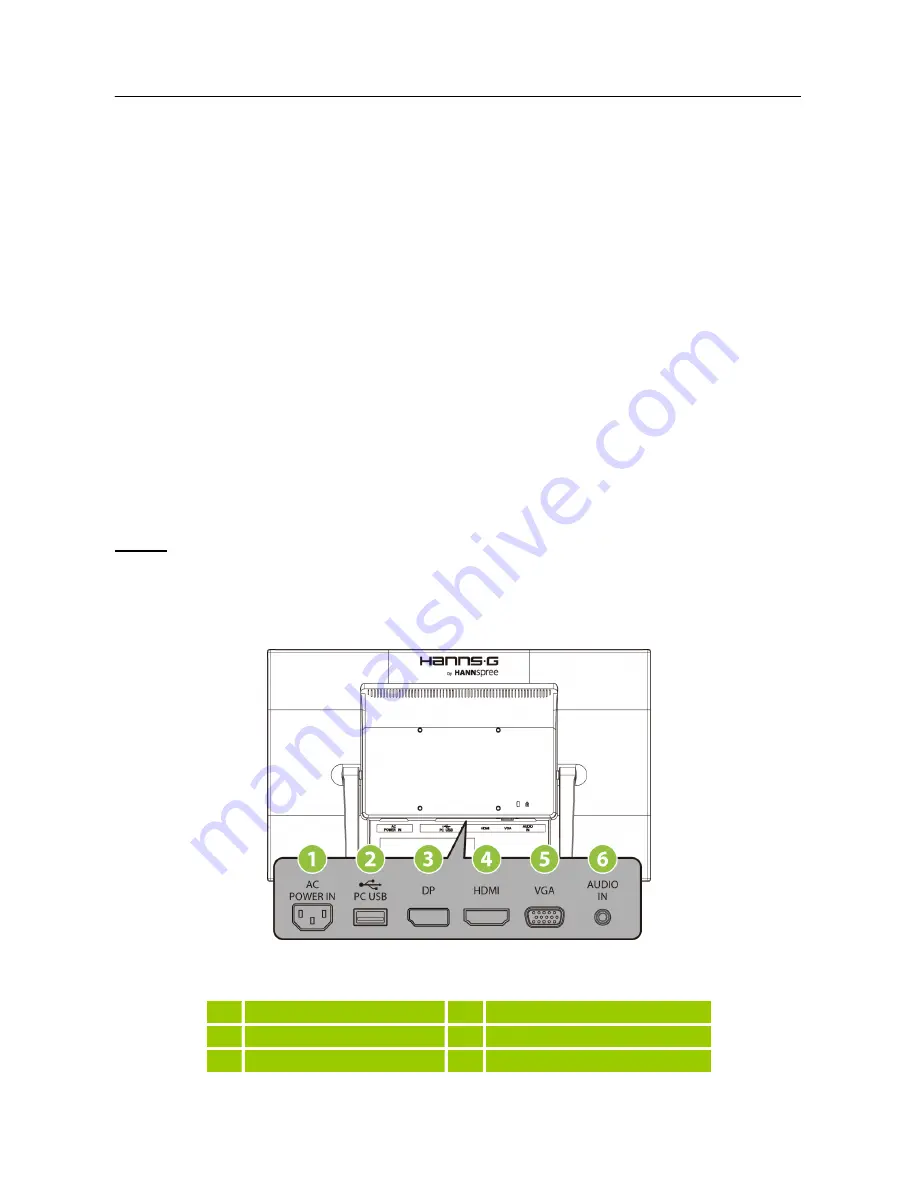
CONNECTING TO A PC
Turn off your computer before performing the procedure below.
1. Connect one end of the VGA cable to the back of the monitor and connect the other end to the
computer’s VGA port.
2. Connect one end of the HDMI cable (optional) to the back of the monitor and connect the other
end to the computer’s HDMI port.
3. Connect one end of the Display Port cable (optional) to the back of the monitor and connect the
other end to the computer’s Display Port port.
4. Connect the audio cable between the monitor's audio input and the PC's audio output (green
port).
5. Connect one end of the USB cable to the back of the monitor and connect the other end to the
computer’s USB port.
6. Plug one end of the AC power cord to the LCD monitor’s AC input socket, and the other end to
Wall outlet.
7. Turn on your monitor and computer.
NOTE:
The HT225HPB is available with USB connection. It is Microsoft Windows 10 HID (Human
Interface Device) compatible if you use the USB touch screen interference. No additional software
driver is required. Calibration is a simple process and can be invoked by running Tablet PC Settings
from Control Panel and clicking the Calibrate button.
Figure.2. Connecting to a PC
1
Power AC Input
2
USB-Type A to B
3
Display Port Input
4
HDMI Input
5
VGA Input
6
LINE IN
9


