4
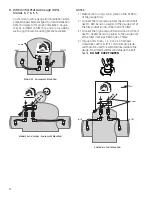
NOTES:
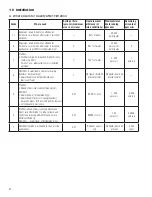
1) Make certain o-rings are in place on the bottom
of the gauge body.
2) Connect the low pressure transmission bolt (bolt
next to RED band on gauge) to the gauge port at
the filter outlet (down-stream side of filter).
3) Connect the high pressure transmission bolt (bolt
next to GREEN band on gauge) to the gauge port
at the filter inlet (upstream side of filter).
4) Torque bolts to 25 +/- 5 inch oz. A flathead
screwdriver with a 3/8” (1 cm) minimum blade
width can be used to assemble/disassemble the
gauge. Small blade widths will damage the bolt
heads.
DO NOT OVER TIGHTEN
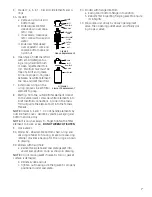
WALL
INLET
OUTLET
O-RINGS
All Models - Wall Mounted
D. Differential Pressure Gauge (DPG) -
Grades 9, 7, 6, 5, 3
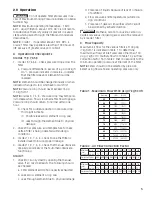
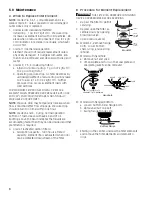
On standard units, a gauge and installation kit are
shipped separately packaged for field installation.
Refer to diagram for proper installation. Gauge
may be installed on filter housing or on a nearby
wall using the wall mounting bracket supplied.
INLET
OUTLET
O-RINGS
Model 52 - Equipment Mounted
Model 54 and Larger - Equipment Mounted

