background image

INTRODUCTION

Compressed air is generated by compressing atmospheric air 

of which contains moisture and other containments, into high 

pressure air. After compression, the air is not saturated but when 

it is cooled by the aftercooler, the RH remains 100%.
If it travels down the pipe line and cools further, moisture starts 

to condensate into liquid water. Condensate water in the pipe 

line is harmful to the manufacturing process as it causes rust 

or sludge etc.
In order to avoid this problem, the only solution is to dry the 

compressed air with an air dryer. Refrigerated compressed air 

dryers are used as a cost effective and energy efficient solu-

tions for eliminating moisture from the compressed air system.
SPX Flow’s discovery of using Phase Change Material (PCM) as 

a component in the refrigerated compressed air dryer to pro-

duce latent heat has encouraged great energy savings. Through 

latent heat properties, it is able to save up to 99% of energy at 

no load condition. This is indeed a breakthrough in refrigerated 

compressed air dryer technology.

SAFETY

The dryers are designed and built with safety as a prime con-

sideration; industry accepted safety factors have been used in 

the design. Each dryer is checked at the factory for safety and 

operation. All necessary adjustments are made before shipment.
Follow the maintenance schedules outlined in this manual for 

good performance and safe operation. 
Only qualified personnel with proper tools should do mainte-

nance.

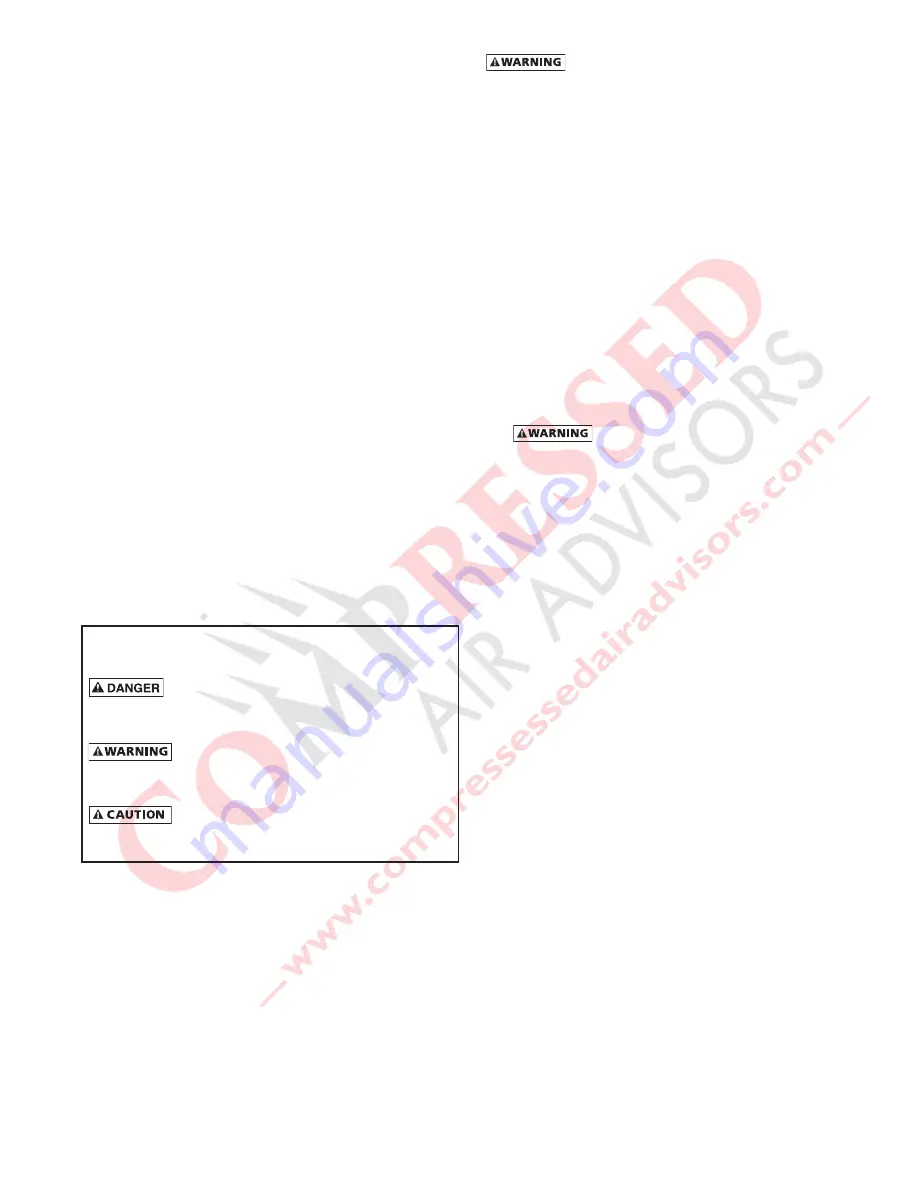
Safety instructions in this manual used to indicate hazard 

seriousness levels are classified as follows:

Immediate hazard which WILL result in severe injury or 

death.


Hazard or unsafe practice which COULD result in severe 

injury or death.

Hazard or unsafe practice which COULD result in minor 

injury or product damage. 


Carefully read the following safety rules before proceed-

ing with installation, operation or maintenance. The rules 

are essential to ensure safe dryer operation. Failure to 

follow these rules may void the warranty or result in dryer 

damage or personal injury.

1.  Do not install or try to repair a dryer that has been damaged 

in shipment. See Receiving and Inspection for instructions.

2.  Compressed air and electricity have the potential to cause 

personal injury or equipment damage. Before doing any 

work on the dryer, be sure the electrical supply has been 

locked and tagged and the internal pressure of the dryer 

has been vented to the atmosphere.

3.  Do not operate the dryer at pressures or temperatures 

above the maximum conditions shown on the data plate.

4.  Always supply electrical power that complies with the volt-

age shown on the data plate.

5.  Do not readjust the dryer without factory authorization.
6.  Do not operate the dryer with any dryer cabinet panel 

removed.


Cooling air flow across the condenser may be reduced 

if a dryer panel has been removed while the dryer 

is operating, resulting in the dryer not functioning 

properly and/or dryer failure. Failure to follow these 

instructions may result in a non-warrantable dryer 

failure.


7.  Only a competent refrigeration mechanic works on the 

refrigeration system.

8.  Use only manufacturer’s genuine replacement parts. The 

manufacturer bears no responsibility for hazards caused 

by the use of unauthorized parts. 

INSTALLATION

Inspect the dryer closely when it is received. Record any indica-

tion of damage on the delivery receipt, especially if the dryer 

will not be immediately uncrated. Obtain the delivery person’s 

signed agreement to recorded damages to facilitate future 

insurance claims .
Since the dryer is shipped F.O.B. Factory, the manufacturer’s 

responsibility for the shipment ceases when the carrier signs 

the bill of lading.
If goods are received short or in damaged condition, notify the 

carrier and insist on a notation of the loss or damage across 

the face of the freight bill. Otherwise no claim can be enforced 

against the carrier. 
If concealed loss or damage is discovered, notify your carrier 

at once and request an inspection. This is absolutely necessary. 

Unless you do this, the carrier will not consider any claim for 

loss or damage. The carrier will make an inspection and may 

grant a concealed damage notation. If you give the carrier a 

clear receipt for the goods that have been damaged or lost in 

transit, you do so at your own risk and expense.
The manufacturer is willing to assist you in collecting claims for 

loss or damage. Willingness does not make the manufacturer 

responsible for collecting claims or replacing material. Claim 

filing and processing is your responsibility.

Summary of Contents for SPX Flow FLEX Series

Page 1: ...rs Models FLX 1 1 FLX 1 2 FLX 1 5 1 FLX 1 5 FLX 2 1 FLX 2 1 4 FLX 3 1 FLX 4 1 FLX 4 5 FLX 5 5 FOR M NO 7440062 R EVI S ION 09 2018 R EAD AN D U N D E R STAN D TH I S MAN UAL PR IOR TO OPE RATI NG OR S E RVICI NG TH I S PROD UCT I N STR UCTION MAN UAL ...

Page 2: ...LX 1 2 11 Models FLX 1 5 1 FLX 1 5 FLX 2 1 FLX 2 1 4 12 Models FLX 3 1 FLX 4 1 13 Models FLX 4 5 FLX 5 5 14 Electrical Schematic Models FLX 1 1 FLX 1 2 115V 1PH 60Hz 15 Models FLX 1 5 1 115V 1Ph 60Hz 16 Models FLX 1 5 FLX 2 1 FLX 4 1 230V 1Ph 60Hz 17 Models FLX 2 1 4 FLX 3 1 FLX 4 5 FLX 5 5 460V 3Ph 60Hz 18 Air and Refrigerant Flow Schematic 19 REPLACEMENT PARTS 20 21 MAINTENANCE KITS 22 NOTES 23 ...

Page 3: ...ions 2 Compressed air and electricity have the potential to cause personal injury or equipment damage Before doing any work on the dryer be sure the electrical supply has been locked and tagged and the internal pressure of the dryer has been vented to the atmosphere 3 Do not operate the dryer at pressures or temperatures above the maximum conditions shown on the data plate 4 Always supply electric...

Page 4: ...on the dryer data plate and must be in accor dance with applicable codes Support all piping do not allow the weight of any piping to stress the dryer or filters Inlet and outlet shutoff valves and bypass valves are recommended Pip ing should be at least the size of the inlet and outlet connections to minimize pressure drop in the air system See Specification Table for dryer inlet and outlet connec...

Page 5: ... cooled by outgoing cold air The inlet air is further cooled in the refrigeration chiller The condensate is removed from the air stream by an electronic drain valve The cold dry air is reheated by incoming warm air as it passes back through the air to air heat exchanger Using the outgo ing air to pre cool the inlet air condenses up to 65 percent of the moisture out of the inlet air before it reach...

Page 6: ... Allow the dryer to run 15 minutes Confirm that the tem perature indicators are in the green zone 3 SLOWLY open the dryer outlet valves permitting flow through the dryer 4 Confirm that condensate is discharging from the drain valve by pressing the Push to Test button 5 Confirm that the inlet air temperature pressure and airflow to the dryer meet the specified requirements see Engi neering Data sec...

Page 7: ... or other reasons use the following procedure 1 Turn off the power switch 2 Disconnect the main power supply 3 Lock out and tag the power supply in accordance with OSHA requirements If mechanical repairs are to be made or service is performed vent the internal pressure of the dryer to atmospheric pressure Restart the dryer according to the start up instructions Disconnect power supply and depressu...

Page 8: ...least once daily See the Field Service Guide for remedies to drain valve malfunctions Monthly Maintenance It is recommended to inspect the condenser coils monthly If necessary remove dirt or other particles with compressed air from an OSHA approved air nozzle that limits its discharge pressure to 30 psig 2 1 kgf cm2 Yearly Maintenance It is recommended to replace the drain service unit annually Fo...

Page 9: ...e The dew point level is red on LCD window Inlet air temperature too high Reduce aftercooler discharge temperature to design conditions See Engineering Data Tables Excessive airflow Check airflow and system capacity Reduce airflow or resize and replace system Condenser fouled or clogged Clean or replace condenser Fan motor inoperative Replace fan motor High ambient temperature Ventilate area See E...

Page 10: ... 19 4 493 43 7 1 111 335 152 FLX 4 5 450 NPT 2 40 6 1 032 19 5 494 49 3 1 253 366 166 FLX 5 5 550 NPT 2 40 6 1 032 19 5 494 49 3 1 253 396 180 1 Rated Flow Capacity Conditions for rating dryers are in accordance with ISO 7183 Option A2 Compressed air at dryer inlet 100 psig 6 9 barg and 100 F 38 C ambient air temperature 100 F 38 C operating on 60 Hz power supply 2 Refer to dryer data plate for re...

Page 11: ...ut Out psig barg Cut In psig FLX 1 1 FLX 1 2 FLX2 1 4 R 134a 304 psig 21 barg Manual Reset FLX 1 5 1 FLX 1 5 FLX 2 1 FLX 3 1 FLX 4 1 FLX 4 5 FLX 5 5 R 407c 406 psig 28 barg Manual Reset CORRECTION FACTORS MULTIPLIERS Air Inlet Temperature F C Multiplier Air Inlet Pressure psig barg Multiplier Ambient Air Temperature F C Multiplier 80 F 27 C 90 F 32 C 100 F 38 C 110 F 43 C 120 F 49 C 1 46 1 23 1 00...

Page 12: ... H I J K FLX 1 1 4 69 119 4 97 126 2 8 41 213 5 19 20 487 7 14 27 362 4 29 58 751 2 12 75 324 23 72 602 5 3 39 86 2 15 40 391 2 22 14 562 4 1 NPT 120 54 5 DRIED AIR OUTLET WETTED AIR INLET AIR FLOW COOLING C D E F G MAIN POWER CABLE A B 4 Ø10 MOUNTING HOLES DRAIN OUTLET FOOT PRINT FRONT VIEW REAR VIEW RIGHT SIDE VIEW TOP VIEW H J K I ...

Page 13: ...D E F G H I J K FLX 1 2 3 41 86 5 4 97 126 2 6 77 172 19 25 489 2 14 29 363 28 711 2 12 76 324 30 76 781 3 5 56 141 2 19 29 490 29 18 741 2 1 NPT 147 66 5 AIR FLOW COOLING DRIED AIR OUTLET WETTED AIR INLET F E C D A B 5 Ø10 MOUNTING HOLES G DRAIN OUTLET POWER CORD FOOT PRINT FRONT VIEW REAR VIEW RIGHT SIDE VIEW TOP VIEW J K I H ...

Page 14: ... 2 17 44 443 29 97 761 2 15 91 404 35 50 901 3 3 39 86 2 27 16 690 33 91 861 2 2 NPT 188 5 85 5 FLX 2 1 4 86 123 5 7 86 199 6 3 63 92 24 38 619 2 17 44 443 29 97 761 2 15 91 404 37 85 961 3 3 39 86 2 29 53 750 36 27 921 2 2 NPT 217 98 5 FLX 2 1 4 4 86 123 5 7 86 199 6 3 63 92 24 38 619 2 17 44 443 29 97 761 2 15 91 404 37 85 961 3 3 39 86 2 29 53 750 36 27 921 2 2 NPT 244 110 5 DRIED AIR OUTLET WE...

Page 15: ... VIEW RIGHT SIDE VIEW TOP VIEW H I J K MODEL DIMENSIONS INCHES MM INLET OUTLET CONNECTIONS WEIGHT Lb kg A B C D E F G H I J K FLX 3 1 4 86 123 5 7 86 199 6 8 31 211 2 25 59 650 19 41 493 35 88 911 2 17 88 454 43 75 1111 3 3 39 86 2 35 43 900 42 17 1071 2 2 NPT 324 147 FLX 4 1 4 86 123 5 8 58 218 8 35 212 25 56 649 2 19 41 493 35 88 911 2 17 88 454 43 75 1111 3 3 39 86 2 35 43 900 42 17 1071 2 2 NP...

Page 16: ...HT SIDE VIEW TOP VIEW I J K L MODEL DIMENSIONS INCHES MM INLET OUTLET CONNECTIONS WEIGHT Lb kg A B C D E F G H I J K L FLX 4 5 4 87 123 8 8 58 218 9 79 248 6 30 83 783 19 43 493 5 40 61 1031 6 17 72 450 19 30 490 1 97 50 43 70 1110 47 64 1210 49 32 1252 8 2 NPT 366 166 FLX 5 5 4 87 123 8 8 58 218 9 78 248 6 30 83 783 19 43 493 5 40 61 1031 6 17 72 450 19 30 490 1 97 50 43 70 1110 47 64 1210 49 32 ...

Page 17: ... COM ON R1 S1 FG S2 R2 COM ON COM RB RA TS1 TS2 DRAIN TRAP1 MC1 8 9 10 8 N1 L1 PCB LEGEND M1 Refrigerant Compressor M2 Fan Motor MC1 Magnetic Contactor CR Running Capacitor CS Starting Capacitor R PTC Relay S1 Switch On Off S2 Overload Protector S3 High Pressure Switch TS1 Temperature Sensor 1 TS2 Temperature Sensor 2 SOL No Loss Drain Valve PCB Control Board S0 Main Switch Customer s installation...

Page 18: ... Sensor TS2 Heat Exchanger Inlet Temp Sensor TS3 Air Inlet Temp Sensor SOL No Loss Drain Valve PCB Control Board S0 Main Switch Customer s installation F0 Main Fuse Customer s installation N L E Customer s installation CH 115V 1PH 60Hz MC1 S1 S R CR M1 C S2 L1 N1 S0 F0 16A M2 SOL S3 1 DIP SW 2 3 4 AC IN1 COMP1 ALARM1 DRAIN COM N O N C COM ON R1 S1 FG S2 R2 COM ON COM RB RA TS1 TS2 DRAIN TRAP1 MC1 ...

Page 19: ... TS2 DRAIN TRAP1 MC1 8 9 10 8 N1 L1 PCB TS3 RS232 RS485 RS232 RX GND RS232 TX RS485 GND RS485 LEGEND M1 Refrigerant Compressor M2 Fan Motor MC1 Magnetic Contactor CR Running Capacitor CH Crankcase Heater S1 Switch On Off S2 Overload Protector S3 High Pressure Switch TS1 Separator Inlet Temp Sensor TS2 Heat Exchanger Inlet Temp Sensor TS3 Air Inlet Temp Sensor SOL No Loss Drain Valve PCB Control Bo...

Page 20: ...or TS3 Air Inlet Temp Sensor DRAIN TRAP No Loss Drain Valve PCB Control Board L3 L1 L2 0V 480V 0V 120V 460V 3PH 60HZ W1 U1 V1 W2 U2 V2 MAIN POWER TB1 L3 L1 E L2 F1 2A MOTOR FAN MC2 MC1 COMP TRANSFORMER 50VA 60Hz S1 CRANK CASE HEATER R1 T1 MC1 4 5 L1 L3 R2 T2 1 DIP SW 2 3 4 AC IN1 COMP1 ALARM1 DRAIN COM N O N C COM ON R1 S1 FG S2 R2 COM ON COM RB RA TS1 TS2 DRAIN TRAP1 11 10 9 8 R2 T2 PCB TS3 RS232...

Page 21: ...FRIGERANT FLOW FILTER REFRIGERANT COMPRESSOR BRAZED PLATE HEAT EXCHANGER TEMP SENSOR1 TS1 REF PCM AIR WETTED AIR INLET DRIED AIR OUTLET AIR AIR MOISTURE SEPARATOR INTEGRATED DRAIN VALVE DRAIN OUTLET NO LOSS MANUAL VALVE HIGH PRESSURE SWITCH CONDENSER FAN BLADES FAN MOTOR COOLING AIR FLOW CAPILLARY TUBE AIR COOLED TEMP SENSOR2 TS2 TS3 TEMP SENSOR3 FLX1 5 5 5 ONLY H P S ...

Page 22: ...33676 7433676 7 Plate Heat Exchanger 7440039 7440114 7440247 7440115 7440116 8 High Pressure Switch 3161273 3161273 7433678 7433678 7433678 9 No Loss Drain Valve 7440053 7440053 7440053 7440053 7440053 10 Controller 7440050 7440050 7440051 7440051 7440051 11 Temperature Sensor 7440054 7440054 7440249 7440249 7440249 12 Magnetic Contactor Compressor 7433697 7433697 7433697 7433697 7433697 13 Magnet...

Page 23: ...51 7440051 11 Temperature Sensor 7440249 7440250 7440250 7440250 7440250 12 Magnetic Contactor Compressor 7440251 7440251 7433698 7440251 7440251 13 Magnetic Contactor Fan 7440221 7440221 7440221 7440221 14 On Off Switch 3209745 3209745 7440052 3209745 3209745 15 Start Capacitor 16 Run Capacitor 7433695 17 Crankcase Heater 7439996 7439996 7440067 7439996 7439996 18 Voltage Transformer 7439965 7439...

Page 24: ... Element Filter Drain Valve Repair Kit 2 FLX1 1 FPMK 7461654 FLX1 2 FPMK 7461655 FLX1 5 FPMK 7440120 FLX2 1 FPMK 7461656 Model Kit Components FLX 3 1 FLX 4 1 FLX 4 5 FLX 5 5 Standard Kit No Loss Drain Valve Repair Kit Drain Cover FLXMK 7461648 FLXMK 7461648 FLXMK 7461648 FLXMK 7461648 Standard Kit with Mounted Filtration No Loss Drain Valve Repair Kit Drain Cover Prefilter Element Afterfilter Elem...

Page 25: ...23 NOTES ...

Page 26: ...is the exclusive remedy of any buyer of the manufacturer s product The maximum damages liability of the manufacturer is the original purchase price of the product or part THE FOREGOING WARRANTY IS EXCLUSIVE AND IN LIEU OF ALL OTHER WARRANTIES WHETHER WRITTEN ORAL OR STATUTORY AND IS EXPRESSLY IN LIEU OF THE IMPLIED WARRANTY OF MERCHANTABILITY AND THE IMPLIED WARRANTY OF FITNESS FOR A PARTICULAR PU...

Reviews: