background image

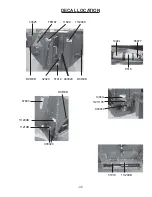
DECAL LOCATION

-34-

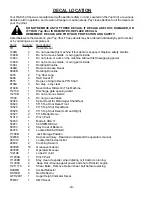
Your H&S Top Shot was manufactured with operator safety in mind. Located on the Top Shot  are various
decals to aid in operation, and to warn of danger or caution areas. Pay close attention to all the decals on
your Top Shot.

DO NOT REMOVE ANY OF THESE DECALS. IF DECALS ARE LOST, DAMAGED, OR
IF YOUR Top Shot
 IS REPAINTED, REPLACE DECALS.
REMEMBER: DECALS ARE FOR YOUR PROTECTION AND SAFETY.

Listed below are the decals on your Top Shot. These decals may be ordered individually by part number,
or by ordering as a complete set.

Part #      Quantity

Description

311

1

Patent Decal

1494A

4

Do not operate this machine if this decal is exposed. Replace safety shields

1494B

1

Do not remove shields - moving parts inside

1494J

1

Do not clean or work on the machine without first disengaging power

1494K

1

Do not remove shields - moving parts inside

1494L

1

Rotating Driveline

3494A

1

Remote Grease Decal

5896B

1

Rotating Driveline

8353

2

Top Shot Logo

8496

4

H&S Decal 8”

8515

1

Degree of Angle Decal-PTO Shaft

9194A

3

No step - stay clear

9194B

1

Never Allow Riders On This Machine

11210A

1

Discharge gate opening decal

11210B

1

Do not remove shields

11599

4

Do not go near leaks

32320

1

Spiral Decal for Main Auger Shaft-Rear

33524

1

5115 Top Shot Decal Front

33525

1

5115 Top Shot Decal Back

33526

2

5115 Top Shot Decal (Left and Right)

33527

2

5115 Model Decal

51010

4

Pinch Point

54033

1

Made in USA 3”

56877

1

540 RPM DECAL

58703

2

Stay Clear of Beaters

66076

2

Located Behind Shield

71188B

1

Jack Storage Position

72203A

1

Help Avoid Injury - Read and understand the operators manual

081312

1

Located behind sprocket

82602

2

Crushing Hazard

093020

16

Grease zerk decal

093366

1

Operators Manual

102196

1

Lube-CV Joint

111209A

1

Pinch Point

111209B

3

Stay clear of expeller when rotating or if tractor is running

111209C

4

Keep Out - Disengage all power and shut off tractor engine

11211176

2

Shear Bolts - Remove broken shear bolt before replacing

DCAMB

6

Amber Reflector

DCRED

3

Red Reflector

LW112901

1

Auger Height Indicator Decal

TFM97

1

SMV Decal

Summary of Contents for 5115

Page 1: ...ARSHFIELD WISCONSIN 54449 WARNING HSMFG0814 5115 TOP SHOT MANURE SPREADER OPERATOR S MANUAL Revision 01 5115 Starting Serial 510006 READ AND UNDERSTAND THIS MANUAL BEFORE OPERATING THIS EQUIPMENT UNSA...

Page 2: ...8 Safety Decals 9 10 Warning Owner Must Read and Understand 11 Bolt Torque Chart 12 Set Up Assembly 13 Transporting 14 Storage 14 Preparing for Operation 15 17 Operation 18 23 Adjustments 24 25 Servi...

Page 3: ......

Page 4: ......

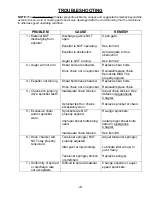
Page 5: ...ached and there are no visible leaks Guards and shields are secure Wheels are properly mounted Tires are inflated to correct pressure Chains tension is properly adjusted See Adjustment Chapter of this...

Page 6: ...4 Intentionally Left Blank...

Page 7: ...r that regular lubrication is required for proper operation and long life of machine Show customer the Lubrication Chapter of the Operator s Manual Give the customer the Operator s Manual and make sur...

Page 8: ...6 Intentionally Left Blank...

Page 9: ...R YOUR PERSONAL SAFETY IS INVOLVED TAKE TIME TO BE CAREFUL REMEMBER THE CAREFUL OPERATOR IS THE BEST OPERATOR MOST ACCIDENTS ARE CAUSED BY HUMAN ERROR CERTAIN PRECAUTIONS MUST BE OBSERVED TO PREVENT T...

Page 10: ...ORMATION OBSERVE MAXIMUM TRANSPORT SPEED The maximum transport speed for this implement is 32 km h 20 m p h Some tractors are capable of operating at speeds that exceed the maximum transport speed of...

Page 11: ...9 SAFETY INFORMATION...

Page 12: ...SAFETY INFORMATION 10...

Page 13: ...or engine remove ignition key and allow all mechanisms to stop Before cleaning or working on the machine detach the PTO shaft and completely disengage the tractor hydraulics DO NOT attempt to perform...

Page 14: ...12...

Page 15: ...and adjustment and make sure that all bolts are tightened 4 Securely retighten after a few hours of operation as bolts can loosen up on new machinery 5 Lubricate the Top Shot completely SET UP ASSEMB...

Page 16: ...w it to the shoulder TOWING ON HIGHWAY To view beyond the back of the larger trailer mounted Top Shot when transporting the unit on a public highway consider obtaining and installing a rear view mirro...

Page 17: ...al sets of mounting holes to level theTop Shot for proper material delivery to the expeller If additional positioning is required turn the clevis assembly upside down to obtain additional adjustment I...

Page 18: ...3 Secure the drawbar so that the hitch pin hole is directly below the power drive line Fasten the Top Shot to the tractor drawbar with an appropriate hitch pin with safety locking device After the co...

Page 19: ...smooth quiet running drive line without power fluctuation The Top Shot can only be properly hooked up to a tractor which has PTO and hitch dimensions conforming to ASAE Standard S203 Horsepower requir...

Page 20: ...er and drive line foreign objects such as stones timber or metal should never be placed into the Top Shot tank 1 In winter or freezing temperatures make sure the auger and expeller are free to rotate...

Page 21: ...auger fully raised the discharge gate fully raised and blocked Position the jack height so that liquids will run forward to the discharge opening 3 Before loading the Top Shot again unblock the disch...

Page 22: ...the auger should be cycled up and down frequently to provide a more consistent feeding of material into the expeller NOTE Do NOT exceed the rated 540 or 1000 RPM operating speed of your particular mod...

Page 23: ...alled 1000 RPM driveline Compared to the 540 RPM units the 1000 RPM driveline equipped unit has a different combination of drive and driven sprockets drive chains and a 1000 RPM constant velocity tele...

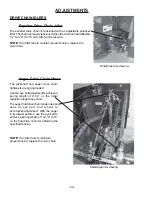
Page 24: ...In freezing temperatures leave the discharge gate partially opened when the unit is parked overnight to prevent the gate from freezing against the bottom of the opening A discharge gate height indicat...

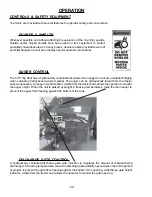
Page 25: ...Shot as shown The telescoping PTO drive is provided with a spring loaded locking collar on one end to positively lock the drive connection onto the tractor PTO shaft Depress the locking collar against...

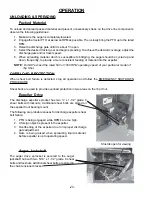
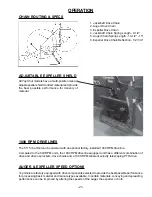
Page 26: ...an Idler fails to maintain proper tension replace the worn chain Shield open for viewing Shield open for viewing The jackshaft and auger drive chain tighteners are spring loaded Use the eye bolt adju...

Page 27: ...t the tank then re tighten the retaining hardware Grease the slide assembly to ensure a leak free seal 25 DISCHARGE GATE The discharge gate is retained by adjustable angles that secure the gate to the...

Page 28: ...opening the expeller shield over the front expeller bearing Additional shear bolts are stored on the expeller front bearing mount To replace the expeller shear bolts proceed as follows 1 Disengage the...

Page 29: ...E If the auger jackshaft bolts shear proceed as follows 1 Disengage the PTO 2 If an object is lodged in the discharge door opening or inside the tank raise the discharge door then raise the main auger...

Page 30: ...xpeller speeds to various spreading needs Sprockets are available as service parts SAFETY CHAINS An appropriate sized safety chain to accommodate the potential weight of the loaded Top Shot is availab...

Page 31: ...n them will cause the shields to bind and not rotate Dented or damaged PTO shields will also result in excessive force being applied against the jackshaft Damaged shields also cause difficulty when in...

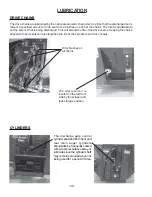
Page 32: ...f the drive chains Keeping the chains aligned with sprockets will also lengthen the life of the sprockets and drive chains The discharge gate control cylinder shaft and both front and rear main auger...

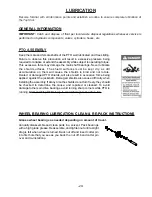
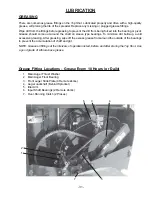
Page 33: ...will prolong the life of the spreader Replace any missing or plugged grease fittings Wipe dirt from the fittings before greasing to prevent the dirt from being forced into the bearing or pivot Grease...

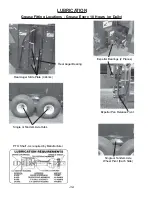
Page 34: ...nufacturer Rear Auger Slide Plate 4 Zerks Expeller Bearings 2 Places Single or Tandem Axle Hubs Single or Tandem Axle Wheel Pivot Each Side Expeller Pan Release Pivot Grease Fitting Locations Grease E...

Page 35: ...bolts have sheared Drive chain not on sprocket Replace shear bolts Reinstall replace chain 4 Chains are jumping drive sprocket teeth Inadequate chain tension Sprocket teeth or chains excessively worn...

Page 36: ...e 8353 2 Top Shot Logo 8496 4 H S Decal 8 8515 1 Degree of Angle Decal PTO Shaft 9194A 3 No step stay clear 9194B 1 Never Allow Riders On This Machine 11210A 1 Discharge gate opening decal 11210B 1 Do...

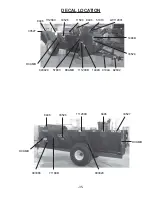
Page 37: ...DECAL LOCATION 35 DCAMB DCAMB 11599 51010 1494B 9194A LW112901 8496 8496 82602 33527 093020 1494K 33526 111209B 33524 111209C 57803 111209C 8496 71188B DCAMB DCAMB 8496 093366 33527 33526 093020...

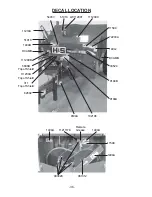
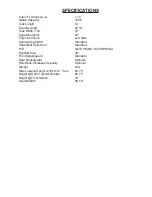
Page 38: ...112901 82602 9194A 51010 111209B 9194B 9194A 1494J 72203A 11599 11210A 1494B DCAMB 33524 5896B Top of Shield DCAMB 111209A Top of Shield 102196 54033 1494A Remote Grease 093020 11211176 081312 DECAL L...

Page 39: ...DECAL LOCATION 57803 DCRED 111209B 11210B 093020 093020 51010 111209C 11599 DCRED DCRED 32320 56877 1494L 8515 33525 TFM97 111209B 51010 1494A 11211176 093020 37...

Page 40: ...SERVICE NOTES 38...
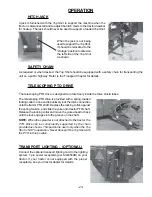
Page 41: ...Overrunning Clutch Standard Shear Bolt Protection Standard PTO 540 RPM Std 1000 RPM Opt Expeller Size 30 Front Splashguard Standard Rear Splashguard Optional Side Rails Increases Capacity Optional We...

Page 42: ...H S MFG H S MFG H S MFG H S MFG H S MFG CO CO CO CO CO products approved for the FEMA FEMA FEMA FEMA FEMA SEAL OF Q SEAL OF Q SEAL OF Q SEAL OF Q SEAL OF QU U U U UALITY ALITY ALITY ALITY ALITY...

Reviews: