background image

EN

22

5.  Check that the nozzle holder is correctly 

positioned as shown in the diagram.

     FIG.   14

6.  Screw in all the screws.

     FIG.   15

7.  Screw the sleeve coupling on the outlet.

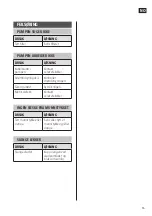
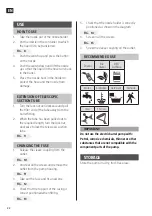
RECOMMENDED USE

Diesel

Bio 

diesel

DEF/

AdBlue

Water

Antifreeze 

Detergent

Pesticide

Urea

Thin oil

     IMPORTANT:   
Do not use the electric barrel pump with: 
Petrol, corrosive chemicals, thinner or other 
substances that are not compatible with the 
component parts of the pump.

STORAGE

Store the pump in a dry, frost-free place.

USE

HOW TO USE

1.  Take the nozzle out of the nozzle holder.
2.  Put the nozzle in the container to which 

the liquid is to be transferred.

     FIG.   8

3.  Push the switch up and press the button 

on the nozzle.

4.  Push the switch down and lift the nozzle 

up so that the liquid in the hose runs back 
to the barrel.

5.  Place  the nozzle back in the holder to 

protect the hose and the nozzle from 
damage.

EXTENSION OF TELESCOPIC 
SUCTION TUBE

1.  Turn the lock nut anticlockwise and pull 

the filter end of the tube away from the 
barrel fitting.

2.  When the tube has been pulled out to 

the required length, turn the lock nut 
clockwise to lock the telescopic suction 
tube.

     FIG.   9

CHANGING THE FUSE

1.  Release the sleeve coupling from the 

outlet.

     FIG.   10

2.  Unscrew all the screws and remove the 

outlet from the pump housing.

     FIG.   11

3.  Take out the fuse and fit a new one.

     FIG.   12

4.  Check that the top part of the casing is 

correct positioned when fitting.

     FIG.   13

Summary of Contents for 006780

Page 1: ...s bruksanvisningen noggrant innan anv ndning Spara den f r framtida behov FATPUMP SE EN DRUM PUMP Operating instructions Translation of the original instructions Important Read the user instructions...

Page 2: ...ce by zagro eniem dla rodowiska i dla zdrowia Produkt nale y odda do odpowiedniego punktu sk adowania lub przynie go do jednego ze sklep w gdzie przy zakupie nowego sprz tu bezp atnie przyjmiemy stary...

Page 3: ...1 1 2 3 4 5 9 8 10 11 6 7...

Page 4: ...2 3 4 5...

Page 5: ...8 6 7...

Page 6: ...9 10 11 12 850 mm 1245 mm...

Page 7: ...13 14 15...

Page 8: ...15 min fr n S KERHETSANVISNINGAR Produkten r inte avsedd att anv ndas av personer barn eller vuxna med n gon typ av funktionshinder eller av personer som inte har tillr cklig erfarenhet eller kunskap...

Page 9: ...B rhandtag 2 Munstycksh llare 3 Str mbrytare 4 Pumputlopp med sv ngbar anslutning 5 G ngadapter 2 5 tum x 5 mm trapetsg nga 6 Teleskopiskt sugr r 7 Sil av rostfritt st l 8 3 4 tum 19 mm pip av rostfr...

Page 10: ...pp t och tryck in knappen p munstycket 4 F r omkopplaren ned t och lyft munstycket upp t s att v tskan i slangen rinner tillbaka till fatet 5 S tt tillbaka munstycket i h llaren f r att skydda slangen...

Page 11: ...a servicetekniker Str mf rs rjningsfel Kontrollera str mf rs rjningen S kring utl st Byt s kringen Motor defekt Kontakta serviceteknikerk INGEN V TSKA FR N MUNSTYCKET ORSAK L SNING Munstycke eller sla...

Page 12: ...ETSANVISNINGER Produktet er ikke beregnet p bruk av personer barn eller voksne med funksjons hemninger eller av personer uten tilstrekkelig erfaring med eller kunnskap i bruke det med mindre de har f...

Page 13: ...BESKRIVELSE 1 B reh ndtak 2 Munnstykkeholder 3 Str mbryter 4 Pumpeutl p med svingbar tilkobling 5 Gjengeadaper 2 5 tommer x 5 mm trapesgjenge 6 Teleskopisk suger r 7 Sil i rustfritt st l 8 3 4 19 mm t...

Page 14: ...til BILDE 8 3 F r omkobleren oppover og trykk inn knappen p munnstykket 4 F r omkobleren nedover og l ft munnstykket slik at v sken i slangen renner tilbake til fatet 5 Sett munnstykket tilbake i hol...

Page 15: ...servicetekniker Str mforsyningsfeil Kontroller str mforsyningen Sikring utl st Bytt sikringen Motor defekt Kontakt servicetekniker INGEN V SKE FRA MUNNSTYKKET RSAK L SNING Tett munnstykke eller slange...

Page 16: ...otkowy pi ciobiegunowy silnik DC Maksymalna lepko rodka 100 cSt Wsp czynnik obci enia 15 min w 15 min wy ZASADY BEZPIECZE STWA Produkt nie jest przeznaczony do stosowania przez osoby dzieci lub doros...

Page 17: ...cznik 4 Wylot pompy z obrotowym z czem 5 Przej ci wka gwintu gwint trapezowy 2 5 x 5 mm 6 Teleskopowa rura ss ca 7 Sitko ze stali nierdzewnej 8 Wylewka 3 4 19 mm ze stali nierdzewnej 9 Dysza do r czne...

Page 18: ...pompy OBS UGA SPOS B U YCIA 1 Wyjmij dysz z uchwytu 2 Umie dysz w zbiorniku do kt rego ma zosta przelana ciecz RYS 8 3 Przesu prze cznik w g r i wci nij przycisk na dyszy 4 Przesu prze cznik w d i po...

Page 19: ...I ZANIE Przerwanie przewodu pompy Skontaktuj si z technikiem serwisowym Awaria zasilania Sprawd zasilanie Aktywowa si bezpiecznik Wymie bezpiecznik Usterka silnika Skontaktuj si z serwisantem Z DYSZY...

Page 20: ...e product is not intended to be used by persons children or adults with any form of functional disorders or by persons who do not have sufficient experience or knowledge on how to use it unless they h...

Page 21: ...d or material damage DESCRIPTION 1 Handle 2 Nozzle holder 3 Power switch 4 Pump outlet with swivel connection 5 Thread adapter 2 5 inch x 5 mm trapezoidal thread 6 Telescopic suction tube 7 Stainless...

Page 22: ...transferred FIG 8 3 Push the switch up and press the button on the nozzle 4 Push the switch down and lift the nozzle up so that the liquid in the hose runs back to the barrel 5 Place the nozzle back...

Page 23: ...e in the pump Contact service technician Power supply fault Check the power supply Triggered fuse Replace the fuse Motor defective Contact service technician NO LIQUID FROM THE NOZZLE CAUSE SOLUTION N...

Reviews: