background image

 12
 

Drawer Box Assembly (continued)

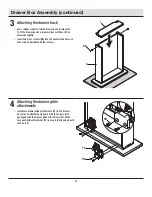
Attaching the drawer back


Use a rubber mallet to tap the drawer back (I) into place. 
To fit the drawer back on, drawer sides will have to flex 
outwards slightly.


Insert two more screws (BB) into the countersunk holes on 
each side. Fully tighten all four screws.

I

G

BB

Attaching the drawer glide 

attachments


Install two drawer glide attachments (FF) to the drawer. 
Secure each attachment in place with the screws (HH) 
packaged with the drawer glide attachments (FF). Make 
sure each glide attachment (FF) is secured fully underneath 
each corner.

FF

HH

HH

Summary of Contents for 10006596138

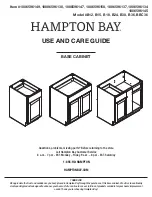
Page 1: ...ll line of products available for your home improvement needs Thank you for choosing Hampton Bay USE AND CARE GUIDE BASE CABINET Questions problems missing parts Before returning to the store call Hampton Bay Customer Service 8 a m 7 p m EST Monday Friday 9 a m 6 p m EST Saturday 1 855 HD HAMPTON HAMPTONBAY COM Item 1006596149 10006596138 1006596147 1006596150 1006596137 1006596134 1006596145 Mode...

Page 2: ...E SYMPTOMS INCLUDING SHORTNESS OF BREATH HAVE BEEN REPORTED AS A RESULT OF FORMALDEHYDE EXPOSURE ELDERLY PERSONS AND YOUNG CHILDREN AS WELL AS ANYONE WITH A HISTORY OF ASTHMA ALLERGIES OR LUNG PROBLEMS MAY BE AT GREATER RISK RESEARCH IS CONTINUING ON THE POSSIBLE LONG TERM EFFECTS OF EXPOSURE TO FORMALDEHYDE REDUCED VENTILATION MAY ALLOW FORMALDEHYDE AND OTHER CONTAMINANTS TO ACCUMULATE IN THE IND...

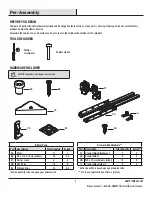
Page 3: ...ps screwdriver Rubber mallet HARDWARE INCLUDED NOTE Hardware not shown to actual size AA BB CC DD EE Blister Pack Part Description Total Quantity Extras AA Posts 17 1 BB 8 x 1 in Screws yellow 34 4 9 CC Corner Locks 8 0 DD Shelf Pins 13 9 EE Silicone Pads 10 2 4 Extras quantity is based upon your cabinet size FF HH II GG Drawer Glide Hardware Part Description Total Quantity Extras FF Drawer Glide ...

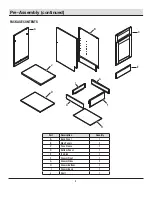
Page 4: ...ued PACKAGE CONTENTS A B C E F H D J I G G Part Description Quantity A Back Panel 1 B Side Panels 2 C Face Frame 1 D Bottom Panel 1 E Toe Kick 1 F Drawer Front 1 G Drawer Sides 2 H Drawer Bottom 1 I Drawer Back 1 J Shelf 1 ...

Page 5: ...th pre drilled holes on each of the panels and frame A C and secure with four screws BB on each panel and frame A C BB AA A B C AA BB 2 Installing the drawer glide holders to the back panel Install drawer glide holders II to the back panel A by inserting the holders II into holes in the back panel A Secure with two small screws HH A II II A HH HH ...

Page 6: ...art by placing the face frame C flat on a smooth surface that will not scratch or damage the face of the cabinet such as a towel or piece of cardboard 1 from the packaging with the door facing down Slide the two side panels B into the mating grooves on the face frame C B B C 1 1 C ...

Page 7: ...l D into grooves in the sides Snap four corner locks CC over the posts to secure the face frame C and side panels B as shown At the top of the cabinet the smooth face of each corner lock CC should be facing out NOTE If installing a laminate countertop the smooth face of each corner lock CC should be facing the inside of the cabinet D C B AA CC CC CC ...

Page 8: ... corner lock CC in the opposite direction Bottom corner lock assembly will be the same for all countertop types If installing a laminate countertop the top four corner locks CC should be oriented as shown below From inside of the cabinet screw through the corner locks CC into the bottom of the countertop to secure into place CC For all other countertop types the top four corner locks CC should loo...

Page 9: ...Insert a screw BB through each hole in the bottom four corner locks CC and screw into the bottom panels BB CC 7 Attaching the toe kick Slide the toe kick E into the grooves of the side panels B so that it sits flush with the bottom of the cabinet Insert two screws BB into the pocket holes to secure the toe kick E to the sides B E E BB ...

Page 10: ...back and side panels Insert screws BB into countersunk holes in the back A and side panels B Proceed to the Drawer Box Assembly section NOTE Base cabinets 27 in and wider will have two holes through the back all other sizes will have one BB B BB A ...

Page 11: ...h as a towel or piece of cardboard 1 from the packaging Use a rubber mallet to tap the drawer sides G into place on the drawer front F Insert a screw BB into the countersunk holes on each side and partially tighten NOTE It is important that you only partially tighten the screws in order to avoid cracking G G G G F 1 1 BB BB 2 Attaching the drawer bottom Slide the drawer bottom H into the groves on...

Page 12: ...lightly Insert two more screws BB into the countersunk holes on each side Fully tighten all four screws I G BB 4 Attaching the drawer glide attachments Install two drawer glide attachments FF to the drawer Secure each attachment in place with the screws HH packaged with the drawer glide attachments FF Make sure each glide attachment FF is secured fully underneath each corner FF HH HH ...

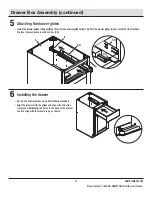
Page 13: ...o the drawer glide holders II Pull the drawer glides GG out until the front reaches the face frame and secure with a screw HH A C GG II GG HH 6 Installing the drawer Ensure the drawer glides are pulled out fully extended Align the drawer with the glides and then click and slide into place Additionally the holes in the back of the drawer need to align with the metal prong as shown ...

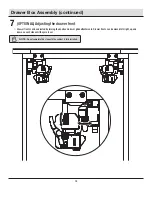
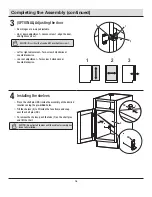
Page 14: ...ing the drawer front Drawer fronts can be adjusted by turning the knobs on drawer glide attachments Drawer fronts can be moved left right up and down on each side until they are level NOTE Do not complete this step until the cabinet is fully installed ...

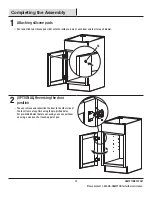
Page 15: ...wo silicone pads EE onto the inside corners of each door and four for each drawer EE 2 OPTIONAL Reversing the door position You can remove and reposition the door to the other side of the face frame at any time using the pre drilled holes For pre drilled holes that are not used you can cover them up using a wax pencil or touch up paint pen ...

Page 16: ...ockwise or counterclockwise In or out adjustment Turn screw 3 clockwise or counterclockwise 1 3 2 1 2 3 4 Installing the shelves Place the shelf pins DD inside the assembly at the desired locations using the pre drilled holes Tilt the shelves E to fit inside the face frame and snap over the shelf pins DD To remove the shelves push the tabs 1 on the shelf pins and lift the shelf NOTE Do not install...

Page 17: ... Doors can be cleaned with most general purpose household cleaners Do not use caustic agents and or abrasive scrubbers or oven cleaners Cabinets can be cleaned with a damp sponge or cloth using soapy water or most general purpose household cleaners Do not use any abrasive cleaner or scrubbers Do not allow liquids to remain on the surfaces for long periods of time ...

Page 18: ...s problems missing parts Before returning to the store call Hampton Bay Customer Service 8 a m 7 p m EST Monday Friday 9 a m 6 p m EST Saturday 1 855 HD HAMPTON HAMPTONBAY COM Retain this manual for future use ...

Reviews: