10
Assembly (continued)
13
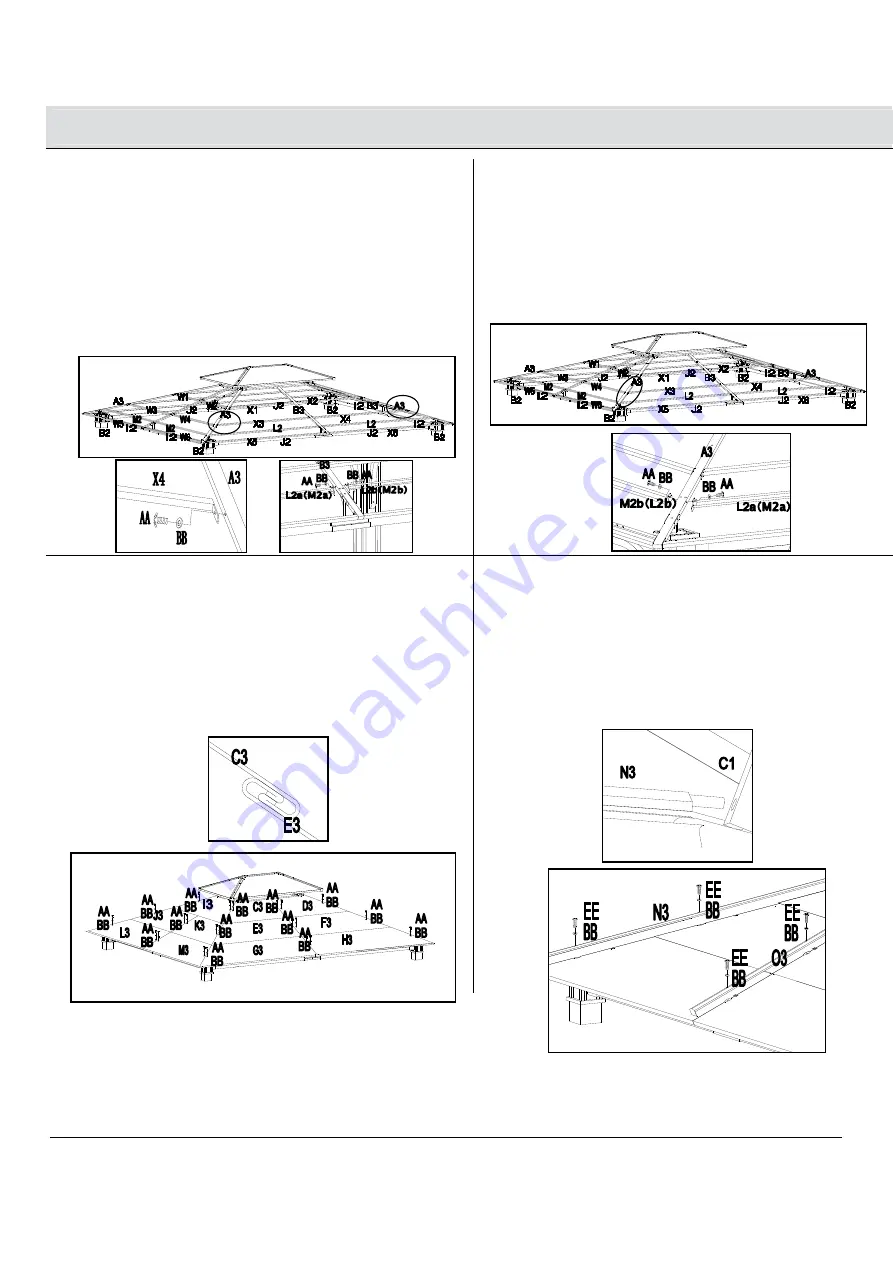
Attaching the netting beams
14
Secure the netting beam
□
Attaching the top
middle beams (X1-X4, and W1-W4) to
the top beams (A3) using screws (AA) and flat washers
(BB).
□
Secure one end of long netting beam 1 (L2a) and long
netting beam 2 (L2b) to the top post (B3) using screws
(AA) and flat washers (BB). Repeat for the short netting
beams (M2a and M2b).
□
Secure the other ends of the long netting beams 1 (L2a)
and long netting beams 2 (L2b) to the top beams (A3)
using screws (AA) and flat washers (BB). Repeat for the
short netting beams (M2a and M2b).
15
Attaching the long and short
beams
16
Attaching the corner covers
□
Attaching the left long cover 1(C3) and left long cover 2
(E3)
to the roof assembly using screws (AA) and flat
washers (BB).
Repeat this step for the remaining long and
short covers (D3, F3, G3, H3, I3,J3,K3, L3, M3) from top
to bottom way.
□
Insert the corner covers (N3) to the holes of the support
beams (C1).
□
Secure the corner covers (N3) to the top oblique beam and
secure the middle covers (O3) to the top middle beams (X3
and X4) using screws (EE) and flat washers (BB).


