


Page 4
ASSEMBLY INSTRUCTIONS
1. TURN OFF ELECTRICITY at main fuse box (or
circuit breaker box) before beginning installation by
switching circuit breaker off or removing fuse. MIN
90º C SUPPLY CONDUCTORS. CONSULT A
QUALIFIED ELECTRICIAN TO ENSURE COR-
RECT BRANCH CIRCUIT CONDUCTOR.
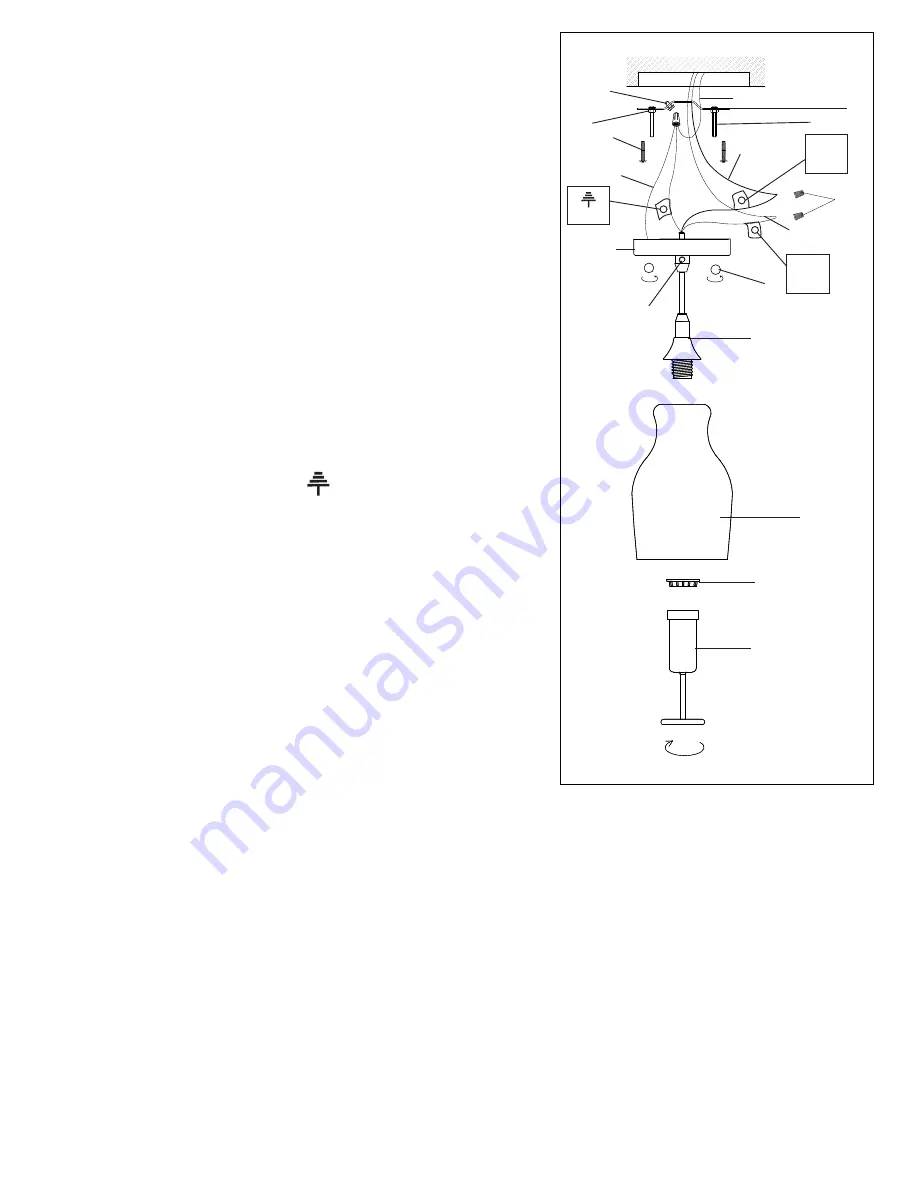
4. Attach glass shade (H) to lamp holder (I) and secure
in place by tightening the socket nut (G) onto lamp
holder (I) using the socket fastener (K). Install light bulb
(not included). Only use bulb of the specified type and
maximum rated wattage or less.
Cord fastener
A
B
Ground supply wire
E
F
J
H
C
G
D
I
L
K
Black (hot)
White (neutral)
Ground
fixture wire
Ground
Hot
L
Neutral
N
3. Place the canopy (F) onto the mounting bracket
(A); Both ends of the mounting screws (D) are to
come out through the canopy (F). Tighten decorative
nuts (J) onto the mounting screws (D).
2. To adjust length of cord, loosen screw on cord fas-
tener slipping cord through it to shorten or lengthen
cord to desired length. Tighten the mounting screws (D)
into the mounting strap (A) and secure with mounting
screw nuts (L). Fasten mounting strap (A) onto the
outlet box using two outlet box screws (B). Ensure that
all supply circuit wires protrude out of the outlet box.
Strip ¾ in. of insulation from wire ends of fixture and of
supply circuit wires. Attach ground supply circuit wire
and ground fixture wire with
_ v
symbol label together
with wire nut (C). Never connect ground wire to black
or white power supply wires. Twist stripped wire ends
of fixture and supply circuit wires together black to wire
with
L
symbol label (hot) and white to wire with
N
symbol label (neutral). Twist on wire nuts (C). Tape
wire nuts and wires together. Carefully tuck connected
wires and wire nuts into outlet box.
(Alternatively, if there is no ground supply circuit wire,
only attach the ground fixture wires to the mounting
strap (A) with the green screw (E)).
H
G
I
K