3
4
5
d. At the end of the Quick Setup, click the Finish button to exit this
Quick Setup. The AP Hamlet should now be connecting you to
the Internet.
NOTE:
If you have difficulty with these steps, please refer to the
User Guide on the Resource CD for detailed instructions.
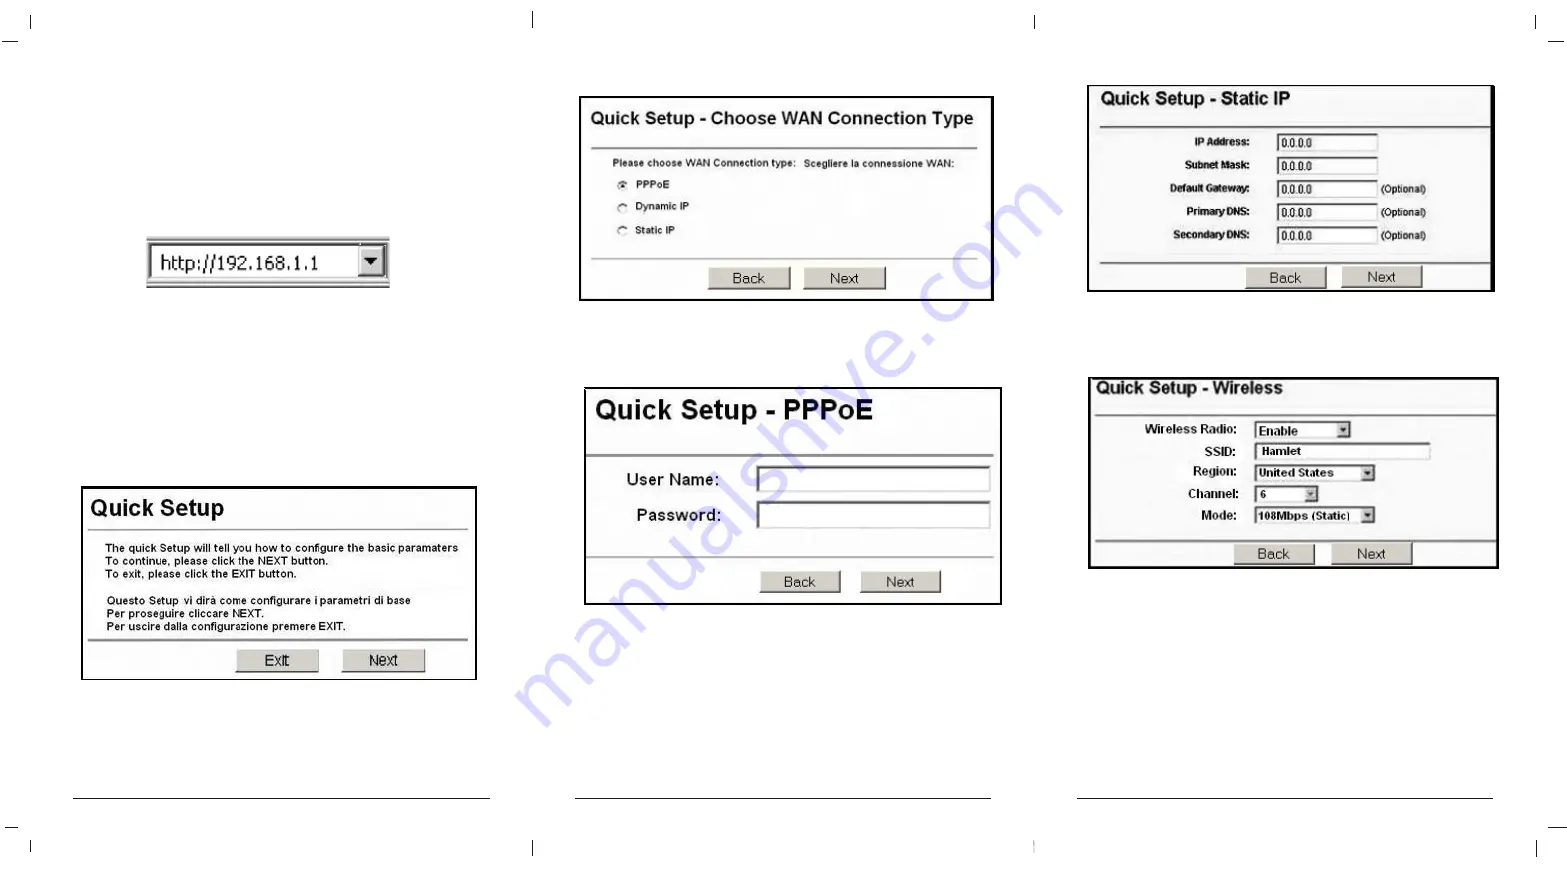
c. Complete the screen appeared and click Next . The wireless settings
screen will appear as the following:
III. If you have a fixed IP (or static IP) account, select Static IP and click
Next to load the following figure, and fill the blanks with the parameters
provided by your ISP.
II. If you have a Dynamical IP (or automatic IP) account, select Dynamic IP
and click Next , the AP Hamlet will automatically get IP parameter from
your ISP without entering any parameters.
I. If you have a PPPoE account, select PPPoE and click Next to load the
following figure, and enter User Name and Password provided by
your ISP.
3. Connecting the Internet
a. If the User Name and Password are correct, you can configure the AP
using the web browser. Please click the Quick Setup link on the left of
the main menu and the Quick Setup screen will appear :
b.
Click Next, the Choose WAN Connection Type screen will appear.
Make sure which connection type has been provided by your ISP,
choose it, and then click Next.
2. Login to the AP
To connect to the AP Hamlet, you should set up the TCP/IP Protocol in
"Obtain an IP address automatically" mode on your PC(s).
If you need instructions as to how to do this, please refer to Appendix B
in the User Guide on the Resource CD.
a. Connect to the AP by typing http://192.168.1.1 in the address field
of web browser.
b. After a moment, a login window will appear. Enter admin for
the User Name and Password, both in lower case letters.
Then click OK or press ENTER.


