4
L
Short Instruction
5
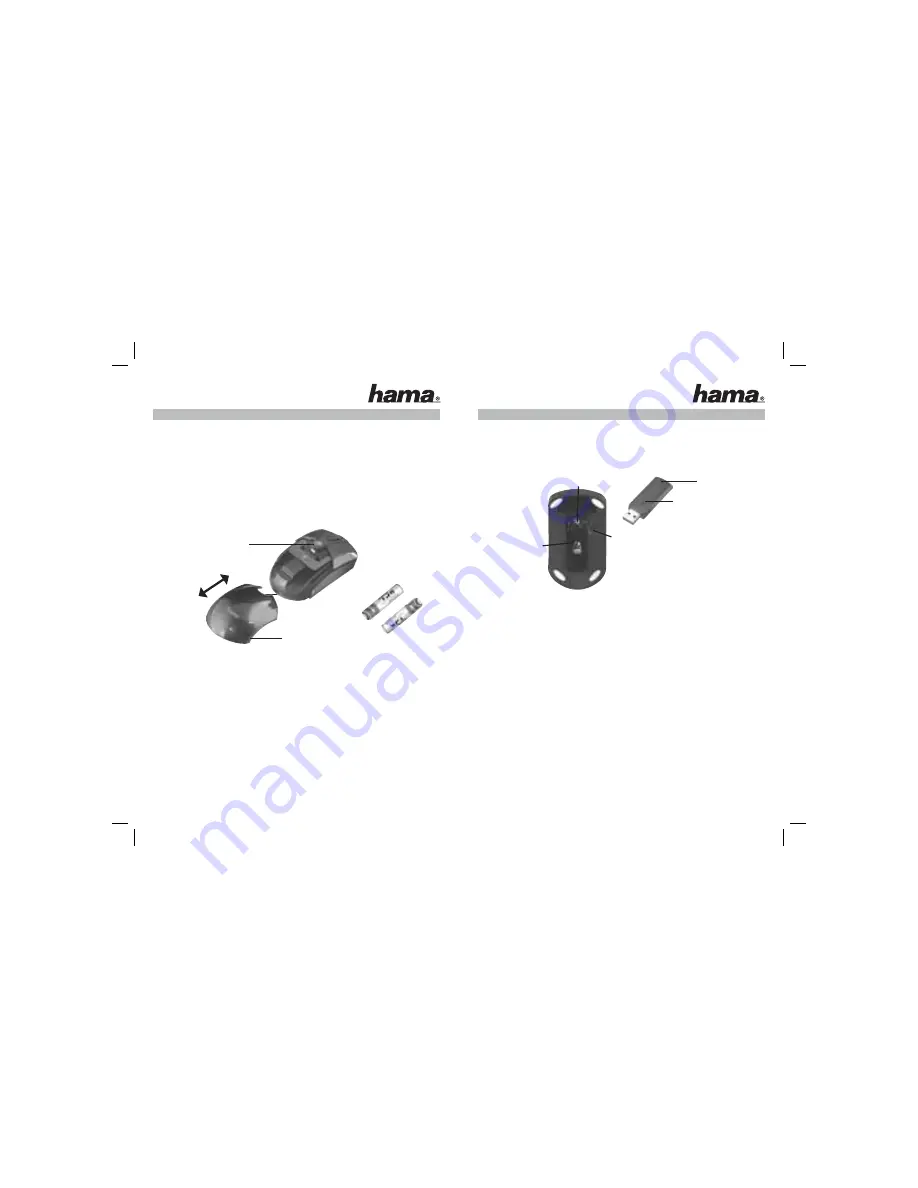
Fig.1
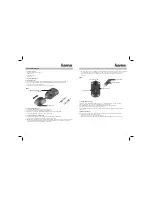
Fig.2
Battery comparatment
button
+
+
-
-
Battery cover
Connect Button
Status-LED
Connect Button
Fixing mechanism
optical Sensor
1. Package
contents
·
Wireless optical notebook mouse
· USB
receiver
·
Two AAA batteries
· Instructions
2. Installing
the
hardware
2.1 Inserting Batteries
a) Press the battery compartment button and pull the battery cover back at the same time (Fig. 1)
b) Insert the two AAA batteries into the battery compartment pointed in the correct direction.
The correct poles are indicated there.
c) Put the battery cover back in place so that is securely closed.
2.2 Connecting the USB receiver
a) Connect the USB receiver to a free USB port on the PC.
b) Switch on your computer if you have not already done so.
c) Windows now detects the USB plug and integrates it into the operating system.
d) Set the ON-OFF switch on the base of the mouse to “ON”.
3. Connecting the mouse / getting started
a) Press the connect button on the receiver; the status LED starts to blink (Fig. 2).
The receiver is now ready to synchronise the mouse automatically.
b) Within 10 seconds, press the connect button with a pointed object (for instance a pen) on the base of the
mouse. This button is marked with “Connect”. Please note that the mouse should be no more than
30 cm away from the receiver during this connect phase.
c) The status LED on the receiver lights continuously after the synchronisation process has been completed
successfully. The mouse is now ready for use. If the cursor does not move then repeat steps 3a-b.
This also applies if interference originating from other radio mice or keyboards occurs during
operation.
4. Switching the mouse on/off
The mouse can be switched off completely to save e. g. the batteries if the mouse is not used for a
longer period of time. Press the connecting button for at least 2 seconds.
A short lighting up of the optical sensor indicates that the mouse is now switched off.
Press the connecting button to switch on the mouse again.
You can also switch it off by removing the receiver from the PC and by attaching it to the bottom side
of the mouse.
5. Functionality problems
If the mouse does not function as expected, ensure that you have carried out the following steps:
• The batteries are new and inserted correctly
• The receiver is correctly connected to the computer.
• Receiver and devices are within their communication range (depending on location, max. 1,5 m)


