4
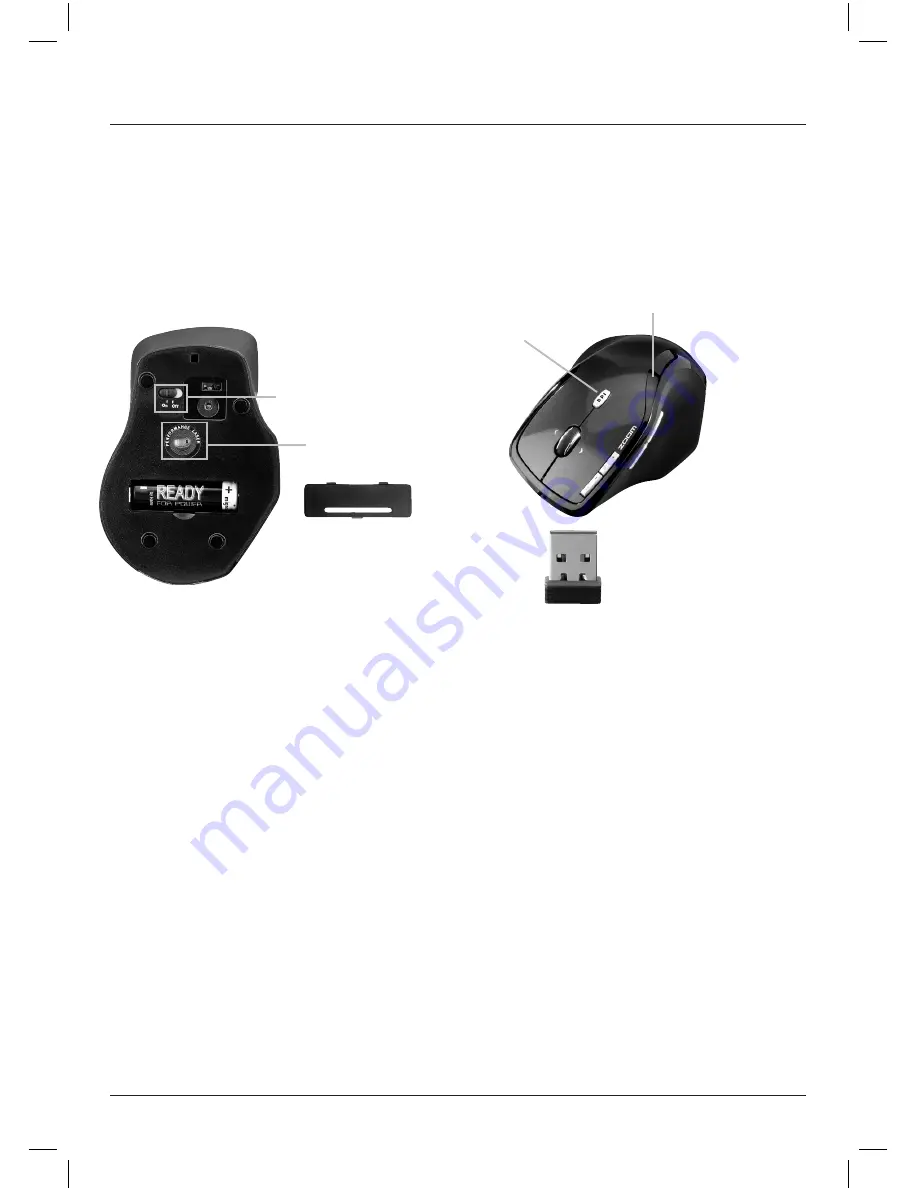
On/off switch
+
-
fig. 1
Laser sensor
(M2130: optical sensor)
DPI/mode button
Battery indicator display
fig. 2
Nano receiver
Zoom in
Zoom out
Play/pause
Start media
player
Previous
Track
Next
Track
g
Operating Instruction
1. Hardware installation
1.1 Inserting the battery
a) Remove the battery compartment cover and insert
the battery into the battery compartment in the
correct direction (fig. 1).
b) Replace the battery compartment cover and make
sure that it is securely closed.
c) Set the ON-OFF switch on the bottom of the mouse
to “ON”.
1.2 Connecting the nano receiver
a) Switch on your computer and connect the nano
receiver to a free USB port on your computer.
b) Windows detects the USB receiver and installs it
for use with the operating system.
c) Thanks to Smart-Link technology, the standard
functions of the mouse can be used immediately.
d) To be able to enjoy the full range of functions your
cordless mouse offers, you must install the
provided software (for more information,
see point 6).
2. Battery indicator display (fig. 2)
The battery indicator display starts to flash when the
battery voltage is too low.
Although the mouse will still function for some time, you
should change the battery as soon as possible.
Note:
When you turn on the mouse or insert a new
battery, the battery indicator display flashes ten times.
3. DPI/mode button
Press the DPI/mode button (fig. 2) briefly to switch the
sensitivity between 800 and 1600 dpi (M2130: between
500 and 1000 dpi). The higher the dpi number, the more
precise the scanning and the more quickly the cursor
moves in response to the same mouse movements.
If you hold down this button for at least 3 seconds, you
switch from standard mode to media mode. To return to
standard mode, hold down the DIP/mode button once
again for at least 3 seconds.


