4
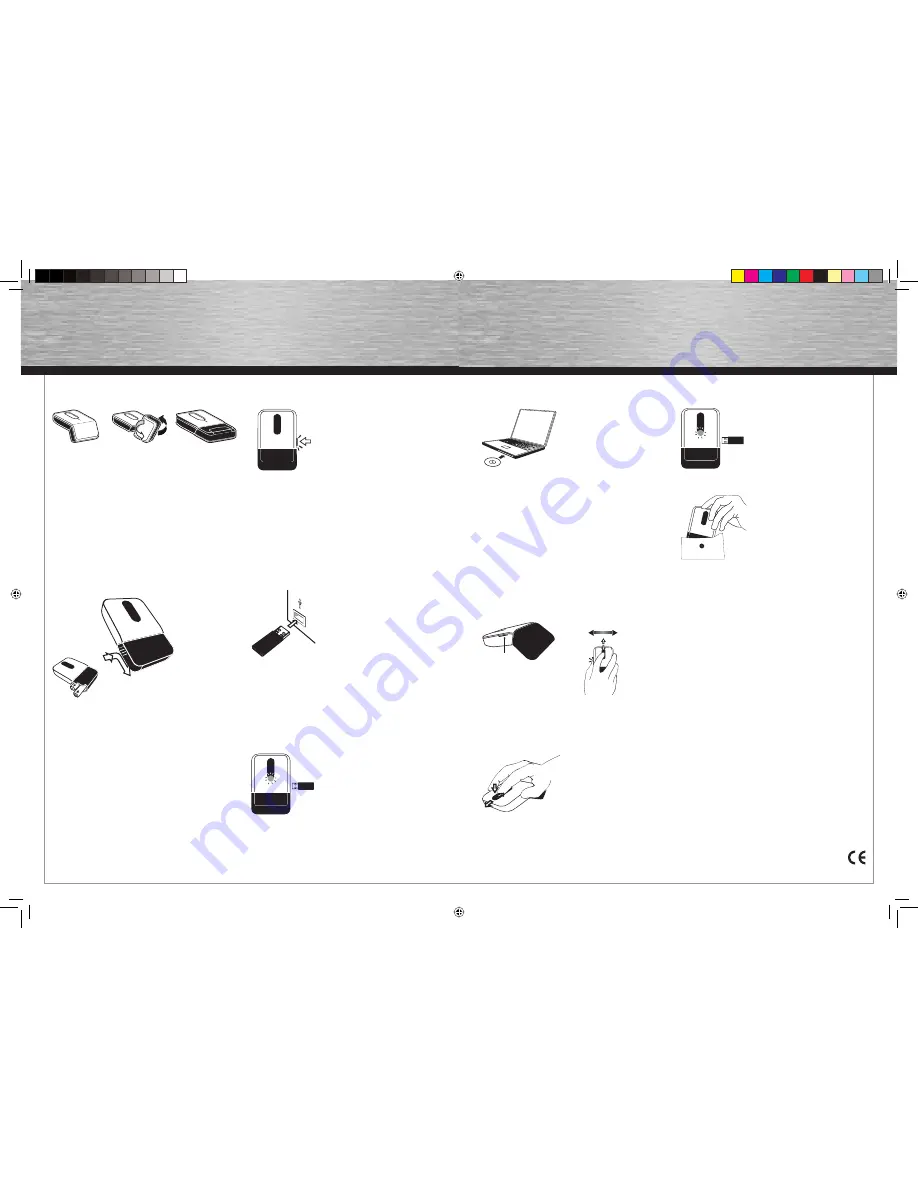
5
press
slide
side button
1. Using the mouse
1. operatioal
2. conversion
3. ready to
transport
Note:
Do not turn or rotate excessively
(max. 180°).
Over rotating can cause damage to the mouse.
2. INSERTING THE BATTERY
Press & slide open the battery door to
insert the AAA batteries.
3. Installing the Hardware
The receiver is located in
themouse. Remove as is
shown in the diagram with a
short counterpressure.
Automatic connection.
Insert the receiver to a free USB-Port.
After a few seconds, the mouse will work
(automatic connection between mouse
and receiver)
• Green Led on Receiver: mouse
movement
• Red Led on Receier: low battery
Once receiver is out, Status-LED on mouse will light up.
• GREEN light: battery good
• RED light blinking slowly: low battery
• RED light blinking rapidly: extremely low
4. Software
The software allows you to
assign various functions
to the buttons.
Place the enclosed CD in your CD-ROM or DVD-ROM
drive. Wait a moment, installation is started automatical-
ly. If it does not start automatically, click Start => Run,
enter “X:\Setup” (where „X” is the drive letter of your
CD-ROM drive) and press Enter to confi rm.
4a For horizontal scrolling
Set any button with the function “horizontal scroll”
and store the settings to carry out a Horizontal scroll.
Press and hold the button at the side and move your
fi nger on the fl at scroll button upwards or downwards
if you have chosen e.g. the lateral button.
4b For vertical scrolling
Similar to the trackpad on your notebook,
use the fl at scroll for vertical scrolling
or push it down to activate the middle button.
5. Switching the mouse on and off
Mouse off: Receiver in
Mouse on: Receiver out
Now, you`re ready to go!
6. Functionality problems
If the mouse does not function as expected, ensure that
you have carried out the following steps:
• The batteries are new and inserted correctly
• The receiver is correctly connected to the computer.
• Receiver and devices are within their
communication range (depending on location,
max. 10 m)
g
Operating Instruction
00052493bda.indd Abs2:4-Abs2:5
00052493bda.indd Abs2:4-Abs2:5
13.12.2007 8:17:06 Uhr
13.12.2007 8:17:06 Uhr


