background image

9

10. Care and maintenance

Note

Disconnect the product from the mains before

cleaning and during prolonged periods of

non-use.

Only clean this product using a lint-free, slightly

damp cloth and do not use any harsh cleaners.

Ensure that no water is able to enter the product.

11. Warranty disclaimer

Hama GmbH & Co KG assumes no liability and

provides no warranty for damage resulting from

improper installation/mounting, improper use of

the product or from failure to observe the operating

instructions and/or safety notes.

12. RF exposure information

This device complies with the EU requirements

for limiting the exposure of the general public

to electromagnetic fields by means of health

protection. The device complies with RF

specifications provided it is used 20 cm away from

the body.

13. Declaration of conformity

Hama GmbH & Co KG hereby

declares that the radio equipment

type [00176571, 00176573,

00176574, 00176575, 00176594,

00176612, 00176624, 00176626, 00176627] is in

compliance with Directive 2014/53/EU. The full text

of the EU declaration of conformity is available at

the following Internet address:

www.hama.com->00176571, 00176573,

00176574, 00176575, 00176594, 00176612,

00176624, 00176626, 00176627->Downloads.

Summary of Contents for 00176624

Page 1: ...Power Socket WiFi Steckdose D GB Operating Instructions Bedienungsanleitung 00176571 00176573 00176574 00176575 00176594 00176612 00176624 00176626 00176627 Link to App https link hama com app smart...

Page 2: ...cted Only operate with closed safety covers The product is intended only for use inside buildings Protect the product from dirt moisture and over heating and use it in dry environments only This produ...

Page 3: ...the product from a socket that has been approved for the device The socket must be installed close to the product and must be easily accessible Disconnect the product from the mains using the On Off s...

Page 4: ...nfirm with NEXT Now confirm that the socket socket strip s LED is flashing quickly by ticking Next step and clicking on Next Your socket socket strip is now connected Connecting Now Once the connectio...

Page 5: ...en the Apple Home app Press the in the top right hand corner to add a new device Now select Add Accessory Now use your mobile phone to scan the QR code on the socket Once the device has been recognise...

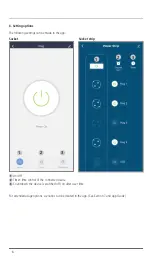
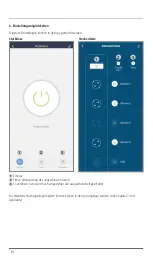
Page 6: ...ade in the app 1 On Off 2 Timer time control of the connected device 3 Countdown the device is switched off on after a set time Socket 1 2 3 Socket strip 1 2 3 For extended usage options scenarios can...

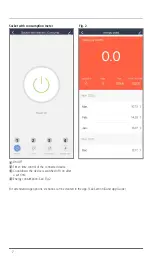
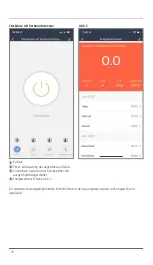
Page 7: ...onnected device 3 Countdown the device is switched off on after a set time 4 Energy consumption See Fig 2 Socket with consumption meter Fig 2 2 1 3 4 For extended usage options scenarios can be create...

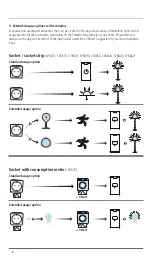
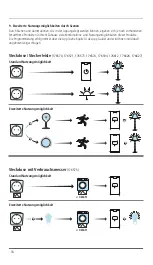
Page 8: ...ding on the SmartHome products in your home Programming is always via the app see Section 4 of the App Guide and will be offered suggested to you on an individual basis Socket socket strip 176571 1765...

Page 9: ...or safety notes 12 RF exposure information This device complies with the EU requirements for limiting the exposure of the general public to electromagnetic fields by means of health protection The de...

Page 10: ...en Sicherheitsabdeckungen in Betrieb nehmen bzw betreiben Das Produkt ist nur f r den Gebrauch innerhalb von Geb uden vorgesehen Sch tzen Sie das Produkt vor Schmutz Feuchtig keit und berhitzung und v...

Page 11: ...Betrieb Warnung Betreiben Sie das Produkt nur an einer daf r zugelassenen Steckdose Die Steckdose muss in der N he des Produktes angebracht und leicht zug nglich sein Trennen Sie das Produkt mittels d...

Page 12: ...en Sie mit WEITER Best tigen Sie nun dass die LED der Steckdose Steckerleiste schnell blinkt indem Sie den Haken bei N chster Schritt setzen und auf Weiter klicken Ihre Steckdose Steckerleiste wird nu...

Page 13: ...Sie oben rechts in der Ecke auf um ein neues Ger t hinzuzuf gen W hlen Sie nun Ger t hinzuf gen aus Scannen Sie nun mit Ihrem Handy den auf der Steckdose angebrachten QR Code Wurde das Ger t erkannt...

Page 14: ...erden 1 Ein Aus 2 Timer Zeitsteuerung des angeschlossen Ger ts 3 Countdown Ger t wird nach eingestellter Zeit ausgeschaltet eingeschaltet Steckdose 1 2 3 Steckerleiste 1 2 3 F r erweiterte Nutzungsm g...

Page 15: ...3 Countdown Ger t wird nach eingestellter Zeit ausgeschaltet eingeschaltet 4 Energieverbrauch Siehe Abb 2 Steckdose mit Verbrauchsmesser Abb 2 2 1 3 4 F r erweiterte Nutzungsm glichkeiten k nnen Szen...

Page 16: ...tzungsm glichkeiten dieser Produkte Die Programmierung erfolgt immer ber die App siehe Kapitel 4 des App Guide und wird Ihnen individuell angeboten vorgeschlagen Steckdose Steckerleiste 176570 176571...

Page 17: ...und oder der Sicherheitshinweise resultieren 12 HF Expositionsinformationen Dieses Ger t erf llt die EU Anforderungen zur Begrenzung der Exposition der Bev lkerung gegen ber elektromagnetischen Felde...

Page 18: ...18...

Page 19: ...ons excepted and subject to technical changes Our general terms of delivery and payment are applied Hama GmbH Co KG 86652 Monheim Germany Service Support www hama com 49 9091 502 0 DG 00176571_73_74_7...

Reviews: