


10
11
Contents:
1. Product description
1.1 Features
1.2 Package contents
1.3 Description
1.4 Connection options
2. Hard drive installation
3. Software
3.1 Installing the software
3.2 Adding the NDAS enclosure
3.3 Software features
4. RAID function
4.1 Connecting hard drives together
4.2 Cancelling combinations
5. Safety instructions
6. Contact and support information
Warning:
Insert your hard drive into the external casing before
installing the software. The hard drive casing may
never be disconnected from the computer while data
is being transferred! Your data could be lost.
Please observe the instructions in this installation
guide.
Hama GmbH & Co KG does not accept liability under
any circumstances for loss of data stored on data
storage media!
1. Product description
1.1 Features
• Supports 3.5” IDE hard drives
• Hard drive is installed as network drive in
My Computer
• Simple network installation. No extra server
required
• Data exchange to several network users possible
• Network or USB 2.0 connection can be selected
• Supports hard drives with a size of up to 500 GB
• Additional fan can be switched on/off
• Supports the combination of several NDAS
devices (RAID function)
• Safety management
1.2 Package contents
• Hama NDAS hard drive enclosure
• Power supply unit 12 V, 1.5 A
• Operating instructions
• Network cables
• USB cable
• Software/driver CD
• Stand base
• Mounting screws
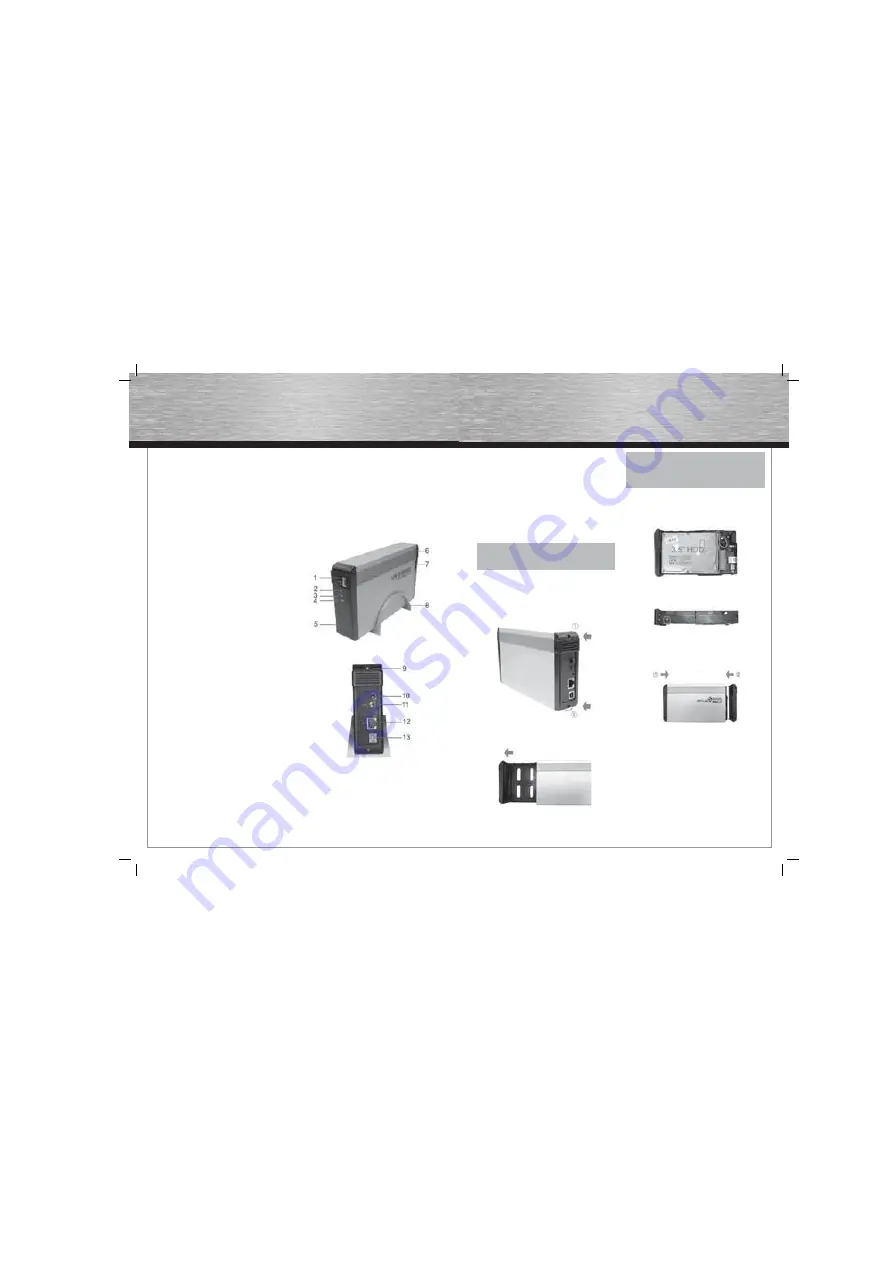
1.3 Description
(1) On/off switch
(2) Power LED
(3) HDD LED
(4) LAN LED
(5) Front cover
(6) Rear
(7) Aluminium enclosure
(8) Stand base
(9) Rear cover
(10) Fan on/off
(11) Power supply
(12) RJ-45 connection
(13) USB connection
1.4 Connection options
1. Network connection
Connect the supplied network cable to the
RJ-45 socket of the NDAS device and then
connect the NDAS device with your existing
network.
2. USB connection
The NDAS enclosure can be connected directly to
a PC using the supplied USB cable.
Caution:
Never connect the enclosure simultaneously via
USB and to the network!
2. Hard drive installation
1. Remove the two screws at the rear of the unit
and carefully pull the plastic cover back.
2. Remove the hard disk carrier carefully from the
enclosure.
Important:
Please ensure that you have set the hard drive to
„Master” with the jumper on the connection strip
before installing the hard disk.
3. Now connect the power and data cable to the
hard drive and then place it on the hard drive
carrier.
4. Secure the hard drive on the hard drive carrier
using the screws supplied.
5. Insert the hard drive back into the aluminium
enclosure and secure the carrier using the screws
removed in the fi rst step.
6. Now connect the NDAS enclosure to your network
as described in section 1.4.
3. Software
3.1 Installing the software
Mac users: the hard drive installed must be
formatted to FAT32 so that it can be accessed by
the Mac.
Insert the software/driver CD in the CD-ROM drive
of your PC.
Operating Instruction
g
All manuals and user guides at all-guides.com
all-guides.com