4
5
Screen Navigation
Three keys perform the screen navigation.
• Press
.
key to go back to the previous
screen in the sequence.
• Press
,
key to go to the next screen
in the sequence.
• Press
O
to go to the home (default)
screen.
When the dash is powered up it will display
a Haltech Logo Screen. After an initial
configuration time the dash will display the
default home screen.
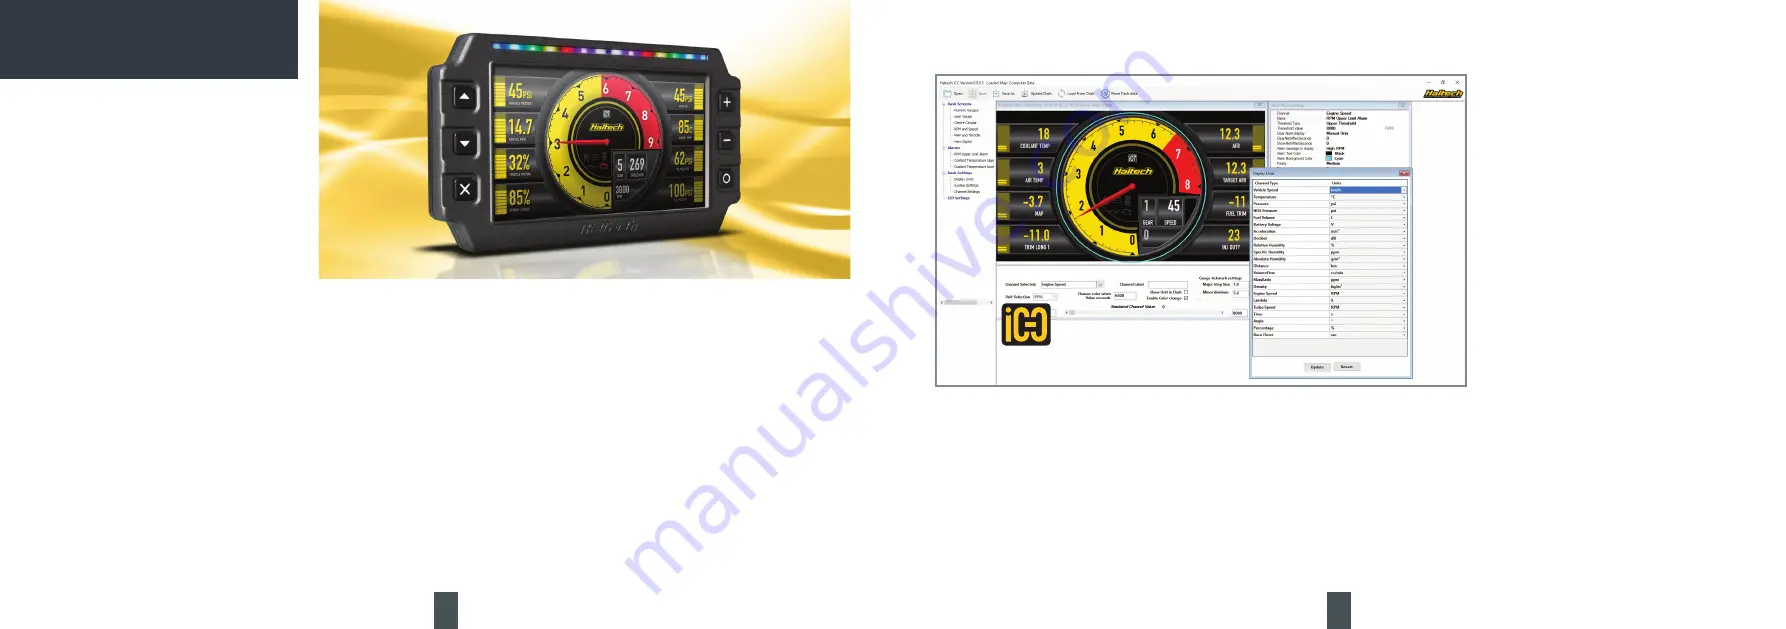
You can choose from a number of display
layouts available in the Haltech iCC software.
Display channels are user-customisable.
Brightness Control
The dash has an ambient light sensor placed in
the light bar to detect ambient light conditions.
In addition, the dash has a manual brightness
control which alters the range of the ambient
light sensor.
There are five brightness settings. On minimum
brightness setting, the display is at its minimum
brightness when the environment is dark, and
the brightness of the display increases as the
environment becomes brighter.
On the maximum brightness setting, the display
is always at full brightness regardless of the
ambient light level.
The default setting is brightness level 3.
Press the
=
key to increase the brightness
level by 1.
Press the
-
key to decrease the brightness
level by 1.
Shift / Alarm Lights
The default function of the shift / alarm light
panel is as a shift light bar, however alarms can
be progremmed for any channel in the iC-7.
There are 14 lights in the sequence.
Each LED has a threshold to trigger, and a
colour which it lights up when the RPM exceeds
the threshold.
The colours available are red, green, blue and
their combinations (yellow, cyan, magenta and
white).
Alarms are configured using the Haltech iCC
software. When an alarm event occurs, a
message will appear on the screen.
The lights on the light bar can be set to flash in
a preset colour.
When an alarm is triggered there are two
options of turning it off:
1. Press the
x
key to acknowledge the alarm.
2. Pre-set your alarm to turn off automatically
when the alarm condition is no longer active
after a preset amount of time.
For more information, please see the Help file
in the Haltech iCC software.
iC-7 DISPLAY DASH OPERATION
First Start Up
1. Remove the protective film from the screen.
2. Turn on the ignition power.
3. Initially, the dash will display a Haltech logo
while it starts up. It will go to black briefly
before the main dash image appears.
4. After a few seconds, the dash will display the
default screen selected in the software, with
data from your Haltech ECU or vehicle’s OBD-II.
• The channel to be displayed at each location
on the screen.
• The connection method. Eg. Haltech CAN
or OBD-II.
• Shift light RPM points and colours.
• Alarm thresholds, colour for on-screen
display and shift lights, manual or auto reset
methods.
Installing the software
1. Insert the supplied USB Key into your PC. If
you have lost your USB key, you can download
the Haltech iCC software directly from the
“Downloads” section of the Haltech website.
2. If the window does not open automatically,
open My Computer and find the USB drive.
Double click on the USB drive.
3. Double click on the installer icon you see in
the root directory of the USB drive.
4. Once the Haltech iCC is installed, run the
software.
5. With the the software opened, press F1 to
read the Help file.
If you need help contact our Tech Support on:
Email: support
@
haltech.com
USA: +1 888 298 8116
UK:
+44 121 285 6650
AUS: +61 2 9729 0999
NZ:
+64 9 887 0616
Haltech IC-C Software
With this software you can change various
aspects of the dash behaviour including:
• Ranges of channels. Eg. the maximum RPM
on a needle style tacho or a bar graph.
• Red ranges for channels. Eg. when a numeric
display changes to red, red zone on a tacho.
• Display units. Eg. metric or imperial,
lambda or AFR.


