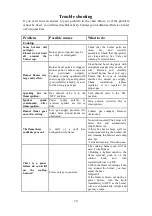
Hallman HRG4801U User Manual Download Page 43


Trouble shooting 

39 

If  you  can’t  find  an  answer  to  your  problem  in  the  chart  below,  or  if  the  problem 
cannot be fixed, you will need technical help. Contact your Authorized Service Center 
or Customer Care. 
 

Problem 

Possible causes 

What to do 

Cooktop 

Some  burners  will 
not light. 
Flames  do  not  burn 
all 

around 

the 

burner cap. 

Burner parts or igniters may be 
wet, dirty, or misaligned. 

Check  that  the  burner  parts  are 
clean, 

dry, 

and 

correctly 

assembled.  Check  that  the  igniters 
are  clean  and  dry.  See  ‘Care  and 
cleaning’ for instructions. 

Burner  flames  very 
large and yellow.   

Burner  bezel  ports  are  clogged. 
Burner  ports  or  burner  caps  are 
not 

positioned 

properly. 

Cooktop  is  being  operated  with 
the wrong type of gas. Regulator 
is not installed, is faulty, or is set 
for the wrong type of gas.   

Clean  burner  bezel  ring  ports  with 
straightened  paper  clip,  needle,  or 
wire. 

Remove 

and 

carefully 

re-install  burner  bezel  and  caps. 
Ensure  that  the  type  of  cooktop 
matches  the  natural  gas  supply. 
Check 

installation, 

replace 

regulator,  or  set  regulator  for 
proper gas.   

Sparking 

but 

no 

flame ignition.   

Gas  shut-off  valve  is  in  the 
‘OFF’ position.   

Turn  shut-off  valve  to  the  ‘ON’ 
position.   

Igniters 

spark 

continuously 

after 

flame ignition.   

Power 

supply 

polarity 

is 

reversed.  Igniters  are  wet  or 
dirty.   

Have  polarity  corrected.  Dry  or 
clean igniters.   

Burner  flame  goes 
out at low setting.   

Low  gas  supply  pressure.  Air 
intake  holes  around  knobs  are 
obstructed.   

Contact  gas  company.  Remove 
obstruction.   

The flames have 
suddenly gone out. 

draft 

or 

spill 

has 

extinguished the flame. 

No action required. The burner will 
detect 

this 

and 

automatically 

relight. However, 
if  there  has  been  a  large  spill,  we 
recommend turning the burners off 
and cleaning the burners and sump 
area. See 
‘Care and cleaning’ for instrucions. 

There  is  a  power 
failure 

  can I still 

use 

the 

cooktop 

burners? 


Power outage in your area. 

The  cooktop  burners  can  still  be 
used. To light them: 
1.Holding  a  lighted  match  to  the 
flame  spreader,  push  in  on  the 
control 

knob 

and 

turn 

counterclockwise to LITE. 
2.When the flame is burning all the 
way  around  the  burner,  you  may 
adjust the heat. 
Important! 
If  the  flame  is  blown  out  during  a 
power  failure,  turn  the  knob 
immediately  to  OFF,  as  the  burner 
will  not  automatically  relight  and 
gas may escape. 

Summary of Contents for HRG4801U

Page 1: ...Professional Gas Range User Manual...

Page 2: ...I...

Page 3: ...unique features that our product offers Please keep this manual for future reference as it contains answers to questions that you might have as you begin to cook Thank you Hallman Industries This man...

Page 4: ...ktop use Cooktops 20 Guidelines for using the cooktop burners 22 Oven use Oven burner use 25 Broil burner use 25 Oven cooking guidelines 26 Oven function 27 Griddle use 31 Care and cleaning Parts care...

Page 5: ...not avoided could result in minor or moderate injury CAUTION when used without the safety alert symbol indicates a potentially hazardous situation which if not avoided could result in property damage...

Page 6: ...rounding plug for your protection against shock hazard and should be plugged directly into a properly grounded power outlet Do not under any circumstances cut or remove the grounding prong from this p...

Page 7: ...rsons could be injured or a fire could start Keep the area around the appliance free from combustible materials e g wall coverings curtains drapes gasoline and other flammable vapors and liquids Do no...

Page 8: ...lt in poisoning or death Hot Surface Hazard Accessible parts may become hot during use Do not touch burners areas near burners the grill griddle grease drip pans heating elements or interior surfaces...

Page 9: ...eave children alone Children should not be left alone or unattended in the area where the appliance is in use They should never be allowed to play with the appliance or to sit or stand on any part of...

Page 10: ...the oven gasket or use any oven cleaning products on it It is essential for a good seal which ensures that the oven operates efficiently Care should be taken not to rub damage or move it Do not use ha...

Page 11: ...Introduction 7 48 series 36 6 burners series 36 with griddle series 30 series...

Page 12: ...ence in the space provided in section Warranty and service 3 Read this guide taking special note of the Safety and warnings section 4 Remove all the packaging from the oven s and cooktop Recycle items...

Page 13: ...e They may cause permanent damage to the surface When cooking set the burner controls so that the flame heats only the bottom of the utensil and does not overlap at the sides of the utensil Utensils p...

Page 14: ...PPLIANCE FOR NG GAS 10 0 IN W C APPLIANCE REGULATOR IS SET AT 10 0IN W C OUTLET PRESSURE FOR LP APPLIANCE REGULATOR IS SET AT 5 0IN W C OUTLET PRESSURE FOR NG Keep appliance area clear and free from c...

Page 15: ...ecessary to install non combustible materials behind the range below the counter top height The minimum distance from the side of the range above the counter top to combustible sidewalls must be at le...

Page 16: ...Installation Introduction 12...

Page 17: ...Installation Introduction 13 The maximum depth of cabinets installed above cooking tops be 13 in 330mm or a great specified by the manufactures as tested by the certification agency...

Page 18: ...n 14 The bottom of the hood should be 30 min to 36 above the counter top This would typically result in the bottom of the hood being 66 to 72 above the floor These dimensions provide safe and efficien...

Page 19: ...rt 1 and or local codes A copy of this standard may be obtained from National Fire Protection Association 1 Battery march Park Quincy Massachusetts 02269 9101 The power supply must be the correct pola...

Page 20: ...he gas line in an easily accessed location outside the range in the gas piping external to the appliance for the purpose of turning on or shutting off gas to the appliance 2 Install male 1 2 flare uni...

Page 21: ...to check for gas leaks 7 The appliance must be isolated from the building s gas supply piping system by closing its individual manual shut off valve during any pressure testing of the gas supply pipi...

Page 22: ...ure for 30 minutes using BAKE 30 minutes using BROIL some ovens only There will be a distinctive smell while you are conditioning the oven This is normal but make sure the kitchen is well ventilated d...

Page 23: ...ly to keep it in horizontal 2 Put the shelf on the slot horizontally 3 Lift the front about 15 upward till the tag of the shelf clear the safety stop of the side rack Then lower the shelf horizontally...

Page 24: ...Cooktop Use 20 Cooktops 48 36...

Page 25: ...Cooktop Use 21 Cooktops 36 30...

Page 26: ...don t extend over the edge of the range or another burner that is on Take care when deep frying Oil or fat can overheat very quickly particularly on a high setting Make sure that all burner parts are...

Page 27: ...ttempt to disassemble or clean around any burner while another burner is on Do not touch any burner cap burner base or igniter while the igniters are sparking Simmer and Boil 1 A smaller flame will gi...

Page 28: ...wer fails it is not capable of being safely placed in operation and user that no attempt should be made to operate during power failure Cooktop To prevent the cooktop from discoloring or staining clea...

Page 29: ...he desired heat setting Broil burner use To light the broiler burner push and turn the appropriate control knob clockwise to the broil position You will hear a clicking noise the sound of the electric...

Page 30: ...mel Do not cover the slotted grid of the broil roast pan with aluminum foil This will catch the grease and could cause fire Do not use plastic wrap or wax paper in the oven For food safety reasons do...

Page 31: ...shelves and baking utensils from the oven Preheat the oven to the temperature stated in the recipe before most baking Depending on the temperature and the size of the oven preheating will take around...

Page 32: ...or Customer Care When roasting larger items like a whole turkey use only the pan and grid for greater stability Convection Defrost With temperature control off a motorized fan in the rear of the oven...

Page 33: ...minutes Preheating is not necessary when broiling meat well done To Broil Broil one side until the food is browned turn and cook on the second side Season and serve Always pull the rack out to the sto...

Page 34: ...positions 2 or 3 Use shelf position 4 for thinner items that need less cooking time like steaks chops or hamburger patties When finishing off meals by browning the top under the broiler use metal or g...

Page 35: ...ckwise to the preferred cooking temperature 2 Preheat the griddle for 10 12 minutes 3 When the griddle is preheated to the desired temperature the indicator light will turn on 4 Butter or cooking oil...

Page 36: ...ing different parts of the range for cleaning or maintenance To help you identify any parts see illustrations in section Introduction and after this cleaning chart Do not use aerosol cleaners until th...

Page 37: ...fibrous or plastic brush and nylon pad for cleaning Always dry components completely before using the cooktop Control Panel Door Handle Control Housing Clean the control panel door handle and control...

Page 38: ...ely with a soft lint free cloth Oven door gasket Avoid cleaning this part If you need to remove large food particles off it proceed as follows 1 Dampen a sponge with clean hot water 2 Gently wipe off...

Page 39: ...surface in the kitchen to rest the door on Take care the oven door is heavy When replacing the burners make sure that the two locating pins on the bottom of the brass flame spreader are properly align...

Page 40: ...moving the oven door 1 Open the door fully 2 Open the levers fully on both sides 3 Holding the door firmly on both sides 4 Disengage the hinges and remove the gently close it about halfway door place...

Page 41: ...irmly in an 2 Insert the hinge tongues into the slots approximately halfway open position making sure that the notches on both sides drop into place as shown 3 Open the door fully 4 Fully close the le...

Page 42: ...Care and Cleaning 38 Replacing the oven light bulb When replace bulbs release the glass cover on the lamp holder first and then remove the bulb to replace new light bulb...

Page 43: ...proper gas Sparking but no flame ignition Gas shut off valve is in the OFF position Turn shut off valve to the ON position Igniters spark continuously after flame ignition Power supply polarity is re...

Page 44: ...moisture content or local climate temperature humidity is contributing to condensation Condenstaion is normal You can wipe the drops off the control panel If there is frequent or excessive condensati...

Page 45: ...st you please call 512 444 2775 Hallman Industries will not pay for This limited warranty does not cover 1 Service to instruct you on how to use your range to correct house wiring replace or repair ho...

Page 46: ...not responsible for incidental or consequential damages Under no circumstances will Hallman s liability exceed the cost that you paid for the product Some states do not allow the exclusion or limitati...

Reviews: