Page 10 of 29
TM
dm10
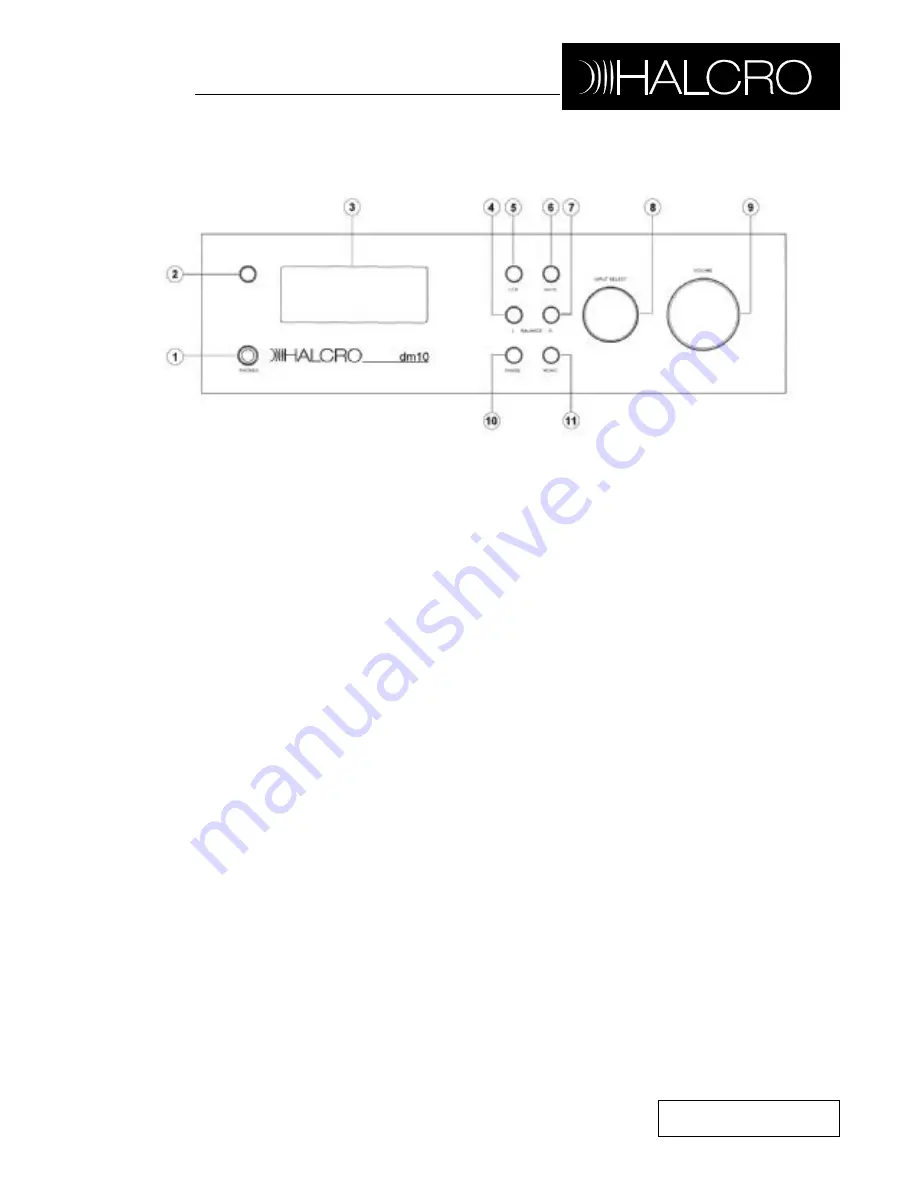
Front Panel Controls
Figure 1
1. Headphone Jack
2. Remote Sensor
Window
3. LCD Information
Display
4. Balance Control Left
5. Standby/On button
6. Mute button
7. Balance Control Right
8. Input Select Control
9. Volume Control
10. Phase button
11. Mono/Stereo button
1. Headphone Jack:
This jack may be
used to listen to the dm10’s output
through a pair of headphones. Ensure
that the headphones have a standard ¼”
stereo plug.
2. Remote Sensor Window
: Behind this
window is a sensor that receives infrared
signals from the remote control. Aim the
remote at this area and do not block or
cover the sensor window.
3. LCD information display:
This
display delivers messages and system
status to assist
you in operating the unit.
See page 12
for a complete breakdown on
the display.
4. Balance Control Left:
Using this
button in conjunction with Balance
Control Right (Fig 1, 7), the user can
change the relative volume for the left
and right channels. Pressing the Left
button will increase the volume on the
left hand channel and decrease the
volume on the right.
5. Standby/On button:
The Halcro dm10
is designed to remain in standby mode
when not in use. This button will toggle
the unit between Standby and On.
To turn the unit off completely, use the
Main Power Switch on the rear panel.
6. Mute button:
Depressing this button
will Mute the output to the speakers but
not the headphones.


