Installation Instructions
3
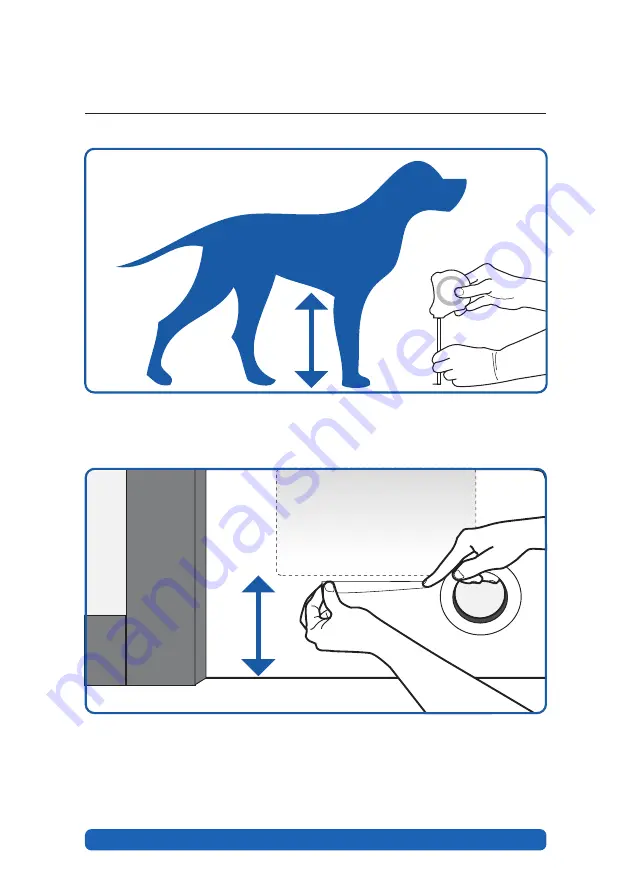
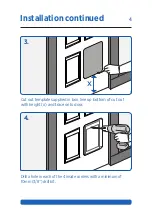
1.
X
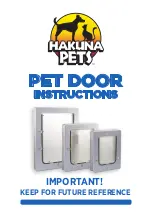
2.
Measure the height (x) from the underside of the dogs
stomach to the floor.
Mark height (x) on door / panel with tape or similar.
Page 1: ...IMPORTANT KEEP FOR FUTURE REFERENCE PET DOOR INSTRUCTIONS...
Page 2: ...arts All defective products or parts will be repaired or replaced This warranty does not cover batteries or any other consumable items Normal Wear and Tear This warranty does not cover normal wear and...
Page 3: ...Installation Instructions 3 1 X X 2 Measure the height x from the underside of the dogs stomach to the floor Mark height x on door panel with tape or similar...
Page 4: ...tallation continued 4 X 3 4 Cut out template supplied in box line up bottom of cut out with height x and trace onto door Drill a hole in each of the 4 inside corners with a minimum of 10mm 3 8 drill b...
Page 5: ...and caps provided Select the correct size screws below for your installation Security Screens use the 12mm screws tunnel is not required Standard Doors Align tunnel and frames secure with 45mm screws...
Page 6: ...treats Then leaving him where he is go to the other side of the pet door lift the flap and repeat the same exercise Do a few repetitions going each way then take a break This training can be stressful...
Page 7: ...e or liable for unintended use or misuse Please remember it is you the purchaser who must at all times be aware of what you have allowed access to by the installation of this pet door Please think saf...