background image

MVERF

XTALO

HW-RST

ISP-TXD

ISP-RXD

PCM_A[14:0]

PCM_D[7:0]

PWM1

PWM0

CI_IRQA_N

CI_CE_N

CI_WAIT_N

CI_REG_N

CI_RESET

PCM_CD_N

CI_A9

AV2-Rin

AV2-Lin

RXO2+

RXO2-

RXO0-

RXO1-

RXO1+

RXO0+

RXOC-

RXO3+

RXO3-

RXOC+

CI_D6

CI_A7

CI_A6

CI_A5

CI_A4

CI_A3

CI_A2

CI_A1

CI_A0

TS_MOSTART0

TS_MOVAL0

TS_CLK

TS_D7

TS_D6

TS_D5

TS_D4

TS_D3

TS_D2

TS_D1

TS_D0

CI_D3

CI_D7

CI_D0

CI_D4

CI_A8

XTALI

CI_D1

CI_D5

CI_D2

KEY0

FLASH_WP

PWM0

PWM1

UART-TX

UART-RX

IR_SYNC

HW-RST

CI_A14

CI_A13

CI_A12

CI_A11

TS_MDI2

TS_MDI7

TS_MDI5

TS_MDI6

TS_MDI4

TS_MDI3

TS_MDI0

TS_MDI1

TS1_START

TS1_VLD

TS1_CK

T_SCL

T_SDA

#IF_OUT

IF_OUT

SPI-CSNI

SPI-SCKI

SPI-SDII

SPI-SDOI

KEY1

SDA

SCL

CI_IOWR_N

CI_WE_N

CI_IORD_N

CI_OE_N

TS1_D0

TS1_D1

TS1_D7

TS1_D6

TS1_D5

TS1_D4

TS1_D3

TS1_D2

MVERF

I2S_OUT_MCK

I2S_OUT_SD

I2S_OUT_BCK

LVA0P

LVA0N

LVA1N

LVA1P

LVA2N

LVA2P

LVACN

LVACP

LVA3N

LVA3P

LVB1P

LVB1N

LVB2P

LVB2N

LVBCP

LVBCN

LVB3N

LVB3P

LVB0P

LVB0N

LVB1N

LVB1P

LVB2N

LVB2P

LVBCN

LVBCP

LVB3N

LVB3P

LVB0N

LVB0P

CI_A10

LVB4N

LVB4P

LVA4N

LVA4P

RXE0+

RXE0-

LVA0N

LVA0P

RXE1-

RXE1+

RXE3-

RXE3+

RXE2+

RXEC-

RXEC+

RXE2-

LVA1N

LVA1P

LVA2N

LVA2P

LVACN

LVACP

LVA3N

LVA3P

LVB4P

LVB4N

RXO4-

RXO4+

RXE4-

RXE4+

LVA4N

LVA4P

AUIDO_L

AUIDO_R

VGA-Lin

VGA-Rin

AV1-Lin

AV1-Rin

UART-RX

UART-TX

AUVRM

AUVRP

AUVAG

I2S_OUT_SD

I2S_OUT_MCK

I2S_OUT_BCK

CVBS_OUT

PCM_A11

PCM_A13

PCM_A10

PCM_OE_N

PCM_A8

PCM_IORD_N

PCM_A14

MIUA_A13

MIUA_DQ0

MIUA_DQ1

MIUA_BA0

MIUA_BA1

MIUA_DQ2

MIUA_BA2

MIUA_DQ3

MIUA_DQ4

MIUA_DQ5

MIUA_DQ6

MIUA_DQ7

MIUA_ODT

MIUA_DQ8

MIUA_DQ9

MIUA_DQ10

MIUA_DQ11

MIUA_DQ12

MIUA_DQ13

MIUA_DQ14

MIUA_DQ15

MIUA_A[0:13]

MIUA_DQ[0:15]

MIUA_DQS0

MIUA_DQS0B

MIUA_DQS1

MIUA_DQS1B

MIUA_DQM0

MIUA_DQM1

MIUA_MCLK

MIUA_MCLKZ

MIUA_MCKE

MIUA_A0

MIUA_A1

MIUA_A2

MIUA_A3

MIUA_A4

MIUA_A5

MIUA_A6

MIUA_A7

MIUA_A8

MIUA_A9

MIUA_A10

MIUA_A11

MIUA_A12

MIUA_WEZ

MIUA_RASZ

MIUA_CASZ

MIUB_A6

MIUB_A7

MIUB_A8

MIUB_A9

MIUB_A10

MIUB_A11

MIUB_A12

MIUB_A13

MIUB_DQ0

MIUB_DQ1

MIUB_DQ2

MIUB_DQ3

MIUB_DQ4

MIUB_DQ5

MIUB_DQ6

MIUB_DQ7

MIUB_DQ8

MIUB_DQ9

MIUB_DQ10

MIUB_DQ11

MIUB_DQ12

MIUB_DQ13

MIUB_DQ14

MIUB_DQ15

MIUB_DQ[0:15]

MIUB_A[0:13]

MIUB_WEZ

MIUB_RASZ

MIUB_CASZ

MIUB_BA0

MIUB_BA1

MIUB_BA2

MIUB_ODT

MIUB_DQS0

MIUB_DQS0B

MIUB_DQS1

MIUB_DQS1B

MIUB_DQM0

MIUB_DQM1

MIUB_MCLK

MIUB_MCLKZ

MIUB_MCKE

MIUB_A0

MIUB_A1

MIUB_A2

MIUB_A3

MIUB_A4

MIUB_A5

LEDG

SPI-SDI

SPI-SDO

SPI-CSN

SPI-SCK

DVDD_NODIE

TS_MOCLK

TS_MDO4

TS_MDO5

TS_MDO6

TS_MDO7

TS_MDO[7:0]

TS_MDO0

TS_MDO1

TS_MDO2

TS_MDO3

TS_MOSTART

TS_MOVAL

TS_D0

TS_D1

TS_D2

TSCLK

TSVALID

TSSTART

PCM_IRQA_N

PCM_OE_N

PCM_IORD_N

PCM_CE_N

PCM_WAIT_N

PCM_REG_N

PCM_RESET

PCM_IOWR_N

PCM_WE_N

CI_D0

CI_D1

CI_D2

PCM_D4

PCM_D5

PCM_D6

PCM_D7

PCM_A0

PCM_A1

PCM_A2

PCM_A3

PCM_A4

PCM_A5

PCM_A6

PCM_A7

PCM_A12

PCM_A9

PCM_RESET

PCM_CE_N

PCM_WAIT_N

PCM_REG_N

PCM_IOWR_N

TS_MOCLK

TS_MDO5

TS_MDO6

TS_MDO7

TS_MDO3

TS_MOVAL

TS_MOSTART

TSCLK

TSSTART

TS_MDI2

TS_MDI7

TS_MDI5

TS_MDI6

TS_MDI4

TS_MDI3

TS_MDI0

TS_MDI1

TS_MDO4

PCM_D3

PCM_WE_N

PCM_IRQA_N

TSVALID

TP2

SPI-SCK

SPI-SDO

#F_WP

SPI-SDI

SPI-CSN

FLASH_WP

RXE1-

RXE0-

RXEC-

RXE2-

RXE3-

RXE1+

RXE3+

RXEC+

RXE2+

RXE0+

RXO2-

RXO0-

RXO1-

RXOC-

LCD_OP

RXO3-

RXO1+

RXOC+

RXO2+

RXO0+

RXO3+

PANEL_ON/OFF

OVERDRIVER

OVERDRIVER

STANDBY

IRIN

LED_G

LED_R

KEY1

KEY0KEY0KEY0KEY0KEY0KEY0KEY0KEY0KEY0KEY0KEY0KEY0KEY0KEY0KEY0KEY0KEY0

KEY1-in

KEY0-in

KEY1-in

KEY0-in

STANDBY

IRINIRIN

KEY0-in

KEY1-in

LED_R

LED_G

LEDG

LED_G

LED_R

IRIN

IR_SYNC

HDMI_E_CEC

RX1BCLKP

RX1BCLKN

HOTPLUG1

RX1B1P

RX1B1N

RX1B0P

RX1B0N

RX1B2N

RX1B2P

DDC1BSCL

DDC1BSDA

PHDETEC

PH_DETEC

PHDETEC

RXO4+

RXO4-

RXE4+

RXE4-

PANEL_ON/OFF

#F_WP

SPI-SDO

SPI-CSN

TP2

SPI-SCK

SPI-SDI

3.3VU

RX3B0N

RX3BCLKP

RX3B2P

DDC3BSDA

RX3BCLKN

HOTPLUG3

RX3B2N

RX3B1N

DDC3BSCL

RX3B1P

RX3B0P

RX2BCLKP

RX2BCLKN

HOTPLUG2

RX2B1P

RX2B1N

RX2B0P

RX2B0N

RX2B2N

RX2B2P

DDC2BSCL

DDC2BSDA

TS_D4

TS1_D7

CI_A7

CI_A6

CI_A5

CI_A4

CI_A3

CI_A2

CI_A1

CI_A0

CI_REG_N

TS_CLK

TS_MOVAL0

TS_MOSTART0

CI_A12

CI_RESET

CI_WAIT_N

CI_D6

CI_D7

CI_D4

CI_D5

TS_D5

TS_D6

TS_D7

TS_D3

CI_D3

CI_OE_N

CI_A10

CI_IORD_N

CI_A11

CI_CE_N

CI_IOWR_N

TS1_D0

TS1_D6

TS1_D1

TS1_D2

TS1_D3

TS1_D4

TS1_D5

CI_WE_N

CI_IRQA_N

TS1_START

TS1_CK

CI_A9

TS1_VLD

CI_A8

CI_A14

CI_A13

TS_MDO0

TS_MDO1

TS_MDO2

PCM_D0

PCM_D1

PCM_D2

CD_N

CD_N

TS1_D4

TS1_D5

TS1_D2

TS1_D3

TS1_D0

TS1_D1

TS1_D7

TS1_VLD

TS1_D6

TS1_START

TS1_CK

LCD_OP

EPM_WP

SCL

SDA

EPM_WP

SDA

SCL

1.8VA

3.3VU

3.3VA

5V_Tuner

5V_Tuner

1.32V

2.5VA

3.3VU

3.3VA

1.8VA

3.3VA

3.3VU

VCC-Panel

3.3VA

VCC-Panel

5Vstb

5Vstb

3.3VU

5Vstb

5Vstb

5Vstb

3.3VU

3.3VU

3.3VU

3.3VA

SIDE_CVBS

7

DVD_CVBS

7

AUOUTL1

9

ISP-RXD
7

ISP-TXD
7

PCM_A[14:0]

5

PCM_D[7:0]

5

PCM_CD_N

5

AV1-Vin+

7

AV2-Rin

7

AV2-Lin

7

PCM_WAIT_N
5

PCM_IRQA_N
5

RF_AGC_SEL

4

ADJ-PWM
1

AUOUTR1

9

AUOUTR0

9

AUOUTL0

9

TS_MDI[7:0]

4,5

T_SDA

4

T_SCL

4

RF_AGC

4

VIFP

4

VIFM

4

IF_OUT

4

#IF_OUT

4

IF_AGC_T

4

R
7

RGB0_GIN-
7

RGB0_BIN-
7

R
7

R
7

RGB0-SOG
7

RGB0_RIN-
7

RGB1_G-
7


7


7

RGB1_R-
7


7

RGB1_B-
7

RGB1_SOG
7

COMP_Y-
7


7


7

COMP_R-
7


7

COMP_B-
7

C
7

AV4-Vin+

7

SPDIFO

7

AUIDO_R

7

AUIDO_L

7

VGA-Lin

7

VGA-Rin

7

AV1-Lin

7

AV1-Rin

7

CVBS_OUT

7

ON_PANEL

1

PWR-ON/OFF

1

DVD_ON/OFF

7

MUTE_1517

9

MIUA_BA0
3

MIUA_BA1
3

MIUA_BA2
3

MIUA_ODT
3

MIUA_A[0:13]
3

MIUA_DQ[0:15]
3

MIUA_DQS0
3

MIUA_DQS0B
3

MIUA_DQS1
3

MIUA_DQS1B
3

MIUA_DQM0
3

MIUA_DQM1
3

MIUA_MCLK
3

MIUA_MCLKZ
3

MIUA_MCKE
3

MIUA_WEZ
3

MIUA_RASZ
3

MIUA_CASZ
3

MIUB_CASZ

3

MIUB_BA0

3

MIUB_DQ[0:15]

3

MIUB_BA1

3

MIUB_DQS0

3

MIUB_BA2

3

MIUB_ODT

3

MIUB_DQS0B

3

MIUB_DQS1

3

MIUB_DQS1B

3

MIUB_DQM0

3

MIUB_DQM1

3

MIUB_A[0:13]

3

MIUB_MCLK

3

MIUB_MCLKZ

3

MIUB_MCKE

3

MIUB_WEZ

3

MIUB_RASZ

3

ON_PBACK

1

AUDIO_SEL

7

SC1_FS
7

SC1_FB
7

VGA_VSYNC
7

VGA_HSYNC
7

TS_MDO[7:0]

5

TS_MOCLK

5

TS_MOSTART

5

TS_MOVAL

5

TSSTART

4,5

TSCLK

4,5

TSVALID

4,5

PCM_IRQA_N

5

PCM_IORD_N

5

PCM_OE_N

5

PCM_CE_N

5

PCM_RESET

5

PCM_WAIT_N

5

PCM_REG_N

5

PCM_WE_N

5

PCM_IOWR_N

5

IR_in
7

HDMI_E_CEC
6

RX1BCLKN
6

DDC1BSCL
6

RX1BCLKP
6

HOTPLUG1
6

RX1B0P
6

RX1B0N
6

RX1B1P
6

RX1B1N
6

RX1B2P
6

DDC1BSDA
6

RX1B2N
6

PH_DETEC
7

USB1_CTL

8

USB2_CTL

8

USB1_DETE

8

USB2_DETE

8

MUTE_3110

9

MUTE_3544

9

USB_DP0
8

USB_DM0
8

USB_DP1
8

USB_DM1
8

RESET_DMBT_S

4

LNB_ON/OFF

4

DDC3BSCL
6

RX3BCLKN
6

RX3BCLKP
6

RX3B0N
6

RX3B0P
6

HOTPLUG3
6

RX3B1N
6

RX3B1P
6

DDC3BSDA
6

RX3B2P
6

RX3B2N
6

DDC2BSCL
6

RX2BCLKN
6

RX2BCLKP
6

RX2B0N
6

RX2B0P
6

HOTPLUG2
6

RX2B1N
6

RX2B1P
6

DDC2BSDA
6

RX2B2P
6

RX2B2N
6

TS1_D0

4

TS1_START

4

TS1_CK

4

TS1_D5

4

TS1_D2

4

TS1_D7

4

TS1_D4

4

TS1_D1

4

TS1_VLD

4

TS1_D6

4

TS1_D3

4

MSD309

LVDS CONNECTOR

RESET

DEBUG PORT

KEYBOARD

Mode Selection

FLASH

MSD309PX

PCMCIA IO

MSD309

MSD306

TS to CI

TS back from CI

LVDS CONNECTOR

KEY PAD

ON

OFF

LED

To dvd

EAR PH DETECT

WITH EAR PH

WITHOUT

SCART CVBS

SIDE_CVBS

DVD_CVBS

REAR CVBS

DMBT TS

32F0 Bit3 LVDS

ᐙᑺ

10ppm

EEPROM

I2C address

at A0.

NC

IR

ferrite

For OAD

FOR TEST

C113

1n

C113

1n

R65

0R-0402

R65

0R-0402

7

5

3

1

8

6

4

2

RP11

22RX4

7

5

3

1

8

6

4

2

RP11

22RX4

R45

100R

R45

100R

R75

22R

R75

22R

7

5

3

1

8

6

4

2

RP1

22RX4

7

5

3

1

8

6

4

2

RP1

22RX4

C86

12pF-NPO

C86

12pF-NPO

R51

4.7K

R51

4.7K

R43

100K

R43

100K

R60

4.7K

R60

4.7K

P

W

M

S

A

R

S

P

I

U

A

R

T

/I2

C

S

I2

C

M

G

P

IO

L

V

D

S

G

P

IO

_P

M

IR

X

T

A

L

R

E

S

E

T

G

P

IO

_T

C

O

N

U

S

B

U7D

MSD309PX

P

W

M

S

A

R

S

P

I

U

A

R

T

/I2

C

S

I2

C

M

G

P

IO

L

V

D

S

G

P

IO

_P

M

IR

X

T

A

L

R

E

S

E

T

G

P

IO

_T

C

O

N

U

S

B

U7D

MSD309PX

PADA_OUTN_CH[6](PAD_R_ODD[6])

AC25

PADA_OUTP_CH[6](PAD_R_ODD[7])

AC24

PADA_OUTN_CH[7](PAD_R_ODD[4])

AD25

PADA_OUTP_CH[7](PAD_R_ODD[5])

AD24

PADA_OUTN_CH[8](PAD_R_ODD[2])

AC23

PADA_OUTP_CH[8](PAD_R_ODD[3])

AE24

PADA_OUTN_CH[10](PAD_G_ODD[6])

AC22

PADA_OUTP_CH[10](PAD_G_ODD[7])

AE22

PADA_OUTN_CH[9](PAD_R_ODD[0])

AD23

PADA_OUTP_CH[9](PAD_R_ODD[1])

AE23

PADA_OUTN_CH[11](PAD_G_ODD[4])

AD22

PADA_OUTP_CH[11](PAD_G_ODD[5])

AC21

PADA_OUTN_CH[12](PAD_G_ODD[2])

AD21

PADA_OUTP_CH[12](PAD_G_ODD[3])

AC20

PADA_OUTN_CH[13](PAD_G_ODD[0])

AD20

PADA_OUTP_CH[13](PAD_G_ODD[1])

AE20

PADA_OUTN_CH[14](PAD_B_ODD[6])

AC19

PADA_OUTP_CH[14](PAD_B_ODD[7])

AE19

PADA_OUTN_CH[15](PAD_B_ODD[4])

AD19

PADA_OUTP_CH[15](PAD_B_ODD[5])

AC18

PADA_OUTN_CH[16](PAD_B_ODD[2])

AD18

PADA_OUTP_CH[16](PAD_B_ODD[3])

AC17

PADA_OUTN_CH[17](PAD_B_ODD[0])

AD17

PADA_OUTP_CH[17](PAD_B_ODD[1])

AE17

PAD_PWM0

AB25

PAD_PWM1

AB24

PAD_PWM2

E6

PAD_PWM3

D6

PAD_SAR0

J5

PAD_SAR1

G4

PAD_SPI_CK

A2

PAD_SPI_DI

B3

PAD_SPI_DO

A3

DDCA_CK

P6

DDCA_DA

N6

PAD_DDCR_CK

AA23

PAD_DDCR_DA

AA24

PAD_TESTPIN

E11

PAD_GPIO1(AMP_RST)

C7

PAD_GPIO2(INV_CTL)

F4

PAD_GPIO3(PANEL_CTL)

E4

PAD_GPIO4(USB_CTL)

C3

PAD_GPIO_PM0(5V_HDMI_3)

AB8

PAD_GPIO_PM4(POWER_ON_OFF)

C5

PAD_GPIO_PM11(DSUB_DET)

L5

PAD_GPIO_PM6(BOOT_FLASH_CS)

C4

PAD_SPI_CZ(BACKUP_FLASH_CS)

A4

PAD_GPIO_PM8(FLASH_WP)

B2

PAD_IRIN

G5

PAD_XTAL_IN

AD1

PAD_XTAL_OUT

AE2

PAD_RESET

E5

PAD_GND_EFUSE

F11

PAD_TCON0

AA10

PAD_TCON4

AA9

PAD_TCON1(SC1_RE1)

T5

PAD_TCON3(TUNER_RESET)

AB7

PAD_TCON10(HP_DET)

Y8

PAD_DP_P0

C2

PAD_DM_P0

B1

PAD_TCON9(COMP_DET)

R6

PAD_TCON11(HP_MUTE)

Y9

PAD_TCON2(FE_ANT5V_MONITOR)

AB10

PAD_TCON5(SC1_MUTE)

V5

PAD_GPIO_PM12(EDID_WP)

M6

PAD_GPIO_PM5(5V_HDMI_2)

K4

PAD_GPIO5(ERROR_OUT)

D4

PAD_GPIO_PM1(5V_HDMI_1)

H5

PAD_SAR2(POWER_DET)

B4

PAD_GPIO0(NTP_MUTE)

A7

PAD_GPIO12(AMD_SCL)

F6

PAD_GPIO13(AMP_SDA)

F5

PAD_TCON15(SC1_DET)

T4

PAD_TCON7(SIDE_AV_DET)

AA8

PAD_TCON6(PCM_5V_CTL)

AC11

PAD_SAR3

AA7

PAD_DP_P1

AD11

PAD_DM_P1

AE11

R110

NC/10K

R110

NC/10K

R98

10k

R98

10k

C59

2.2u

C59

2.2u

Q7

3906

Q7

3906

1

3

2

R53

4.7K

R53

4.7K

R56

68R

R56

68R

C109

0.1uF

C109

0.1uF

R46

100R

R46

100R

R47

2.2K

R47

2.2K

C286

0.1uF

C286

0.1uF

R81

1K

R81

1K

C10

2

30P

C10

2

30P

7

5

3

1

8

6

4

2

RP15

22RX4

7

5

3

1

8

6

4

2

RP15

22RX4

C57

1uF

C57

1uF

R58

4.7K

R58

4.7K

C71

12pF-NPO

C71

12pF-NPO

R72

22R

R72

22R

L2

60

-0603

L2

60

-0603

R463

10K

R463

10K

7

5

3

1

8

6

4

2

RP12

22RX4

7

5

3

1

8

6

4

2

RP12

22RX4

C80

12pF-NPO

C80

12pF-NPO

C93

10P

C93

10P

7

5

3

1

8

6

4

2

RP2

22RX4

7

5

3

1

8

6

4

2

RP2

22RX4

R88

100K

R88

100K

R48

2.2K

R48

2.2K

R86

10k

R86

10k

C61

0R-0402

C61

0R-0402

R95

10K

R95

10K

7

5

3

1

8

6

4

2

RP4

22RX4

7

5

3

1

8

6

4

2

RP4

22RX4

C10

4

1n

C10

4

1n

R54

1K

R54

1K

C10

5

1n

C10

5

1n

C65

12pF-NPO

C65

12pF-NPO

CN6

6pin-2.0mm

CN6

6pin-2.0mm

1

1

2

2

3

3

4

4

5

5

6

6

T

S

1

T

S

0

P

C

M

C

IA

N

A

N

D

 F

LA

S

H

FR

O

N

T

 E

N

D

U7B

MSD309PX

T

S

1

T

S

0

P

C

M

C

IA

N

A

N

D

 F

LA

S

H

FR

O

N

T

 E

N

D

U7B

MSD309PX

PAD_PCM_D[0]

W21

PAD_PCM_D[1]

U21

PAD_PCM_D[2]

U19

PAD_PCM_D[3]

AD12

PAD_PCM_D[4]

AC12

PAD_PCM_D[5]

AD13

PAD_PCM_D[6]

Y12

PAD_PCM_D[7]

AA11

PAD_PCM_A[0]

Y24

PAD_PCM_A[1]

Y22

PAD_PCM_A[2]

AB22

PAD_PCM_A[3]

AA22

PAD_PCM_A[4]

AA20

PAD_PCM_A[5]

Y21

PAD_PCM_A[6]

AA18

PAD_PCM_A[12]

AA17

PAD_PCM_A[8]

AA16

PAD_PCM_A[9]

AA14

PAD_PCM_A[11]

Y15

PAD_PCM_A[13]

AA15

PAD_PCM_A[10]

AA12

PAD_PCM_A[7]

AA19

PAD_TS1_CLK

Y18

PAD_TS1_SYNC

AB16

PAD_TS1_VLD

AE16

PAD_TS1_D[0]

Y16

PAD_TS1_D[1]

AD14

PAD_TS1_D[2]

AD15

PAD_TS1_D[3]

AC15

PAD_TS1_D[4]

AC16

PAD_TS1_D[5]

Y17

PAD_TS1_D[6]

AB17

PAD_TS1_D[7]

AB19

PAD_TS0_CLK

Y19

PAD_TS0_SYNC

W20

PAD_TS0_VLD

Y23

PAD_TS0_D[0]

U20

PAD_TS0_D[1]

V20

PAD_TS0_D[2]

R19

PAD_TS0_D[3]

AE13

PAD_TS0_D[4]

AC13

PAD_TS0_D[5]

Y11

PAD_TS0_D[6]

AB11

PAD_TS0_D[7]

AB13

PAD_IP

AA3

PAD_IM

AA2

PAD_QP

Y3

PAD_QM

Y2

PAD_TGPIO0(RF_AGC_CTRL)

AC4

PAD_TGPIO1(DEMOD_RESET)

AD2

PAD_TGPIO2(TUNER_SCL)

AD4

PAD_TGPIO3(TUNER_SDA)

AE4

PAD_IFAGC

AD3

PAD_VIFP

AB1

PAD_VIFM

AA1

PAD_RFAGC_TAGC

AE3

PAD_SIFM

AB3

PAD_SIFP

AB2

PAD_PCM_RESET

Y20

PAD_PCM_A[14]

AE14

PAD_PCM_IRQA_N

AD16

PAD_PCM_OE_N

Y13

PAD_PCM_IORD_N

Y14

PAD_PCM_CE_N

AA13

PAD_PCM_WE_N

AC14

PAD_PCM_CD_N

AB23

PAD_PCM_WAIT_N

AB20

PAD_PCM_IOWR_ N

AB14

PAD-PCM_REG_N

AA21

PAD_PF_ALE

T21

PAD_PF_AD[15]

T19

PAD_PF_CE0Z

P21

PAD_PF_CE1Z

P20

PAD_PF_OEZ

R20

PAD_PF_WEZ

T20

PAD_F_RBZ

P19

PAD_PCM2_CE_N

Y25

C72

12pF-NPO

C72

12pF-NPO

D2

BAV99

D2

BAV99

3

1

2

C90

10P

C90

10P

R108

10K

R108

10K

C112

2.2u

C112

2.2u

R85

1K

R85

1K

C70

12pF-NPO

C70

12pF-NPO

C10

6

10P

C10

6

10P

7

5

3

1

8

6

4

2

RP9

22RX4

7

5

3

1

8

6

4

2

RP9

22RX4

C68

12pF-NPO

C68

12pF-NPO

7

5

3

1

8

6

4

2

RP5

22RX4

7

5

3

1

8

6

4

2

RP5

22RX4

C91

47n

C91

47n

U202

24C32

U202

24C32

A0

1

A1

2

A2

3

GND

4

SDA

5

SCL

6

WP

7

VCC

8

C94

10P

C94

10P

C66

12pF-NPO

C66

12pF-NPO

C58

2.2u

C58

2.2u

C74

12pF-NPO

C74

12pF-NPO

R63

47R

R63

47R

C95

0.1uF(X7R)

C95

0.1uF(X7R)

Q9

3904

Q9

3904

1

2

3

R59

NC

R59

NC

C110

10uF

C110

10uF

CN8

LED-IR

CN8

LED-IR

1

1

2

2

3

3

4

4

5

5

6

6

7

7

8

8

9

9

10

10

CN7

KEY

CN7

KEY

1

2

3

R99

10

K

R99

10

K

R90

10K

R90

10K

R106

22R

R106

22R

R71

10K

R71

10K

R87

10k

R87

10k

7

5

3

1

8

6

4

2

RP3

22RX4

7

5

3

1

8

6

4

2

RP3

22RX4

C87

12pF-NPO

C87

12pF-NPO

R84

1K

R84

1K

C85

12pF-NPO

C85

12pF-NPO

C422

0.1u

C422

0.1u

Q8

3904

Q8

3904

1

2

3

R73

22R

R73

22R

7

5

3

1

8

6

4

2

RP17

22RX4

7

5

3

1

8

6

4

2

RP17

22RX4

R102

10K

R102

10K

C69

12pF-NPO

C69

12pF-NPO

7

5

3

1

8

6

4

2

RP14

22RX4

7

5

3

1

8

6

4

2

RP14

22RX4

R79

10K

R79

10K

7

5

3

1

8

6

4

2

RP46

22RX4

7

5

3

1

8

6

4

2

RP46

22RX4

R91

NC/10K

R91

NC/10K

C96

0.1uF

C96

0.1uF

C78

12pF-NPO

C78

12pF-NPO

R96

10K

R96

10K

R105

22R

R105

22R

R100

10K

R100

10K

C111

100pF

C111

100pF

L406

NC/330nH

L406

NC/330nH

R103

10K

R103

10K

C76

47n

C76

47n

7

5

3

1

8

6

4

2

RP6

22RX4

7

5

3

1

8

6

4

2

RP6

22RX4

C88

12pF-NPO

C88

12pF-NPO

H

D

M

I

A

U

D

IO

I2

S

S

P

D

IF

U7C

MSD309PX

H

D

M

I

A

U

D

IO

I2

S

S

P

D

IF

U7C

MSD309PX

PAD_LINEIN_L0

R4

PAD_LINEIN_R0

R5

PAD_LINEIN_L1

T6

PAD_LINEIN_R1

U6

PAD_LINEIN_L2

V6

PAD_LINEIN_R2

U5

PAD_LINEIN_L5

AD6

PAD_LINEIN_R5

AC6

PAD_RX0N_A

G2

PAD_RX0P_A

H3

PAD_RX1N_A

H2

PAD_RX1P_A

J3

PAD_RX2N_A

J2

PAD_RX2P_A

J1

PAD_RXCN_A

G3

PAD_RXCP_A

G1

DDCDA_CK

M4

DDCDA_DA

M5

PAD_HOTPLUGA

K6

PAD_RX0N_B

D2

PAD_RX0P_B

E3

PAD_RX1N_B

E2

PAD_RX1P_B

F3

PAD_RX2N_B

F2

PAD_RX2P_B

F1

PAD_RXCN_B

D3

PAD_RXCP_B

D1

DDCDB_CK

J6

DDCDB_DA

L6

HOTPLUGB

J4

PAD_RX0N_C

AC8

PAD_RX0P_C

AD9

PAD_RX1N_C

AC9

PAD_RX1P_C

AD10

PAD_RX2N_C

AE10

PAD_RX2P_C

AC10

PAD_RXCN_C

AE8

PAD_RXCP_C

AD8

DDCDC_CK

AE7

DDCDC_DA

AD7

PAD_HOTPLUGC

AC7

PAD_CEC

K5

PAD_LINEOUT_L0

V1

PAD_LINEOUT_R0

V2

PAD_EARPHONE_OUTL

AD5

PAD_EARPHONE_OUTR

AE5

PAD_VRP

AB4

PAD_VAG

AB5

AVSS_VRM_ADC_DAC

AC3

PAD_I2S_OUT_MCK

A6

PAD_I2S_OUT_SD

B5

PAD_I2S_OUT_WS

B6

PAD_I2S_IN_BCK(USB_OCD)

C1

PAD_I2S_IN_SD(LED_ON)

H6

PAD_I2S_IN_WS(WARM_LED_ON)

G6

PAD_SPDIF_OUT

P5

PAD_I2S_OUT_BCK

C6

PAD_LINEOUT_L3

AA6

PAD_LINEOUT_R3

Y5

R55

NC

R55

NC

SOIC8

208mil

U8

M

X

25L6405D

M

I-

1

2G

˄

SO

P-

1

6

˅

SOIC8

208mil

U8

M

X

25L6405D

M

I-

1

2G

˄

SO

P-

1

6

˅

HOLD

1

VCC

2

NC1

3

NC2

4

NC3

5

NC4

6

SO16-CS

7

DO

8

WP/Vpp

9

VSS

10

NC5

11

NC6

12

NC7

13

NC8

14

DI

15

CLK

16

SOP8

-CS

17

SOP8

-DO

18

SOP8

-WP/Vp

p

19

VSS

20

SOP8

-DI

21

SOP8

-CLK

22

SOP8

-HOLD

23

SOP8-VCC

24

C101

33p-NPO

C101

33p-NPO

L407

NC/330nH

L407

NC/330nH

L4

60

-0603

L4

60

-0603

R44

10k

R44

10k

7

5

3

1

8

6

4

2

RP18

22RX4

7

5

3

1

8

6

4

2

RP18

22RX4

U7F

MSD309PX

U7F

MSD309PX

AVDD_DDRA

F18

AVDD_DDRB

J16

AVDD_DVI

E9

AVDD_DVI

E10

VDDC1.2V

E22

VDDC1.2V

F22

VDDC1.2V

E21

AVDD2P5_ADC

M9

AVDD_AU25

R9

AVDD_AU33

K9

AVDD_EAR33

J9

AVDD25_REF

N8

AVDD25_PGA

T8

AVDD_DDRA

E17

AVDD_DDRB

G16

VDDP

E19

AVDD25_MOD

P8

AVDD_DDRA

E18

AVDD_DDRB

H16

AVDD_DDRA

F17

AVDD_DDRB

H17

AVDD25_MOD

P9

AVDD1P2

J21

VDDP

F19

AVDD2P5_ADC

M8

DVDD_MIUA

H20

DVDD_MIUB

J20

AVDD_LPLL_MEMPLL

G18

AVSS_PGA

U8

AVDD_DDRA

G17

AVDD_DDRB

J17

VDDC1.2V

F21

VDDC1.2V

G21

VDDC1.2V

H21

VDDC1.2V

E20

VDDC1.2V

F20

VDDC1.2V

G20

VDDC1.2V

G22

AVDD25_REF

N9

DVDD_NODIE

L10

AVDD_DVI

F9

AVDD_DVI

F10

AVDD_DVI

G9

AVDD_DMPLL

G10

AVDD3P3_ADC

H9

AVDD3P3_ADC

H10

GND

V7

GND

W7

GND

V8

GND

W8

GND

V9

GND

W9

GND

J10

GND

K10

GND

M10

GND

N10

GND

P10

GND

R10

GND

T10

GND

U10

GND

V10

GND

W10

GND

D11

GND

G11

GND

H11

GND

J11

GND

K11

GND

L11

GND

M11

GND

N11

GND

P11

GND

R11

GND

T11

GND

U11

GND

V11

GND

W11

GND

D12

GND

E12

GND

F12

GND

G12

GND

H12

GND

J12

GND

K12

GND

L12

GND

M12

GND

N12

GND

P12

GND

R12

GND

T12

GND

U12

GND

V12

GND

W12

GND

D13

GND

E13

GND

F13

GND

H13

GND

J13

GND

K13

GND

L13

GND

M13

GND

N13

GND

P13

GND

R13

GND

T13

GND

U13

GND

D14

GND

E14

GND

F14

GND

G14

GND

H14

GND

J14

GND

K14

GND

L14

GND

M14

GND

N14

GND

P14

GND

R14

GND

T14

GND

U14

GND

D15

GND

E15

GND

F15

GND

G15

GND

H15

GND

J15

GND

K15

GND

L15

GND

M15

GND

N15

GND

P15

GND

R15

GND

T15

GND

U15

GND

D16

GND

E16

GND

F16

GND

K16

GND

L16

GND

M16

GND

N16

GND

P16

GND

R16

GND

T16

GND

U16

GND

K17

GND

L17

GND

M17

GND

N17

GND

P17

GND

R17

GND

T17

GND

U17

GND

K18

GND

L18

GND

M18

GND

N18

GND

P18

GND

R18

GND

T18

GND

U18

GND

K19

GND

L19

GND

M19

GND

N19

GND

N20

GND

M20

GND

L20

GND

K20

GND

N21

GND

M21

GND

L21

GND

K21

GND

N22

GND

M22

GND

L22

GND

K22

GND

J22

GND

H22

GND

Y10

GND

AC2

GND

AE1

C89

47n

C89

47n

R

G

B

C

V

B

S

U7E

MSD309PX

R

G

B

C

V

B

S

U7E

MSD309PX

PADA_BIN0M

K1

PADA_GIN0P

L3

PADA_GIN0M

L2

PADA_SOGIN0

K2

PADA_RIN0M

M2

PAD_HSYNC0

N4

PAD_VSYNC0

N5

PADA_BIN1M

N3

PADA_GIN1P

N2

PADA_SOGIN1

N1

PADA_RIN1M

R3

PAD_HSYNC1

W6

PAD_VSYNC1

Y6

PADA_BIN2M

R1

PADA_GIN2M

T2

PADA_RIN2M

U2

PADA_SOGIN2

T3

PAD_HSYNC2

V4

PADA_RIN0P

M3

PADA_BIN0P

K3

PADA_RIN1P

P2

PADA_GIN1M

P3

PADA_BIN1P

M1

PADA_RIN2P

U3

PADA_GIN2P

T1

PADA_BIN2P

R2

PADA_CVBS0

AC5

PADA_CVBS4

W2

PADA_CVBS5

W3

PADA_CVBS_OUT1

V3

PADA_VCOM

W1

PADA_CVBS1

W4

PADA_CVBS2

W5

PADA_CVBS_OUT2

AA4

PADA_CVBS3

AA5

C97

2.2u

C97

2.2u

C84

12pF-NPO

C84

12pF-NPO

Y1

24MHZ

Y1

24MHZ

1

2

R101

NC/10K

R101

NC/10K

H1H1

1

2

3

4

R78

8.2K

R78

8.2K

C62

0.1uF

C62

0.1uF

R64

0R-0402

R64

0R-0402

C10

7

10P

C10

7

10P

R77

8.2K

R77

8.2K

R94

10

K

R94

10

K

R52

10k

R52

10k

R49

1K

R49

1K

R57

NC

R57

NC

TF1

TP

TF1

TP

TF1

1

TF2

2

TF3

3

TF4

4

TF5

5

TF6

6

TF7

7

TF8

8

R109

10K

R109

10K

R74

22R

R74

22R

L3

60

-0603

L3

60

-0603

C77

12pF-NPO

C77

12pF-NPO

7

5

3

1

8

6

4

2

RP10

22RX4

7

5

3

1

8

6

4

2

RP10

22RX4

R80

1M

R80

1M

C63

0.1uF

C63

0.1uF

C10

8

10P

C10

8

10P

R50

10K

R50

10K

C79

12pF-NPO

C79

12pF-NPO

C92

0.1uF

C92

0.1uF

C73

12pF-NPO

C73

12pF-NPO

C75

12pF-NPO

C75

12pF-NPO

C98

33p-NPO

C98

33p-NPO

R82

0R-0402

R82

0R-0402

C67

12pF-NPO

C67

12pF-NPO

C10

0

10P

C10

0

10P

R61

NC

R61

NC

7

5

3

1

8

6

4

2

RP13

22RX4

7

5

3

1

8

6

4

2

RP13

22RX4

R104

NC/10K

R104

NC/10K

C81

12pF-NPO

C81

12pF-NPO

C287

0.1uF

C287

0.1uF

7

5

3

1

8

6

4

2

RP47

22RX4

7

5

3

1

8

6

4

2

RP47

22RX4

7

5

3

1

8

6

4

2

RP8

22RX4

7

5

3

1

8

6

4

2

RP8

22RX4

C285

150P

C285

150P

L408

120nH

L408

120nH

CN5

2*20Pin-2.0mm

CN5

2*20Pin-2.0mm

GND

1

GND

2

RO0-

3

RO0+

4

RO1-

5

RO1+

6

RO2-

7

RO2+

8

ROC-

9

ROC+

10

RO3-

11

RO3+

12

RO4-

13

RO4+

14

GND

15

GND

16

RE0-

17

RE0+

18

RE1-

19

RE1+

20

RE2-

21

RE2+

22

REC-

23

REC+

24

RE3-

25

RE3+

26

RE4-

27

RE4+

28

GND

29

GND

30

LCDOP

31

GND

32

VCC

33

VCC

34

VCC

35

VCC

36

VCC

37

VCC

38

OP1

39

OP2

40

R107 100R

R107 100R

R92

4.7K

R92

4.7K

7

5

3

1

8

6

4

2

RP7

22RX4

7

5

3

1

8

6

4

2

RP7

22RX4

C82

12pF-NPO

C82

12pF-NPO

C64

12pF-NPO

C64

12pF-NPO

C83

12pF-NPO

C83

12pF-NPO

C99

10P

C99

10P

C60 0R-0402

C60 0R-0402

7

5

3

1

8

6

4

2

RP16

22RX4

7

5

3

1

8

6

4

2

RP16

22RX4

R62

NC

R62

NC

R89

1K

R89

1K

M

IU

A

M

IU

B

U7A

MSD309PX

M

IU

A

M

IU

B

U7A

MSD309PX

PAD_IO[8](A_A0)

C10

PAD_IO[41](A_A1)

A22

PAD_IO[5](A_A2)

A9

PAD_IO[44](A_A3)

B23

PAD_IO[3](A_A4)

B9

PAD_IO[43](A_A5)

A23

PAD_IO[6](A_A6)

C9

PAD_IO[45](A_A7)

C23

PAD_IO[4](A_A8)

B8

PAD_IO[46](A_A9)

A24

PAD_IO[42](A_A10)

B22

PAD_IO[2](A_A11)

C8

PAD_IO[35](A_A12)

B24

PAD_IO[14](A_DQ0)

C13

PAD_IO[32(A_DQ1)

A19

PAD_IO[15](A_DQ2)

A12

PAD_IO[33](A_DQ3)

B19

PAD_IO[34](A_DQ4)

C20

PAD_IO[13](A_DQ5)

B12

PAD_IO[31](A_DQ6]

C19

PAD_IO[17](A_DQ7)

A13

PAD_IO[18](A_DQ8)

B14

PAD_IO[29](A_DQ9)

C18

PAD_IO[19](A_DQ10)

C14

PAD_IO[30](A_DQ11)

A18

PAD_IO[28](A_DQ12)

B18

PAD_IO[16](A_DQ13)

B13

PAD_IO[27](A_DQ14)

B17

PAD_IO[20](A_DQ15)

C15

PAD_IO[23](A_DQS0)

A16

PAD_IO[24](A_DQS0B)

C16

PAD_IO[21](A_DQS1)

A15

PAD_IO[22](A_DQS1B)

B15

MVREF

D22

PAD_IO[26](A_DQM0)

B16

PAD_IO[25](A_DQM1)

C17

PAD_IO[12](A_MCLK)

C12

PAD_IO[10](A_MCLKZ)

B11

PAD_IO[37](A_CKE)

C21

PAD_IO[36](A_WEZ)

B20

PAD_IO[9](A_RASZ)

B10

PAD_IO[7](A_CASZ)

A10

PAD_IO[39](A_BA0)

A21

PAD_IO[38](A_BA1)

B21

PAD_IO[40](A_BA2)

C22

PAD_IO[11](A_ODT)

C11

PAD_IO[55](B_A0)

E23

PAD_IO[88](B_A1)

U24

PAD_IO[52](B_A2)

D24

PAD_IO[91](B_A3)

V25

PAD_IO[50](B_A4)

D25

PAD_IO[90](B_A5)

V24

PAD_IO[53](B_A6)

D23

PAD_IO[92](B_A7)

W25

PAD_IO[51](B_A8)

C25

PAD_IO[93](B_A9)

W24

PAD_IO[89](B_A10)

V23

PAD_IO[49](B_A11)

C24

PAD_IO[82](B_A12)

W23

PAD_IO[61](B_DQ0)

H23

PAD_IO[79](B_DQ1)

P24

PAD_IO[62](B_DQ2)

G24

PAD_IO[80](B_DQ3)

R23

PAD_IO[81](B_DQ4)

R24

PAD_IO[60](B_DQ5)

G25

PAD_IO[78](B_DQ6)

P23

PAD_IO[64](B_DQ7)

H24

PAD_IO[65](B_DQ8)

J25

PAD_IO[76](B_DQ9)

N23

PAD_IO[66](B_DQ10)

J24

PAD_IO[77](B_DQ11)

N24

PAD_IO[75](B_DQ12)

N25

PAD_IO[63](B_DQ13)

J23

PAD_IO[74](B_DQ14)

M25

PAD_IO[67](B_DQ15)

K23

PAD_IO[70](B_DQS0)

L24

PAD_IO[71](B_DQS0B)

L23

PAD_IO[68](B_DQS1)

K24

PAD_IO[69](B_DQS1B)

K25

PAD_IO[73](B_DQM0)

M23

PAD_IO[72](B_DQM1)

M24

PAD_IO[59](B_MCLK)

G23

PAD_IO[57](B_MCLKZ)

F25

PAD_IO[84](B_CKE)

T23

PAD_IO[83](B_WEZ)

R25

PAD_IO[56](B_RASZ)

F23

PAD_IO[54](B_CASZ)

E24

PAD_IO[86](B_BA0)

T24

PAD_IO[85](B_BA1)

T25

PAD_IO[87](B_BA2)

U23

PAD_IO[58](B_ODT)

F24

PAD_IO[0](A_A13)

B7

PAD_IO[47](B_A13)

B25

R97

NC/10K

R97

NC/10K

R42

100K

R42

100K

R111

100K

R111

100K

R93

4.7K

R93

4.7K

R83

1K

R83

1K

Summary of Contents for LET46C800HF

Page 1: ......

Page 2: ...5 Auto Tuning DVB T 15 Auto Tuning DVB C 16 DTV Manual Tuning DVB T DTV Manual Tuning DVB C ATV Manual Tuning 17 17 18 PICTURE MENU 18 19 SOUND MENU 18 TIME MENU 18 OPTION MENU LOCK MENU EPG Menu Electronic Program Guide 19 PVR function 20 Prepare to record the program 20 19 Record the program 21 Play the record 21 Timeshift function 22 Prepare to record the program 22 USB Drive Storage Format 22 ...

Page 3: ...S PRODUCT THERE IS A EXCLAMATION MARK IN THE TRIANGLE THIS SYMBOL ALERTS YOU THAT IMPORTANT LITERATURE CONCERNING OPERATION AND MAINTENANCE HAS BEEN INCLUDED WITH THIS PRODUCT CAUTION TO REDUCE THE RISK OF ELECTRIC SHOCK AND FIRE DO NOT PUT THE TV SET NEAR SOURCES OF HUMIDITY DO NOT USE ANY ABRASIVE CLEANERS WHICH MAY SCRATCH OR DAMAGE THE LCD SCREEN AVOID CONTACT WITH OBJECTS THAT MAY SCRATCH THE...

Page 4: ...the Safety notice EN 3 ...

Page 5: ...ion Do not trap the power supply cord under the television receiver Caution Never stand on lean on or suddenly push the television or its stand You should pay special attention to children Serious injury may result if it should fall Caution Do not place your television on an unstable cart stand shelf or table Serious injury to an individual and damage to the television may result if it should fall...

Page 6: ...l LED TV s are high voltage electrical equipment When you clean dust or any water drops off the SCREEN or CABINET or around any of the buttons or connectors the power cabled should be removed from the power socket Wipe the TV with a soft dry dust free cloth During thunderstorms unplug the power cable and aerial antenna cable to prevent damage to your TV and any other devices connected to it All re...

Page 7: ...PRESET MODE PC 3 5 1024x768 1280x1024 60 60 1 640x480 60 31 47 2 800x600 60 37 88 48 36 63 98 RESOLUTION V Freq KHz H Freq KHz 4 1360x768 60 47 7 Introduction EN 6 6 1920x1080 60 66 64 ...

Page 8: ... screws INSTALLATION NOTES Locate the TV in a room where light does not strike the screen directly Total darkness or a reflection on the screen can cause eyestrain Soft and indirect lighting is recommended for comfortable viewing Allow enough space between the TV and the wall to permit ventilation Avoid excessively warm locations to prevent possible damage to the cabinet or premature component fai...

Page 9: ...uture use 1 Place the LED LCD Television onto a solid surface Please place some soft material over the front of the screen to protect it from any damage 3 Use the four screws provided to fix the TV onto a wall mounting bracket not included via the four VESA standard holes on the back of the television Introduction EN 8 This television can be wall mounted as follows M6x9 M6x9 M6x9 M6x9 ...

Page 10: ...nnel up and down In MENU press CH or CH to select items STANDBY 2 VOL VOL Adjust sound level In MENU adjust the item that you selected 5 Introduction Front control panel EN 9 30 30 1 2 3 SOURCE 1 MENU CH CH VOL STANDBY VOL 2 3 4 5 1 AV 2 input 3 YPbPr input 4 input 5 input input 7 SCART input 8 PC AUDIO input 9 L R AUDIO Intput 10 11 Input 12 input 1 2 3 4 5 6 7 8 10 9 11 12 AC Power Source HDMI2 ...

Page 11: ...AVI cable press the SOURCE button on the remote and use the keys to select AV and press the OK button Option 4 COMPONENT Green Blue Red White Red Make sure that both TV and the device are switched off before connecting TV Connect the cables not supplied from the COMPONENT IN sockets Y Pb Pr green blue red and L Audio R white red on the TV to the DVD player or games console etc To select the device...

Page 12: ...ace service provider to get more information about the modules and subscription Please noted that CA modules and smart cards are neither supplied nor optional accessories from us COMMON INTERFACE CHANNEL PICTURE SOUND TIME OPTION LOCK Auto Tuning ATV Manual Tuning Programme Edit Signal Information DTV Manual Tuning Software Update USB CI Information OK OK MENU MOVE OK Introduction EN 11 ...

Page 13: ...t File 27 Teletext Yellow Button USB Previous File 28 USB STOP 29 USB PAUSE 30 START RECORD 31 UP DOWN LEFT RIGHT Cursor Press to navigate your selection 32 Fav To access your favourite channels list in TV or DTV mode 33 Select Programme Press Button to select the next or previous TV channel 34 GUIDE Press to display electronic programme guide in TV mode 35 Q View To access the previously viewed c...

Page 14: ...ication appears top left To freeze the page To display or hide the concealed information games solutions The user can set four favorite pages to be directly linked to the four color keys While list mode is activated it is not possibility to use TOP or FLOF navigation with the colorkeys The favorite page numbers should be stored and restored to from nonvolatile memory for each channel by the system...

Page 15: ...ay a If you select DVB T the next step is to select the Tune type and country then press the OK button to start tuning b If you select DVB C the next step is to config the DVB C system like scan type Frequency Network ID Sy mbol KS S then press OK button to into the tune type and country select menu this step is the same as DVB T select the tune type DTV ATV Choose the right country press OK butto...

Page 16: ...uning half way A pop up screen will be displayed press the button to select YES to confirm You will then go straight to DTV tuning You may repeat the above step if you also want to skip the DTV tuning An installation reminder will appear the next time you turn on the TV 5 After tuning is complete the channels are arranged in a preset order If you wish to skip channels modify the preset order or re...

Page 17: ...ons to select Auto Tuning and then press the OK button 3 Press the buttons to select DVB T DVB C Press select DVB C and then press the OK button to confirm 4 Press buttons to select Scan type Symbol Ks S press the OK button to confirm 5 In the Tune Type menu press the buttons to select ATV DTV DTV ATV Press the button and then press the buttons to select the country where you will operate the TV P...

Page 18: ...Press the MENU button and then press the buttons to select the CHANNEL menu and then press the OK button 3 The DTV Manual Tuning screen will pop up Press the buttons to select the desired UHF channel and then press the OK button to commence the search of that channel When the signal has been tuned the picture and signal strength will be displayed on the screen 1 Press the MENU button and then pres...

Page 19: ...FAV button it will show on the right side of the program Choose the FAV program press FAV button again you can cancel the FAV the will disappear Once your favorite group is created you can press the FAV key to quickly access your favorite channel 1 Tint is available in NTSC system only 2 There are four colors temperature modes can be selected medium warm cool user 3 Screen is available in PC mode ...

Page 20: ...n PVR File system menu you can set up USB disk for PVR Automatic Power down 1 If after 4 hours from switch on and no changes have been made to the TV for example no channel or volume changes the TV will start the automatic power down sequence And pop up window will appear on screen After 150 seconds the TV will automatically switch to standby To override the automatic shutdown press any button on ...

Page 21: ...device is available for time shift and record If not please format the device to make sure the device available The default Free Record Limit is 6 hour if the space on the disk is big enough If the space is not big enough the record time should be shorter depends on the room on the device During the check PVR File System checking please do not take any other operation until it finished The recordi...

Page 22: ... practical use 2GB to 500GB is recommended 2 Video may become pixelated when Video bit rate is too low This can be caused by connecting a USB extension cable instead of plugging the USB directly into the TV 3 Not all USB devices are compatible Below is a list of recommended USB drives Models that are not listed may be compatible but it is not guaranteed to work The USB support list are the same as...

Page 23: ...f the power or remove the USB device during formatting During formatting a speed test will be done on the USB device If it fails it means the USB device may not support the Time Shift function Record a paused DTV program to USB storage device Please do not unplug the USB storage device when the Time Shift function is activated Approximately 4GB of memory buffers about offer 140 minutes 1 While in ...

Page 24: ...peatedly change operations between PLAY PAUSE FWD REV 6 Video may become pixelated when Video bit rate is too low 7 Not all USB devices are compatible The USB hard disk drive electricty should be 500MA Below is a list of recommended USB drvies Models that are not listed may be compatible but it is not guaranteed to work San Disk Extreme Contour USB Flash Drive 8GB SDCZ8 8192 E75 San Disk Extreme C...

Page 25: ...ic You can adjust the audio track or program in the Info menu while Playing the video file Choose the Info icon and press OK can display the Info MENU USB playback is supported for the following photo file formats JPEG JPEG format files with the extension jpg BMP files with the extension bmp PNG files with the extension png USB playback is supported for the following music file formats MP3 files w...

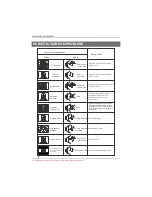
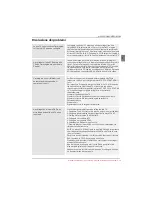
Page 26: ... Mute Power cord is not inserted Power switch is not opened Contrast and brightness volume setup Press standby key on the remote control for inspecting No colour Normal audio Colour control Picture breaking up Normal audio or weak retune channel No colour Noise TVsystem Normal audio antenna position direction or connection Trouble phenomenon Symptom Ghost Normal audio Change aspect to zoom There i...

Page 27: ...tart at ATV and repeat the sequence below for all input sources ATV DTV SCART HDMI 1 and 2 as each input source is controlled separately Press TV Menu button Press Right Arrow to access Picture sub menu Press Down Arrow to select Aspect Ratio Select Auto Press Exit Repeat for all input sources I have just plugged in a DVD player or another item into my TV and it doesn t work This is applicable to ...

Page 28: ...I plug should be very close or touching the body of the TV or component When plugging in any HDMI cables you may experience problems if the HDMI cables are plugged in when the TV or the other component is switched on Always switch off both the TV and the component you are plugging in If you have checked the plugs and sockets switch off the TV and whatever you have plugged in to the TV and then swi...

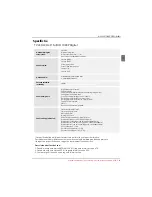
Page 29: ...d here are for reference only Difierences may occur as product technology is updated Design and specifications are subject to change without notice Scart Output description 1 When current source is ATV AV SCART scart output signal is ATV 2 When current source is DTV scart output signal is DTV 3 Other source have no scart output signal UHF VHF tuner Sleep timer Child lock Picture and text Remote co...

Page 30: ......

Page 31: ...Bitte lesen Sie diese Bedienungsanleitung vor der Inbetriebnahme des Geräts sorgfältig durch und bewahren Sie diese für späteres Nachschlagen auf LCD Fernseher mit dem LED Bildschirm BEDIENUNGSANLEITUNG ...

Page 32: ...g der Aufnahme 22 USB Laufwerk formatieren 22 Unterbrochenes DTV Programm auf USB Gerät zwischenspeichern 22 Limitierungen der TimeShift Funktion 23 USB Media Player 24 Störungserkennung 05 Störungserkennung 26 Spezifikationen 29 Willkommen Wichtige Informationen 2 2 Sicherheitshinweise Warnhinweise 3 4 Parameter Standfuß montieren 02 Einleitung 5 7 Wandmontage Vorderes Bedienfeld 8 9 TV Anschluss...

Page 33: ...FNEN SIE DAS GERÄTEGEHÄUSE NICHT ES BEFINDEN SICH KEINE VOM VERBRAUCHER WARTBAREN TEILE IM INNEREN DES GERÄTS WENDEN SIE SICH MIT PROBLEMEN UND FRAGEN ZUR WARTUNG AN DEN KUNDENDIENST DER BLITZ IM GLEICHSEITIGEN DREIECK BEDEUTET DASS IM GERÄT HOCHSPANNUNGSGEFAHR BESTEHT DAS AUSRUFUNGSZEICHEN IM GLEICHSEITIGEN DREIECK BEDEUTET DASS WICHTIGE WARTUNGS UND BEDIENUNGSHINWEISE IN DER BEDIENUNGSANLEITUNG ...

Page 34: ...werden zur Belüftung benötigt Stellen Sie das Gerät nicht auf einem Kissen Sofa oder ähnlichen Flächen ab Stellen Sie das Gerät nicht auf einem unstabilen Wagen Aufsteller Stativ Tisch oder einer Halterung ab Es kann herunterfallen und Verletzungen und Schäden verursachen Stellen Sie keine schweren oder scharfkantigen Gegenstände auf dem Gerät ab Ziehen Sie nach der Benutzung den Netzstecker Entso...

Page 35: ...m Fernseher ein Stehen Sie nicht auf dem Fernseher lehnen Sie sich nicht gegen den Fernseher stoßen Sie ihn nicht an Achten Sie auch besonders auf Kinder Der Fernseher kann schwere Verletzungen und Schäden verursachen wenn er umfällt Vorsicht Stellen Sie das Gerät nicht auf einem unstabilen Wagen Aufsteller Stativ Tisch oder einer Halterung ab Es kann herunterfallen und Verletzungen und Schäden ve...

Page 36: ...bPr x 1 SCART x 1 46 CI x 1 USB Port x 1 RF Co Ax x 1 Komposit Videoeingang 350 YPbPr 400 Machen Sie sich nicht an Bauteilen im Fernsehgerät oder an irgendwelchen anderen Einstellungssteuerungen zu schaffen die nicht in diesem Handbuch beschrieben sind Alle LED Fernsehgeräte sind elektrische Hochspannungsgeräte Wenn Sie Staub oder Wassertropfen von dem Bildschirm oder dem Gehäuse oder um die Knöpf...

Page 37: ...5 1024x768 1280x1024 60 60 1 640x480 60 31 47 2 800x600 60 37 88 48 36 63 98 Auflösung V Freq kHz H Freq kHz 4 1360x768 60 47 7 Einleitung De LCD Fernseher mit dem LED Bildschirm Bedienungsanleitung DE 6 6 1920x1080 60 66 64 ...

Page 38: ...vor direkter Sonneneinstrahlung geschützt auf Dunkelheit und Reflektionen auf dem Bildschirm können zu einer Überforderung der Augen führen Weiche und indirekte Beleuchtung wird für komfortables Fernsehen empfohlen Lassen Sie auf der Rückseite des Fernsehers ausreichend Platz zur Ventilation Hinweis Der TV Standfuß ist nicht schwenkbar Vermeiden Sie besonders warme Standorte um einen Hitzestau im ...

Page 39: ...em Bildschirm auf eine flache Arbeitsfläche Legen Sie ein Tuch unter um den Bildschirm zu schützen 3 Schrauben Sie den Fernseher mit den vier vorgesehenen Schrauben an eine VESA Wandhalterung nicht mitgeliefert Einleitung Dieser Fernseher kann wie folgt an der Wand montiert werden De LCD Fernseher mit dem LED Bildschirm Bedienungsanleitung DE 8 M6x9 M6x9 M6x9 M6x9 ...

Page 40: ...en Kanälen auf und ab Im MENÜ wählen Sie mit CH oder CH einen Menüpunkt STANDBY 2 VOL VOL Lautstärkeeinstellen ImMENÜstellenSiedengewähltenMenüpunktein 5 Vorderes Bedienfeld Einleitung SchaltetdenFernseherindenStandby Betrieb DE 9 LCD Fernseher mit dem LED Bildschirm Bedienungsanleitung 1 AV 2 3 YPbPr 4 5 Eingang 7 SCART 8 PC AUDIO 9 L R AUDIO 10 11 12 1 2 3 4 5 6 7 8 10 9 11 12 DC Netzteil HDMI2 ...

Page 41: ...um AV auszuwählen und die Taste OK zu drücken Option 4 COMPONENT Grün Blau Rot Weiß Rot Stellen Sie sicher dass sowohl der Fernseher als auch das Gerät vor dem Anschließen ausgeschaltet sind Schließen Sie die Kabel nicht mitgeliefert über die COMPONENT IN Buchsen Y Pb Pr grün blau rot und L Audio R weiß rot des Fernsehers an den DVD Player oder die Spielkonsole usw an Um das mit dem AVI Kabel ange...

Page 42: ...Sie das Modul in den Common Interface Schacht einschieben Setzen Sie zunächst das CI Modul und dann die SmartCard im CI Schacht an der Seite des Fernsehers ein Schalten Sie den Fernseher ein die nachstehende Meldung wird angezeigt wenn das CI Modul erkannt wird Warten Sie einen Moment ab bis die Karte aktiviert ist Drücken Sie MENU und dann zur Anzeige der CI Informationen Detaillierte Information...

Page 43: ...ext Halten 25 Teletext Untercode Teletext Unterseite 26 Teletext Taste Blaue Taste USB Funktion Nächste Datei 27 Teletext Taste Gelbe Taste USB Funktion Vorherige Datei 28 USB Funktion STOPP 29 USB Funktion ABSPIELEN PAUSE 30 AUFNAHME STARTEN 31 Navigationstasten NACH OBEN NACH UNTEN NACH LINKS NACH RECHTS Drücken Sie die Tasten um zu Ihrer Auswahl zu gelangen 32 Favoriten Zugriff auf die Liste mi...

Page 44: ...dieser Taste blättern Sie um oder halten Sie die Unterseite Die Seitenzahl wird oben links im Bild angezeigt Mit dieser Taste halten Sie eine Seite sie wird nicht umgeblättert Versteckte Informationen anzeigen oder verbergen Spielauflösungen Mit den vier Farbtasten können vier Favoritenseiten markiert werden In diesem Modus ist eine weitere Navigation mit den Farbtasten nicht möglich Mit dieser Ta...

Page 45: ...bourg Norway a Wenn Sie DVB T ausgewählt haben wählen Sie im nächsten Schritt den Tuning Typ und das Land aus und drücken Sie dann die OK Taste um mit dem Suchlauf zu beginnen b Wenn Sie DVB C ausgewählt haben konfigurieren Sie im nächsten Schritt das DVB C System wie Such Typ Frequenz Netzwerk ID Symbol KS S und drücken Sie dann die OK Taste Wählen Sie im Anschluss den Tuning Typ DTV ATV und Ihr ...

Page 46: ...ücken Sie die Taste um OK auszuwählen Gehen Sie dann direkt weiter zum DTV Suchlauf Sie können den Schritt wiederholen wenn Sie auch den DTV Suchlauf überspringen möchten Eine Installationserinnerung wird angezeigt wenn Sie das nächste Mal Ihr Fernsehgerät einschalten 5 Nachdem der Suchlauf abgeschlossen ist werden die Kanäle in einer vorgegebenen Reihenfolge angeordnet Wenn Sie Kanäle überspringe...

Page 47: ...Automatischen Suchlauf auszuwählen und drücken Sie dann die OK Taste Programme s Programme s Programme s Programme s 1 CHANNEL PICTURE SOUND TIME OPTION LOCK Auto Tuning ATV Manual Tuning Programme Edit Signal Information CADTV Manual Tuning Software Update USB CI Information OK OK MENU MOVE OK OK French Italy Greece Nederlands Poland Germany Hungary Luxembourg Norway 1 Drücken Sie die MENU Taste ...

Page 48: ...ENU Taste und drücken Sie anschließend die Tasten um das Menü KANAL auszuwählen und drücken Sie dann die OK Taste 3 Der DTV Bildschirm für den manuellen Suchlauf wird angezeigt Drücken Sie die Tasten um den gewünschten UHF Kanal auszuwählen und drücken Sie dann die OK Taste um mit der Suche nach diesem Kanal zu beginnen Wenn das Signal gefunden wurde wird das Bild und die Signalstärke auf dem Bild...

Page 49: ...om Kanal das Symbol angezeigt Zur Auswahl eines Favoritenkanals drücken Sie FAV Zum Löschen des Kanals in der Favoritenliste drücken Sie FAV damit erlischt das Symbol Drücken Sie FAV zum Aufrufen Ihrer Favoritenliste 1 Tint Hautfarbe haben Sie nur für das NTSC System 2 Ihnen stehen vier Farbtemperaturen Color Temperature zur Verfügung mittel medium warm kühl cool und benutzerdefiniert user 3 Die O...

Page 50: ...egelt schaltet sich das Gerät automatisch in den Ruhemodus Ein Informations Fenster erscheint auf dem Bildschirm Nach 150 Sekunden schaltet das Fernsehgerät automatisch in den Ruhemodus um Um das automatische Abschalten zu verhindern drücken Sie irgendeine Taste auf der Fernbedienung 2 Um die automatische Abschaltung zu deaktivieren wählen Sie die Automatische Abschaltung 4h im Optionsmenü aus und...

Page 51: ...steht Ihnen das USB Speichermedium für TimeShift und Aufnahme zur Verfügung Anderenfalls formatieren Sie bitte das Gerät Das Freie Aufnahmelimit Free Record Limit ist standardgemäß auf 6 Stunden eingestellt sofern die Speicherkapazität ausreichend ist Anderenfalls ist die Aufnahmezeit kürzer Während der Überprüfung gemäß Prüfe PVR Dateisystem Check PVR File System drücken Sie bitte keine weiteren ...

Page 52: ...0GB liegen aber für den praktischen Gebrauch wird eine Größe von 2GB bis 500GB empfohlen 2 Videos erscheinen gepixelt wenn die Video Bitrate zu gering ist Dies kann verursacht werden wenn ein USB Verlängerungskabel verwendet wird anstatt das USB Gerät direkt am Fernsehgerät anzuschließen 3 Nicht alle USB Geräte sind kompatibel Im Folgenden finden Sie eine Liste der empfohlenen USB Festplatten Mode...

Page 53: ...um nicht vom Fernseher Während der Formatierung wird für das USB Speichermedium ein Geschwindigkeitstest durchgeführt Schlägt dieser fehl so kann das USB Speichermedium nicht für die TimeShift Funktion benutzt werden Unterbrochenes DTV Programm auf USB Gerät zwischenspeichern Ziehen Sie das USB Speichermedium während der aktivierten TimeShift Funktion nicht ab 4 GB Speicher puffern ca 140 Minuten ...

Page 54: ...e 5 Schalten Sie nicht schnell zwischen WIEDERGABE PAUSE VORLAUF RÜCKLAUF um 6 Das Video kann verpixeln falls die Bitrate zu niedrig eingestellt ist 7 Nicht alle USB Speichermedien sind kompatibel Das USB Laufwerk sollte 500 mA haben Nachstehende Liste mit empfohlenen USB Laufwerken Nicht aufgeführte Modelle sind möglicherweise kompatibel das ist jedoch nicht garantiert SanDisk Extreme Contour USB...

Page 55: ...ei Musik USB Wiedergabe wird unterstützt für folgende Bildformate JPEG JPEG Format Dateien mit der Endung jpg BMP Dateien mit der Endung bmp PNG Dateien mit der Endung png USB Wiedergabe wird unterstützt für folgende Audioformate MP3 Dateien mit der Endung mp3 WAV Dateien mit der Endung wav USB Wiedergabe wird unterstützt für folgende Textformate TXT Dateien mit der Endung txt USB Wiedergabe wird ...

Page 56: ...lung der Signalquelle möglich Bitte wählen Sie mittels der Pfeile zwischen TV AV Komponenten VGA HDMI um die gewünschte Quelle auszuwählen Standardprogramm Im TV Modus können Sie eine Kanalnummer voreinstellen Bitte wählen Sie mittels der Pfeile die gewünschte Kanalnummer aus Menüanzeige Sie können den Menüaufruf für den Nutzer sperren indem Sie diese Option auf Aus stellen Signalquellen Sperre Si...

Page 57: ...ontrast und Helligkeit Lautstärke einstellen Drücken Sie STANDBY auf der Fernbedienung keine Farbe normaler Ton Farbe im Bildmodus überprüfen Bildverschwindet normaler Ton oder leise Kanal neu konfigurieren keine Farbe gestört Schlechtes TV Signal normaler Ton Antennenposition ausrichtung oder anschluss Problem Schatten normaler Ton Zoom Ansicht ändern Sie sehen einen schwarzen Balken oben und unt...

Page 58: ...t wird Drücken Sie die Fernseher Menütaste Drücken Sie Pfeil nach rechts um auf Bild Untermenü zuzugreifen Drücken Sie Pfeil nach unten um Bildformat zu wählen Wählen Sie Auto Drücken Sie Ende Wiederholen Sie dies für alle Eingangsquellen Ich habe gerade an einen DVD Player oder einen anderen Artikel in meinem Fernseher angeschlossen und er funktioniert nicht Dies gilt für jeden Artikel der Geräte...

Page 59: ...können Probleme auftreten falls die HDMI Kabel eingesteckt werden wenn der Fernseher oder andere Komponente eingeschaltet ist Schalten Sie immer sowohl den Fernseher als auch die Komponente aus die Sie einstecken möchten Wenn Sie die Stecker und Steckdosen überprüft haben schalten Sie den Fernseher und alles was Sie an den Fernseher angeschlossen haben aus und dann schalten Sie sie wieder ein Ich ...

Page 60: ...ibel mit dem Top up TV CI Slot Kompatibel mit der Audiobeschreibung UHF VHF Tuner Sleep Timer Kindersicherung Bild und Text Batterien für die Fernbedienung benötigt 2 x AAA im Lieferumfang enthalten VESA Haltergröße 200 x 200 mm Paketgröße BxHxT mm Set Größe BxHxT mit Standfuß mm Set Größe BxHxT ohne Standfuß mm Paketgewicht kg Set Gewicht mit Standfuß kg Set Gewicht ohne Standfuß kg 1285x780x170 ...

Page 61: ...Lisez attentivement ces instructions avant d utiliser l appareil et conservez les pour toute référence ultérieure Téléviseur à écran plat à LED GUIDE D UTILISATION ...

Page 62: ...gistrer une émission DTV télévision numérique mise en pause sur le dispositif de stockage USB 22 Limites du TimeShift 23 Lecteur USB 24 Dépannage 05 Dépannage 25 Spécification 28 Bienvenue Information Importante 01 Avertissment de sécurité 2 2 Instruction de sécurité Avertissements et mise en garde 3 4 Principaux Caractéristiques Installation Murale 02 Introduction 5 7 Wandmontage Panneau de comma...

Page 63: ...écran dans le présent mode d emploi peuvent suite aux innovations technologiques apportées ne pas correspondre tout à fait aux caractéristiques de votre modèle Tout démontage sans approbation préalable du présent produit est strictement interdit elle entrainerait l annulation de la garantie Haier AVERTISSEMENT pour éviter tout risque d incendie tenez bougies et autres sources de flammes ouvertes à...

Page 64: ...un support un trépied ou une table instable L appareil pourrait tomber causant des dommages ou des blessures Ne placez jamais d objets lourds ou tranchants sur le panneau ou le cadre Débranchez la prise de courant lorsque l appareil n est pas utilisé Il faut tenir compte de la protection de l environnement lors de l élimination des piles AVERTISSEMENT L utilisation d un casque ou d écouteurs avec ...

Page 65: ...on sous le récepteur de télévision Attention Ne montez jamais sur le téléviseur ne vous appuyez pas dessus et ne le poussez pas brusquement sur son socle Prêtez une attention particulière aux enfants Risque de blessures graves en cas de chute Attention Ne placez pas le téléviseur sur un chariot une étagère ou une table instable Le téléviseur risque de tomber et peut provoquer des blessures graves ...

Page 66: ...site 350 Ne modifiez aucun composant interne et bouton de commande du téléviseur non décrit dans ce manuel Tous les téléviseurs à LED sont des équipements de haute tension électrique Il faut débrancher le téléviseur avant de nettoyer de la poussière ou des gouttes d eau sur l écran du boîtier ou autour de l un des boutons ou des connecteurs Utilisez un chiffon doux et sec et non pelucheux pour ess...

Page 67: ...PC 3 5 1024x768 1280x1024 60 60 1 640x480 60 31 47 2 800x600 60 37 88 48 36 63 98 RESOLUTION V Fréq KHz H Fréq KHz 4 1360x768 60 47 7 Introduction FR Ecran télé plat à LED Guide d utilisation FR 6 6 1920x1080 60 66 64 ...

Page 68: ...frappe pas directement sur l écran L obscurité totale ou une réflexion sur l écran peut provoquer une fatigue visuelle Un éclairage doux et indirect est recommandé pour une visualisation confortable Prévoyez suffisamment d espace entre le téléviseur et le mur pour permettre la ventilation S il vous plaît ne pas tourner ce téléviseur Évitez les endroits trop chauds pour éviter tout dommage possible...

Page 69: ... téléviseur LCD LED sur une surface solide Mettez un matériau souple à l avant de l écran pour le protéger contre tout dommage 3 Utilisez les quatre vis fournies pour fixer le téléviseur sur un support mural non inclus par les quatre trous VESA standard à l arrière du téléviseur Introduction Ce téléviseur peut être accroché au mur en suivant la procédure suivante FR Ecran télé plat à LED Guide d u...

Page 70: ...H ou CH pour sélectionner des fonctions VEILLE 2 VOL VOL Pourréglerleniveausonore DansMENU permetderéglerl élémentsélectionné 5 Panneau frontal Introduction FR 9 Ecran télé plat à LED Guide d utilisation 30 30 1 2 3 SOURCE 1 MENU CH CH VOL STANDBY VOL 2 3 4 5 1 AV 2 3 YPbPr 4 5 Entrée 7 PERITEL 8 PC AUDIO 9 Audio Gauche Droite 10 11 12 1 2 3 4 5 6 7 8 10 9 11 12 Sources d alimentation CC HDMI2 6 H...

Page 71: ...Vert Bleu Rouge Blanc Rouge Eteignez le téléviseur et l appareil avant de procéder aux connexions Branchez les câbles non fournis de l entrée COMPONENT IN Y Pb Pr vert bleu rouge et L Audio R blanc rouge du téléviseur au lecteur DVD ou console de jeux etc Option 5 VGA Sub D 15 broches Connectez un câble VGA non fourni du connecteur VGA du téléviseur au PC ordinateur portable Remarque VGA transmet ...

Page 72: ...le dans le logement d interface commune Eteignez correctement le CAM module d accès conditionnel puis la carte à puce dans le logement CI qui se trouve sur le côté du téléviseur Allumez le téléviseur le message ci dessous s affiche si un module CA est détecté Attendez quelques instants jusqu à ce que la carte soit activée Appuyez sur la touche MENU puis appuyez sur la touche pour sélectionner l op...

Page 73: ...ier précédent USB 28 Arrêt USB 29 PLAY PAUSE Lecture Pause 30 DEMARRER L ENREGISTREMENT 31 TOUCHES DE DEPLACEMENT HAUT BAS DROITE GAUCHE Appuyez pour atteindre votre sélection 32 Fav Pour accéder à votre liste de chaînes favorites en mode TV ou DTV 33 Sélection de programme Utilisez pour sélectionner la chaîne suivante ou précédente 34 GUIDE Appuyez pour afficher le guide électronique des programm...

Page 74: ...uche Pour figer la page Pour afficher ou masquer les informations cachées solutions de jeux L utilisateur peut définir quatre pages préférées à être directement liées aux quatre touches de couleur Lorsque que le mode liste est activé il n est pas possible d utiliser la navigation Haut et Bas avec les touches de couleur Les numéros des pages préférées sont conservés et restaurés dans de la mémoire ...

Page 75: ... étape suivante consiste à sélectionner le type de Recherche et le pays puis appuyez OK pour lancer la recherche b Si vous sélectionnez DVB C l étape suivante consiste à configurer le système DVB C tel que le type de recherche Fréquence ID Réseau Symbole KS S puis d appuyer sur OK pour accéder au menu de sélection du type de recherche et du pays cette étape est la même que celle pour DVB T sélecti...

Page 76: ...pour confirmer Vous serez redirigez directement à la recherche DTV Vous pouvez répéter l étape ci dessus si vous voulez ignorer recherche DTV Un rappel d installation apparaîtra la prochaine fois vous allumez le téléviseur 5 Une fois la recherche terminée les chaînes seront disposées dans un ordre préétabli Si vous souhaitez ignorer des chaînes modifier l ordre des chaînes préréglées ou les renomm...

Page 77: ...ur sélectionner Auto Tuning recherche automatique puis sur OK Programme s Programme s Programme s Programme s 1 CHANNEL PICTURE SOUND TIME OPTION LOCK Auto Tuning ATV Manual Tuning Programme Edit Signal Information CADTV Manual Tuning Software Update USB CI Information OK OK MENU MOVE OK OK French Italy Greece Nederlands Poland Germany Hungary Luxembourg Norway 1 Appuyez sur la touche MENU puis su...

Page 78: ...our quitter le menu 2 2 Recherche manuelle DTV DVB C 1 Appuyez sur la touche MENU puis sur les touches pour sélectionner le menu CHANNEL puis sur la touche OK 3 L écran DTV Manual Tuning recherche manuelle DTV s affiche Appuyez sur les touches pour sélectionner UN canal UHF puis sur la touche OK pour lancer la recherche dans ce canal Lorsque le signal est accordé l image et la force du signal sont...

Page 79: ...ez sur pour choisir le programme appuyez sur la touche FAV le symbole apparaît sur le côté droit du programme Choisissez le programme FAV appuyez à nouveau sur la touche FAV pour annuler FAV le symbole disparaît Une fois votre groupe favori créé vous pouvez appuyer sur la touche FAV pour accéder rapidement à votre programme favori 1 Teinte n est disponible qu avec le système NTSC 2 Il y a quatre m...

Page 80: ... paramètres par défaut efface tous les programmes et mot de passe 1 Le téléviseur lance la séquence d arrêt automatique si au bout de 4 heures de mise en marche aucun changement n est apporté par exemple changement de chaîne ou de volume Une fenêtre apparaîtra à l écran Au bout de 150 secondes le téléviseur passe automatiquement en mode veille Appuyez sur une touche quelconque de la télécommande p...

Page 81: ...TimeShift Dans le cas contraire formatez le dispositif pour s assurer qu il la prendra en charge La valeur par défaut Limite d enregistrement est 6 heures si l espace sur le disque est suffisant Si l espace n est pas suffisant le temps d enregistrement devrait être réduit en fonction de l espace disponible sur le disque Pendant le processus Vérifier le système de fichiers PVR ne faites aucune opér...

Page 82: ... raisons pratiques il est recommandé d utiliser 2 Go à 500 Go 2 La vidéo risque de devenir pixélisée si le débit vidéo est trop faible Cela peut être dû à la connexion d un câble à rallonge USB au lieu d une connexion directe du téléviseur via un câble USB 3 Les dispositifs USB ne sont pas tous compatibles Voici une liste des lecteurs USB recommandés Les modèles qui ne sont pas listés peuvent être...

Page 83: ...matage un test de vitesse sera effectué sur le dispositif USB S il échoue cela signifie que le dispositif USB peut ne pas supporter la fonction TimeShift lecture décalée Enregistrer une émission DTV télévision numérique mise en pause sur le dispositif de stockage USB Ne débranchez pas le dispositif de stockage USB lorsque la fonction TimeShift est en cours Environ 4 Go de mémoire tampon offre 140 ...

Page 84: ...on TimeShift 5 Ne changez pas rapidement et de façon répétée les opérations entre PLAY PAUSE FWD REV 6 La vidéo risque de devenir pixélisée si le débit vidéo est trop faible 7 Pas tous les dispositifs USB sont compatibles le courant électrique des disques durs USB devrait être 500 mA Voici une liste des lecteurs USB recommandés Les modèles qui ne sont pas listés peuvent être compatibles mais ce n ...

Page 85: ...it pour quitter la barre de contrôle excepter pour la musique La lecture USB est prise en charge pour les formats de fichiers photo suivants JPEG format JPEG les fichiers avec l extension Jpg BMP fichiers avec l extension Bmp PNG fichiers avec l extension Png La lecture USB est prise en charge pour les formats de fichiers audio suivants MP3 fichiers avec l extension Mp3 WAV fichiers avec l extensi...

Page 86: ...rupteur d alimentation n est pas ouvert Configuration du contraste luminosité volume Appuyez sur la touche standby veille de la télécommande pour inspection Pas de couleur Audio norma Contrôle des couleurs Rupturedel image Audio normal ou faible Recherchez le canal Pas de couleur Bruit Système TV Audio normal position de l antenne direction ou connexion Symptôme du problème fantôme Audio normal Ch...

Page 87: ...essous pour toutes les sources d entrée ATV DTV Péritel HDMI 1 et 2 car chaque source d entrée est contrôlée séparément Appuyez sur la touche TV Menu Appuyez sur la flèche droite pour accéder au sous menu Image Appuyez sur la flèche vers le bas pour sélectionner Aspect Ratio Format d image Sélectionnez Auto Automatique Appuyez sur Quitter Répétez l opération pour toutes les sources d entrée Dès qu...

Page 88: ...roblèmes lors du branchement des câbles HDMI s ils sont branchés lorsque le téléviseur ou composant est allumé Eteignez toujours le téléviseur et le composant que vous branchez Si vous branchez des fiches et des prises éteignez le téléviseur et tout ce que vous avez branché à ce dernier puis rallumez les J ai connecté mon PC au téléviseur Pas de son Si en connectant votre PC ou ordinateur portable...

Page 89: ...tible Description audio Tuner UHF VHF Mise en veille programmable Verrouillage enfants Image et texte 2 Piles AAA de la télécommande incluses Dimensions du support de montage VESA 200 x 200 mm Dimensions du paquet LxHxP mm Dimensions du poste LxHxP avec socle mm Dimensions du poste LxHxP sans socle mm Poids du paquet kg Poids du poste avec socle kg Poids du poste sans socle kg 1285x780x170 1074x70...

Page 90: ......

Page 91: ...Lees deze handleiding zorgvuldig door alvorens het toestel te gebruiken en bewaar het voor latere naslag LED achtergrondverlichte platte TV GEBRUIKSAANWIJZING ...

Page 92: ...EN GEPAUZEERD DTV PROGRAMMA NAAR EEN USB OPSLAGAPPARAAT 22 TIJDVERPLAATS beperkingen 23 USB speler 24 Oplossen van problemen 05 Oplossen van problemen 25 Specificatie 28 BEELD MENU 18 Welkom Belangrijke informatie 01 Veiligheid en waarschuwingen 2 2 Mededeling over de veiligheid Waarschuwingen en voorzichtigheid 3 4 Belangrijkste kenmerken Montagewijze van het voetstuk 02 Introductie 5 7 Richtlijn...

Page 93: ...IENST VOOR EVENTUELE PROBLEMEN ER BEVINDT ZICH EEN BLIKSEMSCHICHT PIJLSYMBOOL IN DE DRIEHOEK DIT SYMBOOL GEEFT AAN DAT ER ZICH EEN HOOG VOLTAGE BINNENIN BEVINDT HET KAN GEVAARLIJK ZIJN OM ELKE VORM VAN CONTACT TE MAKEN MET DE ONDERDELEN BINNENIN DIT PRODUCT ER BEVINDT ZICH EEN UITROEPTEKEN IN DE DRIEHOEK DIT SYMBOOL ATTENDEERT U EROP DAT ER BELANGRIJKE LITERATUUR MEEGELEVERD IS BIJ DIT PRODUCT BET...

Page 94: ... beugel of tafel Het apparaat kan vallen wat resulteert in mogelijke schade of mogelijk letsel Plaats nooit zware of scherpe voorwerpen op het paneel of frame Haal de stekker uit het stopcontact wanneer het apparaat niet in gebruik is Er moet speciale aandacht besteed worden aan milieu aspecten bij inzameling van batterijen WAARSCHUWING de batterijen of accu s mogen niet blootgesteld worden aan ex...

Page 95: ...len Leun of sta nooit op de televisie of standaard of druk er niet plotseling tegenaan Besteed speciale aandacht aan kinderen Een ernstig letsel kan veroorzaakt worden indien het toestel valt Voorzorgsmaatregelen Plaats uw televisie niet op een onstabiel karretje standaard plank of tafel Een ernstig letsel aan een individu of schade aan de televisie kan veroorzaakt worden indien het valt Voorzorgs...

Page 96: ...oppen die niet in deze handleiding beschreven zijn Alle LED TV s zijn hoogspanning elektrische apparatuur Wanneer u afstoft of er water aan het scherm de kast rond de knoppen of aansluitingen komt moet het netsnoer uit het stopcontact worden verwijderd Veeg de TV af met een zachte droge stofvrije doek Ontkoppel het netsnoer en de antenne antennekabel tijdens onweer om schade aan uw TV en eventuele...

Page 97: ... 5 1024x768 1280x1024 60 60 1 640x480 60 31 47 2 800x600 60 37 88 48 36 63 98 RESOLUTIE V Freq KHz H KHz Freq 4 1360x768 60 47 7 Introductie DU LED achtergrondverlichte platte TV Gebruiksaanwijzing DU 6 6 1920x1080 60 66 64 ...

Page 98: ... kamer waar er geen rechtstreeks licht op het scherm valt Totale duisternis of een reflectie op het scherm kan leiden tot vermoeidheid van de ogen Zachte en indirecte verlichting wordt aanbevolen voor meer kijkcomfort Laat voldoende ruimte tussen de tv en de muur om ventilatie mogelijk te maken Deze televisie niet draaien a u b Vermijd uitzonderlijk warme plaatsen om schade aan de kast of voortijd...

Page 99: ...op een stevige ondergrond Plaats een zachte doek over de voorkant van het scherm om het tegen eventuele schade te beschermen 3 Gebruik de vier meegeleverde schroeven om de tv vast te zetten aan de wandbeugel niet meegeleverd via de vier VESA standaardgaten aan de achterzijde van de televisie Deze televisie kan als volgt aan de muur gemonteerd worden Introductie DU LED achtergrondverlichte platte T...

Page 100: ... CH of CH om uit geselecteerde onderdelen te kiezen STANDBY 2 VOL VOL Aanpassengeluidsniveau InMENU pasthetonderdeelaandatu geselecteerdheeft 5 Het voorpaneel Introductie DU 9 LED achtergrondverlichte platte TV Gebruiksaanwijzing 1 AV 2 3 YPbPr 4 5 Ingang 7 SCART input 8 PC AUDIO input 9 L R AUDIO Intput 10 11 Input 12 input 1 2 3 4 5 6 7 8 10 9 11 12 DC vermogen HDMI2 6 HDMI1 USB GEMEENSCHAPPELIJ...

Page 101: ...lecteren en druk op de OK toets Optie 4 COMPONENT Groen blauw rood wit rood Zorg ervoor dat zowel de TV als het apparaat vóór het aansluiten zijn uitgeschakeld Sluit de kabels niet meegeleverd aan vanaf de COMPONENT IN aansluitingen Y Pb Pr groen blauw rood en L Audio R wit rood op de TV naar de DVD speler of spelconsole enz Druk op de SOURCE toets op de afstandsbediening om het apparaat te select...

Page 102: ...it voordat u een module in de gemeenschappelijke interface gleuf stopt Plaats de CAM er correct in stop daarna pas de smartkaart in het CI sleuf dat zich aan de zijkant van de tv bevindt Schakel de tv in op het scherm zal een bericht verschijnen indien de CA module gedetecteerd wordt Wacht enkele ogenblikken tot de kaart geactiveerd is Druk op de MENU toets en druk vervolgens op de toetsen om de C...

Page 103: ...orig bestand 28 USB STOP 29 USB AFSPELEN PAUZEREN 30 START OPNEMEN 31 Cursor OMHOOG OMLAAG LINKS RECHTS Indrukken om uw selectie te navigeren 32 Fav Om uw favoriete kanalenlijst in de TV of DTV modus te benaderen 33 Selecteer programma Druk op de knop om het volgende of vorige TV kanaal te selecteren 34 GIDS Indrukken om het elektronische programmagids in de TV modus weer te geven 35 Q View Om het...

Page 104: ...vat De aanduiding verschijnt links bovenaan De pagina bevriezen Het weergeven of verbergen van informatie oplossingen bij spelletjes De gebruiker kan vier favoriete pagina s direct koppelen aan de vier gekleurde toetsen Terwijl de lijst geactiveerd is is het niet mogelijk om met TOP of FLOF te navigeren met de kleurtoetsen De favoriete paginanummers moeten opgeslagen en hersteld worden van naar ee...

Page 105: ... stap het selecteren van het afstemtype en land druk vervolgens op de OK knop om het afstemmen te starten b Als u DVB C selecteert is de volgende stap het configureren van het DVB C systeem zoals Scantype Frequentie Netwerk ID Symbool KS S druk vervolgens op de OK knop om naar het selectiemenu van de afstemtype en land te gaan deze stap is hetzelfde als bij DVB T selecteer het afstemtype DTV ATV K...

Page 106: ...knop om YES te selecteren om te bevestigen Vervolgens gaat u rechtstreeks naar DTV afstemmen U kunt de bovenstaande stap herhalen als u ook de DTV afstemmen wilt overslaan Een installatie herinnering verschijnt de volgende keer dat u de TV inschakelt 5 Nadat het afstemmen voltooid is zijn de kanalen gerangschikt in een vooraf ingestelde volgorde Als u kanalen wilt overslaan wijzig de vooraf ingest...

Page 107: ...om Auto Tuning te selecteren en druk vervolgens op de OK knop Programme s Programme s Programme s Programme s 1 CHANNEL PICTURE SOUND TIME OPTION LOCK Auto Tuning ATV Manual Tuning Programme Edit Signal Information CADTV Manual Tuning Software Update USB CI Information OK OK MENU MOVE OK OK French Italy Greece Nederlands Poland Germany Hungary Luxembourg Norway 1 Druk op de MENU knop en druk vervo...

Page 108: ...1 Druk op de MENU knop en druk vervolgens op de knoppen om het Channel menu te selecteren en druk vervolgens op de OK knop 3 Het DTV Manual Tuning scherm zal verschijnen Druk op de knoppen om het gewenste UHF kanaal te selecteren en druk vervolgens op de OK knop om het zoeken van dat kanaal te beginnen Wanneer het signaal is afgestemd zal het beeld en de signaalsterkte op het scherm worden weergeg...

Page 109: ...ecteerd heeft Favoriet Druk op om het programma te kiezen Druk op de FAV toets zal aan de rechterkant van het programma verschijnen Kies het favoriete programma en druk nogmaals op de FAV toets U kunt FAV annuleren zal dan verdwijnen Zodra uw favoriete groep is aangemaakt kunt u snel toegang krijgen tot uw favoriete kanaal door op de FAV toets te drukken 1 Tint is alleen beschikbaar voor het NTSC ...

Page 110: ...en restore factory default zal alle programma s en wachtwoorden verwijderen 1 Als na 4 uur vanaf het inschakelen geen wijzigingen aan de TV worden aangebracht bijvoorbeeld geen kanaal of volume veranderd zal de TV het automatische uitschakelproces starten En pop up venster zal verschijnen op het scherm Na 150 seconden schakelt de TV automatisch over naar stand by Druk op een willekeurige knop op d...

Page 111: ...aat beschikbaar is voor tijdverplaatsing en opnemen Indien dit niet het geval is dient u het apparaat te formateren om ervoor te zorgen dat het apparaat beschikbaar is De standaard vrije opneemlimiet free record limit is zes uur mits de ruimte op de schijf groot genoeg is Indien de ruimte niet groot genoeg is moet de opneemtijd korter worden afhankelijk van de ruimte op het apparaat Voer geen ande...

Page 112: ...oor praktisch gebruik is 2 GB tot 500 GB aanbevolen 2 De video kan korrelig worden wanneer de bitratio van de video te laag is Dit kan door het aansluiten van een USB verlengkabel worden veroorzaakt in plaats van de USB direct op de TV aan te sluiten 3 Niet alle USB apparaten zijn compatibel Hieronder is een lijst van aanbevolen USB stations Modellen die niet worden vermeld kunnen compatibel zijn ...

Page 113: ...eren Tijdens het formatteren wordt een snelheidstest gedaan op het USB apparaat Indien dit mislukt betekent dit dat het USB apparaat eventueel geen ondersteuning heeft voor de TIJDVERPLAATS functie OPNEMEN VAN EEN GEPAUZEERD DTV PROGRAMMA NAAR EEN USB OPSLAGAPPARAAT Verwijder het USB opslagapparaat niet wanneer de TIJDVERPLAATS functie geactiveerd is 4GB aan geheugen biedt ongeveer 140 minuten aan...

Page 114: ...WD REV niet herhaaldelijk en te snel steeds met elkaar af 6 De video kan korrelig worden als de videobit sterkte te laag is 7 Niet alle USB apparaten zijn gelijkwaardig de electriciteit van de USB harde schijf dient 500MA te zijn Hieronder treft u een lijst aan met aanbevolen USB drives Modellen die niet opgenomen zijn kunnen werken maar dit is niet gegarandeerd SanDisk Extreme Contour USB Flash D...

Page 115: ...rlaten behalve voor muziek USB terugspelen wordt ondersteund door de volgende fotobestandformaten JPEG JPEG formaat bestanden met het achtervoegsel jpg BMP bestanden met het achtervoegsel bmp PNG bestanden met het achtervoegsel png USB terugspelen wordt ondersteund door de volgende muziekbestandformaten MP3 bestanden met het achtervoegsel mp3 WAV bestanden met het achtervoegsel wav USB teruspelen ...

Page 116: ...staat niet aan Contrast en helderheid volume instellingen zijn geopend Druk vanuit de standby toets op de afstandsbediening om dit te controleren Geen kleur Normale audio Kleurbeheer Steedsverlies vanbeeld Normale audio of zwak Kanaal opnieuw instellen Geen kleur Geluid tv systeem Normale audio Antennepositie richting of aansluiting Probleemsymtoom Wazig Normale audio Aspect wijzigen om te zoomen ...

Page 117: ...e bron afzonderlijk wordt gecontroleerd Druk op de Menu toets van de TV Druk op de pijl naar rechts om het submenu van het beeld te openen Druk op de omlaagpijl om hoogte breedteverhouding te selecteren Selecteer Auto Druk op Exit Herhaal dit voor alle ingangsbronnen Ik heb net een DVD speler of een ander apparaat op mijn TV aangesloten en het werkt niet Dit is op alle apparatuur op de TV aangeslo...

Page 118: ...e TV of het onderdeel zijn of raken Wanneer HDMI kabels worden aangesloten kunt u problemen ervaren als de HDMI kabels worden aangesloten terwijl de TV of het andere component is ingeschakeld Schakel altijd de TV en het component uit dat u wilt aansluiten Als u de stekkers en stopcontacten hebt gecontroleerd schakel de TV en wat u op de TV hebt aangesloten uit en schakel ze vervolgens opnieuw in I...

Page 119: ...eschrijving compatibel UHF VHF tuner Slaaptimer Kinderslot Beeld en tekst 2 x AAA batterijen voor de afstandsbediening meegeleverd Afmeting VESA mount 200 x 200 mm Pakketafmeting LxBxH mm Set afmeting LxBxH met standaard mm Set afmeting LxBxH zonder standaard mm Pakketgewicht kg Set gewicht met standaard kg Set gewicht zonder standaard kg 1285x780x170 1074x703x280 1074x645x78 17 13 7 11 8 Specific...

Page 120: ......

Page 121: ...Lea este manual con atención antes de operar la unidad y consérvelo para referencia futura TV LED plano con luz de fondo MANUAL DE INSTRUCCIONES ...

Page 122: ...la unidadUSB 22 Grabación de una emisión de TDT en pausa en el dispositivo de almacenamiento USB 22 Limitaciones de la función Timeshift 23 Reproductor USB 24 Solución de problemas 05 Solución de problemas 25 Especificaciones 28 MENÚ DE IMAGEN 18 Bienvenidos Información importante 01 Seguridad y advertencias 2 2 Aviso de seguridad Advertencias y precauciones 3 4 Características principales Instruc...

Page 123: ...ER PROBLEMA SOLICITE SERVICIO TÉCNICO A LA LÍNEA DE ASISTENCIA AL CLIENTE EL SÍMBOLO DEL RAYO EN EL INTERIOR DE UN TRIÁNGULO INDICA ALTA TENSIÓN EN SU INTERIOR ES PELIGROSO TENER CUALQUIER TIPO DE CONTACTO CON LAS PIEZAS INTERNAS DE ESTE PRODUCTO UN SIMBOLO DE EXCLAMACIÓN EN EL INTERIOR DE UN TRIÁNGULO ESTE SÍMBOLO LE AVISA QUE SE HA INCLUIDO LITERATURA RELACIONADA CON EL FUNCIONAMIENTO Y CON EL M...

Page 124: ... inestables El aparato podría caer produciendo posibles daños o lesiones Nunca coloque objetos pesados o afilados sobre el panel o el marco Desenchufe la alimentación de la toma de corriente cuando no se utilice el aparato Se debe prestar atención a los aspectos medioambientales sobre la eliminación de la batería PRECAUCIÓN Un volumen excesivo en el sonido de los auriculares puede causar pérdida d...

Page 125: ...uede atrapado bajo el televisor Cuidado Nunca se suba ni se apoye ni empuje bruscamente el televisor o su soporte Debe prestar especial atención a los niños Si cayera podría causar serias lesiones Cuidado No coloque su televisor sobre un carrito soporte estantería o mesa inestables Si cayera podría causar serias lesiones personales y daños al televisor Cuidado Cuando el televisor no se vaya a usar...

Page 126: ... que no se mencione en este manual Todos los TV LED son equipos eléctricos de alta tensión Cuando limpie el polvo o cualquier gota de agua en la PANTALLA o o alrededor de los botones o conectores debe desconectar el cable de alimentación del conector de alimentación Limpie el TV con un paño suave y seco libre de polvo Durante las tormentas eléctricas desconecte el cable de alimentación y el cable ...

Page 127: ...x768 1280x1024 60 60 1 640x480 60 31 47 2 800x600 60 37 88 48 36 63 98 RESOLUCIÓN Frecuencia V KHz Frecuencia H KHz 4 1360x768 60 47 7 INTRODUCCIÓN ES Manual de instrucciones para TV LED plano con luz de fondo ES 6 6 1920x1080 60 66 64 ...

Page 128: ...no le refleje directamente sobre la pantalla La oscuridad total o un reflejo en la pantalla pueden provocar cansancio en la vista Se recomienda iluminación suave e indirecta para una visión cómoda Deje espacio suficiente entre el TV y la pared a fin de permitir ventilación Atención El pie de esta TV no es posible rotarlo Evite ubicaciones excesivamente calurosas para prevenir un posible daño o un ...

Page 129: ...rficie sólida Por favor coloque algún material suave sobre el frente de la pantalla para protegerla de cualquier daño 3 Utilice los cuatro tornillos suministrados para fijar el TV sobre el soporte de pared del TV no incluido por medio de los cuatro orificios estándar VESA de la parte posterior del televisor Este televisor puede montarse en pared de la siguiente manera INTRODUCCIÓN ES Manual de ins...

Page 130: ...CH para seleccionar las opciones STANDBY 2 VOL VOL Ajustaelniveldelsonido EnMENU ajustelaopciónque seleccionó 5 Panel frontal de control INTRODUCCIÓN ES 9 Manual de instrucciones para TV LED plano con luz de fondo 1 AV 2 3 YPbPr 4 5 entrada 7 SCART 8 PC AUDIO 9 L R AUDIO 10 11 12 1 2 3 4 5 6 7 8 10 9 11 12 FuentedealimentaciónCA HDMI2 6 HDMI1 USB COMMON INTERFACE CI ENTRADAVGA ANT 30 30 1 2 3 SOUR...

Page 131: ...Opción 4 COMPONENT verde azul rojo blanco rojo Asegúrese de que tanto el TV como el dispositivo estén apagados antes de realizar la conexión Conecte los cables no incluidos de las conexiones COMPONENT IN entrada de componente Y Pb Pr verde azul rojo y L Audio R blanco rojo en el TV al reproductor de DVD o a la consola de juegos etc Para seleccionar el dispositivo conectado con el cable AVI pulse e...

Page 132: ...OK Advertencia Desconecte el TV antes de insertar los módulos en la ranura de la Interfaz Común Inserte la CAM correctamente luego la Tarjeta Inteligente a la ranura de la IC que se ubica en la parte lateral del TV Encienda el TV y éste mostrará el siguiente mensaje si se detecta el módulo AC Aguarde unos minutos hasta que se active la tarjeta Pulse el botón MENU y luego el botón para seleccionar ...

Page 133: ... USB 29 REPRODUCIR PAUSA USB 30 INICIO DE LA GRABACIÓN 31 Cursor ARRIBA ABAJO IZQUIERDA DERECHA Pulse para navegar hasta su selección 32 Fav Utilizado para acceder a sus canales favoritos en el modo de TV analógica o de TDT 33 Seleccionar programa Presione los botones para seleccionar el canal de TV siguiente o anterior 34 GUÍA Presiónelo para mostrar la guía electrónica de programación en el modo...

Page 134: ... congelar la página Para mostrar u ocultar la información oculta soluciones de juegos El usuario puede establecer cuatro páginas favoritas para ser enlazadas directamente por las cuatro teclas coloreadas Mientras el modo de lista esté activado no hay posibilidad de utilizar la navegación TOP o FLOF con las teclas coloreadas Los números de página favoritos se almacenarán y recuperarán en desde la m...

Page 135: ...ente es seleccionar el tipo de Sintonía y el país a continuación presione el botón OK para comenzar a sintonizar b Si selecciona DVB C el paso siguiente es configurar el sistema DVB C como tipo de exploración Frecuencia ID de red Símbolo KS S entonces presione el botón OK para ir al menú del tipo de sintonía y de selección de país Este paso es el mismo que DVB T seleccione el tipo de sintonía DTV ...

Page 136: ... presione el botón y seleccione YES para confirmar Entonces irá directamente a la sintonía de DTV Puede repetir el paso anterior si también desea saltar la sintonización de TDT La próxima vez que encienda el TV aparecerá un recordatorio de instalación 5 Después que esté completa la sintonización los canales se ordenarán en un orden preestablecido Si desea saltar canales modifique el orden preestab...

Page 137: ...o Tuning y a continuación presione el botón OK Programme s Programme s Programme s Programme s 1 CHANNEL PICTURE SOUND TIME OPTION LOCK Auto Tuning ATV Manual Tuning Programme Edit Signal Information CADTV Manual Tuning Software Update USB CI Information OK OK MENU MOVE OK OK French Italy Greece Nederlands Poland Germany Hungary Luxembourg Norway 1 Presione el botón MENU y a continuación presione ...

Page 138: ...ón manual de DTV DVB C 1 Presione el botón MENU y a continuación presione los botones para seleccionar el menú CHANNEL y presione el botón OK 3 Emergerá la pantalla de DTV Manual Tuning Presione los botones para seleccionar el canal UHF deseado y a continuación presione el botón OK para comenzar la búsqueda de ese canal Cuando se haya sintonizado la señal la imagen y la intensidad de la señal de m...

Page 139: ...FAVORITOS se mostrará al lado derecho del programa Escoja el programa en FAVORITOS pulse el botón FAVORITOS de nuevo podrá cancelar la acción El símbolo desaparecerá Una vez creado su grupo de favoritos puede pulsar la tecla FAVORITOS para acceder rápidamente a sus canales favoritos 1 El matiz sólo está disponible en el sistema NTSC 2 Hay cuatro modos de temperatura del color que pueden selecciona...

Page 140: ...de 4 horas a partir del encendido no se hacen cambios en el TV por ejemplo no se cambia de canal ni se ajusta el volumen el TV iniciará la secuencia de apagado automático Aparecerá en la pantalla una ventana emergente Después de 150 segundos el TV pasará automáticamente al estado de espera Para anular el apagado automático presione cualquier botón del mando a distancia 2 Para cancelar el apagado a...

Page 141: ...ación De otro modo formatee el dispositivo a fin de asegurar que el dispositivo esté disponible El Free Record Limit Límite libre de grabación por defecto es de 6 horas si el espacio en el disco es suficientemente grande Si el espacio no es suficientemente grande el tiempo de grabación será más corto eso depende del espacio en el dispositivo Durante la verificación check PVR File System verificar ...

Page 142: ... práctico se recomienda utilizar de 2GB a 500GB 2 Cuando la tasa de bits es muy baja la imagen puede pixelarse Esto puede estar provocado por la conexión de un cable de extensión USB en vez de conectar directamente el USB al TV 3 No todos los dispositivos USB son compatibles A continuación hay una lista de unidades USB recomendadas Los modelos que no aparezcan en la lista pueden ser compatibles pe...

Page 143: ... el formato se realizará una prueba de velocidad al dispositivo USB Si falla significa que el dispositivo USB no puede soportar la función Timeshift Grabación de una emisión de TDT en pausa en el dispositivo de almacenamiento USB No desconecte el dispositivo de almacenamiento USB cuando la función Timeshift esté activada Con un dispositivo de 4 gb se puede almacenar temporalmente hasta 140 minutos...

Page 144: ...entre PLAY PAUSE FWD REV 6 El video puede pixelarse si la tasa de transferencia de video es demasiado baja 7 No todos los dispositivos USB son compatibles La tensión del dispositivo USB debe de ser menor de 500Ma A continuación hay una lista de unidades USB recomendadas Los modelos que no estén en la lista pueden ser compatibles pero su funcionamiento no está garantizado SanDisk Extreme Contour US...

Page 145: ...o de función pulse el La reproducción del USB está soportada para los siguientes formatos de archivo de imagen JPEG formato JPEG archivos con extensión jpg BMP archivos con extensión bmp PNG archivos con extensión png La reproducción del USB está soportada para los siguientes formatos de archivo de música MP3 archivos con extensión mp3 WAV archivos con extensión wav La reproducción del USB está so...

Page 146: ...ón apagado Ajustes de Contraste y brillo Volumen Pulsar tecla Standby en el mando para examinarlo Sin color Sonido normal Control del color Imagenpartida Sonido normal o débil Resintonizar canal Sin color Ruido Sistema de TV Sonido normal Posición dirección o conexión de la antena Síntoma del problema Borroso Sonido normal Cambie el formato de pantalla Hay barras negras en la parte superior y en l...

Page 147: ...a que se muestra a continuación para todas las fuentes de entrada ATV DTV SCART HDMI 1 y 2 ya que cada fuente de entrada se controla por separado Pulse el botón TV Menu Pulse la flecha derecha para acceder al submenú Picture Pulse la flecha de abajo para seleccionar Aspect Ratio Seleccione Auto Pulse Exit Repita para todas las fuentes de entrada Recién he conectado un reproductor de DVD u otro equ...

Page 148: ...osterior del enchufe HDMI debe estar muy cerca del cuerpo del TV o del componente o debe tocarlos Cuando se conectan cables HDMI puede experimentar problemas si se los conecta cuando el TV u otro componente están encendidos Siempre apague tanto el TV como el componente que está conectando Si ha verificado los enchufes y las conexiones apague el TV y lo que haya conectado al TV y luego enciéndalos ...

Page 149: ... audiodescripción Sintonizador UHF VHF Temporizador Bloqueo infantil Imagen y texto 2 baterías AAA incluidas requeridas para el mando a distancia Tamaño de montaje VESA 200 x 100 mm Tamaño del paquete ancho x alto x profundidad mm Ajustar tamaño ancho x alto x profundidad con soporte mm Ajustar tamaño ancho x alto x profundidad sin soporte mm Peso del paquete kg Ajustar peso con soporte kg Ajustar...

Page 150: ......

Page 151: ...Leggere questo manuale con attenzione prima di utilizzare l unità e conservarlo per futuro riferimento TVaschermopiattoconretroilluminazioneaLED MANUALEDIISTRUZIONI ...

Page 152: ...are un programma DTV in pausa in un dispositivo di archiviazione USB 22 Limitazioni della differita 23 Lettore USB 24 Risoluzione dei problemi 05 Risoluzione dei problemi 25 Specifiche 28 Menù immagini 18 Benvenuti Informazioni Importanti 01 Sicurezza ed avvisi 2 2 Avvisi di sicurezza Avvisi e cautela 3 4 Parametri principali Istruzionidiassemblaggiodellabasedisostegno 02 Introduzione 5 7 Linee gu...

Page 153: ...INDICA LA PRESENZA ALL INTERNO DI ALTO VOLTAGGIO E PERICOLOSO AVERE QUALUNQUE TIPO DI CONTATTO CON QUALUNQUE PARTE INTERNA DI QUESTO PRODOTTO E PRESENTE UN PUNTO ESCLAMATIVO IN UN TRIANGOLO QUESTO SIMBOLO VI AVVISA CHE NEL PRODOTTO SONO INCLUSE ISTRUZIONI IMPORTANTI PER L USO E LA MANUTENZIONE CAUTELA PER RIDURRE IL RISCHIO DI INCENDI O SHOCK ELETTRICO NON PONETE IL TELEVISORE VICINO A SORGENTI DI...

Page 154: ...lo sostegno scaffale tripode braccio o tavolo instabile L unità potrebbe cadere causando danni Non posizionate oggetti pesanti o affilati sullo schermo o sulla cornice Scollegate l alimentatore dalla presa quando l unità non è in uso Si deve fare attenzione agli aspetti ambientali perlo smaltimento delle batterie AVVISO Le batterie batteria batterie o pacco batterie non devono essere esposte a cal...

Page 155: ...poggiatevi né spingete all improvviso il televisore o il suo supporto Fate particolarmente attenzione ai bambini Se dovesse cadere potrebbe causare serie ferite Cautela Non posizionate l unità su un carrello sostegno scaffale o tavolo instabile Se dovesse cadere potrebbe causare serie ferite alle persone e danni al televisore stesso Cautela Quando il televisore non viene utilizzato per un lungo pe...

Page 156: ... o nessun altro controllo di regolazione non descritto in questo manuale Tutte le TV LED sono apparecchiature elettroniche ad alta tensione Quando si toglie la polvere o qualsiasi goccia d acqua dallo SCHERMO o dalla STRUTTURA o intorno a pulsanti o connettori il cavo di alimentazione deve essere rimosso dalla presa di alimentazione Pulire la TV con un panno morbido asciutto e senza polvere Durant...

Page 157: ...24x768 1280x1024 60 60 1 640x480 60 31 47 2 800x600 60 37 88 48 36 63 98 RISOLUZIONE V Freq KHz H Freq KHz 4 1360x768 60 47 7 INTRODUZIONE Manuale di istruzioni TV a schermo piatto con retroilluminazione a LED IT 6 IT 6 1920x1080 60 66 64 ...

Page 158: ...nza dove la luce non colpisca direttamente lo schermo L oscurità totale o i riflessi sullo schermo possono causare affaticamento oculare Si raccomanda un illuminazione indiretta e soffusa per una visione confortevole Nota si prega di non ruotare questo TV Lasciate abbastanza spazio tra il televisore e il muro per permettere la ventilazione Evitate luoghi eccessivamente caldi per prevenire eventual...

Page 159: ...tabile Posizionate un panno morbido sulla parte anteriore dello schermo per proteggerlo da qualunque danno 3 Utilizzate le quattro viti fornite per fissare il televisore su un braccio di sostegno a muro non incluso attraverso i quattro fori standard VESA sul retro del televisore Questo televisore può essere montato a muro come segue INTRODUZIONE Manuale di istruzioni TV a schermo piatto con retroi...

Page 160: ... o CH per selezionare gli oggetti STANDBY 2 VOL VOL Controllodelvolumeaudio Inmenù regolal oggettoselezionato 5 Controlli del pannello anteriore INTRODUZIONE STANDBY IT 9 Manuale di istruzioni TV a schermo piatto con retroilluminazione a LED 1 AV 2 3 YPbPr 4 5 7 SCART 8 AUDIO PC 9 AUDIO L R 10 11 12 1 2 3 4 5 6 7 8 10 9 11 12 Alimentazione DC HDMI2 6 HDMI1 USB COMMON INTERFACE CI IngressoVGA ANT 3...

Page 161: ... selezionare AV e premere il pulsante OK Opzione 4 COMPONENT Verde Blu Rosso Bianco Rosso Assicurarsi che la TV e il dispositivo siano spenti prima di effettuare il collegamento Collegare i cavi non forniti dalle prese COMPONENT IN Y Pb Pr verde blu rosso e L Audio R bianco rosso sulla TV al lettore DVD alla console giochi ecc Per selezionare il dispositivo collegato con il cavo AV premere il puls...

Page 162: ...rire qualunque modulo nello slot Common Interface Inserite la CAM correttamente quindi inserite la Smart Card nello slot CI posizionato sul lato del televisore Accendete il televisore ed esso visualizzerà il messaggio sottostante se il modulo CA viene identificato Aspettate qualche momento perché la scheda si attivi Premete il tasto MENU quindi premete il tasto per selezionare l opzione di informa...

Page 163: ...to giallo Teletext File precedente USB 28 STOP USB 29 PLAY PAUSA USB 30 AVVIO REGISTRAZIONE 31 Cursori SOPRA SOTTO SINISTRA DESTRA Premere per muoversi nella propria selezione 32 Fav Per accedere ai canali preferiti in modalità TV o DTV 33 Seleziona programma Premere il pulsante per selezionare il canale TV successivo o precedente 34 GUIDE Premere per visualizzare la guida elettronica dei programm...

Page 164: ... le informazioni nascoste soluzioni dei giochi L utente può impostare quattro pagine preferite da collegare direttamente ai quattro tasti colorati Mentre è attivata la modalità lista non è possibile utilizzare la navigazione TOP o FLOF con i tasti colorati I numeri delle pagine preferite devono essere archiviate in e ripristinate da una memoria non volatile per ogni canale dal software di sistema ...

Page 165: ...il passo successivo è selezionare il tipo di sintonia e il paese quindi premere il pulsante OK per avviare la b Se si seleziona DVB C il passo successivo è configurare il sistema DVB C come tipo di scansione Frequenza ID Rete Simbolo KS S quindi premere il pulsante OK per accedere al menu di selezione del tipo di sintonia e del paese questo passo è lo stesso del DVB T selezionare il tipo di sinton...

Page 166: ...e per selezionare YES per confermare Si passerà direttamente alla sintonizzazione DTV È possibile ripetere il passo precedente se si desidera saltare la sintonizzazione DTV Un promemoria di installazione apparirà alla successiva accensione della TV 5 Dopo il completamento della sintonizzazione i canali sono organizzati in un ordine preimpostato Se si desidera saltare canali modificare l ordine pre...

Page 167: ...per selezionare Auto Tuning e quindi premere il pulsante OK Programme s Programme s Programme s Programme s 1 CHANNEL PICTURE SOUND TIME OPTION LOCK Auto Tuning ATV Manual Tuning Programme Edit Signal Information CADTV Manual Tuning Software Update USB CI Information OK OK MENU MOVE OK OK French Italy Greece Nederlands Poland Germany Hungary Luxembourg Norway 1 Premere il pulsante MENU e premere i...

Page 168: ...ne manuale DTV DVB C 1 Premere il pulsante MENU e premere i pulsanti per selezionare il menu CHANNEL e quindi premere il pulsante OK 3 Apparirà la schermata di Sintonizzazione manuale DTV Premere i pulsanti per selezionare il canale UHF desiderato e quindi premere il pulsante OK per iniziare la ricerca di tale canale Quando il segnale è stato sintonizzato l immagine e la potenza del segnale sarà v...

Page 169: ...iete il programma preferito premete di nuovo il tasto FAV potrete annullare la selezione del canale preferito l immagine sparirà Una volta che avrete creato il gruppo dei preferiti potete premete il tasto FAV per accedere rapidamente al vostro canale preferito 1 Tint tinta è disponibile solo in sistema NTSC 2 Ci sono quattro modalità di temperatura colori che possono essere selezionate medio caldo...

Page 170: ...gramme Title Channel Name Ripristinare le impostazioni di fabbrica cancellerà tutti i programmi e le password 1 Se dopo 4 ore dall accensione e non sono state effettuate modifice alla TV ad esempio non è stato cambiato alcun canale o modificato il volume la TV inizierà la sequenza di spegnimento E una finestra di popup apparirà sullo schermo Dopo 150 secondi la TV passerà automaticamente in standb...

Page 171: ...registrazione Se non è così formattate il dispositivo per assicurarvi che il dispositivo sia disponibile Il Free Record Limit limite di registrazione libera è 6 ore se lo spazio sul disco è sufficiente Se lo spazio non è sufficiente il tempo di registrazione dovrebbe essere più breve a seconda dello spazio sul dispositivo Durante il controllo check PVR File System controllo del file di sistema PVR...

Page 172: ...si raccomanda da 2GB a 500GB 2 Il video può diventare pixellato quando la frequenza video è troppo bassa Ciò può essere causato dal collegamento di un cavo prolunga USB invece di collegare direttamente la USB alla TV 3 Non tutti i dispositivi USB sono compatibili Di seguito una lista di unità USB raccomandate I modelli che non sono riportati nella lista possono essere compatibili ma non è garantit...

Page 173: ...e Durante la formattazione verrà fatto un test di velocità sul dispositivo USB Se fallisce significa che il dispositivo USB potrebbe non supportare la funzione differita Registrare un programma DTV in pausa in un dispositivo di archiviazione USB Siete pregati di non scollegare il dispositivo di archiviazione USB quando la funzione Time Shift differita è attivata 4GB di memoria archiviano circa 140...

Page 174: ...mente l operatività tra PLAY PAUSE FWD REV 6 Il video potrebbe diventare pixellato quando il bit rate video è troppo basso 7 Non tutti i dispositivi USB sono compatibili L alimentazione necessario per l hard disk USB dovrebbe essere 500MA Sotto trovate una lista dei Drive USB raccomandati I modelli che non sono qui elencati possono essere compatibili ma non è garantito SanDisk Extreme Contour USB ...

Page 175: ...are l icona funzione La riproduzione di Foto da USB è supportata per i seguenti formati JPEG Formato JPEG file con estensione jpg BMP file con estensione bmp PNG file con estensione png La riproduzione di Musica da USB è supportata per i seguenti formati MP3 file con estensione mp3 WAV file con estensione wav La riproduzione di Testo da USB è supportata per i seguenti formati TXT file con estensio...

Page 176: ...agado Ajustes de Contraste y brillo Volumen Pulsar tecla Standby en el mando para examinarlo Nessun colore Audio normale Control del color L immagineè spezzata Audio normale o debole Resintonizar canal Nessun colore Rumore di sottofondo Sistema de TV Audio normale Posición dirección o conexión de la antena Sintomo del problema Effetto fantasma Audio normale Cambie el formato de pantalla C è una st...

Page 177: ...tte le sorgenti di ingresso ATV DTV SCART HDMI 1 e 2 in quanto ogni sorgente di ingresso è controllata separatamente Premere il pulsante menu TV Premere la freccia Destra per accedere al sottomenu Picture Premere la freccia Giù per selezionare Aspect Ratio Selezionare Auto Premere Exit Ripetere per tutte le sorgenti di ingresso Ho collegato un lettore DVD o un altro dispositivo alla mia TV e non f...

Page 178: ...I deve essere molto vicina o toccare quasi il corpo della TV o del dispositivo collegato Quando si collega un qualsiasi cavo HDMI possono verificarsi problemi se i cavi HDMI sono collegati quando la TV o altro dispositivo è acceso Spegnere sempre sia la TV sia il dispositivo collegato Se si devono collegare gli spinotti e le prese spegnere la TV e ricollegare e riaccendere Ho collegato il mio PC a...

Page 179: ...Sintonizzatore UHF VHF Timer di spegnimento Blocco bambini Immagine e testo Batterie telecomando 2 x AAA incluse Dimensioni supporto VESA 200 x 200 mm Dimensioni confezione LxAxP mm Dimensioni set LxAxP con supporto mm Dimensioni set LxAxP senza supporto mm Peso confezione kg Peso set con supporto kg Peso set senza supporto kg 1285x780x170 1074x703x280 1074x645x78 17 13 7 11 8 La specifica delle p...

Page 180: ...output SCH BLOCK FOR MSD309PT SUBWOOFER Schematics Blockdiagram AC INPUT 5VSTB 5V 12V POWER DVD CVBS input AUDIO INPUT DVD audio Side audio SWITCH Side CVBS input LINEIN0 R4 R5 CVBS1 W4 CVBS2 W5 PDIF OUT P5 GPIO13 F5 GPIO12 F6 LINEOUT3 AA6 Y5 CVBS_OUT V3 LINEIN1 T6 U6 CVBS0 AC5 RGB1 LINEIN2 V6 U5 RGB0 LINEIN5 AD6 ADC CVBS4 W2 RGB2 OPTION OPTION OPTION OPTION OPTION OPTION OPTION Audio switch AA8 S...

Page 181: ...SY8008B SOT 23 SY8008B SOT 23 U6 SY8008B SOT 23 GND 2 LX 3 VIN 4 OUT FB 5 EN 1 C8 0 1uF C8 0 1uF R35 1K R35 1K C39 0 1uF X7R C39 0 1uF X7R R14 NC R14 NC C1 0 1uF C1 0 1uF U3 MP1482 U3 MP1482 EN 7 FB 5 VCC 2 OUT 3 BST 1 GND 4 SS 8 COMP 6 R27 10K R27 10K Q6 3904 Q6 3904 1 2 3 CN1 DCJACK CN1 DCJACK 1 2 3 C54 0 1uF X7R C54 0 1uF X7R EC9 220uF 16V EC9 220uF 16V R157 1K R157 1K L1 15uH_2A L1 15uH_2A R32...

Page 182: ... PAD_PCM_D 3 AD12 PAD_PCM_D 4 AC12 PAD_PCM_D 5 AD13 PAD_PCM_D 6 Y12 PAD_PCM_D 7 AA11 PAD_PCM_A 0 Y24 PAD_PCM_A 1 Y22 PAD_PCM_A 2 AB22 PAD_PCM_A 3 AA22 PAD_PCM_A 4 AA20 PAD_PCM_A 5 Y21 PAD_PCM_A 6 AA18 PAD_PCM_A 12 AA17 PAD_PCM_A 8 AA16 PAD_PCM_A 9 AA14 PAD_PCM_A 11 Y15 PAD_PCM_A 13 AA15 PAD_PCM_A 10 AA12 PAD_PCM_A 7 AA19 PAD_TS1_CLK Y18 PAD_TS1_SYNC AB16 PAD_TS1_VLD AE16 PAD_TS1_D 0 Y16 PAD_TS1_D ...

Page 183: ...2 RP36 75RX4 7 5 3 1 8 6 4 2 RP36 75RX4 7 5 3 1 8 6 4 2 RP27 75RX4 7 5 3 1 8 6 4 2 RP27 75RX4 R119 100R R119 100R 7 5 3 1 8 6 4 2 RP31 75RX4 7 5 3 1 8 6 4 2 RP31 75RX4 A B C D E F G H J K L M N P R 1 2 3 7 8 9 Vdd NC Vss DQ14 VssQ UDM VddQ DQ9 VddQ DQ12 VssQ DQ11 Vdd NC Vss DQ6 VssQ LDM VddQ DQ1 VddQ DQ4 VssQ DQ3 VddL Vref Vss CKE WE RFU BA0 BA1 A10 A1 Vss A3 A5 A7 A9 Vdd A12 RFU VssQ UDQS VddQ UD...

Page 184: ...F R124 NC 33R 0603 R124 NC 33R 0603 R142 10R 0402 R142 10R 0402 U11 TCL DT58WT 3RB E U11 TCL DT58WT 3RB E Body 15 Body 16 RF_AGC 3 SCL 4 B2 6 SDA 5 DF1 11 IF_AGC 9 DF2 10 AIF 12 Body 14 Body 13 NC 1 B1 2 VTU_TP 7 AS 8 R133 0R 0402 R133 0R 0402 EC13 220uF 16V EC13 220uF 16V R127 NC 4 7K R127 NC 4 7K C119 NC 47n C119 NC 47n R130 10K R130 10K EC14 220uF 16V EC14 220uF 16V C124 0 1uF C124 0 1uF R129 1...

Page 185: ... TSVALID 2 4 PCM_CE_N 2 PCM_A 14 0 2 PCM_RESET 2 PCM_WAIT_N 2 PCM_IRQA_N 2 PCM_D 7 0 2 PCM_REG_N 2 TS_MOCLK 2 PCM_OE_N 2 PCM_WE_N 2 TS_MDI 7 0 2 4 TS_MOSTART 2 TS_MOVAL 2 PCM_CD_N 2 PCM_IORD_N 2 TS_MDO 7 0 2 FOR EUROPE EC19 220uF 16V EC19 220uF 16V C164 0 1uF C164 0 1uF R187 270R R187 270R D3 BAW70 D3 BAW70 3 1 2 R186 1K R186 1K R188 2 2K R188 2 2K R185 1K R185 1K CN10 PCMCIA_CNT CN10 PCMCIA_CNT G...

Page 186: ...3 10R R603 10R R189 1K R189 1K R198 4 7K R198 4 7K R619 10R R619 10R R193 22K R193 22K CN11 HDMI19 2 CN11 HDMI19 2 1 DATA2 20 2 DATA2 SHIELD 21 3 DATA2 22 4 DATA1 23 5 DATA1 SHIELD 24 6 DAT1A 25 7 DATA0 26 8 DATA0 SHIELD 27 9 DATA0 28 10 CLK 29 11 CLK SHIELD 30 12 CLK 31 13 CEC 32 14 NC 33 15 SCL 34 16 SDA 35 17 DDC CEC GND 36 18 5V POWER 37 19 HOT PLUG 38 18 5V POWER 18 GND 41 14 NC 14 1 DATA2 1 ...

Page 187: ...75R R256 75R R254 12K R254 12K R225 100R R225 100R CN17 PC Audio Input CN17 PC Audio Input 1 2 3 4 5 6 7 8 R273 100K R273 100K 75R R295 75R R295 R297 100R R297 100R R209 10K R209 10K C169 47n C169 47n CN19 7pin 2 0mm CN19 7pin 2 0mm 1 2 3 4 5 6 7 NC V800AA RX1 NC V800AA RX1 C195 10P C195 10P R206 0R 0402 R206 0R 0402 R287 4 7K R287 4 7K C217 10P C217 10P C216 47n C216 47n R290 68R R290 68R C210 10...

Page 188: ...SOP8E U16 MP6231 MSOP8E GND 1 PO 2 EN1 3 EN2 4 FLAG1 8 OUT1 7 OUT2 6 FLAG2 5 GND 9 CN26 4pin 2 0mm CN26 4pin 2 0mm 1 2 3 4 EC21 220uF 16V EC21 220uF 16V RX13 NC V800AA RX13 NC V800AA EC22 220uF 16V EC22 220uF 16V C230 0 1uF X7R C230 0 1uF X7R R298 47K R298 47K CN28 4pin 2 0mm CN28 4pin 2 0mm 1 2 3 4 RX14 NC V800AA RX14 NC V800AA R301 47K R301 47K R300 100K R300 100K R303 100K R303 100K R299 10K R2...

Page 189: ...R L15 56 L15 56 R373 0R 0402 R373 0R 0402 C259 200p C259 200p R370 10K R370 10K C253 10P C253 10P R355 NC 10K R355 NC 10K 0R 0402 R332 0R 0402 R332 U17B NC 4558 U17B NC 4558 5 6 7 8 4 Q28 3904 Q28 3904 1 2 3 R404 10R R404 10R C279 0 1uF C279 0 1uF R321 100K R321 100K 20K R311 20K R311 C238 NC 10uF C238 NC 10uF R385 4 7K R385 4 7K C277 0 22uF C277 0 22uF C131 10P C131 10P EC24 100uF 16V EC24 100uF ...

Page 190: ... 1M R818 1M C823 0 1uF X7R C823 0 1uF X7R R806 4 7K R806 4 7K R841 NC 20K R841 NC 20K C818 0 1uF X7R C818 0 1uF X7R R82510K R82510K R847 1K R847 1K R809 0R 0402 R809 0R 0402 L801 10uH_1 5A L801 10uH_1 5A C827 NC 0 1uF X7R BOT C827 NC 0 1uF X7R BOT C809 10uF X7R C809 10uF X7R C844 NC 0 1uF X7R BOT C844 NC 0 1uF X7R BOT C814 0 1uF C814 0 1uF R850 NC 0R 0402 R850 NC 0R 0402 FB800 60 0603 FB800 60 060...

Page 191: ... 1 3 3 LF103 1mH LF103 1mH 1 2 3 4 R107 1M RC1206 R107 1M RC1206 R114 NC R114 NC C207 223 C207 223 RJ107 0R RJ107 0R C203 102 400V C203 102 400V LF101 10mH LF101 10mH 1 2 3 4 Q101 C8050 Q101 C8050 C107 100pF C107 100pF C111 104 C111 104 ZD101 FLZ18VC ZD101 FLZ18VC C104 472 400V C104 472 400V F101 5A 250VAC FUSE2 5 08X8 32 F101 5A 250VAC FUSE2 5 08X8 32 D108 HER204 D108 HER204 R128 10K R128 10K CX1...

Page 192: ...2 EN13003 SOT23 R214 9 1K R214 9 1K C216 104 C216 104 C204 104 100V C204 104 100V R277 120K R277 120K R156 510K R156 510K R271 0R RC0805 R271 0R RC0805 R262 5 1K RC0805 R262 5 1K RC0805 U103 OB2263 U103 OB2263 GND 1 FB 2 RI 3 SENSE 4 VDD 5 GATE 6 D113 1N4148 D113 1N4148 D112 FR207 D112 FR207 ZD203 FLZ22VC ZD203 FLZ22VC C221 0R C221 0R R230 NC R230 NC R260 NC R260 NC T103 EFD30 T103 EFD30 10 7 1 2 ...

Page 193: ......

Reviews: