background image

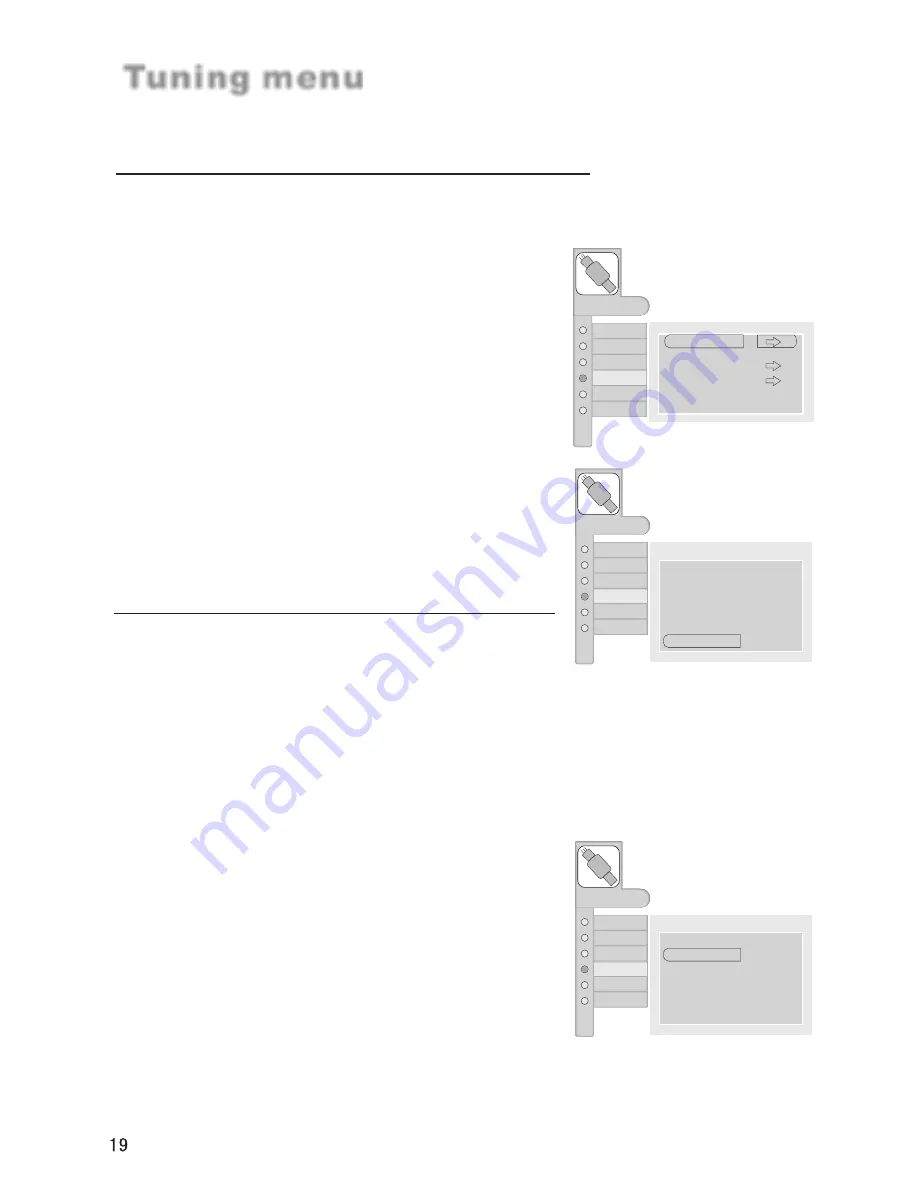
If the colour of some channel is abnormal

       Usually this should be set in the auto position. However if the colour displayed on the 
screen are incorrect, you can manually select the correct colour system.

Press CH+/- button  to select  "Sound System", then 
press VOL-/+ button to select the correct sound 
system.
Press VOL+/- button to select 

D/K, I, B/G, L, L' 

in turn.

If sound is abnormal

Edit Name

Tuning menu

AUDIO

ADJUST

FUNCTION

TIMER

MENU

PICTURE

TUNING

Program Number
Edit Name
Color System
Sound System

Manual Search

AFT

Skip

OFF

18

C 28

AUTO

D/K

62.25MHz

AUDIO

ADJUST

FUNCTION

TIMER

MENU

PICTURE

TUNING

Tuning Program

Auto Search

Program Table

Country

England

1  

Press 

MENU 

button and then use CH+/- 

    button to select the 

TUNING 

menu.

2  

Press VOL+/- button and then use CH+/- 

    button to select

 Program Table.

3  

Press VOL+/- button to enter the submenu.

    
4  

Press CH+/- button to select 

Color System. 

5  

Press VOL-/+ button to select the correct color 

    system (

AUTO, NTSC, PAL, SECAM 

and 

NT4.43).

6


Press the 

EXIT 

button to return to normal viewing 

    or press

 MENU 

button to return to the previous 

    menu.

1  

Press 

MENU 

button and then use CH+/- 

    button to select the 

TUNING 

menu.

2  

Press VOL+/- button and then use CH+/- 

    button to select

 Program Table.

3  

Press VOL+/- button to enter the submenu.


Press CH+/- button to select 

Edit Name. 

5  

Press VOL-/+ button to select

6

 position you 

    want to change and press digits to change. 


Press MENU button to ensure it. 

AUDIO

ADJUST

FUNCTION

TIMER

MENU

PICTURE

TUNING

Program Number
Edit Name
Color System
Sound System

Manual Search

AFT

Skip

OFF

18

C 28

AUTO

D/K

62.25MHz

OFF

OFF

Summary of Contents for L26A5A

Page 1: ...Please READ this manual carefully before operating your TV and retain it for future reference LCD TV OWNER S MANUAL MODEL L26A5A L32A5A L37A5A L42A5A S ...

Page 2: ...t WARNING To reduce the risk of electric shock do not remove cover or back No user serviceable parts inside refer service to qualified service personnel This symbol indicates that there are important operating and maintenance instructions in the literature accompanying the appliance Congratulations on your purchase and welcome to the family Dear Haier product owner Thank you for your confidence in...

Page 3: ...The wide blade or the third prong are provided for your safety If the provided plug does not fit into your outlet consult an electrician for replacement of the obsolete outlet To prevent electric shock ensure the Grounding pin on the AC cord power plug is securely connected 10 Power cord protection Power supply cords should be routed so that they are not likely to Be walked on or pinched by items ...

Page 4: ...ding amplifiers that product heat 16 Overloading Do not overload wall outlets and extension cord as this can result in a risk of Fire or Electric shock 17 Outdoor antenna grounding If an outside antenna or cable system is connected to the unit be sure the antenna or cable system is grounded to provide some protection against voltage surges and built up static charges Section 810 of the National El...

Page 5: ...on introduction Effective range External Equipment Connections Switching ON OFF the TV set Choose the Menu Language Tuning menu Manual AFT Auto Fine Tuning Skip Program swap Choose the Input Source Program Table How to select the desired program Front control panel Rear control panel Remote controller Keys of remote controller Operation Set up your TV Auto search search Edit Name Picture Adjustmen...

Page 6: ...2 CH CH Program plus and minus menu options 3 VOL VOL Volume increase and decrease menu reset and entry 4 MENU Menu display 5 TV AV Source input select 6 Remote control signal receive window 7 Remote Indicator In red when standby mode in blue when Display Buttons and interface location 1 TV AV MENU 3 2 5 4 6 7 VOL VOL CH CH POWER ...

Page 7: ... the TV either directly or through your cable box SCART2 Input Connect Scart out from an Scart device to the Scart input Audio input for linking DVI PC audio output terminals VIDEO AUDIO AUDIO Input connect to hear stereo sound from an external device VIDEO Input Connects the video signal from a video device R L HDMI DVI IN2 AC IN Pr Cr Pb Cb Y IN1 HD AUDIO HD AUDIO PC DVI AUDIO IN Audio input for...

Page 8: ...troller away from heat source or humid area to ensure effective performance of the remote controller Make sure that two AAalkaline batteries are loaded The batteries must be of the same type The batteries must be located properly The batteries are not rechargeable 1 Slide open the cover of the battery compartment on the back of the remote controller 2 Load two AA alkaline batteries in the compartm...

Page 9: ...n S STD Sound mode option Program up and down or turns your TV on Teletext buttons buttons which have letters on top also can use in TV Lock button enter the Lock Set menu Channel list button EXIT clears all on screen displays and returns to TV viewing from any menu TIMER Time display only when there is teletext in TV ZOOM Adjust picture aspect ratio Note This User s Manual covers the functions of...

Page 10: ...20 above or below the control window Use of remote control 1 To ensure a normal operation the remote controller should not be dropped or damaged in any way It should also be kept dry and away from all heat sources 2 Battery replacement is necessary when the remote control acts inconsistently or stops operating the LCD display Remote control Effective range above below 20 20 Here showns may be some...

Page 11: ...coaxial cable to remove the disturbance caused by airwave ANT IN outdoor antenna 300 twin lead cable Antenna adapter 75 coaxial cable Plug additional purchase Antenna input 75 standard coaxial type External Equipment Connections If the antenna needs to be split for two Tv s install a 2 WaySignal Splitter in the connections If the antenna is not installed properly contactyour dealer for assistance ...

Page 12: ...jacks to the TV s input jacks as shown in the figure 2 Insert a video tape into the VCR and press PLAY on the VCR Refer to the VCR owner s manual 3 Select the input source by the TV AV button on the remote control S VIDEO Choose Your Connection There are several ways to connect your television depending on the components you want to connect and the quality of the signal you want to achieve The fol...

Page 13: ...D 2 Use the TV AV and VOL button on the remote control to select SCART1 or SCART2 mode 3 Press Play button on external equipment for program play 4 Refer tothe DVD player smanual for operating instructions To watch digitally broadcast programs purchase and connect a digital set top box How to connect Use the TV s YPbPr IN and AUDIO IN jacks PC or HDMI DVI VIDEO port for video connections depending...

Page 14: ... pattern contrast or brightness in PC mode If noise is present change the PC mode to External Equipment Connections PC connection another resolution change the refresh rate to another rate or adjust the brightness and contrast on the menu until the picture is clear If the refresh rate of the PC graphic card can not be changed change the PC graphic card or consult the manufacturer of the PC graphic...

Page 15: ...e a static discharge when touching the unit and the unit fails to function simply unplug the unit from the AC outlet and plug it back in The unit should return to normal operation Polarized AC Cord Plug AC Outlet Wider Hole and Blade You can connect a set of headphones to your set if you wish to watch a TV programme without disturbing the other people in the room Connecting Headphones External Equ...

Page 16: ...om your TV s because it is just an example to help you with the TV operation 1 Press MENU button and then use CH button to select the Function menu 2 Press VOL button and then use CH button to select Language 3 Select your language with VOL button and press the MENU button to confirm you selection 4 When you are satisfied with your choice press the EXIT button to return to normal viewing or press ...

Page 17: ... button and then use CH button to select Country and use VOL button to set the country 3 Press CH button to select Auto Search 4 first according to where you be Press VOL button at this time the prompt will display on the screen and then press VOL button to select the Yes option press MENU button to ensure automatic search with higher level After the search has finished all channels now playing pr...

Page 18: ...n to surpass for 3 seconds then become semiautomatically searches for channel till the channel is obtained AFT Auto Fine Tuning If the picture and or sound are poor try using the Auto Fine Tuning feature Do not use this feature unless reception is poor AUDIO ADJUST FUNCTION TIMER MENU PICTURE TUNING Program Number Edit Name Color System Sound System Manual Search AFT Skip OFF 18 C 28 AUTO D K 62 2...

Page 19: ...tter list 4 Press Vol or CH to select the desired digital or letter 5 Press the yellow button to exit list 6 Press MENU button to ensure 1 Press CH to select the channel 2 Press the blue button on the remote control 3 Press CH button to select the channel to swap 4 Press again the blue button to ensure AUDIO ADJUST FUNCTION TIMER MENU PICTURE TUNING Tuning Program Auto Search Program Table Country...

Page 20: ...n use CH button to select the TUNING menu 2 Press VOL button and then use CH button to select Program Table 3 Press VOL button to enter the submenu 4 Press CH button to select Color System 5 Press VOL button to select the correct color system AUTO NTSC PAL SECAM and NT4 43 6 Press the EXIT button to return to normal viewing or press MENU button to return to the previous menu 1 Press MENU button an...

Page 21: ...el you are using and the channel youused last time 2 3 Swap function enables quick swap to the last watched program 18 C 28 AUTO B G 18 C 28 AUTO B G 8 A 8 AUTO B G 1 Press MENU button and then use CH button to select the TUNING menu 2 Press VOL button and then use CH button to select Program Table 3 Press VOL button to enter the submenu 4 Press CH button to select Skip 5 Press VOL button to 6 set...

Page 22: ...on will fail and previous program will still stay on the screen The program locking password can be modified in the preset menu and previous password will be required 2 Using CH button Press CH button to select a channel number in number increasing direction Press CH button to select a channel number in number decreasing direction Note If Skip is ON on one channel press CH button the channel will ...

Page 23: ...ton to return to the previous menu How to customize your own picture status Contrast This will adjust the intensity of bright parts in the picture but keep the dark parts unchanged Brightness This will adjust the light output of the complete picture which will mainly affect the darker areas of the picture Saturation This will adjust the saturation level of the colors to suit your personal preferen...

Page 24: ...n the best reproduction for your listening position Treble This will adjust the treble output level Bass This will adjust the bass output level Auto Volume Each broadcasting station has its own signal conditions djust the volume every time the channel is changed This feature lets you automatically adjust the volume of the desired channel and reduces the volume differences between channels and prog...

Page 25: ...und elimination mute function is very convenient Eliminate sound 1 Press the MUTE button on the remote control and Mute type face will display on the lower part of the screen At this time the sound of the TV set is turned off 2 If you want to recover the sound press the MUTE button again or directly press VOL button Sound Adjustment ...

Page 26: ...time function the TV set can automatically turn on to a preset channel or shut down at a preset time 1 Press CH button to select On Time and then press the digit buttons to set the value of both hours and minutes 2 Press CH button to select On Prog then press VOL or the digit buttons to select your desired channel 3 Repeat step 1 2 to set Off Time Off On Time 1 Press MENU and then use VOL button t...

Page 27: ...ted from the 13 kinds of languages Menu Timeout Repeat step 2 and 3 to select the time of the OSD display in sequence as follows 5 seconds 10 seconds 15seconds 20seconds 25seconds 30 seconds and 40 seconds Menu Background Repeat step 2 and 3 to select Transparent Opaque background of OSD Blue Screen Repeat step 2 and 3 to select Blue Screen On Off If you select ON when no signal the background is ...

Page 28: ...r press MENU button to return to the previous menu Adjustment Setup When PC input mode is set Display Mode This will adjust the picture aspect ratio RGB This is used for the adjustment of the numerical value of red green and blue in PC mode Default This is used to reset the defecult setting parameters Auto sync This is used for adjustment of picture location frequency and phase parameters in PC mo...

Page 29: ...ust menu 1 Press MENU button and then use CH button to select the ADJUST menu 2 Press VOL button and then use CH button to select Adjust option 3 Press VOL button and use CH button to select the desired adjust parameter option 4 Press VOL for desired adjust parameter option until satisfactory value is achieved When PC signals are received the automatic mode is used for parameter adjustment 5 When ...

Page 30: ...ered the LOCK menu will be displayed If the password is not correctly entered you will be required to reenter the password and the cursor will remain onscreen Press EXIT to exit the window If the preset OSD time is exceeded the menu will disappear automatically H LOCK Lock setup The initial password of the television is 0000 Note If Clear Lock is activated the password setup cannot be changed Tune...

Page 31: ...p AV Max Volume Press CH button to select Max Volume Press VOL button for adjustment between 0 100 If a certain value is set when volume is being adjusted the sound value can not exceed maximum volume value If current volume is over Max Volume when Lock Set menu is set current volume will become set maximum volume If current volume is below maximum volume customer set volume will stay unchanged Cl...

Page 32: ...auto tunning simply press SCAN button again 3 AUTO B G Sleep The TV set will switch automatically to standby at the preset time with the SLEEPtime on You may set the sleep time Operate as follows 1 Press SLEEP button repeatedly to select the number of preset minutes the timer will be set in sequence 0Min 5Min 15Min 30Min 60Min 90Min 120Min 0Min Note If the Off time onthe TIMER menuis set when pres...

Page 33: ...ted functions are not available in TEXT mode Only a few direct button control functions are available in TEXT mode they are 1 Page up down Result Use the CH buttons to browse next or previous page 2 Page number entering Result To select a teletext page either directly enter the page number using the numeric button pad on the remote control or use CH buttons or the colored Fast Text buttons Teletex...

Page 34: ...the teletext page to go directly to that page ZOOM Pressing the button to change from different screen display size This feature is very useful as it magnifies the image making the characters easier to read REVEAL Pressing the button will reveal hidden text This feature is used to reveal information such as answers to Teletext on line interactive puzzles TIMER While in normal TV mode only pressing...

Page 35: ...re s a great way to keep the dust off your screen for a while Wet a soft cloth in a mixture of lukewarm water and a little fabric softener or dish washing detergent Wring the cloth until it s almost dry and then use it to wipe the screen 2 Make sure the excess water is off the screen and then let it air dry before you turn on your TV Cleaning the Cabinet Extended Absence If you expect to leave you...

Page 36: ... 60Hz External Antenna Impedance 75 ohm PAL SECAM NTSC L26A5A Storage Temperature Storage Humidity 15 45 5 90 non condensing L32A5A 1366X768 Dot 5 35 20 80 L26A5A 945X310X702 23 0kg 811X246X621 16kg 679X246X525 12 5kg Sound System D K I B G L L L37A5A L42A5A L32A5A L37A5A L42A5A 1055X318X795 28 8kg ...

Page 37: ...l interference such as an electrical appliance or power tool No picture no sound Verify if the television is properly plugged Verify if the television is properly supplied power Verify if electricity is available Blank screen Verify if correct signals are input Press TV AV button to change signal input to TV input Restart the television of power supply is interrupted No sound Press Mute button and...

Page 38: ...0090500708 01 ...

Reviews: