6
2. Operating Instructions
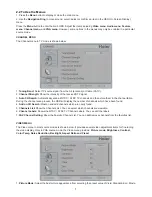
2.1 The Use of Remote Control
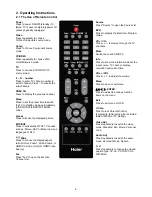
Power
Press to power ON/OFF(standby) TV.
(Note: TV is never completely power off
unless physically unplugged.
Video
Press repeatedly to choose
S-Video/Composite source mode.
Comp
Press to choose Component source
mode.
PC/HDMI
Press repeatedly to choose VGA
or HDMI source mode.
TV
Press to choose ATSC/NTSC TV
source mode.
0 ~ 9 /
–
number
Press to enter TV channel number to
select channel (Press ‘-’ to choose the
sub-channel).
PREV CH
Press to display the previous channel.
Sleep
Press to set the preset time to switch
the TV to standby mode automatically
(off/5/10/15/30/60/90/120/180/240
mins).
Freeze
Press to freeze the displayed picture.
MTS/SAP
Press to activate the NTSC TV sounds,
such as: Stereo, SAP or Mono tone, and
languages of DTV.
Wide
Press to choose the display aspect
ratio: Normal, Zoom1, Wide, Zoom2, or
HDMI PC mode. (Only for HDMI Video
Source)
Fav
Press "Fav" to open the Favorite
Channel List.
Source
Press "Source" to open the Source List.
EPG
Press to display the Electronic Program
Guide.
CH+ / CH -
Press + or - to browse through the TV
channels.
Mute
Switch the sound ON/OFF.
Info
Press to show the information about the
input source, TV channel, display
resolution and current time.
VOL+ / VOL
Press + or - to adjust the volume.
Menu
Press to open or exit menu.
ġ
,
Ģ
,
⦼
,
⦽
, ENTER
Press to adjust the various function
items on the menu.
Exit
Press to exit menu or OSD.
V-Chip
Press to lock Parental Control
temporarily. (After setting the restricted
table of MPAA or TV Rating.)
Video Adj
Press repeatedly to switch the video
mode: Standard, Eco, Movie, Personal,
Vivid.
Audio Adj
Press repeatedly to switch the audio
mode: Personal, Music, Speech.
C. C.
Press repeatedly to change the closed
caption type: CC On, CC Off/CC On
With Mute.
Summary of Contents for L19
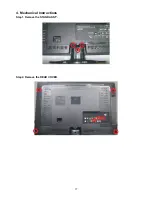
Page 17: ...17 4 Mechanical Instructions Step1 Remove the STAND ASS Y Step2 Remove the REAR COVER ...
Page 19: ...19 Step 5 Separate the MAIN FRAME and PANEL Step 6 Remove the KEY BOARD IR BOARD and SPEAKERS ...
Page 27: ...27 6 PCB Layout 6 1 Main Board 715G3759M02000005K ...
Page 28: ...28 ...
Page 29: ...29 6 2 Power Board 715G3754P01W30003H ...
Page 30: ...30 ...
Page 31: ...31 ...
Page 32: ...32 6 3 Key Board 715G3303 2 6 4 IR Board 715G3963R01000004S ...


