background image

Menu Operations

Picture Menu Options

1. Press 

MENU

 button to  display the main menu, and 

VOL+/VOL-

to select the

    main menu .
2. Press 

CH+/CH-

 to scroll through the parameters

3. Press 

VOL+/VOL-

 buttons to make changes to the parameters

4. Press the 

EXIT

 button to exit the menu

* In this manual, the OSD (On Screen Display) may be differ from your TV
These are examples to illustrate the TV's operation.
Press TV/AV to select the input source. The menu for each source is
different .

Picture quality can be adjusted for any input separately .

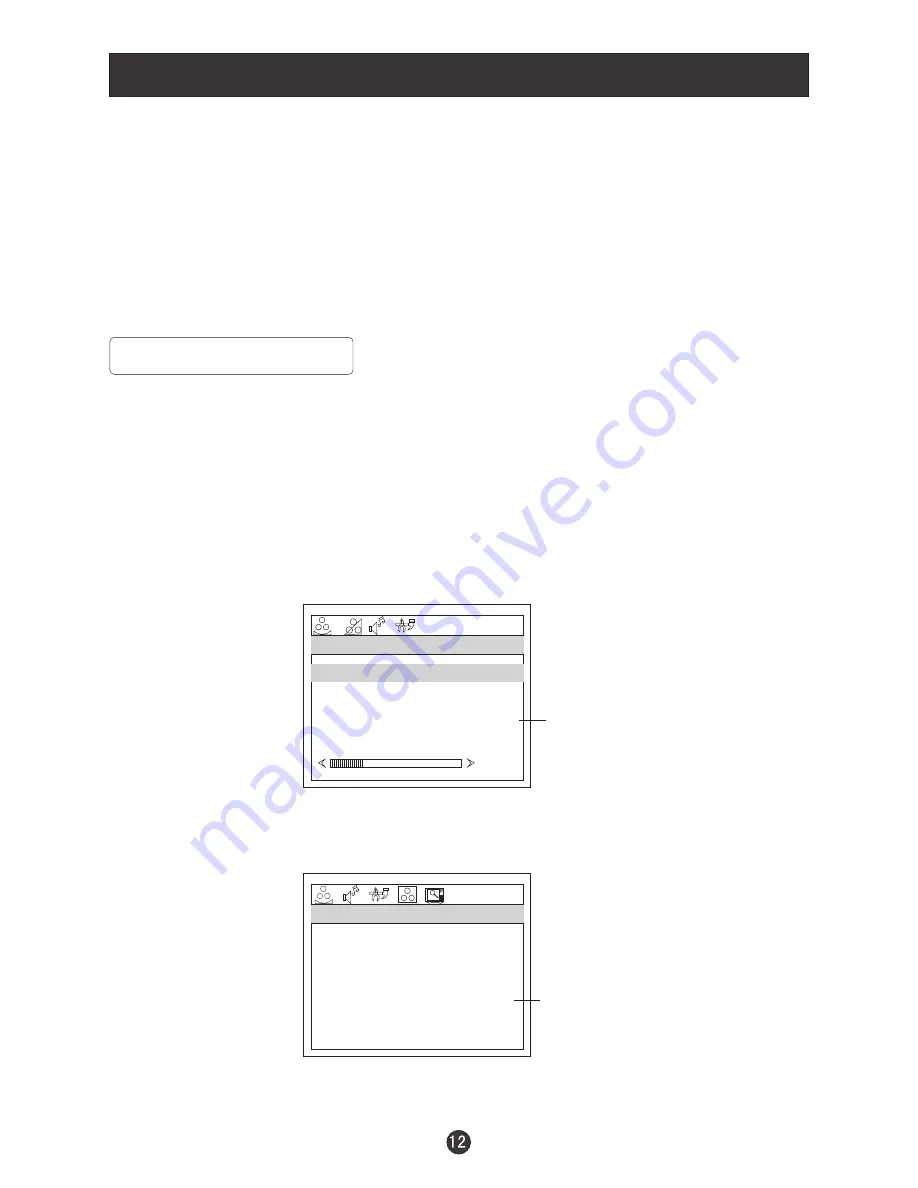
The picture quality on the screen can be adjusted as follows:

1. Press 

MENU

 button and 

VOL+/VOL- 

until the following menu appears 

     on the screen.

PC/COMPONENT MENU

TV/AV/SV MENU

PICTURE

BRIGHTNESS
CONTRAST
SHARPNESS
COLOR
HUE

PICTURE

BRIGHTNESS
CONTRAST
SHARPNESS
COLOR TEMP

30

  Note: Symbols on top of the menu in this manual may differ from the actual set display

30
30
2

COOL

50
50
2
50
50

Only available in NTSC system

Not available in component

Summary of Contents for HLTDC15 - 15" LCD TV

Page 1: ...Please read this manual carefully before using this TV set and keep it for future reference LCD TV USER MANUAL HLTDC15 HLTDC19 HLTDC20 ...

Page 2: ... does not make any recommendations for attachments as they may cause hazards 7 WATERAND MOISTURE Do not use this unit near water For example near a bathtub washbowl kitchen sink laundry tub in a wet basement or near a swimming pool 8 ACCESSORIES Do not place this unit on an unstable cart stand tripod bracket or table The unit may fall causing serious injury and serious damage to the unit When a ca...

Page 3: ...nel 17 DAMAGE REQUIRING SERVICE Unplug this unit from the wall outlet and refer servicing to qualified service personnel under the following conditions a When the power supply cord or plug is damaged b If liquid has been spilled or objects have fallen into the unit c If the unit has been exposed to rain or water d If the unit does not operate normally by following the operating instructions Adjust...

Page 4: ...s to this equipment may cause harmful interference unless the modifications are expressly approved in the instruction manual The user could lose the authority to operate this equipment if an unauthorized change or modification is made CAUTION USE OF CONTROLS OR ADJUSTMENTS OR PERFORMANCE OF PROCEDURES OTHER THAN THOSE SPECIFIED HEREIN MAY RESULT IN HAZARDOUS RADIATION EXPOSURE LASER SAFETY This un...

Page 5: ...n Menu Options Function Menu Options Continued Adjust Menu Options Tuning Menu Options Tuning Menu Options Continued Parental Menu Options Parental Menu Options Continued DVD Features Special Function Playback DVD System Setup Playable Discs Disc Protection and DVD Characteristics Troubleshooting Guide Specifications Warranty 1 2 3 4 5 5 6 6 6 6 7 8 9 9 10 10 10 10 11 11 11 11 12 12 13 13 14 15 16...

Page 6: ...is machine To insure your safety and extend the life span of LCD TV please read the following items carefully before using l Please read and understand all the instructions before operation l l l Please comply with the instructions provided l Please do not use additional devices that are not recommended by manufacturer l l Do not place the unit on unstable dusty and humid places l Never put the un...

Page 7: ...rientation to adjust the item in the OSD VOL Volume up Right orientation to adjust the item Press to enter 5 CH TV channel down to select the item in the menu CH TV channel up to select the item in the menu 6 Power indicator Illuminates red in standby mode illuminates green when the display is turned on 7 Remote Sensor Selects the input signals Receives the signals from the remote control 1 6 7 ...

Page 8: ...eo output from an external device to this jack AV S VIDEO COMPONENT Audio Input Connect audio output from an external device to these jacks PC Audio Input Connect the audio output from the pc to the audio input port Earphone port Antenna Input Connect cable or antenna signals to the TV either direc tly or through your cable box S Video Input Connect S Video out from an S Video device to the jacks ...

Page 9: ...VD SLOW DVD ANGLE DVD SEARCH DVD TITLE PBC DVD PROGRAM DVD CALL TV AV and input selection Return to Previous Channel CCD closed caption On Off Adjust Picture Mode Exit On Screen Display Next Chapter DVD revious hapter Mode Zoom Function Select MONO STEREO SAP in NTSC system DVD AUDIO Buttons on the remote control UP DOWN LEFT RIGHT POWER TV DVD OPEN CLOSE SCAN RECALL DISPLAY MUTE 1 2 3 4 5 6 7 8 9...

Page 10: ...ontroller and television set As strong light may interfere with the signals change your position to operate the remote control if the television cannot be turned on or off as expected Keep the remote control away from heat sources or humid areas to ensure effective performance of the remote Make sure that two AA 1 5V alkaline batteries are loaded The batteries must be of the same type must be inse...

Page 11: ...irection if needed Multi family Dwellings Apartments Connect to wall antenna socket wall antenna socket VHF antenna UHF antenna outdoor antenna Single family Dwellings Houses Connect to wall jack for outdoor antenna Bronze Wire Be careful not to bend the bronze wire when connecting the antenna Bronze Wire Turn clockwise to tighten RF coaxial wire 75 ohm To improve picture quality in a poor signal ...

Page 12: ...f the LCD TV Tighten the screws on the VGA connectors once they are firmly connected 4 Turn on the power of the LCD TV first and then turn on the power of the PC 5 Press the TV AV button to set the video input mode of the LCD TV to PC RGB 6 Check the image on your TV There may be noise associated with the resolution vertical pattern contrast or brightness in PC mode If noise is present change the ...

Page 13: ...utput switch to 3 or 4 and then tune TV to the same channel number Connection Option 2 1 Connect the audio and video cables from the VCR s output jacks to the TV input jacks as shown in the figure When connecting the TV to VCR match the jack colors Video yellow Audio Left white and Audio Right red If you connect an S VIDEO output from VCR to the S VIDEO input the picture quality is improved compar...

Page 14: ...video cables from the Cable Box s output jacks to the TV input jacks as shown in the figure When connecting the TV to a Cable Box match the jack colors Video yellow Audio Left white and Audio Right red 2 Select the input source by using the TV AV button on the remote control 3 Select your desired channel with the remote control for cable box External AV Source Setup How to connect Connect the audi...

Page 15: ...CD TV will go into standby mode and the indicator light turns red Note The display of the input mode will disappear in 3 seconds PC COMPONENT AV SV Switch Among Different Inputs TV PC COMPONENT AV SV Each time you press the TV AV button TV PC COMPONENT AV SV will appear on the screen in order Audio Control 1 Press the VOL button to increase the volume A number will appear on screen indicating the ...

Page 16: ...l the memorized TV channels The scan will pause for about 2 seconds on each channel If you want to stop the function during auto scanning simply press the SCAN button again Picture Mode Press P STD button on the remote control for menu display For desired mode as follows PERSONAL STANDARD MILD FRESH Sleep Press SLEEP button to set the time SLEEP 240 SLEEP 180 SLEEP 120 SLEEP 90 SLEEP 60 SLEEP 45 S...

Page 17: ...tion Press TV AV to select the input source The menu for each source is different Picture quality can be adjusted for any input separately The picture quality on the screen can be adjusted as follows 1 Press MENU button and VOL VOL until the following menu appears on the screen PC COMPONENT MENU TV AV SV MENU PICTURE BRIGHTNESS CONTRAST SHARPNESS COLOR HUE PICTURE BRIGHTNESS CONTRAST SHARPNESS COL...

Page 18: ...ture and by decreasing the level it will darken the lighter parts of the picture Adjust the contrast of the picture The contrast becomes higher as the number increases Adjust the amount of the detail enhancement the image sharpness rises as the number increases By increasing the level it will show cleaner and clearer images and by decreasing the level it will make the picture smoother Adjust the t...

Page 19: ...ur TV BALANCE BASS TREBLE mode AUDIO MODE Press VOL VOL to select among PERSONAL VOICE MUSIC and THEATRE AVL Adjust the balance of the audio output from left to right When indication value of balance increases toward 50 sound from the left speaker becomes weaker When indication value of balance decreases toward 50 sound from the right speaker become weaker Adjust the bass of the sound Can only be ...

Page 20: ...l as helping children learn how to read A built in decoder displays the audio portion of a program as text on the screen when this option is selected OFF When OFF is displayed on CC MODE is turned off CC1 When CC1 on TV means CC MODE is turned on CC2 to CC4 For other modes of video related broadcast information TT1 For program guide and other information displayed by broadcasters This blocks a lar...

Page 21: ... on the screen ADJUST AUTO CONFIG PHASE CLOCK H POSITION V POSITION Note This menu appears only in PC mode 2 Press CH CH button to enter the adjust menu and to go up and down to select the desired option 3 Press VOL VOL button to increase and decrease the level to adjust the selected option to your preference 4 Repeat step 2 and step 3 until desired quality has been achieved Functions AUTO CONFIG ...

Page 22: ...settings have been achieved Functions 1 CHANNEL Press VOL VOL to go up and down to set the channel position The display will show the current playing channel Channel Coverage by Antenna Antenna Type Channel Range VHF 2 13 UHF 14 69 CATV 1 125 2 3 AFC SKIP If you want skip a channel press VOL VOL to select ON and this channel will be skipped next time when you press CH CH You can press the digit bu...

Page 23: ...on to start the automatic search function operation All channels now available will be automatically preset in order After the search has finished the first program number will display on the screen This search automatically adds only the active channels in your area to the TV s memory It deletes any channels on which there is no broadcast or a poor signal ANTENNA sub menu Parental Menu Options 1 ...

Page 24: ... means the lock function is turned off If the Child Lock is in off mode then function will not be active to accept the Parental Guidance signal Child Lock on means the lock function is turned on If the lock is in the on mode then it actively accepts the Parental Guidance signal When MPAA rating is selected you can select OFF G PG PG 13 R NC17 X Select the TV Rating option You can select from OFF T...

Page 25: ...ins little or no violence no strong language and little or no sexual dialogue and situations TV PG Parental Guidance Suggested this type of rated programs may contain limited violence some suggestive sexual dialogue and situations and rare language TV 14 Parents strongly cautioned these types of rated programs may contain sexual content strong language and more intense violence TV MA Mature audien...

Page 26: ...s sports documentaries talk shows music videos and variety of other programs C for children under age 8 There is no offensive language nudity or sexual content C8 T of rated programs are generally considered acceptable for children 8 years and over There is no profanity nudity or sexual content G T of rated programs are generally suitable for all audiences PG Parental Guidance Suggested in of rate...

Page 27: ...topped Stop playback Previous and Next Fast forward and Fast reverse 1 Press FWD to fast forward through the disc Each time the FWD button is pressed the fast forward motion speed changes 2 Press PLAY ENTER to resume normal playback 3 Press REV to fast reverse through the disc Each time the REV button is pressed the fast reverse motion speed changes 4 Press PLAY ENTER to resume normal playback Bas...

Page 28: ...g a disc recorded in multi angle you can view the scene from different angles for example front side whole view and exterior scene Press this key can change the mode of audio such as Audio 1 2 AC 3 2 CH English Audio 2 2 AC 3 5 1 CH English Press this button to cycle between Mono Left Mono Right Mix Mono and Stereo AUDIO TITLE PBC With some DVD discs pressing this key will display the title menu Y...

Page 29: ...ill be displayed automatically Use the UP and DOWN cursor buttons to select a file then press PLAY ENTER The slide show will commence Press PREVIOUS or NEXT to move between pictures Press pause to stop on the current picture Press PLAY ENTER to resume normal playing A JPEG disc contains JPEG jpg format picture information that can be decoded by a micro computer software and displayed through the v...

Page 30: ...escreen material will fill the screen but at the expense of chopping off extreme left and right edges of the original film picture For this feature to work the disc must be specially coded Such discs are uncommon 4 3 LB LB Letter Box You may select this if you have a normal aspect ratio 4 3 TV Widescreen material will be shown in pure unaltered form allowing the entire picture area of the original...

Page 31: ...aver Off On Off Tv Display LB This item allows you to set Angle Mark ON or OFF ANGLE MARK Users can select a particular camera angle when playing a DVD which offers multiple angles On Screen Display OSD Language Users can select on screen display language General Setup Page Tv Display LB Angle Mark On Osd Lang ENG Caption On Screen Saver Off On Off General Setup Page Tv Display LB Angle Mark On Os...

Page 32: ...hip classes for DVDs Note 1 To change this setting you must enter your password Initial password is 2 When set to OFF all discs may be viewed 1234 Preference Page Parental Password Change Default Old Password New Password Confirm Pwd PASSWORD CHANGE You can change your password by entering 4 digits You must confirm the 4 digits before the new password can be accepted Preference Page Parental Passw...

Page 33: ...except password and parental lock status for this DVD player back to the manufacturers original settings Press ENTER to perform the reset Note Some functions may not be available depending on the type of disc Parental Password Default Preference Page Reset SETUP PLAY ENTER ...

Page 34: ...the way the disc was burned In a few cases their performance may not be consistant or may not even operate at all This DVD Player is designed and manufactured according to the Region Management Information that is recorded on a DVD disc If the Region number described on the DVD disc does not correspond to the Region number of this DVD Player this DVD player will not play that disc This Region numb...

Page 35: ... 12cm Disc diameter 30cm 20cm 12cm 12cm Horizontal resolution More than 500 line No more than 430 line No more than 350 line No more than 250 line Multiple kinds Picture proportion One kind One kind One kind Subtitle 32 kinds 16 kinds at most 4 kinds at most 4 kinds at most 4 kinds 2 kinds 2 kinds Language 8 kinds Sound quality 48KHz 96KHz 6 20 24bit 44 1KHz 16bit 44 1KHz 16bit 44 1KHz 16bit 44 1K...

Page 36: ...ted No sound Press MUTE button and verify if Mute mode is on Switch to another channel and verify if the same problem happens Press VOL button to see if the problem can be solved Poor sound Verify if sound system is functional Refer to chapter on adjusting No picture in some channel Verify if correct channel is selected Adjust the antenna Make adjustments by FINE TUNE No color for some channel pro...

Page 37: ...ut port Power requirements Temperature 1 5W 1 5W AV input PC input S VIDEO input PC audio input Headphone output YPbPr input Antenna input 120V 60Hz NTSC M Working 5 35 Storage 10 45 Power consumption 80W Model HLTDC15 Remote control Batteries User manual Warranty card NOTE Design and specifications are subject to change without notice Dimensions quoted in this manual are approximate HLTDC19 HLTDC...

Page 38: ...Warranty Warranty One year parts and Labor Carry in for 27 or less and in home for 32 and above Warranty ...

Page 39: ...V0 1 0090508051C ...

Reviews: