background image

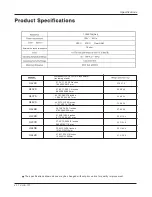
 The specifications shown above may be changed without prior notice for quality improvement.

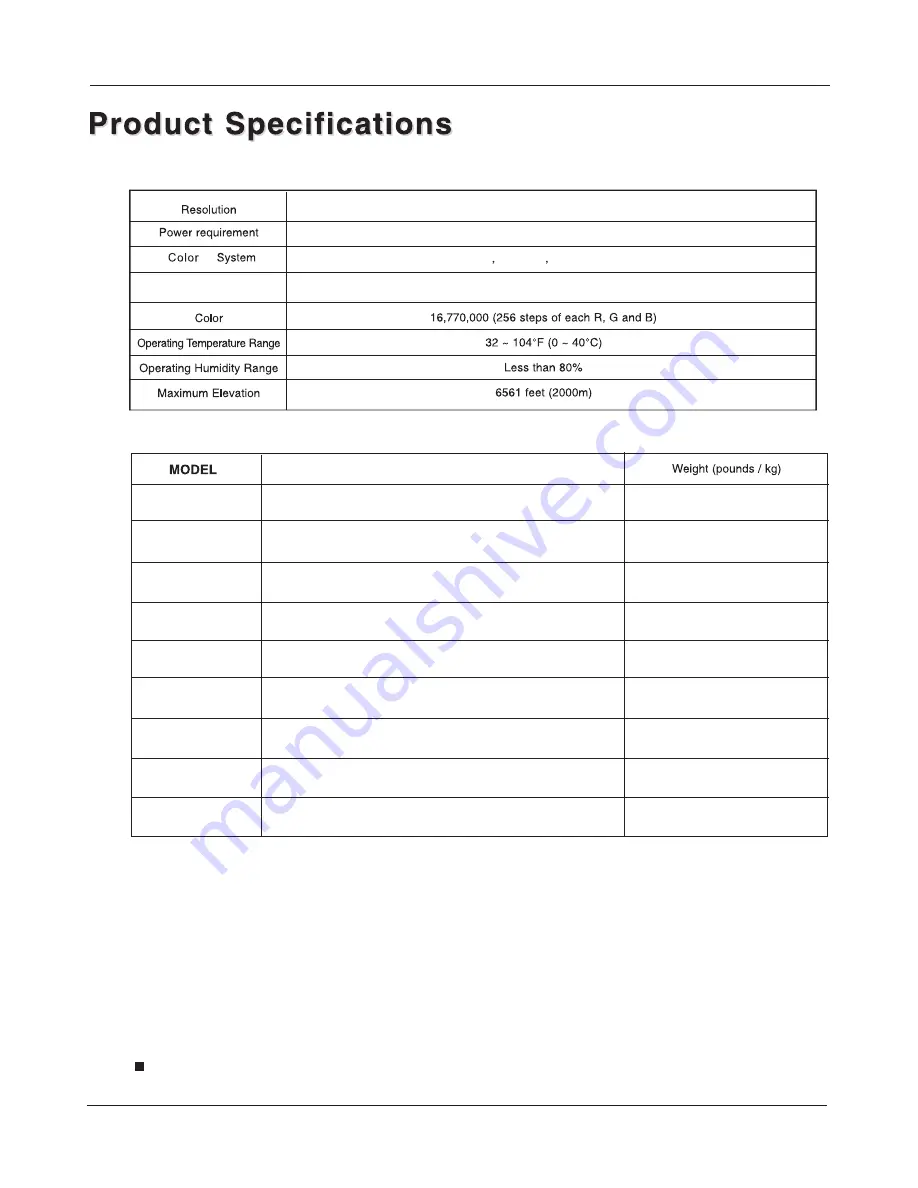
1366X768(Dot)

120V~ , 60Hz

External Antenna Impedance 

75 ohm

Specifications

NTSC

   ATSC

   Clear QAM 

42   TV LCD-TFT

Dimensen(WX X ) Unit::inches/mm

D H

(Including stand)

31.3X11.2 X20.3inches
794X285X515 mm

37.5/17.0

HL26S

HL32S

37.0X11.2X23.4 inches
940X285X595 mm

HL26B

HL32B

52.9/24.0

26.7X9.7X20.7inches
679X246X525 mm

37.2X12.2X28.0 inches
946X310X710 mm

27.6/12.5

35.3/16.0

HL37S

HL42S

HL37B

HL40B

HL42B

43.1X12.8X27.0 inches
1 0 9 6 X 3 2 5 X 6 8 7 m m

62.8/28.5

44.5X13.3X29.5inches
1 1 3 1 X 3 3 7 X 7 5 0 m m

72.8/33.0

50.7/23.0

31.9X9.7X24.4 inches
8 1 1 X 2 4 6 X 6 2 1 m m

39.9X12.2X29.1inches
1014X310X738mm

55.1/25.0

41.9X12.2X31.5inches
1065X310X800mm

57.3/26.0

Summary of Contents for HL37B - 37" LCD TV

Page 1: ...Please READ this manual carefully before operating your TV and retain it for future reference TFT LCD TV OWNER S MANUAL MODELS HL26B HL32B HL37B HL40B HL42B HL26S HL32S HL37S HL42S ...

Page 2: ...nt into an outlet on a circuit different from that to which the receiver is connected Consult the dealer or an experienced radio TV technician for help This device compiles with Part 15 of the FCC Rules Operation is subject to the following two conditions 1 This device may be not cause harmful interference and 2 this device must accept any interference received including interference that may caus...

Page 3: ...te outlet 10 Protect the power cord from being walked on or pinched particularly at plugs convenience receptacles and the point where they exit from the apparatus 11 Only use attachments accessories specified by the manufacturer 12 Use only with the cart stand tripod bracket or table specified by the manufacturer or sold with the apparatus When a cart is used use caution when moving the cart appar...

Page 4: ...anual will guide you in getting the best use of your product Remember to record the model and serial number They are on label in back of the unit Model number serial number Date of purchase Staple your receipt to your manual You will need it to obtain warranty service 4 TV LCD TFT ...

Page 5: ...e Video Menu Aspect Ratio Control Audio Menu SAP Broadcasts Setup elect the desired program elect the desired sound How to select picture modes How to customize your own picture status How to select audio modes How to customize your own audio status Time Menu Function Menu Closed Captions CC mode DTV Caption DTV Caption Style Menu Screen Setup for PC mode Lock Menu Parental Control rating and cate...

Page 6: ...ease menu reset and entry 4 MENU menu display 5 POWER Is used to activate the display or return to standby mode 6 Power indicator in red when standby mode in blue when display 7 Remote control signal receive window HL26B HL26S The buttons are on the bottom of the TV set INPUT CH VOL MENU 1 INPUT 2 3 4 5 HL32S HL32B VIDEO R AUDIO L AUDIO2 Input connect to hear stereo sound from an external device V...

Page 7: ... jacks Earphone jack Earphone audio output terminal PC VIDEO Input Connect the monitor output connector from a PC to the jack Antenna Input Connect cable or antenna signals to the TV either directly or through your cable box S Video Input Connect S Video out from an S VIDEO device to the S VIDEO input Audio Output Connect audio from various types of equipment Note In standby mode these ports will ...

Page 8: ...decreases the sound level Numeric buttons press to change the channel EXIT Clears all on screen displays and returns toTV viewing from any menu INPUT show the input source mode MUTE Switches the sound on or off CC closed caption Select a closed caption CC MUTE CC ON CC OFF TIME Shows time INFO When you watch the TV press the key theinformation displays on bottom of the screen MENU Brings up the ma...

Page 9: ...wire when connecting the antenna Bronze Wire To improve the picture quality in a poor signal area please purchase a signal amplifier and install properly If the antenna needs to be split for two TV s install a 2 Way Signal Splitter in the connections If the antenna is not installed properly contact your dealer for assistance Installation Accessories Remote controller Owner s manual Alkaline batter...

Page 10: ...n 1 Set VCR output switch to channel 3 or 4 and then tune the TV to the same channel number Connection Option 2 1 Connect the audio and video cables from the VCR s output jacks to the TV input jacks as shown in the figure When connecting the TV to VCR match the jack colors Video yellow Audio Left white and Audio Right red If you connect an S VIDEO output from VCR to the S VIDEO input the picture q...

Page 11: ...er tothe DVD player smanual for operatinginstructions DVD connection External Equipment Connections How to connect Connect the audio and video cables from the external equipment s output jacks to the TV input jacks as shown in the figure When connecting the TV to external equipment match the jack colors Video yellow Audio Left white and Audio Right red How to use 1 Select the input source with usi...

Page 12: ...he owner s manual for the digital set top box 2 Use INPUT on the remote control to select YPbPr VGA or HDMI source Send the TV s audio to external audio equipment stereo system via the Audio Output Optical port How to connect 1 Connect one end of an optical cable to the TV Audio Optical Output port 2 Connect the other end of the optical cable to the digital audio optical input on the audio equipme...

Page 13: ...te control 3 Use INPUTon the remotecontrol to selectVGA orHDMI source 4 Check theimage on yourTV There maybe noise associatedwith the resolution vertical pattern contrastor brightness inPC mode If noise ispresent change thePC mode toanother resolution change the refresh rateto another rateor adjust thebrightness and contrast on themenu until thepicture is clear If therefresh rate ofthe PC graphicc...

Page 14: ...1280x720p If the source device does not support Auto HDMI you need to set the output resolution appropriately To get the best picture quality adjust the output resolution of the source device to 1280x720p Select HDMI input source in input source option of Select Main source menu When the source device DVD player or Set TopBox supports DVI How ToConnect 1 Connect the source device to HDMI port of t...

Page 15: ...Cable sample HDMI Cable not supplied with the product HDMI to DVI Cable not supplied with the product Analog Audio Cable Stereo to RCA type not supplied with the product Installation Owner s Manual 15 ...

Page 16: ... cause a static discharge when touching the unit and the unit fails to function simply unplug the unit from the AC outlet and plug it back in The unit should return to normal operation Polarized AC Cord Plug AC Outlet Wider Hole and Blade You can connect a set of headphones to your set if you wish to watch a TV programme without disturbing the other people in the room Connecting Headphones Externa...

Page 17: ... 2 Select the viewing source by using INPUT button on the remote control 3 When finished using the TV press the POWER button on the remote control The TV reverts to standby mode 4 If you intend to be away on vacation disconnect the power plug from the wall power outlet Move cursor OK Go to submenu EXIT MENU Exit main menu English Spanish French Menu Language English CC Mode On Basic Caption CC1 Ad...

Page 18: ... signals and will search for cable TV NTSC ATSC QAM modulated channels available in your area 1 Press the MENU button and then use button to select the Channel menu 2 Press the button and then use button to select Tuner 3 Press the button and then use button to Select Cable or Air mode 4 Press the OK button 5 When you are satisfied with your choice press MENU button to return to the previous menu ...

Page 19: ...number 9 Press EXIT button to return to TV viewing or press MENU button to return to the previous menu Fine Tune only in anolog signal 1 Press the MENU button and then use button to select the Channel menu 2 Press the button to select Fine Tune 3 Press the or OK button 4 Press the button to tune 5 Press EXIT button to return to TV viewing or press MENU button to return to the previous menu B C A V...

Page 20: ...ess the button and then use button to select Rename 3 Press the or OK button to enter the Submenu 4 The cursor flashs Use the digital button to select the letter and press button to move the cursor and OK button to confirm Press the Q VEIW button to delete the letter 5 When you are satisfied with your choice press MENU button to return to the previous menu or Press EXIT button to return to TV view...

Page 21: ...the volume level The range is 0 100 When the volume buttons are pressed the volume level is displayed automatically on the TV screen Volume 21 Operation Mute When you need to pay attention to surrounded sounds or there is a telephone calling you or there are some guests visiting you the sound elimination mute function is very convenient 1 Press the MUTE button on the remote control and type face w...

Page 22: ...ng on the input signal one or more menu items may not be selectable The picture mode provides the pre defined images settings There are four settings standard vivid mild custom Standard Vivid Mild Custom normal mode mode of watching the movement of picture the effect of the picture is soft picture effect which you favorite Note Only when the item of mode is custom the Contrast Brightness Tint colo...

Page 23: ... any alteration However the top and bottom portions of the picture will be cropped Zoom 2 Choose Zoom 2 when you want the picture to be altered both vertically extended and cropped The picture taking a halfway trade off between alteration and screen coverage Subtitle Choose Subtitle when you want to adjust the picture in a non linear proportion that is more enlarged at top sides and no alteration ...

Page 24: ...s the differences in volume level among broadcasters How to Customize your own audio status 1 Press the MENU button and then use button to select the Audio menu 2 Press the button and then use button to select the desired items 3 Press the button and then use button to adjust the setting 4 When you are satisfied with your choice press MENU button to return to the previous menu or press the EXIT bu...

Page 25: ... signals Mono sound is automatically received if the broadcast is only in Mono even though Stereo or SAP has been selected Select Mono if you want to listen to mono sound during stereo SAP broadcasting Stereo or SAP can be received in a Analog channel 1 Use the SAP button to select your desired MTS mode in a analog signal Each time you press the SAP button Mono Stereo or SAP appear If other langua...

Page 26: ...XIT button to return to TV viewing 1 Press the MENU button and then use button to select the Time menu 2 Press the button and then use button to select the Timer Off 3 Press the button and then use button to select the Mode Off Once or Daily 4 Press the OK button to confirm When selecting Once or Daily item On time item will be active press button to set the desired level press button to button mo...

Page 27: ...me mode is set to Automatic This function allows you to select your local time zone Broadcasted time information will correct the clock display for your local time Daylight Saving setting only available when date time mode is set to Automatic Daylight saving time is automatically set by specially broadcasted signals This menu item allows you to disable the automatic setting of daylight saving time...

Page 28: ...to view the digital captioning Advanced Caption In DTV mode This allows you to configure the way you choose to view the digital captioning Select one of the digital service channels made available by the caption provider There are 6 standard services Service 1 is designated as the Primary Caption Service This service contains the verbatim or near verbatim captions for the primary language being sp...

Page 29: ...el Function Lock B C A Video Audio Time Channel Function Lock Closed Caption Short Middle Long Low Middle High Operation Caption Style In DTV mode Style Default Size Default Font Default Text Color Default Text Opacity Default BG Color Default BG Opacity Default Preview OSD Timeout 1 Press the MENU button and then use button to select the Function menu 2 Press the button and then use button to sel...

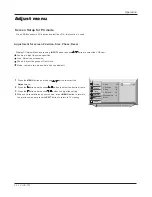
Page 30: ...d default Screen Setup for PC mode 1 Press the MENU button and then use button to select the Adjust menu 2 Press the button and then use button to select the desired items 3 Press the button and then use button to adjust the setting 4 When you are satisfied with your choice press MENU button to return to the previous menu or press the EXIT button to return to TV viewing Video Audio Time Adjust Fun...

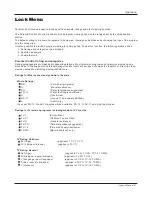
Page 31: ...r direct to video movies use the Movie Rating System MPAA only Ratings for Movies previously shown in theaters Movie Ratings NR Permits all programs G General audience PG Parental guidance suggested PG 13 Parents strongly cautioned R Restricted NC 17 No one 17 and under admitted X Adult only If you set PG 13 G and PG movies will be available PG 13 R NC 17 and X will be blocked Ratings for Televisi...

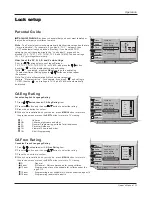
Page 32: ...g as Off thechange of the MPAARating Parental Guide CA Eng Rating and CAFren Rating will be no useful Parental Movie Rating MPAA Blocks movies according to the movie ratings limits specified so children cannot view certain movies You can set the ratings limit by blocking out all the movies with the ratings above a specified level Keep in mind that the movie ratings limit only applies to movies sho...

Page 33: ...able for children under the age of 13 16 ans Programming is not suitable for children under the age of 16 18 ans Programming restricted to adults B C A Video Audio Time Channel Function Lock C C8 G PG 14 18 Password Parental Lock On MPAA Rating Parental Guide CA Eng Rating CA Fren Rating Password Parental Lock On MPAA Rating Parental Guide CA Eng Rating CA Fren Rating Blocks any channels that you ...

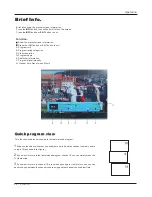
Page 34: ...Day of week Month Program rating F Program signal intensity Operation Brief Info 34 TV LCD TFT Quick program view 1 Suppose the channelnumber you usedjust now is8 and thechannel number youare using is 18 as shown inthe figure If you wantto return tothe last watchedprogram channel 8 you can simplypress the Q View button If you wantto return tochannel 18 press the button again Use this function you ...

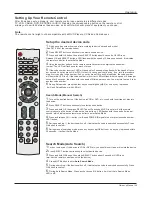
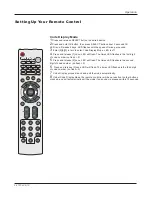
Page 35: ...or with LED off P41 P43 Note The remote control might not be compatible with all DVD Players VCRs and Cable boxes Search Mode Manual Search 1 Turn on the desired device If the device is VCR or DVD etc you should insert tape or disc into the device 2 Press SELECT button continuously to select desired device 3 Press and hold OK then press SELECT about 3 seconds till LED is on aim it at the remote co...

Page 36: ...nd release 2 once LED will flash The times LED flashes is the second digit of code number no flash 0 6 Press and release 3 once LED will flash The times LED flashes is the third digit of code number no flash 0 7 Code Display process is end and exit the mode automatically 8 Under Code Display Mode the remote controller will be no reaction to other buttons pressed and will automatically exit the mod...

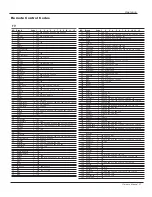
Page 37: ...7 128 130 212 205 206 207 211 9 040 020 010 041 176 144 147 187 180 1 153 1 137 NO B ran d Cod e 1 2 3 4 5 6 7 8 9 10 11 12 76 77 78 79 80 81 Luxman LXI LXI Sears Magnavox Magnavox Majestic Marantz Matsushita Megatron Memorex MGA Midland Minutz Mitsubishi Mitsubishi Motorola MTC Multitech NAD NEC Nikko Noblex Noshi NTC Ntnci Onwa Optmus Optonica Orion Panasonic Penney Penney Peony Philco Philips P...

Page 38: ...i Denon Elta Emerson Fisher GE Go Video Harman Kardon Hitachi Integra JVC KEF Kenwood KLH Konka Lasonic Magnavox Marantz Mitsubishi Mustek NAD Nakamichi Onkyo Optimus Oritron Panasonic Philips Pioneer Profilo PS2 Radioshack RCA Sampo Samsung SEG Sharp Sherwood Shinco Skyworth Sony Sony Sylvania Teac Theta Digital Thomson Toshiba X Box Yamaha Yamakawa Zenith Others 1 2 3 4 5 6 7 8 9 10 11 12 13 14 ...

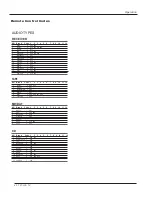
Page 39: ...015 014 052 030 031 038 034 035 033 017 039 040 034 002 003 004 005 1 2 3 4 5 6 7 8 9 10 11 12 13 14 15 16 17 18 19 20 21 22 23 24 25 26 27 28 29 30 31 32 33 34 35 36 37 38 39 40 41 42 43 44 45 46 47 48 49 50 51 52 53 54 55 56 57 58 59 60 61 62 63 64 65 1 3 3 2 2 3 2 1 2 3 4 3 1 8 4 1 4 3 1 3 1 2 7 6 4 8 5 3 1 2 2 8 3 3 2 1 1 5 2 4 5 1 5 8 6 3 1 5 8 2 1 2 1 1 4 1 1 3 4 2 3 5 4 1 4 Operation SETBOX...

Page 40: ... 056 1 057 1 054 1 052 1 057 4 049 050 051 058 1 053 MD DAT NO B ran d Cod e 1 2 3 4 5 6 7 8 9 10 11 12 Denon JVC Kenwood Marantz Panasonic Sansui Sony Teac 1 061 2 063 066 1 062 1 065 1 064 1 067 2 059 060 1 063 1 2 3 4 5 6 7 8 1 2 3 4 5 6 7 8 9 10 11 12 13 14 15 16 1 2 3 4 5 6 7 2 4 1 2 3 1 1 1 1 2 1 1 2 2 2 2 AUDIO TYPES CD NO B ran d Cod e 1 2 3 4 5 6 7 8 9 10 11 12 Denon GoldStar LG JVC Kenwo...

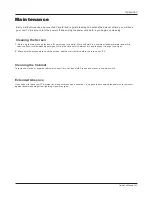
Page 41: ...ay to keep the dust off your screen for a while Wet a soft cloth in a mixture of lukewarm water and a little fabric softener or dish washing detergent Wring the cloth until it s almost dry and then use it to wipe the screen 2 Make sure the excess water is off the screen and then let it air dry before you turn on your TV Cleaning the Cabinet Extended Absence If you expect to leave your TV dormant f...

Page 42: ...ches 794X285X515 mm 37 5 17 0 HL26S HL32S 37 0X11 2X23 4 inches 940X285X595 mm HL26B HL32B 52 9 24 0 26 7X9 7X20 7inches 679X246X525 mm 37 2X12 2X28 0 inches 946X310X710 mm 27 6 12 5 35 3 16 0 HL37S HL42S HL37B HL40B HL42B 43 1X12 8X27 0 inches 1096X325X687mm 62 8 28 5 44 5X13 3X29 5inches 1131X337X750mm 72 8 33 0 50 7 23 0 31 9X9 7X24 4 inches 8 1 1 X 2 4 6 X 6 2 1 m m 39 9X12 2X29 1inches 1014X3...

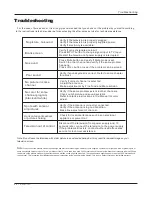
Page 43: ...icture no sound Verify if the television is properly plugged Verify if the television is properly supplied power Verify if electricity is available Blank screen Verify if correct signals are input Press INPUT button to change signal input to TV input Restart the television of power supply is interrupted No sound Press Mute button and verify if Mute mode is set Switch to other channel and verify if...

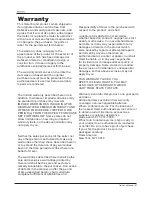
Page 44: ...arranties described herein shall be the sole and exclusive warranties granted by Haier and shall be the sole and exclusive remedy available to the purchaser Correction of defects in the manner and for the period of time described herein shall constitute complete fulfillment of all abilities and Responsibility of Haier to the purchaser with respect to the product and shall constitute full satisfact...

Page 45: ......

Reviews: