20
How to use
Turn on the computer and the TV.
A
Use INPUT on the remote control to select VGA or
B
HDMI source.
Check the image on your TV. There may be noise
C
associated with the resolution, vertical pattern,
contrast or brightness in VGA mode. If noise
is present, change the VGA mode to another
resolution, change the refresh rate to another rate
or adjust the brightness and contrast on the menu
until the picture is clear. If the refresh rate of the VGA
graphic card can not be changed, change the VGA
graphic card or consult the manufacturer of the VGA
graphic card.
Note
Use a DVI cable.
R
Avoid keeping a fixed image on the TV’s screen
R
for a long period of time. The fixed image may
become permanently imprinted on the screen.
The synchronization input form for Horizontal and
R
Vertical frequencies is separate.
Resolution
Y
Mode
Resolution
Frame
frequency
(Hz)
VGA
640
s
480
60Hz
SVGA
800
s
600
60Hz
75Hz
XGA
1024
s
768
60Hz
75Hz
Cable TV Setup
After subscribing to a cable TV service from a local
provider you can watch cable TV programming. The TV
cannot display TV programming unless a TV tuner
device or cable TV converter box is connected to the TV.
For further information regarding cable TV service,
contact your local cable TV
service provider(s).
Connection Option 1
Select 3 or 4 with channel switch on cable box.
A
Tune the TV channel to the same selected output
B
channel on cable box.
Select channels at the cable box or with the cable
C
box remote control.
VIDEO
A
V
IN
AUDIO OUT
L R
L -AUDIO- R
ANT IN
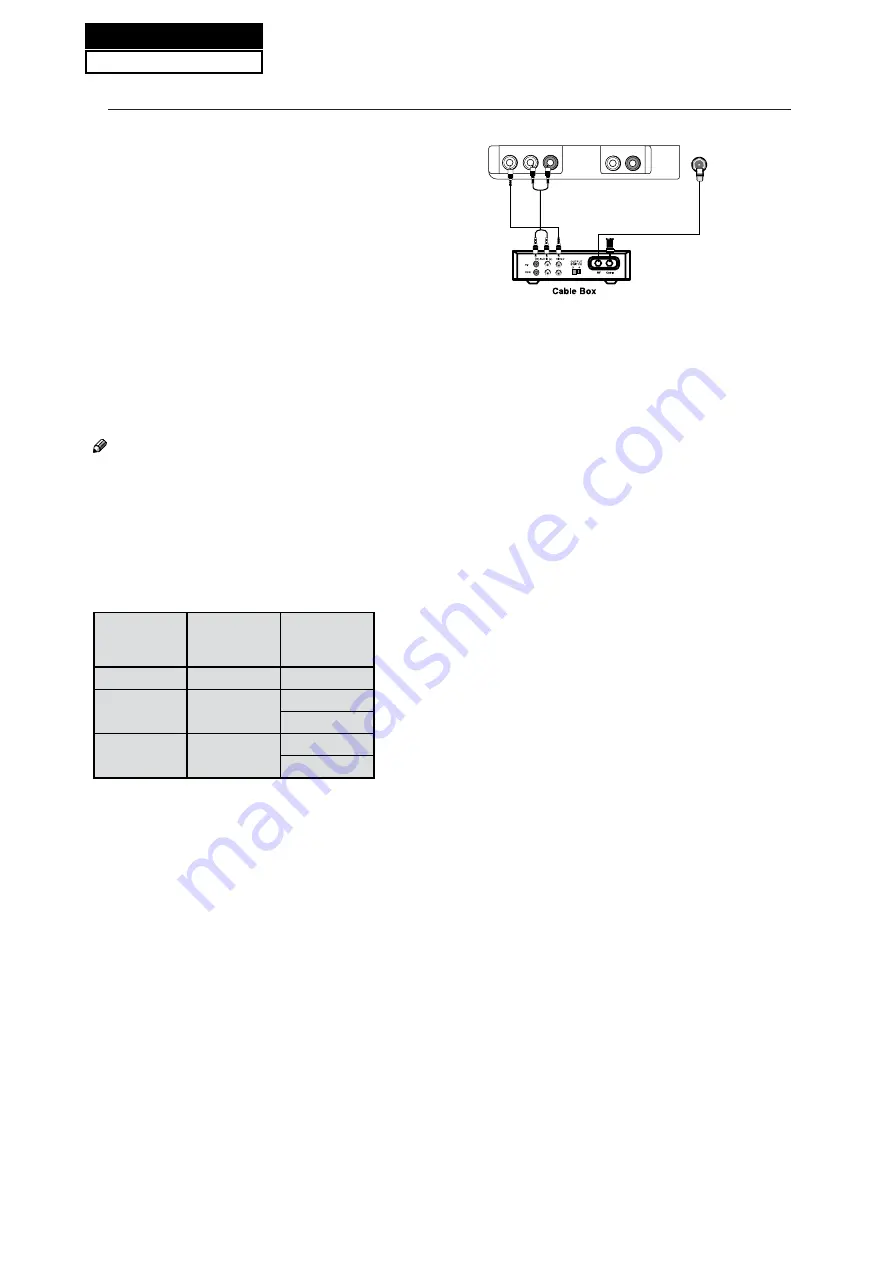
Connection Option 2
Connect the audio and video cables from the Cable
A
Box's output jacks to the TV input jacks, as shown in the
figure.When connecting the TV to a Cable Box, match
the jack colors (Video = yellow, Audio Left = white, and
Audio Right = red).
Select the input source by using the
B
INPUT
button
on the remote control or on the TV.
Select your desired channel with the remote control
C
for cable box.
HDMI input
How To Connect
Connect the cables from the external equipment's
output jacks to the TV input jacks, as shown in the figure.
How To Use
Select the input source by using
A
INPUT
button on
the remote control or on the TV.
Operate the corresponding external equipment.
B
Refer to external equipment operating guide.
Service Manual
Model No.:HL24XSLW2a
Summary of Contents for HL24XSLW2
Page 10: ...Service Manual Model No HL22XSLW2a 9 2 2 External pictures four faces Front Side Left Side ...
Page 11: ...10 Right Side Back Side Service Manual Model No HL24XSLW2a ...
Page 18: ...Service Manual Model No HL24XSLW2a 17 Panle LVDS Connector CNC4 ...
Page 28: ...Service Manual Model No HL24XSLW2a 7 3 Wiring Connection Diagram 27 ...
Page 29: ...28 Service Manual Model No HL24XSLW2a ...
Page 30: ...Service Manual Model No HL24XSLW2a 29 ...
Page 31: ...30 Service Manual Model No HL24XSLW2a ...
Page 32: ...Service Manual Model No HL24XSLW2a 31 ...
Page 33: ...32 Service Manual Model No HL24XSLW2a ...
Page 34: ...Service Manual Model No HL24XSLW2a 33 ...
Page 35: ...34 Service Manual Model No HL24XSLW2a ...
Page 36: ...Service Manual Model No HL24XSLW2a 35 ...
Page 37: ...36 Service Manual Model No HL24XSLW2a ...
Page 38: ...Service Manual Model No HL24XSLW2a 37 ...
Page 39: ...38 Service Manual Model No HL24XSLW2a ...
Page 40: ...Service Manual Model No HL24XSLW2a 39 ...
Page 49: ...9 2 Power Supply Board Failure Check 48 Service Manual Model No HL24XSLW2a ...


