background image

Ventilation

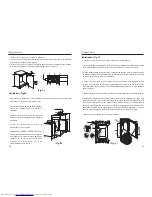
Figure B

*Level the kitchen cabinet unit with a spirit level and a try square. Level the unit by placing

packing material underneath if required.

*A minimum gap of 38mm must be maintained at

the back of the appliance for ventilation.

*Air inlet A must be at least 200 cm square and

air must flow through the panel in the cabinet

plinth.

*Check that the position of the power socket (1)

is correct. AC voltage in the location at which

the appliance is to be used must comply with

that as shown on the data plate located on the

left inside wall of the appliance next to the

vegetable bins. The power supply must be

suitably earthed.

Preparation

9. Remove and replace component (10), at the corresponding position on the left, with the

special tool provided.

10. Fix component (7) in the corresponding opposite position.

Preparation

5

6

(Figure A)

(Figure B)

Installation

Figure C

1.Check that the kitchen unit door is in the correct operating position.

2. Run the mains cable through the unit such that it can be connected to the power supply

after installing the appliance. Remove the cover (6) only if space is restricted.

3.Push the appliance into the kitchen unit leaving a gap of 4mm at the handle side of the

appliance. Align the top and bottom front edges of the support brackets (2) such that they

are flush with the front edge of the kitchen unit. See detail X

4.Cut sealing strip (1) to the height of the kitchen unit and attach to the handle side of the

unit to close the gap between the appliance and the side panel of the kitchen unit (press

the strip (a) into the gap. Pull away the protective strip on the plastic profile before insertion.

5.Push the appliance against the side panel of the kitchen unit and secure it at the top and

bottom (3).

6.Install the door connecting element (4) in accordance with the handle height and the

number of doors. Open the door fully and insert the connecting rod (5) and screw it to the

kitchen unit door maintaining distance (d) to the edge of the door (d=the thickness of the

panel). Adjust the connecting element so that the handle side of the kitchen unit door

does not make contact with the unit body when closed. (Approximately 1mm gap for

large appliances), mount the second door connecting element where appropriate.

7.Plug the open hole in the appliance door.

(Figure C)

⑷ ⑸

d

4mm

x

b

a

Summary of Contents for EKS-150A

Page 1: ...huishoudelijke Koelkast huishoudelijke Koelkast huishoudelijke Koelkast huishoudelijke Koelkast huishoudelijke Koelkast Operation Instructions Operation Instructions Operation Instructions Operation Instructions Operation Instructions Gebrauchsanweisung Gebrauchsanweisung Gebrauchsanweisung Gebrauchsanweisung Gebrauchsanweisung L instruction d emploi L instruction d emploi L instruction d emploi L...

Page 2: ...zur Inbetriebnahme 22 25 Entfernen der Reifschicht Reinigen Außer Betrieb setzen 26 27 Probleme 28 Catalogue Catalogue Catalogue Catalogue Catalogue Conseils de sécurité 29 30 Nom des composants 31 Préparation 32 34 Mise en service 35 Instructions pour l utilisation 36 39 Dégivrage Nettoyage Mise hors service 40 41 Réponses aux problèmes 42 Inhoudsopgave Inhoudsopgave Inhoudsopgave Inhoudsopgave I...

Page 3: ...t responsibility for any damages that may arise due to non observation of the following instruction Cautions Damaged appliances are not to be put into operation In case of doubt consult your supplier Connection and installation of the appliance are not to be carried out in strict compliance with the relative instructions set forth in the Use s Guide For the purpose of safety the appliance must be ...

Page 4: ...vot pin 1 and the spring washer and re fix to the corresponding position on the left Bracket cover 5 should also be moved to the corresponding left position 3 Carefully place the door on the upper bracket 6 and lower bracket 2 Tighten the lower bracket screws to the refrigerator case 4 Place the screw cover 3 over the original lower bracket hole on the right side 5 Change the position of component...

Page 5: ...e appliance Remove the cover 6 only if space is restricted 3 Push the appliance into the kitchen unit leaving a gap of 4mm at the handle side of the appliance Align the top and bottom front edges of the support brackets 2 such that they are flush with the front edge of the kitchen unit See detail X 4 Cut sealing strip 1 to the height of the kitchen unit and attach to the handle side of the unit to...

Page 6: ...the amount of food in storage T Position Conditions 1 2 Summer or ambient temperature between25 35 3 4 Spring autumn or ambient temperature between15 25 4 5 Winter or ambient temperature between5 15 6 7 Quick freeze Cautions for cold storage Hot food must be cooled to room temperature before storing in the refrigerator Dry any water droplets on the food before placing it in the refrigerator It is ...

Page 7: ...acement unplug to disconnect the power Remove the lamp by turning anti clockwise 9 10 Instructions for food storage Storage period will be extended if vegetables are placed with their roots towards the cold source Leaves of carrots or turnips should be removed before storage Put a wad of tissue on the bottle holder before placing bottles on it so that later cleaning is easier Frozen food can be pl...

Page 8: ...is designed for automatic defrosting Frost formed on the back wall will melt and flow via the drainpipe to the evaporat ing container over the compressor on the back of the refrigerator where the heat generated by the compressor will evaporate the water Caution Always keep the drain over the vegetable and fruit tray clear to ensure the normal flow of defrosted water Use the rod provided to clear a...

Page 9: ...un for comparatively longer periods when the refrigerator is first started Wipe water drops on the external surface of the refrigerator with a soft cloth When the refrigerator is opened frequently or stay open too long in humid seasons the cavity will be dampened A slight sound will be heard when the liquid refrigerant circulates or when the compressor switches on and off A slight sound will be he...

Page 10: ...t nicht wenn die nachstehenden Hinweise nicht beachtet werden Sicherheitshinweise verwenden Sie zun Reinigen oder Abtauen auf Keinen Fall ein Dampfreinigungsgerät Der Dampf kann an spannungsführende Teile des Gerätes gelangen und einen Kuitschluß oder Stromschlag verursachen keine elektrischen Geräte innerhalb des Gerätes verwenden Beschädigtes Gerät nicht in Betrieb nehmen im Yweifel beim Liefera...

Page 11: ...en näheres unter Reinigen Stillegen Das Gerät nach dem Reinigen für mindestens 30 Minuten stillegen dann einschalten um es ordnungsgemäß in Betrieb zu setzen Rechts und Linkstüranschlag Abb A Der Anschlag der Gerätetür von links und rechts ist bei diesem Modell möglich 1 Scharnierwinkel 2 und Schraubendeckel 3 abschrauben Gerätetür nach vorn abnehmen und beiseite legen 2 Scharnierbolzen 1 und Fede...

Page 12: ...das eingebaute Gerät mit der Steckerdose angeschlossen sein kann Deckel 6 abnehmen im Fall von eingeschränktem Raum in der Kabinet 3 Stellen Sie das Gerät in die Kabine und halten eine Lücke von 4mm an der Griffseite Richten die obere und untere Kanten des Scharnierwinkels 2 so aus damit sie mit der Vorderkante der Kabine einwandfrei angeschlossen sein können Siehe X 4 Distanzleisten 1 gemäß der H...

Page 13: ... Türöffnens und der Beschickung T Zahlen Verwendungszeit 1 2 Im Sommer Umgebungstemperatur 25 35 C 3 4 Im Frühling und Herbst Umgebungstemperatur 15 25 C 4 5 Im Winter Umgebungstemperatur 5 15 C 6 7 Bei Superfrosteinstellung 21 22 Hinweise zum Kühlschrank Heiße Speisen und Getränke vor dem Einlegen in den Kühlschrank auf Zimmertemperatur abkühlen Vor dem Lagern Lebensmittel waschen und Wasser abwi...

Page 14: ...all eine Lampe mit mehr als 15 W einsetzen Beim Auswechseln der Glühlampe Netzstecker ziehen Abdeckblende abziehen kaputte Glühlampe gegen die Uhrzeigerichtung drehen und neue Glühlampe auswechseln 23 24 Hinweise zum Kühlen Gemüse in Wachstumsrichtung aufbewahren um die Lagerdauer zu verlängern Beim Lagern von Rettich die Blätter wegschneiden um dadurch die Absorbtion von Nährstoffen zu vermeiden ...

Page 15: ...t aus der Schale lösen wenn sie kurze Zeit unter lauwarmes Wasser gehalten wird Messer oder andere Metallwerkzeuge dürfen nicht verwendet werden 25 26 Entfernen der Reifschicht Reinigen Außer Betrieb setzen Bei Stromausfall Aufbewahren der Lebensmittel bei Stromausfall ist auch im Sommer innerhalb von ein paar Stunden problemlos Wenn Sie sich von einem Stromausfall erfahren keine neuen Lebensmitte...

Page 16: ...aturerhöhung des Gerätes und hohe Temperatur des Kompressors bei erster Inbetriebnahme des Gerätes Wasser an der Außenseite des Gerätes bei hoher Raumfeuchtigkeit mit weichem Tuch reinigen Wasser im Gefrierraum durch häufiges oder langes öffnen der Gerätetür in feuchter Jahreszeit Fließgeräusch des Kühlmittels leichtes Geräusch des Kompressors beim Ein und Ausschalten Fließgeräusch des Tauwassers ...

Page 17: ...s Elles pourraient servir a une autre personne si vous revendiez votre appareil La responsabilite de constructeur n est pas engagee si les conseils suivants ne sont pas respectes Ne mettez pas en marche un appareil endommage Dans le doute demandez conseil a votre revendeur Votre systeme de mise a la terre doit etre installe conformement aux prescriptions en vigueur La securite de l appareil en dec...

Page 18: ...andé de procéder à un nettoyage complet avant la première mise en service Gauche Droite Ouverture de Porte Fig A La porte peut être ouverte en deux sens selon votre demande Suivre les instructions ci après pour ouvrir la porte à la gauche 1 Enlever la charnière inférieure 2 et le cache 3 et déposer légèrement la porte en la retirant par le bas et la mettre à côté 2 Enlever le pivot 1 sur la charni...

Page 19: ...uire le cable principal par l unité afin de pouvoir brancher à l alimentation après avoir installé l appareil Enlever le couvercle 6 seulement si l espace est limité 3 Placer l appareil dans l unité de cuisine en laissant un écart de 4 mm au côté de poignée de l appareil Aligner les bords supérieurs et inférieurs avec la charnière 2 tel qu ils sont au ras du bord devant d unité Voir le détail X 4 ...

Page 20: ...érature ambiante 5 15 C Congélation rapide 3 4 3 4 3 4 4 5 6 7 Position Cas de l utilisation thermostat Eté température ambiante 25 35 C 1 2 T 36 Remarques pour la mise en conser vation Laisser refroidir à la température ambiante les aliments chauds avant de les introduire dans le réfrigérateur Essuyer les gouttelettes d eau sur les aliments avant de les introduire dans le réfrigérateur Il est rec...

Page 21: ...our et dévisser l ampoule en tournant dans le sens inverse des aiguilles d une montre selon la figure Remplacer la lampe en tournant dans le sens des aiguilles d une montre Instructions pour l utilisation 3 3 7 9 38 Informations de l utilisation du réfigérateur La période d emmagasinage sera allongée si les légumes sont mis avec leurs racines vers la source froide Les feuilles des carottes ou des ...

Page 22: ...vrer automatique Le givre formé sur le mur postérieur fondra et coulera via l orifice d évacuation du récipient d évaporation au dessus du compresseur au dos du réfrigérateur où la chaleur engendrée par le compresseur évaporera l eau Il est normal qu il se forme des gouttelettes de gelée et d eau sur le mur postérieur du compartiment réfrigérateur Attention Toujours maintenir l orifice d évacuatio...

Page 23: ...ur fonctionnera plus longtemps si l on a introduit des quantités excessives ou si la température ambiante est élevée Sécher la buée sur la surface externe du combiné avec un tissu doux En saison humide l ouverture fréquente et de longtemps crée l air humide interne Le liquide réfrigérant coulant dans l évaporateur produit un bruit d eau L eau coulée dans l évaporateur produit un léger bruit après ...

Page 24: ...s het transport beschadigd apparaat hiet installeren In twijfelgevallen eerst contact opnemen met de Servicedienst of de leverancier Het apparaat uitsluitend volgens het installatievoorschrift plaatsen en aansluiten De elektrische aansluitvoorwaarden en gegevens moeten met de gegevens op het typeplaatje overeenkomen De elektrische veiligheid van het apparaat wordt alleen dan gegarandeerd als het a...

Page 25: ...ndleiding voor verwisselen draairichting deur Figuur A Bij dit model is het mogelijk de deur links en rechts te openen De onderstaande beschrijving is voor het openen van de deur vanaf de rechterkant 1 Verwijder scharnierpen 2 en schroefgat afdekking 3 pak deur af en leg apart 2 Verwijder bovenste scharnier 6 pen 1 en veer Breng deze op dezelfde positie links aan Scharnierafdekking 5 ook verwissel...

Page 26: ...uimte van 4mm overblijft aan de kant waar u de deur opent Stel de boven en onderkant van de steunhaken 2 dusdanig in dat de voorkant van d koelkast aansluit bij de rest van het keukenblok Zie detail X 4 Isoleerstrip 1 op maat snijden en op de kant aanbrengen waar u de deur opent om de ruimte tussen apparaat en rest keukenblok te sluiten duw de strip a in de ruimte Verwijder beschermlaag van het pl...

Page 27: ...vingstemperatuur van 5 15 Bij diepvries instellingen 3 4 3 4 3 4 4 5 6 7 Getallen Conditie T Temperatuurregelaar In de zomer bij een omgevinstemperatuur van 25 35 1 2 49 50 Aanwijzingen voor koelkast Hete gerechten en dranken afkoelen tot kamertemperatuur alvorens in de koelkast te plaatsen Voor opslag water van levensmiddelen afvegen Voor opslag levensmiddelen in verpakking afsluiten om verdampin...

Page 28: ...15W gebruiken Bij verwisselen gloeilamp eerst de stekker uit het stopcontact trekken Kapotte gloeilamp tegen de klok in draaiend verwijderen nieuwe lamp met de klok mee indraaien 51 52 Aanwijzingen voor koelen Fruit bewaren naar rijpheid teneinde houdbaarheid te vergroten Bij opslaan van rettich en wortels blad verwijderen om opname van voedingsstoffen te voorkomen Leg servetten neer alvorens fles...

Page 29: ...schaal te verwijderen deze korte tijd onder lauwwarm water houden 53 54 Ontdooien Schoonmaken Buiten werking stellen Koelkast ontdooien De koelkast ontdooit automatisch Op de achterwand gevormd ijs smelt en stroomt via pijp naar reservoir De warmte van de compressor verdampt het water Opgelet Dooiwater moet ongehinderd door de afvoeropening boven de fruitschaal kunnen stromen Gebruik schoonmaakpin...

Page 30: ...jke temperatuursverhoging van het apparaat en hogere temperatuur van de kompressor bij eerste ingebruikname van het apparaat Water op de buitenkant van het apparaat bij hoge luchtvochtigheid met zachte doek verwijderen Water in vriesgedeelte door vaak of langdurig openen koelkastdeur in vochtige jaargetijden Geluid van koelmiddel licht geruis van compressor bij in en uitschakelen Geluid van dooi w...

Reviews: