background image

.5.

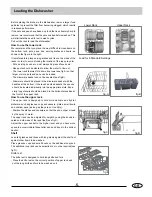
Loading the Dishwasher

Lower Rack

Upper Rack

Load for 9 Standard Settings

GB

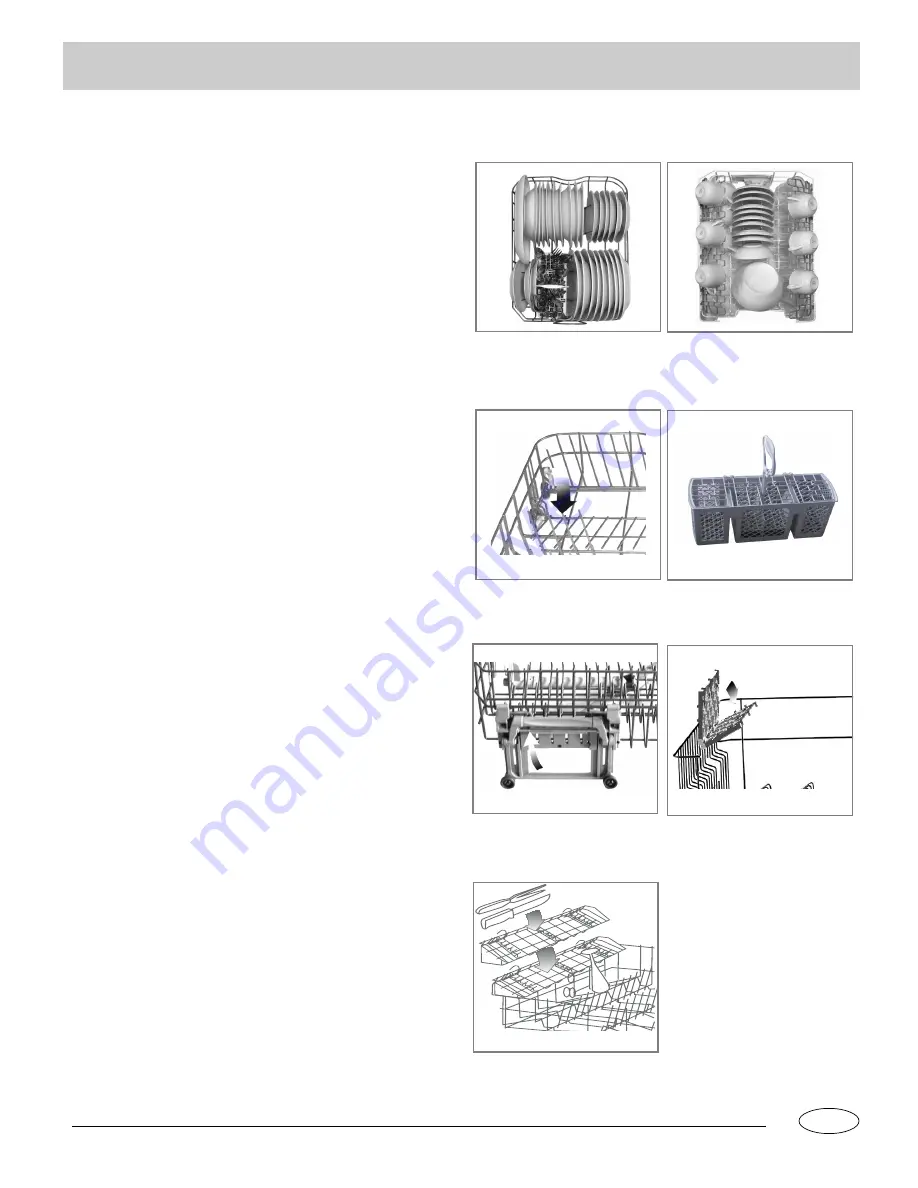
fig.B

fig.A

fig.C

fig.D

fig.E

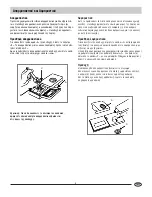
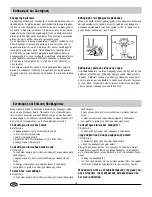
Before placing the dishes in the dishwasher, remove larger food

particles to prevent the filter from becoming clogged, which results

in reduced performance.

If the pots and pans have baked-on food that is extremely hard to

remove, we recommend that they are soaked before washed. This

will eliminate the need for extra wash cycles.

Pull out the rack to load the dishwasher.

How to use the lower rack

We recommend that you place the most difficult to clean items on

the bottom rack: pots, pans, lids, serving dishes and bowls, as

shown in the figure to the right.

It is preferable to place serving dishes and lids on the sides of the

racks in order to avoid blocking the rotation of the top spray arm.

- Pots, serving bowls, etc. must always be placed face down.

- Deep pots should be slanted to allow the water to flow out.

- The lower rack features fold down tine rows (see fig.A) so that

  larger or more pots and pans can be loaded.

- The silverware basket can not be doubled (see fig.B).

- Silverware should be placed in the silverware basket with the

  handles at the bottom; if the rack has side baskets, the spoons

  should be located individually into the appropriate slots. Espe-

  cially long utensils should be placed in the horizontal position at

  the front of the upper rack.

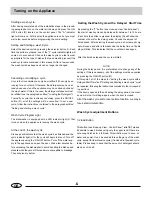
How to use the upper rack

The upper rack is designed to hold more delicate and lighter

dishware, such as glasses, cups and saucers, plates, small bowls

and shallow pans (as long as they are not too dirty).

- Position the dishes and cookware so that they do not get moved

  by the spray of water.

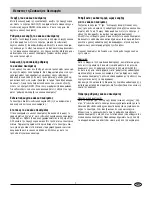
The upper rack can be adjusted for height by using the knobs lo-

cated on both sides of the rack itself (see fig.C).

Adjust the upper basket to the higher level and you have more

space to accommodate those taller pans and trays in the bottom

basket.

Shelf

Lean tall glasses and those with long stems against the shelf-not

against other items to be washed.

Place glasses, cups and small bowls on the additional cup rack.

The additional cup rack can be swivelled in or out as required(see

fig.D).

Knife rest

The knife rest is designed to hold long knife and fork.

- Place the knife rest on the correct position of upper rack, and

  put the long knife and fork to be washed on it.

Summary of Contents for DW9-AFE ME

Page 1: ...GR Domestic Dishwasher DW9 AFE ÈÎÈ Îfi Ï ÓÙ ÚÈÔ È ÙˆÓ DW9 AFE DW9 AFES DW9 AFE ME ...

Page 2: ... Ó ÙÚ Â Ó Ë Û ÛΠÛÏÂÈÙÔ ÚÁ ÎÏ ÛÙ ÙËÓ ÚÔ ÙÔ ÓÂÚÔ fi ÙË Û ÛÎÂ Î È ÔÛ Ó ÛÙ ÙË fi ÙËÓ Ú ÚÂ Ì ÙÔ ÛÙÔÓ ÙÔ Ô Ùfi ÈÓ Û Ì Ô Ï ı Ù ÙÔ ÙÌ Ì Ì ٠ÙÏÔ EÓÙÔ ÈÛÌfi Î È E Ï ÛË ÚÔ ÏËÌ ÙˆÓ Ó ÂÓ Ì ÔÚ ÙÂ Ó Ï ÛÂÙ ÙÔ Úfi ÏËÌ Â ÈÎÔÈÓˆÓ ÛÙ Ì ÙÔ ÂÍÔ ÛÈÔ ÔÙËÌ ÓÔ service ªfiÓÔ ÂÈ ÈÎÂ Ì ÓÔ ÚÔÛˆ ÈÎfi Â Ó È ÂÍÔ ÛÈÔ ÔÙËÌ ÓÔ Ó Î ÓÂÈ Â È ÛÎÂ È Û ÛÎÂ Ô ÂÓ ÚËÛÈÌÔ ÔÈÔ ÓÙ È Ï ÔÓ Ú ÂÈ Ó Ù ıÂÓÙ È ÂÎÙfi ÏÂÈÙÔ ÚÁ Îfi ÔÓÙ ÙÔ Î ÏÒ ÈÔ ÙÚ...

Page 3: ...Î Ï ıÈ E Ùˆ Ú ÔÓ ÂÎ ÛÌÔ F º ÏÙÚÔ Ï Û Ì ÙÔ G À Ô Ô ÔÚÚ ÓÙÈÎÔ Î È Ï Ì Ú ÓÙÈÎÔ H ÎË Ï ÙÈÔ I TÚ ÙÔ Ú ÔÓ ÂÎ ÛÌÔ Ï ÙÔ µ ıÔ Ô ÃˆÚËÙÈÎfiÙËÙ ÂÛË ÓÂÚÔ ÎÂÓÙÚÈÎÔ ÁˆÁÔ ÛË ËÏÂÎÙÚÈÎÔ ÚÂ Ì ÙÔ K Ù Ó ÏˆÛË ÈÛ Ô 45 ÂÎ Ù 60 ÂÎ Ù 85 ÂÎ Ù 9 Ù Ô ÔÈËÌ Ó ı Π0 03 0 6 MPa 220 240V 50Hz 2150W  ÓÈÎ Ú ÎÙËÚÈÛÙÈÎ ...

Page 4: ...ÔÛı ÛÙ ÙÔ Ï ÙÈ ÌfiÏÈ ÚÈÓ fi ÙÔ Ï ÛÈÌÔ ƒ ıÌÈÛË ÙË Î Ù Ó ÏˆÛË Ï ÙÈÔ Ô Ï ÓÙ ÚÈÔ È ÙˆÓ Â Ó È ÂÍÔ ÏÈÛÌ ÓÔ ÌÂ Û ÛÙËÌ Ô Ú ıÌ ÂÈ ÙÔ Â Â Ô Î Ù Ó ÏˆÛË Ï ÙÈÔ Û ÌÊˆÓ Ì ÙË ÛÎÏËÚfiÙËÙ ÙÔ ÓÂÚÔ Ô ÚËÛÈÌÔ ÔÈ Ù Π٠ÙË ÏÂÈÙÔ ÚÁ ÁÈ Ó ÂÏÙÈÛÙÔ ÔÈËıÂ Î È Ó ÚÔÛ ÚÌÔÛÙ ÙÔ Â Â Ô Î Ù Ó ÏˆÛË Ï ÙÈÔ ÛÙÈ ÈÎ Û Û Ó ı ΠÂÓÒ ÂÚÈÔÚ ÂÈ ÙË Î Ù Ó ÏˆÛË ÛÙÔ ÂÏ ÈÛÙÔ M ÔÚ ÙÂ Ó Û Ì Ô Ï ı Ù ÙÈ ÙÔ ÈÎ Ú Û ÂÙÈÎ Ì ÙËÓ ÛÎÏËÚfiÙËÙ ÙÔ ÓÂÚÔ ÛÙË...

Page 5: ...È Ù Ó Ï Ì Ô Ó Î È Ó ÛÙÂÁÓÒÓÔ Ó ˆÚ ÏÂÎ Â H Ô Ô Ú ÛÎÂÙ È ÛÙÔ ÂÛˆÙÂÚÈÎfi Ì ÚÔ ÙË fiÚÙ Î È Ú ÂÈ Ó ÁÂÌ ÂÈ Î ıÂ 80 Î ÎÏÔ Ï Û Ì ÙÔ fiÙ Ó Ó ÂÈ Ë ÂÓ ÂÈÎÙÈÎ Ï Ó ÌËÏÔ Â È Ô Ï Ì Ú ÓÙÈÎÔ ÁÈ ÙÈ Û ÛÎÂ ÌÂ Ù ÙË ÏÂÈÙÔ ÚÁ ÚÔÛı ÎË Ï Ì Ú ÓÙÈÎÔ È Ó ÓÔ ÍÂÙÂ ÙËÓ Ô Ô ÛÙÚ ÙÂ ÙÔ Î ÎÈ C ÓÙ ÛÙÚÔÊ fi ÙÔ Â ÎÙÂ ÙÔ ÚÔÏÔÁÈÔ Î È ÌÂÙ ÚÔÛı ÛÙÂ ÙÔ Ï Ì Ú ÓÙÈÎfi ÊÚÔ ÓÙ ÔÓÙ Ó ÌËÓ ÍÂ ÂÈÏ ÛÂÈ ÔÛfiÙËÙ Ï Ì Ú ÓÙÈÎÔ Ô ÚËÛÈÌÔ ÔÈÂ Ù È ÁÈ Î ıÂ Î ÎÏÔ Ì ...

Page 6: ... ıÈ Ù ÎÔ Ù ÏÈ Ú ÂÈ Ó ÙÔ ÔıÂÙÔ ÓÙ È ˆÚÈÛÙ ÛÂ Î Ù ÏÏËÏÂ Û ÈÛÌ T È È ÈÙ Úˆ Ì ÎÚÈ Ì ÈÚÔ ÚÔ Ó Ú ÂÈ Ó ÙÔ ÔıÂÙÔ ÓÙ È ÛÂ ÔÚÈ fiÓÙÈ ı ÛË ÛÙÔ Ì ÚÔÛÙÈÓfi Ì ÚÔ ÙÔ Óˆ Î Ï ıÈÔ Ò Ó ÚËÛÈÌÔ ÔÈÂ ÙÂ ÙÔ Óˆ Î Ï ıÈ Ô Óˆ Î Ï ıÈ Û Â È ÛÙËÎÂ ÁÈ Ó ÂÙ È Ù ÈÔ Â ıÚ ÛÙ Î È ÈÔ ÂÏ ÊÚ È ÙÈÎ fi ˆ ÔÙ ÚÈ ÊÏÈÙ ÓÈ Î È È Ù ÎÈ ÙÔ Î Ê ÙÛ ÁÈ Ô Î ıÒ Î È È Ù ÌÈÎÚ Ì ÔÏ ÎÈ Î È ÚË ÙËÁ ÓÈ ÂÊ fiÛÔÓ ÂÓ Â Ó È ÔÏ ÚÒÌÈÎ Ô ÔıÂÙ ÛÙÂ Ù È Ù Î È Ù Ì ÁÂÈÚÈÎ Û...

Page 7: ... Ï ٠ÚÈÓ ÂÈ ÛÂÙ ÙÔ Ï ÓÙ ÚÈÔ È ÙˆÓ ÁÈ Ó ÌËÓ È ÛÂÙÂ Ù È Ù Î È Ù Ì ÈÚÔ ÚÔ Ó ÂÓÒ Â Ó È ÎfiÌ Î Ù Î È ÈÔ Â ÎÔÏÔ Ó Û ÛÔ Ó È Ï ÔÓ Ì Ùfi ÙÔÓ ÙÚfi Ô ı ÛÙÂÁÓÒÛÔ Ó Î Ï ÙÂÚ P ıÌ ÔÓÙ Î ı ÛÙ ÚËÛË ÒÚ Ó ÚÍË ÁÈ ÙÔÓ Î ÎÏÔ Ï Û Ì ÙÔ È ÔÓÙ ÙÔ Ï ÎÙÚÔ F Ï Ï ÙÔÌÂÚ Ô Ë Ó Î ÂÏ Á Ô Ì ÔÚ ÙÂ Ó ÔÚ ÛÂÙ ÙË Î ı ÛÙ ÚËÛË Ó ÚÍË ÙÔ Î ÎÏÔ Ï Û Ì ÙÔ fi 1 ˆ 12 ÒÚ K ı ÊÔÚ Ô È ÂÙ ÙÔ Ï ÎÙÚÔ Ë ÔıfiÓË G ı ÂÌÊ Ó ÂÈ ÙÔÓ ÚÈıÌfi ÙˆÓ ˆÚÒÓ Î ı ÛÙ...

Page 8: ...ÚËÛÈÌÔ ÔÈ Ù ÏÈÎ Î ı ÚÈÛÌÔ ÌÂ È Ï ÙÈÎ ÚÔ fiÓÙ Ô Ú Ô Ó È Ó Î ı Ú ÛÂÙ ٠Â͈ÙÂÚÈÎ Î È ÂÏ ÛÙÈÎ Ì ÚË ÙÔ Ï ÓÙËÚ Ô È ÙˆÓ ÌËÓ ÚËÛÈÌÔ ÔÈ Ù ÏÈÎ Î ı ÚÈÛÌÔ ÌÂ È Ï ÙÈÎ ÚÔ fi ÓÙ Ô Ú Ô Ó ÃÚËÛÈÌÔ ÔÈ ÛÙÂ Î Ï ÙÂÚ ÌfiÓÔ Ó Ó Ì ÂÛÙfi Û Ô ÓfiÓÂÚÔ È Ó Ê ÈÚ ÛÂÙ ÏÂÎ Â fi ÙËÓ Â ÈÊ ÓÂÈ ÙÔ ÂÛˆÙÂÚÈÎÔ ÚË ÛÈÌÔ ÔÈ ÛÙÂ Ó ÚÂÁÌ ÓÔ Ó Î È Ï ÁÔ Û ÚÔ Í È ÚÔ fiÓÙ Î ı ÚÈÛÌÔ ÂÈ ÈÎ ÁÈ Ï ÓÙ ÚÈ È ÙˆÓ ŸÙ Ó ËÁ ÓÂÙÂ È ÎÔ ŸÙ Ó ËÁ ÓÂÙ ÛÙÈ È ÎÔ Û ...

Page 9: ... at 50 Rinse with cold water Rinse with hot water 15g Economic test cycle for IECEN50242 Ó Î K ÎÏÔ Ï Û Ì ÙÔ ÎÏÔ ÏËÚÔÊÔÚ Â E ÈÏÔÁ K ÎÏÔ ÂÚÈÁÚ Ê K ÎÏÔ Ï Û Ì ÙÔ ÔÚÚ ÓÙÈÎfi Ì Ú ÓÙÈÎfi ÔÏ ÚÒÌÈÎ È Ù Î ÙÛ ÚfiÏÂ Î È ÙËÁ ÓÈ Ó ÌËÓ ÚËÛÈÌÔ ÔÈÂ Ù È Ì  ÛıËÙ ÓÙÈΠÌÂÓ ÓÙ ÙÈÎfi Ï ÛÈÌÔ Úfi Ï ÛË Ì ÂÛÙfi ÓÂÚfi Ú ÙÂÙ Ì ÓÔ Ï ÛÈÌÔ ÛÙÔ 700 C Á ÏÌ Ì ÎÚ Ô ÓÂÚfi Á ÏÌ Ì ΠÙfi ÓÂÚfi Ù ÁÓˆÌ ÓÔÓÈÎ ÚÒÌÈÎ È Ù Î ÙÛ ÚfiÏÂ Î È ÙËÁ ÓÈ Ó ı...

Page 10: ... ÛÊ ÍÙ ÏÈ ÙÔ Ï ÛÙÈ Ô ÂÈÛ ÁˆÁ ÓÂÚÔ ÛÙË ı ÛË ÙÔ ª ÔÚ ΠÔÈ ÛÙÈÁÌ ÙÔ Ï ÓÙ ÚÈÔ È ÙˆÓ Ó ÌËÓ ÏÂÈÙÔ ÚÁ Πıfi ÏÔ Ó ÌËÓ ÏÂÈÙÔ ÚÁ ۈÛÙ ÚÈÓ Î Ï ÛÂÙ ÙÔ ÂÍÔ ÛÈÔ ÔÙËÌ ÓÔ service Î ÓÙ ÌfiÓÔÈ Û ÌÂÚÈÎÔ ÏÔ ÂÏ Á Ô E Ó ÂÓ Ï ı ÙÔ Úfi ÏËÌ Ì ÙÈ Û Ì Ô Ï Î È È ÈÎ Û Â Ô ÎÔÏÔ ıÔ Ó ÙfiÙ ı Ú ÂÈ Ó Â ÈÎÔÈÓˆÓ ÛÂÙ Ì ÙÔ ÂÍÔ ÛÈÔ ÔÙËÌ ÓÔ service Ô Ï ÓÙ ÚÈÔ È ÙˆÓ ÂÓ ÍÂÎÈÓ Ï ÁÍ ÙÂ Â Ó ÙÔ ÛÌ ÚÂ Ì ÙÔ ÂÈ Ì ÂÈ ÛˆÛÙ ÛÙËÓ Ú ÙÔ Û ÙÈ ÂÈ...

Page 11: ...È ÎÏ ÛË ÌÂÁ Ï ÙÂÚË fi 2Ô Ó Ë Û ÛÎÂ Â Ó È Â ı ÁÚ ÌÌÈÛÌ ÓË ı ÂÍ ÛÊ ÏÈÛÙÂ Ë ÛˆÛÙ fi ÔÛ ÙË Ó ÂÛË ÎÚ Ô ÓÂÚÔ Ó ÛÙ ÙÔ Ï ÛÙÈ Ô ÚÔ ÎÚ Ô ÓÂÚÔ Ì ÂÈ ÈÎfi Ï ÛÙÈ Ô Ï ÓÙË Ú Ô 3 4 Î È Â Èˆı Ù fiÙÈ Â Ó È Î Ï ÛÊÈÁÌ ÓÔ ÛÙË ı ÛË ÙÔ Ï Ì 1 Ó ÔÈ ÛˆÏËÓÒÛÂÈ ÚÔ ÓÂÚÔ Â Ó È Î ÈÓÔ ÚÁÈ ÂÓ Ô Ó ÚËÛÈÌÔ ÔÈËı ÁÈ ÌÂÁ ÏË ÚÔÓÈÎ ÂÚ Ô Ô Ê ÛÙ ÙÔ ÓÂÚfi Ó ÙÚ ÍÂÈ ÁÈ Ó ÛÈÁÔ Ú Ù Ù fiÙÈ ÙÔ ÓÂÚfi Â Ó È Î ı Úfi ˆÚ Î Ù ÏÔÈ Ó ÂÓ ÏËÊıÂ Ù Ë ÚÔÊ Ï ...

Page 12: ...Û Ì ÔÏÔ ÛÙÔ ÚÔ fiÓ ÛÙË Û ÛÎÂ Û ÙÔ ÚÔ fiÓÙÔ ËÏÒÓÂÈ fiÙÈ Ùfi ÙÔ ÚÔ fiÓ ÂÓ Ì ÔÚÂ Ó ÔÚÚÈÊı Ì ٠ÔÈÎÈ Î ÔÚÚ ÌÌ Ù ÓÙ ıÂÙ Ú ÂÈ Ó Ú Ôı Û Π٠ÏÏËÏÔ ÛËÌÂ Ô Û ÁÎ ÓÙÚˆÛË ÁÈ Ó Î ÎψÛË ËÏÂÎÙÚÈÎÔ Î È ËÏÂÎÙÚÔÓÈÎÔ ÂÍÔ ÏÈÛÌÔ Í ÛÊ Ï ÔÓÙ fiÙÈ ÙÔ ÚÔ fiÓ ÔÚÚ ÙÂÙ È ÛˆÛÙ ÔËı Ù ÛÙËÓ ÔÙÚÔ Èı ÓÒÓ ÚÓËÙÈÎÒÓ Û Ó ÂÈÒÓ ÛÙÔ ÂÚÈ ÏÏÔÓ Î È ÙËÓ ÓıÚÒ ÈÓË Á ÔÈ fi ÔÈÂ Ì ÔÚÂ Ó ÚÔÎÏËıÔ Ó ÛÂ È ÊÔÚÂÙÈÎ ÂÚ ÙˆÛË fi ÙÔÓ Î Ù ÏÏËÏÔ ÂÈÚÈÛÌfi ÙÔ ÙÔ ÚÔ...

Page 13: ...he door when it is open as this could overturn the dishwasher Do not touch the heating element during or after a wash cycle If the appliance malfunctions turn off water supply to the appli ance and disconnect the plug from the wall socket Refer to the section entitled Troubleshooting If you cannot solve the problem contact a authorised service centre Only specialised personnel are authorised to ma...

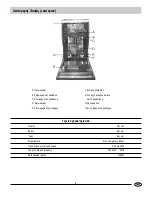
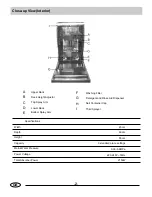
Page 14: ...Rack F G H I Washing Filter Bottom Spray Arm Detergent and Rinse Aid Dispenser Third Sprayer Specifications Width 45 cm Depth 60 cm Height 85 cm Capacity 9 standard place settings Mains Water Pressure 0 03 0 6MPa Power Voltage 220 240V 50Hz 2150W Total Absorber Power Salt Container Cap GB ...

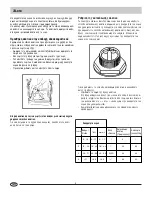
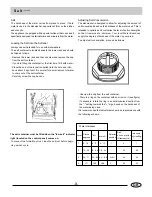
Page 15: ...icator light located on the control panel comes on To prevent the formation of rust load the salt just before begin ning a wash cycle Adjusting Salt Consumption The dishwasher is designed to allow for adjusting the amount of salt consumed based on the hardness of the water used This is intended to optimise and customise the level of salt consumption so that it remains at a minimum Your local Water...

Page 16: ...is product makes dishes sparkle and helps them to dry with out spotting The dispenser is located on the inside panel of the door and should be filled after every 80 wash cycles or when the rinse aid indicator light comes on for those models with this feature Loading the Rinse Aid To open the dispenser turn the C cap in an anti clockwise direction and then pour in the rinse aid making sure not to o...

Page 17: ...be doubled see fig B Silverware should be placed in the silverware basket with the handles at the bottom if the rack has side baskets the spoons should be located individually into the appropriate slots Espe cially long utensils should be placed in the horizontal position at the front of the upper rack How to use the upper rack The upper rack is designed to hold more delicate and lighter dishware ...

Page 18: ...nd Setting and Starting a wash cycle must be repeated following the instructions contained in the correspond ing sections If the door is opened to the unit during the delay period the count down will stop It will begin again when the door is closed All of the wash cycle set to reverse time function we may in focus start circulate time At the end of the wash cycle Six beeps will indicate that the w...

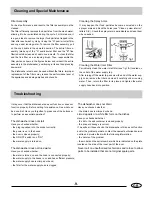
Page 19: ...cket No Solvents or Abrasive Cleaning Products To clean the exterior and rubber parts of the dishwasher do not use solvents or abrasive cleaning products Use only a cloth and warm soapy water To remove spots or stains from the surface of the interior use a cloth damp and a little white vinegar or a cleaning product made specifically for dishwashers When You Go on Holiday When you go on holiday it ...

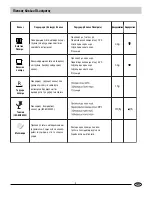
Page 20: ... cycle Pre wash of dishes pots and pans while waiting for the load to be completed after the sub sequent meal Pre wash with cold water Extended wash at 55 Rinse with cold water Rinse with hot water Drying Short wash at 40 Cold rinse Short cold wash to prevent food residue from drying on the dishes 15g Pre wash with warm water Extended wash at 70 Rinse with cold water Rinse with hot water Drying 30...

Page 21: ... buttons or to perform an essential operation The dishwasher does not start Have you checked whether the plug is pushed into the socket correctly the power is on in the house the door is closed properly the ON OFF switch is on ON the water supply is turned on GB The dishwasher does not load water Have you checked whether the water is turned on and the hose is connected properly the water supply to...

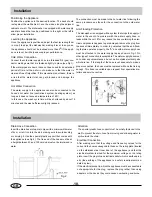
Page 22: ... enough This hose is available upon request from specialised re tailers and service centres Drain Hose Connection Insert the drain hose into a drain pipe with a minimum diameter of 4cm or let it run into the sink making sure to avoid bending or crimping it Use the special plastic support that comes with the appliance see Fig 2 The free end of the hose must be at a height between 40 and 100 cm and ...

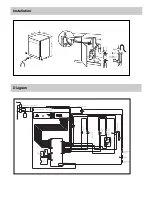
Page 23: ...Installation Diagram ...

Page 24: ...ctronic equipment By ensuring this product is disposed of correctly you will help prevent potential negative consequences for the environment and human health which could otherwise be caused by inappropriate waste handling of this product For more detailed information about recycling of this product please contact your local city office your household waste disposal service or the shop where you p...

Reviews: