background image


22

Service Manual


Model No: DW12-PFE2-E/DW12-PFE2-U/DW12-PFE2ME-U


Issue


Rev.


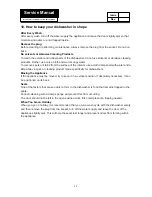
10. How to keep your dishwasher in shape 

After Every Wash 

After every wash, turn off the water supply the appliance and leave the door slightly ajar so that 

moisture and odors are not trapped inside. 

Remove the plug 

Before cleaning or performing maintenance, always remove the plug from the socket. Do not run 

risks. 

No solvents or Abrasive Cleaning Products 

To clean the exterior and rubber parts of the dishwasher, do not use solvents or abrasive cleaning 

products. Rather, use only a cloth and warm soapy water. 

To remove spots or stains from the surface of the interior, use a cloth dampened with water and a 

little while vinegar, or cleaning product made specifically for dishwashers. 

Moving the Appliance 

If the appliance must be moved, try to keep it in a vertical position. If absolutely necessary, it can 

be positioned on its back. 

Seals 

One of the factors that cause odors to form in the dishwasher is food that remains trapped in the 

seals. 

Periodic cleaning with a damp sponge will prevent this from occurring. 

The door should not be left in the open position since this could present a tripping hazard. 

When You Go on Holiday 

When you go on holiday, it is recommended that you run a wash cycle with the dishwasher empty 

and then remove the plug from the socket, turn off the water supply and leave the door of the 

appliance slightly ajar. This will help the seals last longer and prevent odors from forming within 

the appliance. 


Summary of Contents for DW12-PFE2-E

Page 1: ...DISHWAHSER DW12 PFE2 E DW0907S002V0 DW12 PFE2 U DW12 PFE2ME U 2009 Qingdao Haier Dishwasher Co Ltd...

Page 2: ...CONNECTION 7 4 4 DRAIN HOSE CONNECTION 7 4 5 ELECTRICAL CONNECTION 8 4 6 DISSEMBLE AND ASSEMBLE 9 5 PARTS AND FUNCTIONS 14 5 1 CLOSE UP VIEW CONTROL PANEL 14 5 2 DISHWASHER INTERIOR 14 6 HOW TO FILL...

Page 3: ...INSE AID 25 12 4 FILTERS 25 12 5 SPRAY ARMS 25 13 FAULT FINDING 26 13 1 RESOLVING MINOR PROBLEMS YOURSELF 26 13 2 PROBLEMS 26 13 3 DURING WASHING 27 13 4 WITH THE DISHES CUTLERY ETC 28 14 MAINTENANCE...

Page 4: ...rd EN50242 A grade for washing efficiency of European standard EN50242 A grade for drying efficiency of European standard EN50242 Super capacity for 12 settings Electronic control delay washing Water...

Page 5: ...environment and human health which could otherwise be caused by inappropriate waste handling of this product For more detailed information about recycling of this product please contact your local cit...

Page 6: ...flattened 3 3 During normal use The dishwasher must only be used by adults for the washing of household dishes and cooking utensils This appliance cannot be installed outdoor not even if the area in...

Page 7: ...ualified persons in order to avoid a hazard To maintain the EFFICIENCY and SAFETY of this appliance we recommend call only the Service Centers authorized by the manufacturer always use original Spare...

Page 8: ...t it is fastened tightly in place see fig A If the water pipes are new or have not been used for an extended period of time let the water run to make sure that the water is clear and free of impuritie...

Page 9: ...13 amp 3 pin plug fitted with a 13 amp fuse Should the fuse require replacement it must be replaced with a fuse rated at 13 amp and approved to BS1362 If the mains plug is unsuitable for the socket ou...

Page 10: ...Dissemble and assemble screwdriver cross screwdriver Dissemble and assemble for dishwasher components Dissemble and assemble for dishwasher components blade used for unpacking electric drill used for...

Page 11: ...e cross screwdriver to drive two screws which are on left top of machine off side panel Use the cross screwdriver to drive five screws which are in left back of machine off the right side panel Open t...

Page 12: ...salt adding valve and the low salt switch Remove the three clips for fixing the rubber connect pipe then pull out the rubber pipe Open the out door you can see the salt adding cover then circumrotate...

Page 13: ...disassembly Remove the two self drilling bolts for fixing the heater bracket from the middle bar then remove the heater Pull out the three connector of the heater Remove the pipe hoop Remove the conn...

Page 14: ...ssue Rev Detergent dispenser disassembly Open the door disassemble the outer door Accord to the disassembly step Close the door use screwdriver to drive the 6 screws of Detergent Dispenser off pull th...

Page 15: ...C Speedup Wash Indicator H Low Rinse Aid Indicator D Delayed Start Button I Programme Button E Delayed Start Indicator J Programme Indicator 5 2 Dishwasher interior a Upper Rack f Salt Container Cap...

Page 16: ...t is normal for a small amount of water to come out of the salt container Carefully screw the cap back on 6 3 Adjusting salt consumption The dishwasher is designed to allow for adjusting the amount of...

Page 17: ...e setting is 3 7 2 How to fill detergent dispenser 7 2 1 Detergent Detergent specifically intended for use with dishwashers must be used The dispenser must be refilled before the start of each wash cy...

Page 18: ...otice The usage of 3 in 1 or similar tablets is forbidden when Rapid Wash Heat wash and Soak programmes are selected Notice Do not place the tablets in the tub or the cutlery basket as this will resul...

Page 19: ...ed face down see fig C Deep pots should be slanted to allow the water to flow out The silverware basket can be doubled see fig D so that only one section may be used when the silverware load is light...

Page 20: ...Adjust the upper basket to the higher level and you have more space to accommodate those taller pans and trays in the bottom basket 8 3 Shelf Lean tall glasses and those with long stems against the sh...

Page 21: ...rinse Short cold wash to pre vent food residue from drying on the dishes Pre wash use cold water Extended wash at 50 C Rinse with cold water Rinse with hot water Drying Wash at 45 C Rinse with cold wa...

Page 22: ...with rinse aid setting 5 Delayed Start Detergent Extended Wash Prewash Rinse Aid Duration in minutes Energy consump tion in kWh 25g 15g 25g 15g 25g 20g 15g 10g 15g 10g 5g 5g 5g 5g 5g 5g 112 94 102 90...

Page 23: ...loth dampened with water and a little while vinegar or cleaning product made specifically for dishwashers Moving the Appliance If the appliance must be moved try to keep it in a vertical position If a...

Page 24: ...derway press the button A for 3 seconds all of the settings will be canclled Interrupping the programme Open the door Caution There is a risk of water squirting out from inside the appliance Do not op...

Page 25: ...dy drained the wash water If this is the case the detergent dispenser must be refilled see the paragraph entitled Loading the detergent To modify a cycle that is already underway follow the instructio...

Page 26: ...4 Filters The filters 8 9 prevent larger particles of food in the water from reaching the pump These particles may occasionally block the filters When the appliance has finished washing check the filt...

Page 27: ...upply Plug not inserted in wall socket Appliance door not closed properly Programme button has not been pressed Water tap not turned on Blocked strainer in water intake hose The strainer is situated i...

Page 28: ...type number Mod And the serial number S N which are indicated on the plate located on the side of the inner part of the door Lower spray arm rotates with difficulty Spray arm is blocked by small items...

Page 29: ...ets of water could not reach all parts of the dishes etc Too many items in the rack Items in the rack were touching each other Not enough detergent was added to dispenser Selected wash programme was n...

Page 30: ...en completely removed Detergent does not have a sufficient bleaching effect Washing temperature was set too low Traces of rust on cutlery Cutlery is not sufficiently rustproof Salt content in washing...

Page 31: ...ction or does not function properly Before calling for assistance Iet us see what can be done first have you forgotten to press one of the buttons or to perform an essential operation 14 2 Trouble Sho...

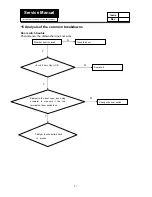
Page 32: ...avometer to measure if the two terminals of door switch is on check if door flap is OK 15 Analysis of the common breakdowns Door switch trouble Phenomenon the dishwasher does not work N Y N Y N Y Cab...

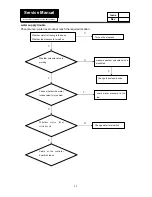
Page 33: ...valve is working Cable or the controller board is broken water supply trouble Phenomenon water level cannot reach the required location measure whether solenoid valve is electrified Change the solenoi...

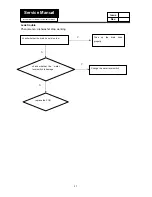
Page 34: ...ntroller board is broken The drain pump is broken Drain pump trouble Phenomenon water cannot be drained Repair the pipeline and drain pump Whether drain pump is working Y N Whether the pipeline and dr...

Page 35: ...suspected damaged Check whether the circuit between the two terminals is open Check the resistance between the heater resistor Heating element trouble Phenomenon Heating element cannot work Connect i...

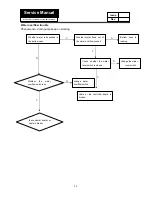
Page 36: ...ter overflow swich is ok Whether water is deposited is the bottom case Whether water flows out of the water overflow conduit Bottom case is leaking change water overflow switch the controller boardr o...

Page 37: ...v replace the power switch check whether the circuit between the two terminals is open Power supply trouble Phenomenon dishwasher cannot work N N Connect it properly check whether the power connector...

Page 38: ...U DW12 PFE2ME U Issue Rev replace the PCB check whether the water level switch is damage Leak trouble Phenomenon dishwasher stop working Y Y Drive up the drain hose properly check whether the drain h...

Page 39: ...12 PFE2 U DW12 PFE2ME U Issue Rev 16 Technical data Width 60 cm Depth 60 cm Height 85cm Capacity 12 standard place settings Mains water pressure 0 03 0 6MPa Power voltage 220 240V 50Hz Total absorbed...

Page 40: ...2 S 2 1 1 9 TS S GND TS GND GND CnP 220V 240V 50Hz Wiring box C 2 1 3 4 6 5 1 2 3 4 5 6 7 8 9 Door switch Water level switch Drain pump Dispenser valve Softener valve Overflow Inlet water Temperature...

Page 41: ...Sincere Forever Haier Group Haier Industrial Park No 1 Haier Road 266101 Qingdao China http www haier com...

Reviews: