background image

Maintenance

8

For series


602 and AB242ACEAA, AB242ACERA, AB282ACEAA, AB362ACERA,

AB482ACEAA

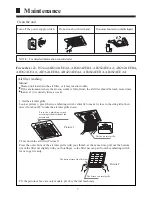
Clean the air filter

Instructions :

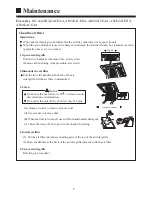
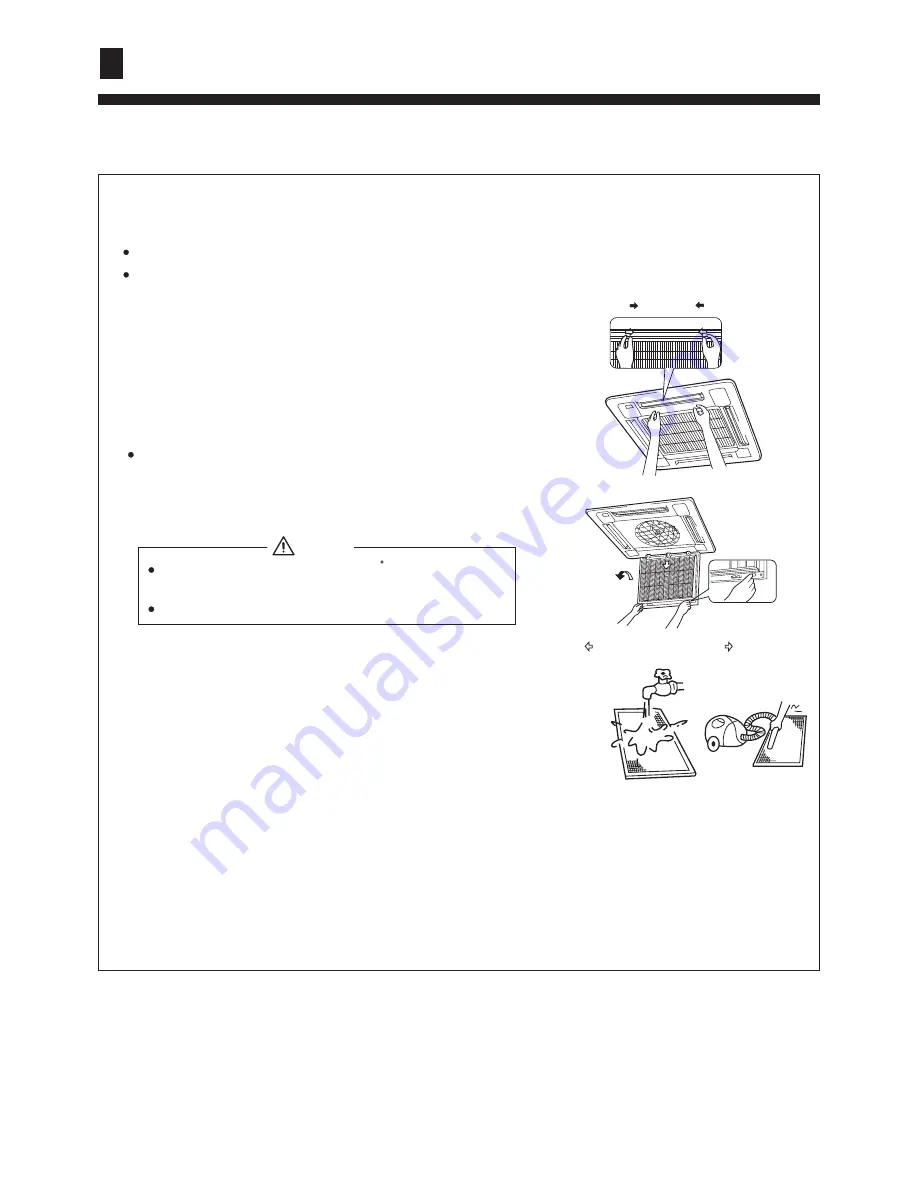
1. Open air inlet grille

2.Dismantle the air filter

3. Clean

When not for cleaning, do not dismantle the air filter, otherwise it may cause trouble.
When the air conditioner is used in a dusty environment, the air filter should  be cleaned more often
(generally once every two weeks).

Pull the two handles at the same time,  slowly draw
them out. (when closing   it, the procedure is reversed.)

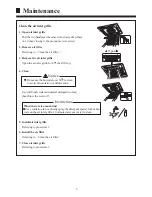
Pull the two side handles at the back of the air
inlet grille, lift the air filter to dismantle it.

Use cleaner or water to clean to


remove dust.

(A) Use cleaner to remove dust.

(B) When the dust is too much, use soft brush and neutral detergent.
(C) Throw the water off, then put it in the shadow for airing.

4. Install air filter

5. Close air inlet grille

(1)

.

Put the air filter into those extruding parts at the top of the air inlet grille.

(2).Draw the handles at the back of the air inlet grille inwards to fix the air filter.

Referring to procedure 1.

  Open

 Open and remove

Notice

Do not use the hot water over 50 C to clean to avoid

discoloration or deformation.

Do not dry the unit on fire, the filter may be burnt.

Summary of Contents for AB122ACEAA

Page 1: ...on Manual CASSETTE TYPE AIR CONDITIONER Please keep this manual carefully and safely AB122ACERA AB182ACERA AB242ACERA AB242AEERA AB282AEERA AB362ACERA AB362AEERA AB482AEERA AB602ACERA AB122ACEAA AB182ACEAA AB242ACEAA AB242AEEAA AB282ACEAA AB282AEEAA AB362ACEAA AB422AEEAA AB482ACEAA AB482AEEAA AB602ACEAA ...

Page 2: ...Contents Cautions Unit Appearance Maintenance Trouble Shooting When Trouble Happens Customer Need to know Installation Procedure 1 5 6 7 10 11 12 13 15 16 17 26 ...

Page 3: ... of the waste materials collecting centers and waste paper disposal services nearest to your house Safety Instructions and Warnings Before starting the air conditioner read the information given in the User s Guide carefully The User s Guide contains very important observations relating to the assembly operation and maintenance of the air conditioner The manufacturer does not accept responsibility...

Page 4: ...imum 27 32 18 19 23 14 35 43 5 24 26 20 27 15 14 5 7 24 15 6 18 DB C WB C DB C WB C Indoor outdoor DB C WB C DB C WB C For EAA series For ERA series 4 The wiring method should be in line with the local wiring standard 5 The power and connecting cable are self provided For series 122 AB182ACEAA The requirement of the power cable H05RN F 3G 2 5mm2 The requirement of connecting cable H05RN F 3G 2 0mm...

Page 5: ...method In such case to continue using the conditioner will damage the conditioner and may cause electrical shock or fire hazard When need maintenance and repairment call dealer to handle it Incorrect mainten ance and repairment may cause water leak electrical shock and fire hazard switch off Please let the dealer be responsible for installing the conditioner Incorrect installation may cause water ...

Page 6: ...rmitted to placed on or stand on outdoor unit The falling of goods and people may cause acci dents Pets and plants should not be blowed directly in the air flow Otherwise will suffer damage Don t operate the air con ditioner with damp hands Otherwise will be shocked Only use correctly typed fuse May not use wire or any other materials replacing fuse other wise may cause faults or fire accidents Do...

Page 7: ...ith high salt content in the air c Near to hot spring with high content of sulfide gases d Area with frequent fluctuation of voltage e g factory etc e In vehicles or ships f Kitchen with heavy oil vapour or humidity g Near to the machine emitting electric magnetic waves h Places with acid alkali vapuor TV radio acoustic appliances etc are at least 1 m far away to the indoor unit outdoor unit power...

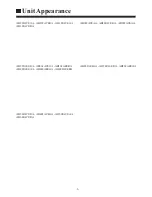
Page 8: ...AB362ACERA AB482ACEAA AB602ACEAA AB602ACERA AB282AEERA AB362ACEAA AB362AEERA AB422AEEAA AB482AEEAA AB482AEERA AB122ACEAA AB122ACERA AB182ACEAA AB182ACERA AB242ACEAA AB242ACERA AB282ACEAA AB242AEEAA AB242AEERA AB282AEEAA ...

Page 9: ...of dust the air filter should be wash more times than ever it is usually twice a week Air filter washing 1 Get the air inlet grille Look at picture 1 press the two embeding switch vertically to make it close to the side grille then raise it for about 45 o to take the air inlet grille down 2 Tear down the air filter Picture 2 Press the outer brim of the air inlet grille with your thumb at the same ...

Page 10: ...d Pull the two side handles at the back of the air inlet grille lift the air filter to dismantle it Use cleaner or water to clean to remove dust A Use cleaner to remove dust B When the dust is too much use soft brush and neutral detergent C Throw the water off then put it in the shadow for airing 4 Install air filter 5 Close air inlet grille 1 Put the air filter into those extruding parts at the t...

Page 11: ...tchen ware on the air inlet grille 10 minutes later use water to clean 5 Install air inlet grille Pull the two handles at the same time slowly draw them out when closing it the procedure is reversed Referring to Clean the air filter Referring to procedure 3 6 Install the air filter Referring to Clean the air filter Referring to procedure 1 7 Close air inlet grille Open Notice Do not use the hot wa...

Page 12: ...an the air filter indoor unit and outdoor unit and cover the unit with dustcoat Pre season Care See that there is no obstacles blocking the air inlet and air outlet of both indoor and outdoor unit to avoid reduce the working efficiency Be sure to install the air filter ensure that the air filter is not dirty Otherwise may result in machine damages or cause malfunciton due th dust inside the unit T...

Page 13: ...aint tobacco absorbed by indoor unit During operation white fog comes out of indoor unit When in COOL or DRY mode a thin water fog can be seen blown out of unit this is the condensed fog because the suddenly cooled indoor air is blown out Automatically switch into FAN mode during cooling To prevent frost from being accumulated on the indoor unit heat exchanger it sometimes auto matically switched ...

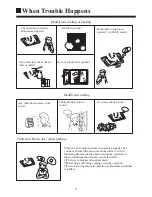
Page 14: ...ning for a while after unit autom atically stops Water or vapor generated from the outdoor unit during heating This happens when the frost accumulated on the outdoor unit is removed during defrosting operation Defrosting operation Please check the following things about your air conditioner before making a service call Unit fails to start Is the power supply switch on Power supply switch is not in...

Page 15: ...rces in the room Sunlight direct into the room Too crowed in the room Cooled air blown out when heating When the air conditioner does not operate properly after you have checked the above mentioned items or when following phenomenon is observed stop the operation of the air conditioner and contact your sales dealer 1 The fuse or breaker often shuts down 2 Water drops off during cooling or drying o...

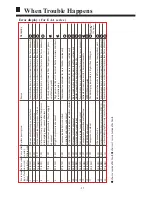
Page 16: ...roken down or short circuit for more than 2m continuously CT check abnormal 3 times in 30m High pressure switch acts 3 times in 30m Fault phase short of phase out of balance greatly Communication abnormal for more than 4m continuously Communication abnormal for more than 4m continuously Float switch broken down for more than 25m continuously Outside signal broken down for more than 10s Sensor brok...

Page 17: ...ensor broken down or short circuit for more than 2m continuously CT check abnormal 3 times in 30m Fault phase short of phase out of balance greatly High pressure switch acts 3 times in 30m Low pressure switch acts in normal running Communication abnormal for more than 4m continuously Communication abnormal for more than 4m continuously Float switch broken down for more than 25m continuously Outsid...

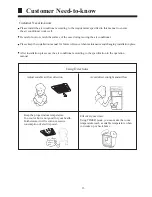
Page 18: ...enance and changing installation place After installation please use the air conditioner according to the specification in the operation manual Using Directions Adjust suitable airflow direction Avoid direct sunlight and airflow Keep the proper indoor temperature Too cool or hot is not good for your health Furthermore it will result in excessive consumption of electric power Optimal temper ature E...

Page 19: ...fessional people don t install unit by yourself Incorrect installation will cause water leakage electric shock or fire Install unit as per the Manual Incorrect installation will cause water leakage electric shock or fire accident Be sure to use specified accessaries and parts Otherwise water leakage electric shock fire accident or unit falling down may happen Unit should be placed on a place stron...

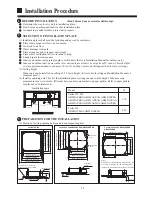
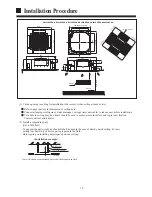
Page 20: ...termine the way to carry unit to installation place Don t remove packing until unit reaches installation place If unpacking is unkavoidable protect unit properly 1 2 18 series 122 182 series 242 and AB282ACEAA AB282AEEAA For series 602 and AB362ACERA AB482ACEAA Distance between suspending bolts 535mm Indoor unit 570mm Ceiling opening 650mm Ornament panel 700mm Indoor unit 570mm Ceiling opening 650...

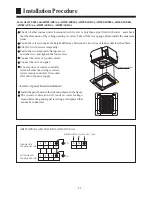
Page 21: ...of Anchor bolt Long nut Suspending bolt Refer to paper pattern for dimension of ceiling hole Connect all pipings refrigerant water drainage wirings inter unit cable to indoor unit before installation Cut a hole in ceiling may be a frame should be used to ensure a smooth surface and to prevent vibration Contact your real estate dealer 1500 1500 1 5 0 0 1 5 0 0 over o v e r over Wall or barrier o v ...

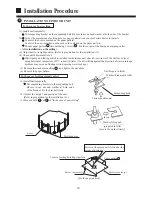
Page 22: ...e unit and on the paper pattern Mount paper pattern onto unit using 3 screws Fix the corner of the drain pan at piping outlet 1 Install unit temporally Put suspending bracket on the suspending bolt Be sure to use nut and washer at both ends of the bracket In the case of ceiling already exists Screws at the piping outlet is fixed at the corner of drain pan Center of ceiling hole Paper pattern 5 Pap...

Page 23: ...ith unit Insert water pipe into water plug until it reaches the white tape Tighten the clip until head of the screw is less than 4mm from hose Wind the drain hose to the clip using seal pad 9 Insulate drain hose in the room 1 Apple refrigerant oil Torque spanner spanner Piping joing Flare nut Clamp 3 Gas pipe Liquid pipe Insulator accessory For liquid pipe Insulator accessory For gas pipe Cover th...

Page 24: ...emporally fixing screws and other two and tighten the four screws Connect the wires of synchro motor Connect the wire of signal If no response of remote controller check whether the wiring is correct restart remote controller 10 seconds after shut off power supply Limits of panel board installation Install the panel board in the direction shown in the figure The incorrect direction will result in ...

Page 25: ...drainage After wiring Remove cover of control box connect 1PH power to terminal 1 and 2 on terminal block use remote controller to operate the unit Note in this operation fan will be running Upon confirmation of a smooth water drainage be sure to cut off power supply Check water drainage in cooling operation When wiring is not complete 1 2 3 D Cover of controll box PCB on indoor unit Terminal bloc...

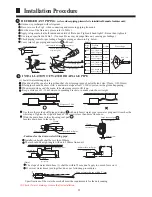
Page 26: ...ions Use copper wire only When make wiring please refer to wiring diagram also All wiring work must be done by qualified electricians A circuit breaker must be installed which can cut power supply to all system See Installation Manual of outdoor unit for specifications of wires circuit breaker switches and wiring etc Connecting of unit Remove cover of switch box 1 drag wires into rubber tube A the...

Page 27: ...erly If there are still space after tightening of screws please readjust the height of indoor unit Refer to Fig 9 Leave no space Fig 9 Gas leakage Gas leakage from roof Contamination Mist exists and drop down Fig 8 For indoor unit installation please refer to Installation Manual 2 1 2 3 4 5 5 _ 8mm 3 2 2 1 4 Holding ring Piping hole position Swing flap motor Fig 7 Seal Indoor unit Ceiling material...

Page 28: ... burned Problem may occur or parts got burned There might be a danger of electric shock Problem may occur or parts got burned This may cause poor cooling It is hard to control refrigerant charging amount ATTENTION after finishing installation confirm no refrigerant leakage 4 Installation of inlet grill and cover plate Installation of inlet grill Install in reversed order of Prepare ornament pandl ...

Page 29: ......

Page 30: ......

Page 31: ......

Page 32: ...HAIER GROUP Qingdao Haier Air Conditioner Electric Co Ltd Address Haier Garden Qianwangang Road Economic Development Zone Qingdao Shandong 266500 P R China Web Site http www haier com ...

Reviews: