background image

ADVANCE

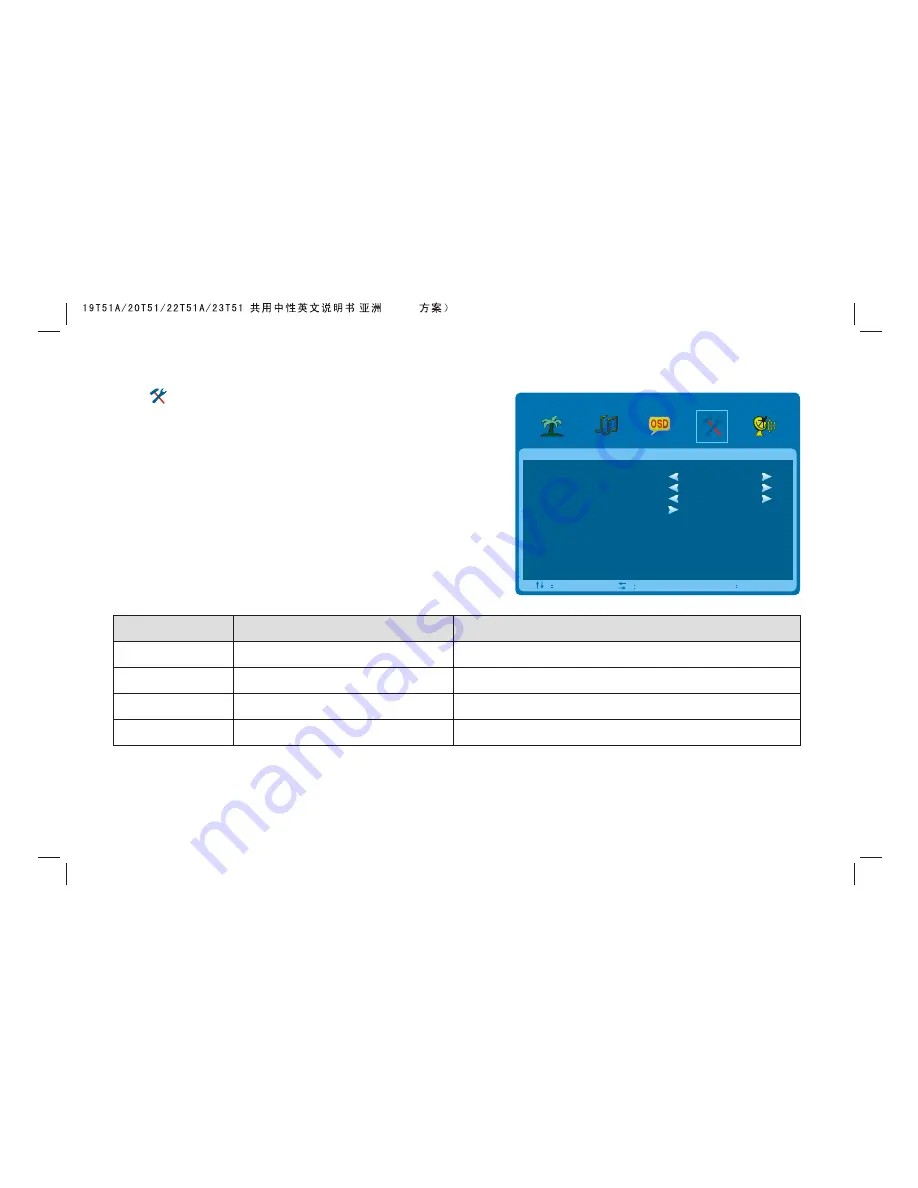
Select       to enter the ADVANCE submenu. Press "Up/Down" key 

on the remote control or "CH+/CH-" key on the front panel to 

choose what you need. Press the "Left/Right" key on the remote 

control or the"VOL+/VOL-" key on the front panel to adjust analog  

value or state (see below table).

S L E E P  -  T I M E R
D C C
B L U E    S C R E E N
R E S E T T I N G

A D VA N C E

S E L

A D J

M E N U

E X I T

O F F
O F F
O N

Option                                  Function                                                                Description

SLEEP - TIMER

DCC

BLUE SCREEN

RESETTING

Set sleep time of the machine

Resume to setting of factory

Open or close DCC

Open or close BLUE  SCREEN

"

",

"ON/OFF" two states.

"ON/OFF" two states.

Off, 15M, 30M, 45M, 60M, 120M  unit: minute.

Reset all values to setting of factory.

25


(

)(6M16

Summary of Contents for 19T51A

Page 1: ...mation 3 Features 4 listing 9 Connection 10 Front Panel Control Keys 17 Remote control 18 Basic Operation Instruction 20 Power On 20 Standby 20 Signal Source Selection 20 Menu Operation Instruction 21 PICTURE 21 SOUND 23 OSD 24 ADVANCE 25 TV 26 Simple troubleshooting 30 Installation 6M16 ...

Page 2: ... your hands pull the cord by grasping the plug Never pull the cord itself 7 If you will not use the machine for a long time please pull out the power cord Do not keep the sleeping mode for too long time 8 Please put this machine in the place of well ventilation instead of extremely hot cool or moist and direct sunshine 9 The slots on the case is designed to release heat so as to assure that all in...

Page 3: ...ne should not suffer from waterdrop or watersplash do not place the vessel with water or other liquids on it for like this it is possibly to cause fire or electric shock 20 The attaching plug should be inserted into the power point completely otherwise it may cause spark to bring fire 21 Please do not put candle ash tray incense inflammables or explosive nearby this machine 22 Please do not stretc...

Page 4: ...d mode can offer you intelligent audiovisual effect Built in the latest digital comb filter which makes image more clear The internal 3D De Interlace technique can totally eliminate the screen dithering caused by interlace signals Own perfect timing functions you can set time to turn off It will be turned off in state of no signals too Automatically operated convenient with telecontrol device Auto...

Page 5: ...t S VIDEO Input YCbCr Ypbpr Audio Input Output TV RF Earphone Interface Specification DB 15 75 0 5 0 7Vp p H V TTL Level Support mode refer to VGA Input Mode Video signal 1080p 1080i 720p 576p 576i 480p 480i Audio LPCM 48KHz 44 1KHz 32KHz 24Bit 20Bit 16Bit 75 1Vp p PAL NTSC SECAM Y 75 1Vp p C 75 0 286Vp p Y 75 1Vp p Cb Cr 75 0 7Vp p Signal mode 1080p 1080i 720p 576p 576i 480p 480i 20K 0 5Vp p 75 I...

Page 6: ...nels 21 5 HD 1366 768 1360 768 60Hz 0 3495mm 0 3495mm 477 417mm 268 416mm 100 240V 60 50Hz 3W 3W PAL NTSC PAL SECAM 525 392 71 mm 585 430 115 mm 5 0Kg 6 5Kg 16 7M 8m 30 199 Anti glare 18 5 1 1 60Hz 0 3mm 0 3mm 409 80mm 230 40mm Anti glare 366 768 360 768 100 240V 60 50Hz 3W 3W 458 354 71 5 518 390 115 16 7M 8m 30 199 PAL NTSC PAL SECAM mm mm 4 5Kg 5 5Kg 20 1600 900 1600 900 60Hz 0 2768mm 0 2768mm ...

Page 7: ...ght Remote control range Storage channels 21 5 FHD 1920 1080 1920 1080 60Hz 0 24825mm 0 24825mm 476 64mm 268 11mm 100 240V 60 50Hz 3W 3W PAL SECAM 525 392 71 mm 585 430 115 mm 5 0Kg 6 5Kg PAL NTSC 16 7M 8m 30 199 Anti glare 23 1920 1080 1920 1080 60Hz 0 2655mm 0 2655mm 509 76mm 286 74mm Anti glare 100 240V 60 50Hz 3W 3W PAL NTSC 557 407 71 5 115 16 7M 8m 30 199 PAL SECAM mm 618 445 mm 5 5Kg 7 0Kg ...

Page 8: ...0 768 70 60 60 60 60 1 2 3 4 5 VGA SVGA XGA WXGA 720 400 640 480 800 600 1024 768 1600 900 1280 720 70 60 60 60 60 60 1 2 3 4 5 6 Note Recommended mode 60Hz 1360 768 Note Recommended mode 60Hz 1600 900 S N Mode Resolution Refresh Hz S N Mode Resolution Refresh Hz 7 6M16 ...

Page 9: ...8 9 10 70 60 60 60 60 60 60 60 60 60 VGA XGA SXGA WXGA SVGA WUXGA 720 400 640 480 800 600 1024 768 1280 960 1280 720 1280 1024 1360 768 1600 900 1920 1080 S N Mode Resolution Refresh Hz Note Recommended mode 60Hz 1920 1080 8 6M16 ...

Page 10: ...peration please do according to real operation Listing Please make sure that all of the following items are complete LCD TV MONITOR Include base User manual Power cord Remote control If any of above listed items is missing please contact your dealer or our service department Power cord Power LED indicator Off On Mode On Standby Power consumption 45W 18 5 21 5 55W 20 65W 23 2W 9 6M16 ...

Page 11: ...r supply and then insert the other end into the socket of the electrical source Notes 1 When connecting the power cord be sure to turn off the machine and other equipment s power 2 If a long time at leisure please disconnect it from power supply AC 100V 240V 60 50Hz 10 AC To power socket AC 100V 240V 60 50Hz 6M16 ...

Page 12: ...colorful and hi definition pictures Attention Please turn off TV power before the outdoor antenna is connected to the TV signal input port Outdoor antenna can t be located near the high voltage wires Please pull out the plug of outdoor antenna to avoid thunder shock in thunder weather 11 AC 6M16 ...

Page 13: ...mputer and another end of VGA cord with the input port of the VGA on its rear cover HDMI digital port Connection Connect external HDMI high signal source to HDMI digital input port of this machine through HDMI digital connector cable push SOURCE button to select HDMI signal source Audio Video machine with HDMIinterfaces 12 AC 6M16 ...

Page 14: ... termination to this machine VIDEO input and AV equipment AUDIO output termination to this machine AUDIO input respectively Press SOURCE key to select AV1 signal source AV1 Video Signal Connection CVBS DVD Player or other machine with CVBS S Video 13 AC 6M16 ...

Page 15: ...of the machine The connection method is the same as AV1 Press SOURCE key to select AV2 signal source gna S VIDEO input connection Through S VIDEO AUDIO cables to connect external AUDIO VIDEO equipment to the machine s AUDIO VIDEO input port and press SOURCE key to select SVIDEO si l source CVBS DVD Player or other machine with CVBS S Video 14 AC 6M16 ...

Page 16: ...me please connect its audio output with TV audio input as shown in the following chart If you choose the YPbPr YCbCr signal please set signal source selection under YPbPr pattern AV connection If you need watch image of DV and connect your TV game machine you can connect audio or video output end of DV and game machine to the monitor AV machine CVBS DVD Player or other machine with YPbPr YCbCr G G...

Page 17: ...f VESA on the rear cover with bolts 4 Spin M4 bolts into the left right nuts on the wall mounting stand 3 4 mm of depth from bolts washer to stand is recommended 5 Hang the machine onto the slot of the wall mounting board Then lock the two bolts on the sides Note Installation method is different because of Hanging arm hardware s Wall Mounting subassembly subassembly structure Must install the wall...

Page 18: ...t the options you need under OSD operation 5 VOL VOL Press these two keys to add or reduce volume and adjust the analog value under OSD operation 6 MENU Press this key to enter main menu 7 Power on Standby 8 Earphone Socket The TV speakers will be shut off when earphone is inserted into this socket 9 HDMI 2 interface 10 Service USB interface 11 Power switch Note There are some apparent differences...

Page 19: ...d mode selection Intelligent image mode selection Up or Down cursor button function select Left or right cursor button analog add or reduce Sound volume add or reduce button Press this button to display menu Press this button to display signal source selection menu Select channel Number System information display switch Timer setting button press this key can set time of turning down Press this bu...

Page 20: ...uctive window of main machine is under direct sunlight or intense illumination the remote control may malfunction by now please change the angle of illumination or this machine or approach the inductive window to operate the remote control 4 When the battery voltage is insufficiency it influences the remote control distance you should replace with new battery when not to use the remote control for...

Page 21: ...s 3 If you do not use it for a long time please turn off the power supply for the machine Do not let the machine work in standby state for a long time Signal Source Selection Press SOURCE key either on the remote control or on the front panel MENU OF SIGNAL SOURCE will be displayed on the screen Then press Up Down key on remote control or CH CH key on the front panel to choose the signal source su...

Page 22: ...e key to display the signal source menu or exit signal source menu 6 During the operation the selections which can not be adjusted at current mode will be hidden automatically and the color of the selections will be changed into gray 7 Menu Operation Instruction in this manual is explained according to TV mode The operations in other modes are similar to the one in TV mode Users can take it as ref...

Page 23: ...E MODE Adjust brightness and blackness of whole picture BRIGHTNESS Adjust the contrast of whole picture CONTRAST Adjust the saturation of whole picture SATURATION Adjust the hue of whole picture HUE Adjust the sharpness of whole picture SHARPNESS SCALE Select picture scale Select color temperature mode of the picture COLOR TONE 3D NR Select model of 3D NR Increasing analog value increases brightne...

Page 24: ...control You can switch the function among the PERSONAL MUTE Open or close sound VOL VOL Add or reduce volume STANDARD NEWS MUSIC four modes 5 0 5 0 5 0 B A S S T R E B L E B A L A N C E S O U N D M O D E STANDARD SOUND S E L A D J M E N U E X I T Option Function Description BALANCE Adjust balance of left or right sound Increasing analog value increases treble Decreasing analog value decreases treb...

Page 25: ... OSD DURATION OSD HALFTONE Option Function Description Choose OSD menu display language Adjust H position of OSD menu Adjust V position of OSD menu Adjust duration of OSD menu Adjust halftone of OSD menu Increasing analog value OSD menu move toward right Decreasing analog value OSD menu move toward left 0 100 There are many languages to select Increasing analog value OSD menu move toward down Decr...

Page 26: ...to adjust analog value or state see below table SLEEP TIMER DCC BLUE SCR EEN RESETTING ADVANCE S E L A D J M E N U E X I T O F F O F F O N Option Function Description SLEEP TIMER DCC BLUE SCREEN RESETTING Set sleep time of the machine Resume to setting of factory Open or close DCC Open or close BLUE SCREEN ON OFF two states ON OFF two states Off 15M 30M 45M 60M 120M unit minute Reset all values to...

Page 27: ...es SOUND SYSTEM COLOR SYSTEM SKIP FINE TUNING CHANNEL EDIT MANUAL SEARCH AUTO SCAN ON OFF two states Please refer to AUTO SCAN Select color system Select sound system Select auto search Select manul search Select channel edit Select skip or not Select fine tuning Please refer to MANUAL SEARCH Please refer to CHANNEL EDIT Please refer to FINE TUNING COLOR SYS TEM SOUND SYS TEM MTS SKIP AUTO SCA N M...

Page 28: ...ontrol or VOL VOL on the front panel to select channel No Press Up Down key on the remote control to select SEARCH press Left Right key on the remote control again the machine begin searching toward low frequency or high frequency In the process of searching the channel automatically press the key of MENU on the remote control to stop searching Select to enter the submenu of Then press Up Down key...

Page 29: ...EL EDIT etter move digit etter Press key on the remote control to select channel which you wish change name s position press 3 key on the remote control then press UP Down key on the remote control to select channel press 1 to confirm Select Channels with CH CH Key Press Program key on the remote control or CH CH key on the front panel to select the channels Select channels with the Return key you...

Page 30: ...DMI2 PC all functions and adjustments are similar with TV User can check it at convenience HDMI connector can realize DVI connector function with external HDMI DVI commutator USB signal source operation Please insert USB memory card into USB interface of TV press SOURCE key on the remote control or front panel to select USB signal source if you don t insert the USB memory card into USB interface o...

Page 31: ...ectional antenna cable Use FINE TUNING of 2 Adjust toward direction of antenna cable TV No color 1 Color saturation is too low 2 Color system is incorrect 1 Enter to add up color saturation 2 Enter to change color system PICTURE TV TV no sound 1 Volume setting is too low 2 Sound is muted 3 Sound system is incorrect 1 Adjust volume to proper value 2 Press MUTE button on remote control to eliminate ...

Page 32: ...stment function 2 Use commend mode Computer display image excursion not full screen over screen 1 Adjustment is incorrect 2 Display mode is incorrect 1 Use auto adjustment function 2 Enter to adjust horizontal or vertical position 3 Use recommended mode GEOMETRIC Symptom Factor Solution Computer no display and prompt no signal input red indicator LED twinkling Signal cable is loose or fall off Che...

Reviews: