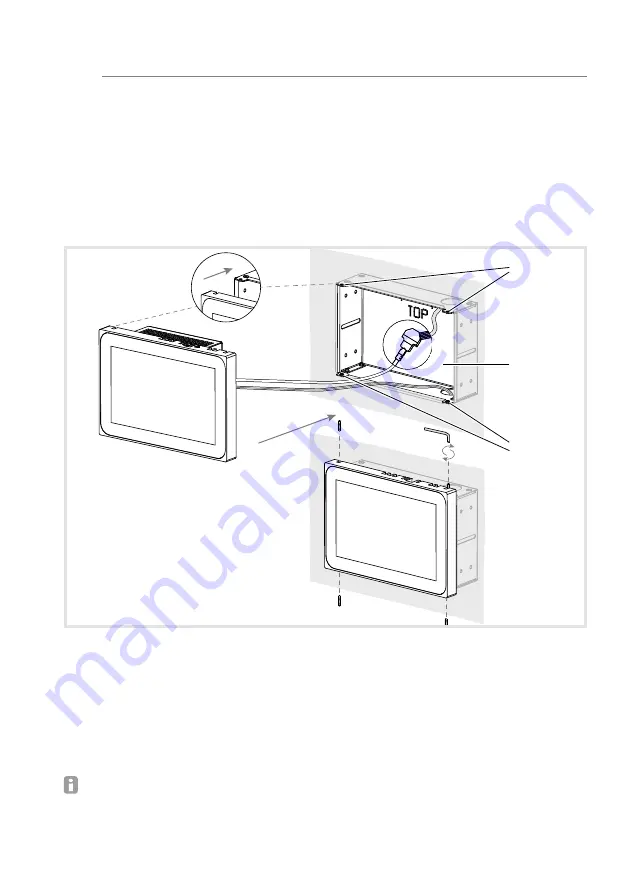
Connecting and installing the device
The RJ45 installing connector is mounted on
the network cable.
Connect the jack to an RJ45 socket on the
touch panel (7/8) using the enclosed, pre-as-
sembled RJ45 patch cable.
If required connect a 24 V DC power supply
(see Accessories) using the enclosed termi-
nal (9). Ensure correct polarity (figure 2/3).
Insert touch panel in the housing (21) in
such a way that the mounting plates (22) of
the housing are pushed under the frame.
Tighten the four screws and the mounting
plates through the frame from above and below
using the enclosed Allen key (Figure 12/13).
The screws must be countersunk in the frame.
(21)
(22)
(22)
Figure 12 a/b: Installation in the flush-mounted housing
(15) Flush-mounted housing (not included in
scope of delivery)
(16) Mounting brackets
If a device is mounted flush with the wall,
guide it into the housing by applying even,
slight pressure on the left and right (Figure
13) until the
>>
Push-to-open
<<
lock of the
housing engages.
When pushing in the touch display into the
housing, make sure that the connected
cables do not get wedged in.
Remove the protective foil from the user
interface.
Switch on auxiliary voltage.
The device charges the operating system/
Launcher and displays the desktop interface/
home page of the Launcher after a few sec-
onds. Device is ready for operation.
z
22
Summary of Contents for WDI07 series
Page 98: ......
Page 99: ......
Page 100: ...Hager Controls S A S 33 rue Saint Nicolas B P 10140 67703 SAVERNE CEDEX France www hager com...


