background image


Date : 20/09/2012 

6T 8207-02a


tebis touch panel User Manual 


USE 


12 


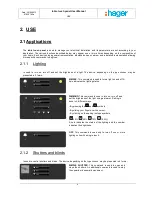
Click  on  the  ‘Learn’  key  in  the  scene  device  and  wait  a  few  seconds  until  learning  is  completed.  If  the  learning 
procedure  has  worked  correctly,  the devices concerned confirm  learning  (On/Off for a lighting unit, up/down for a 
blind, etc.). 

Check that the scene is running by clicking on ‘Read’. 

2.1.6 

Priority command 

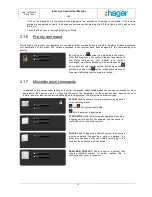
Priority allows you to order your appliances to override all other commands and to maintain the status of these appliances 
until  cancellation  of  this  mode.  The  various  appliances  in  your  system  have  been  assigned  to  this  command  by  your 
installer.  


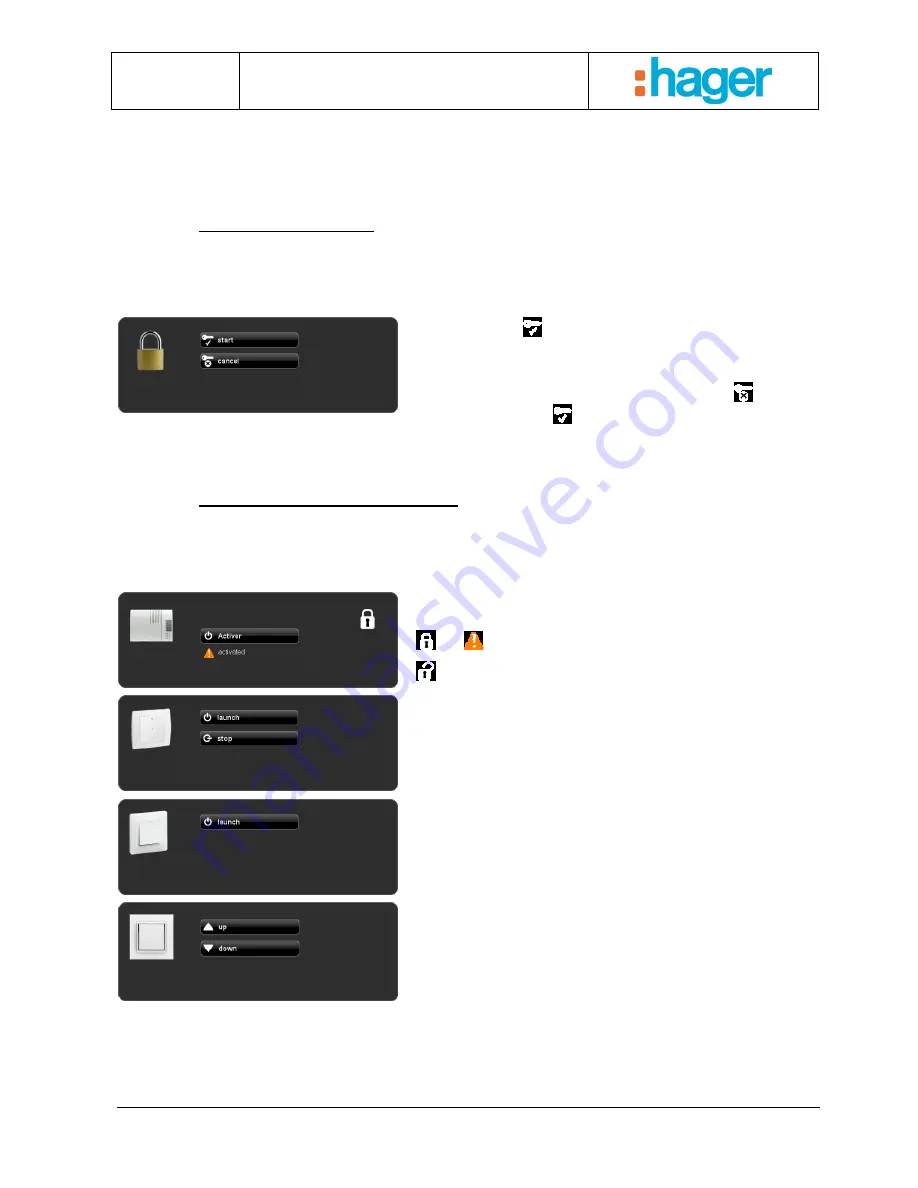
By clicking on the 

 symbol, you will activate the priority. 

From  this  moment  on,  the  system  trips  your  appliances  in 
the  status  defined  by  your  installer  and  remains 
unchanged. No other commands will be acted upon as long 

as you have not unlocked the system by clicking on the 


symbol. In addition, the 

 symbol will appear at the top of 

the screen indicating that the system is locked. 


2.1.7 

Miscellaneous commands 

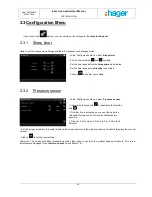
In  addition  to  the  conventional  lighting  and  shutter  commands,  tebis  touch  panel  has  various  commands  for  other 
applications  like  opening  a  gate  or  triggering  the  alarm.  The  parameters  for  these  devices  have  been  set  by  your 
installer and may take various forms depending on the application. The system has 4 different types: 


ALARM: Used to activate your alarm system with indication 
of the operating status. 

 and 

: the system is activated. 

 only: the system is deactivated. 


START/STOP: Used to start/stop any appliance other than 
a lighting unit or a shutter. For example, you can control a 
ventilation unit or a sprinkler system. 


PULSE: Used to trigger an automatic system that requires 
a  pulse  command  like  opening  a  gate  or  a  garage.  The 
pulse  time  has  been  set  by  your  installer  according  to  the 
needs of the appliance to be controlled. 


DEAD-MAN  CONTACT:  Used  to  control  a  system  that 
requires  physical  contact  for  safety  reasons  like  a 
swimming pool cover, for example. 

Summary of Contents for tebis

Page 1: ...Date 20 09 2012 6T 8207 02a tebis touch panel User Manual 1 User Manual tebis touch panel...

Page 2: ...andby function 16 3 1 4 Turning off the tebis touch panel 16 3 1 5 Version 16 3 2 PARAMETER MENU 17 3 2 1 Language 17 3 2 2 Wallpaper 17 3 2 3 Screensaver 18 3 2 4 Halo 18 3 2 5 Date time 18 3 2 6 Sho...

Page 3: ...es from the same interface Temperature Date and time Access configuration menu Access next page Page shortcuts Title of the view Access previous page Device Quick access Halo and detection zone Access...

Page 4: ...ch surface Do not use sharp objects acid products or solvents for cleaning This may damage the device Use only a clean soft dry cloth for cleaning the touch screen see chapter 3 1 1 Only removable sto...

Page 5: ...by touching the screen with your fingers and allows you to make your choice by simply pressing the desired function In general an application contains several views composed of various devices To navi...

Page 6: ...r programmable quick access from a device see chapter 3 4 3 When starting up the tebis touch panel the status of certain appliances may be unknown The undefined status will therefore be shown as follo...

Page 7: ...shows the commands available Object Description Object Description Turn On Comfort mode heating Turn Off Standby mode heating Up Night mode heating Down Frost Protection mode heating Stop Heating mode...

Page 8: ...Screen activation zone if this zone is entered the system displays the screensaver Product wake up zone if this zone is entered the system displays the monitor screen Below the diagrammatic representa...

Page 9: ...forms SIMPLE This command is used to turn a light on and off A halo indicates the lighting status DIMMING This command is used to turn on turn off and set the brightness of the light using a dimmer Se...

Page 10: ...nds You can also make these settings by sliding your finger over the cursor The symbol and the number indicate the position of the blind 2 1 3 Heating This command is used to control the temperature t...

Page 11: ...ations are possible such as a smoke detector or a twilight indicator Alarm indicator this device is intended specifically for an alarm or presence detector 2 1 5 Scenes The scene allows you for exampl...

Page 12: ...e symbol In addition the symbol will appear at the top of the screen indicating that the system is locked 2 1 7 Miscellaneous commands In addition to the conventional lighting and shutter commands teb...

Page 13: ...ommand is used to stop the upward or downward movement HEATING This command is used to set the 4 heating modes Comfort Standby Frost protection Night 2 2 Quick access QAC This function is used to give...

Page 14: ...panel User Manual USE 14 In screensaver mode you have 2 wake up options depending on which zone you touch on the screen To display the menu click on the zone shown in black To activate the QAC comman...

Page 15: ...s displayed in the middle of the screen indicating the number of seconds the screen is deactivated Clean only with a soft cloth After this timed period the screen goes back to the menu 3 1 2 Screensav...

Page 16: ...stem wakes up and again displays your view 3 1 4 Turning off the tebis touch panel This function is used to turn off the system Press the symbol to turn off the system To restart the system press the...

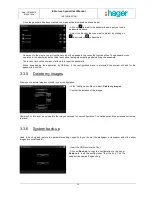
Page 17: ...meters menu without making a selection press 3 2 2 Wallpaper The Wallpaper menu is used to select the image to be displayed as wallpaper Insert your USB key containing the image you wish to display in...

Page 18: ...800x480 pixels for an 8 inch screen and 480x272 pixels for a 5 inch screen to optimise the display 3 2 4 Halo The Halo menu is used to select operation of the halo on the front In the Parameters Menu...

Page 19: ...2 7 Activation Quick Access QAC This function is used to give a single command from all views in one click There are 2 ways to activate this command By clicking on the symbol or touching the screen o...

Page 20: ...n to confirm your setting 3 3 2 Presence sensor In the Configuration Menu select Presence sensor Activate the function with or deactivate the function with If the function is activated you can set the...

Page 21: ...your setting 3 3 4 Password Used to create and modify password protection You can also choose which functions you want to protect with a password Three choices are possible The parameters menu The con...

Page 22: ...e password When downloading the application by USB key if the configuration menu is protected the system will ask for the password to confirm 3 3 5 Delete my images Allows you to delete images not use...

Page 23: ...rameters for a temperature device have been set in the application Select the measurement unit Degrees Celsius C or degrees Fahrenheit F Click on to confirm your setting 3 3 8 Time zone Used to set th...

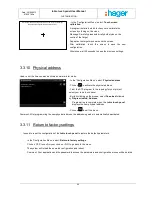
Page 24: ...for your project select your tebis touch panel By right clicking on the mouse select Download followed by Program Individ Address Programming is complete when the tebis touch panel displays the new ph...

Page 25: ...n confirm your choice From the general parameter settings view select the device that you want to modify 3 4 1 Parameters Modification of the image Select the item to be modified by pressing the devic...

Page 26: ...device The following view appears Click on the symbol Confirm screen wake up or otherwise with to activate or to deactivate To go back to the menu press When you turn on this lighting with the switch...

Page 27: ...e switch to activate To go back to the menu press The statuses available for quick access are Toggle switch for a lighting unit Open or close for a shutter or blind Read for a scene For quick access w...

Page 28: ...103 g 167 199 231 40 72 H 104 h 168 200 232 41 73 I 105 i 169 201 233 42 74 J 106 j 138 170 202 234 43 75 K 107 k 171 203 235 44 76 L 108 l 140 172 204 236 45 77 M 109 m 141 205 237 46 78 N 110 n 142...

Page 29: ...D014 D015 D016 D017 D018 D019 D020 D021 D022 D023 D024 D025 D026 D027 D028 D029 D030 D031 D032 D033 D034 D035 D036 D037 D038 D039 D040 D041 D042 D043 D044 D045 D046 D047 D048 D049 D050 D051 D052 D053...

Page 30: ...Date 20 09 2012 6T 8207 02a tebis touch panel User Manual ANNEX 30 D100 D101 D102 D103 D104 D105 D106 D107 D108 D109 D110 D111...

Reviews: