


English - 3
Assembly instructions
BASE ASSEMBLY
1.
Position and insert the outer tube (12) to the base (13) aligned with the central hole.
Insert and fasten the base screw (14).
2.
Loosen the height adjustment ring (11) from the top of the inner tube (10). Pull the
inner tube out from the outer tube to adjust it to the desired height and tighten the
height adjustment ring (11).
3.
Loosen the connection screw (9) on the back of the fan body and then slide the fan
head down over the inner tube and tighten the screw (9). Make sure the connection
screw is tightly secured.
BLADE AND GRILLE ASSEMBLY
1.
Unscrew the propeller cap (2) from the motor shaft by holding the motor shaft and
rotating it clockwise.
2.
Unscrew the rear grid nut (4) from the front of the motor cover (7) by rotating it
anticlockwise.
3.
Position the rear grid (5) against the front of the motor cover, ensuring that the
locating pegs on the motor cover are engaged correctly in the holes on the rear grid.
4.
Replace and tighten the grid nut (4) by turning it clockwise.
5.
Push the propeller (3) onto the motor shaft, locating the slot on the back of the fan
blade on to the drive pin that passes through the motor shaft.
6.
Tighten the propeller cap (2) by turning it anticlockwise.
7.
Position and place the front grid (1) to the rear grid (5), and push the front grid (1)
until all the hooks of the rear grid hook the front grid.
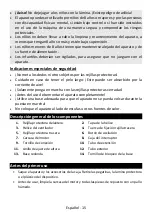
Putting into Service
Working place
Choose a suitable location and a non-slip, flat surface.
Never place the device directly next to heaters or other heat sources. There is always the
danger of fire!
Electrical Connection
1.
Connect the device to a duly installed 220-240V~50/60Hz protective contact socket.
2.
Before inserting the plug into the socket. Make sure that the mains voltage to be
used matches that of the device. You can find this information on the nameplate.
Use
Basic Settings
Set the blower inclination angle before starting the device. You can adjust the inclination
angle by tipping the blower casing with both hands.
The inclination angle amounts to
approx. 15°
.
Summary of Contents for SF-16B.014A
Page 2: ......
Page 30: ...28 H GER H GER...
Page 31: ...29 8 8 8 1 2 3 4 5 6 7 8 9 10 11 12 13 14...
Page 32: ...30 1 12 13 14 2 11 10 11 3 9 9 1 2 2 4 7 3 5 4 4 5 3 6 2 7 1 5 1 1 220 240V 50 60Hz...
Page 33: ...31 2 15 0 1 2 3 1 2 90 1 2 3...
Page 35: ...33 1 2 3 4 5 6 7 8 9 10 11 12...
Page 36: ...34 13 14 15 16 17 2019 771 2019 770...
Page 37: ......
Page 38: ......
Page 39: ......


