5.
Select the Ethernet menu.
a.
If the customer network supports Dynamic Host Configuration Protocol (DHCP), use the
setting
Obtain an IP address automatically
.
b.
If the customer network does not support DHCP, use the setting
Use the following IP
address
and complete the settings with IP addresses supplied by the network administrator.
The controller is factory configured with two different subnets on the Ethernet ports:
• Port 1 (fec0): Ethernet interface for LAN connection with dynamic IP address (default)
• Port 2 (fec1): Ethernet interface for Ethernet-based fieldbus with static IP address
192.168.165.20 (default)
Note: Make sure that the network connection sharing setting is disabled to use the ethernet port for Modbus
TCP/IP communication. Configure the ethernet port parameters to adapt them to the Modbus TCP/IP master
(PLC) configuration.
6.
Select the correct IP setting (dynamic or static). If necessary, enter the correct settings based on
the network topology: IP address, subnet mask and default gateway.
7.
Select Network connection sharing to share the internet connection of the instrument with other
controllers.
Note: When this setting is selected the two ports are switched together and only one port configuration is
necessary. With this configuration the Ethernet port is used for network sharing.
8.
Select Apply to save the settings.
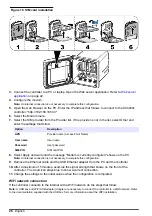
Share the LAN
The instrument can be configured as an ethernet switch. When the network sharing configuration is
enabled, a controller with internet access can share the connection with other controllers. Refer to
. The two ethernet ports share the configuration. The ethernet configuration page only
configures one ethernet port. Refer to
Figure 15 Network sharing
Mobile network connection
If the controller connects to the internet with the factory installed SIM card and the default Hach data
plan, no more steps are necessary. To change the SIM card and connect the controller to the internet
with a cellular network through a customer supplied data plan, do the steps that follow:
1.
Remove the factory installed Micro SIM card.
2.
Install a user-supplied Micro SIM card. Refer to
.
English
25
Summary of Contents for SC4200c
Page 1: ...DOC343 52 90586 SC4200c 06 2019 Edition 7 User Manual...
Page 2: ......
Page 34: ...32 English...
Page 35: ......


