background image


WWW.GVISION-USA.COM 

30398 Esperanza Rancho Santa Margarita CA 92688   /   Tel. 949-586-3338   /   Fax. 949-272-4594   /   Email. [email protected] 

10


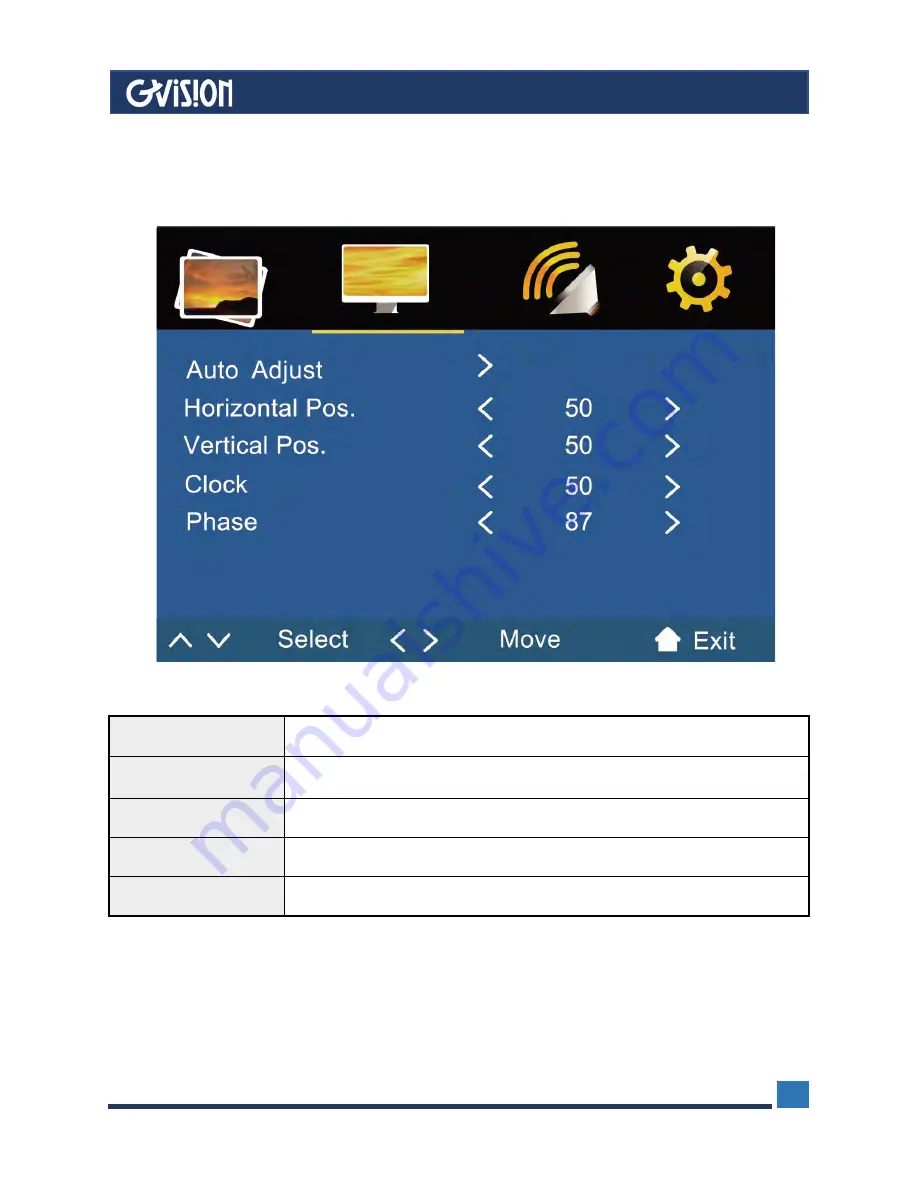
Auto Adjust


Fit the image setting automatically. 

Horizontal Pos.


Adjust the H-Position position of picture.value:0~100. 

Vertical Pos.


Adjust the V-Position position of picture.value:0~100. 

Clock


Adjust the Clock of picture.value:0~100. 

Phase


Adjust the Phase of picture.value:0~100. 


1.5.2 PC 

(Only available with VGA input)


   Select PC from the menu. 

Summary of Contents for C19BD-A6-4000

Page 1: ...C19BD A6 4000 USER S MANUAL SECURITY CCTV MONITOR GVISION USA INC 30398 Esperanza Rancho Santa Margarita CA 92688 949 586 3338 info gvision usa com WWW GVISION USA COM...

Page 2: ...ture concerning the operation and maintenance of this unit has been included Therefore it should be read carefully in order to avoid any problems CAUTION Please use the power cord provided with this d...

Page 3: ...of the reach of children Concerning the Power Cord Can differ by country Check the specification page of this owner s manual to be certain concerning current requirements Do not connect too many devi...

Page 4: ...72 4594 Email info gvision usa com 4 Table of Contents 1 Controllers Settings 5 1 1 Monitor Interface 5 1 2 Monitor Controller Button 6 1 3 Remote Control 7 1 4 Select Input Source 7 1 5 OSD Menu 8 1...

Page 5: ...nitor DC12V 2 HDMI IN HDMI Input Source 3 VGA IN VGA Input Source 4 PC AUDIO IN Audio Input for VGA Input channel 5 BNC CVBS IN BNC Input for CVBS Source 6 BNC CVBS Out BNC Looping output for CVBS Sou...

Page 6: ...E Select an input source 2 MENU Enter the menu save the adjustment of sub menu and exit the OSD 3 LEFT RIGHT Change the value on selected menu 4 UP DOWN Switch a menu on OSD 5 POWER Monitor Power On O...

Page 7: ...menu 5 Source button Press to enter or exit the interface menu 6 Return button Press this key to return the menu 7 HDMI button Press to enter HDMI mode 8 DP button Press to enter DP mode 9 USB C Press...

Page 8: ...light and dark areas of the picture Brightness Adjusts the overall picture brightness Color Adjust the color saturation 0 100 Tint Increase or decrease the intensity of colors in the image Sharpness C...

Page 9: ...4594 Email info gvision usa com 9 Noise Reduction Reduce noise of the display image LOW MIDDLE HIGH OFF Color Temperature Adjust color reproduction choose between Warm User Cool Medium In the USER set...

Page 10: ...o Adjust Fit the image setting automatically Horizontal Pos Adjust the H Position position of picture value 0 100 Vertical Pos Adjust the V Position position of picture value 0 100 Clock Adjust the Cl...

Page 11: ...9 272 4594 Email info gvision usa com 11 Sound Mode Select one of the presets User Sport Movie Music Standard Treble Adjust the Treble of picture value 0 100 Bass Adjust the Bass of picture value 0 10...

Page 12: ...pressing Left Right buttons Restore Factory Default Reset the monitor settings to the factory default by pressing Left Right buttons No Signal Screen Allows the user to select Black or Blue for the s...

Page 13: ...Time Typical 14ms Aspect Ratio 16 9 Viewing Angle 178 H 178 V Display Color 16 7M 8 bit INTERFACE CVBS BNC In 1 CVBS BNC Out 1 HDMI In 1 VGA In 1 PC Audio In 1 AUDIO Speaker 3Wx2 CABINET Color Materia...

Page 14: ...WWW GVISION USA COM 30398 Esperanza Rancho Santa Margarita CA 92688 Tel 949 586 3338 Fax 949 272 4594 Email info gvision usa com 14 3 Dimensions C19BD A6 4000...

Reviews: