


39
PVR Setting
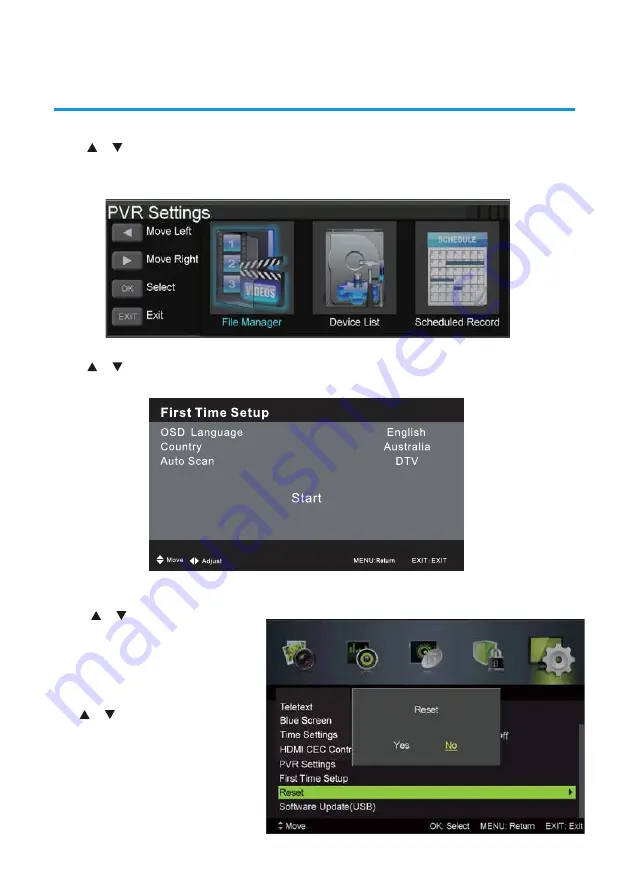
Press / button to select PVR SETTING, then press Ok button to enter submenu. It will
check the USB.
39
PVR Setting
Press / button to select PVR SETTING, then press Ok button to enter submenu. It will
check the USB.
39
PVR Setting
Press / button to select PVR SETTING, then press OK button to enter submenu. It will
check the USB.
First Time Setup
Press / button to select First Time Setup, then press OK button to enter. (Default
Password is 0000).
Reset
Press /
button to select Reset, then press OK button to enter.
Select “Yes” if you are sure to reset.
PVR and Timeshift Operation
First Time Setup
Press / button to select First Time Setup, then press Ok button to enter. (Default
Password is 0000).
39
PVR Setting
Press / button to select PVR SETTING, then press OK button to enter submenu. It will
check the USB.
First Time Setup
Press / button to select First Time Setup, then press OK button to enter. (Default
Password is 0000).
Reset
Press /
button to select Reset, then press OK button to enter.
Select “Yes” if you are sure to reset.
PVR and Timeshift Operation
Reset
Press /
button to select Reset,
then press Ok button to enter.
Select “Yes” if you are sure to reset.
Software Update (USB)
Use / the button to select this
option, then press OK button to
update software using USB.
PVR and Timeshift Operation
PVR Setting
Press / button to select PVR SETTING, then press OK button to enter submenu. It will
check the USB.
First Time Setup
Press / button to select First Time Setup, then press OK button to enter. (Default
Password is 0000).
Reset
Press /
button to select Reset, then press OK button to enter.
Select “Yes” if you are sure to reset.
PVR and Timeshift Operation
First Time Setup
Press / button to select First Time Setup, then press Ok button to enter. (Default
Password is 0000).
39
PVR Setting
Press / button to select PVR SETTING, then press Ok button to enter submenu. It will
check the USB.
39
PVR Setting
Press / button to select PVR SETTING, then press OK button to enter submenu. It will
check the USB.
First Time Setup
Press / button to select First Time Setup, then press OK button to enter. (Default
Password is 0000).
Reset
Press /
button to select Reset, then press OK button to enter.
Select “Yes” if you are sure to reset.
PVR and Timeshift Operation
First Time Setup
Press / button to select First Time Setup, then press Ok button to enter. (Default
Password is 0000).
39
PVR Setting
Press / button to select PVR SETTING, then press OK button to enter submenu. It will
check the USB.
First Time Setup
Press / button to select First Time Setup, then press OK button to enter. (Default
Password is 0000).
Reset
Press /
button to select Reset, then press OK button to enter.
Select “Yes” if you are sure to reset.
PVR and Timeshift Operation
Reset
Press /
button to select Reset,
then press Ok button to enter.
Select “Yes” if you are sure to reset.
Software Update (USB)
Use / the button to select this
option, then press OK button to
update software using USB.
PVR and Timeshift Operation
PVR Setting
Press / button to select PVR SETTING, then press OK button to enter submenu. It will
check the USB.
First Time Setup
Press / button to select First Time Setup, then press OK button to enter. (Default
Password is 0000).
Reset
Press /
button to select Reset, then press OK button to enter.
Select “Yes” if you are sure to reset.
PVR and Timeshift Operation
Reset
Press /
button to select
Reset, then press Ok button to
enter. Select “Yes” if you are sure
to reset to factory settings.
Software Update (USB)
Use / the button to select this
option, then press OK button to
update software using USB.
PVR & TIMESHIFT OPERATION
39
PVR Setting
Press / button to select PVR SETTING, then press Ok button to enter submenu. It will
check the USB.
39
PVR Setting
Press / button to select PVR SETTING, then press OK button to enter submenu. It will
check the USB.
First Time Setup
Press / button to select First Time Setup, then press OK button to enter. (Default
Password is 0000).
Reset
Press /
button to select Reset, then press OK button to enter.
Select “Yes” if you are sure to reset.
PVR and Timeshift Operation
First Time Setup
Press / button to select First Time Setup, then press Ok button to enter. (Default
Password is 0000).
39
PVR Setting
Press / button to select PVR SETTING, then press OK button to enter submenu. It will
check the USB.
First Time Setup
Press / button to select First Time Setup, then press OK button to enter. (Default
Password is 0000).
Reset
Press /
button to select Reset, then press OK button to enter.
Select “Yes” if you are sure to reset.
PVR and Timeshift Operation
Reset
Press /
button to select Reset,
then press Ok button to enter.
Select “Yes” if you are sure to reset.
Software Update (USB)
Use / the button to select this
option, then press OK button to
update software using USB.
PVR and Timeshift Operation
PVR Setting
Press / button to select PVR SETTING, then press OK button to enter submenu. It will
check the USB.
First Time Setup
Press / button to select First Time Setup, then press OK button to enter. (Default
Password is 0000).
Reset
Press /
button to select Reset, then press OK button to enter.
Select “Yes” if you are sure to reset.
PVR and Timeshift Operation
Summary of Contents for GVA39FHD
Page 3: ...3 CONTENTS 49 Care and Maintenance 50 FAQs 51 Text 48 ...
Page 53: ...53 NOTES ...
Page 54: ...54 NOTES ...
Page 55: ...55 NOTES ...