background image

33

DTV MODE

- Press SOURCE button on the unit or remote control to select DTV input source.
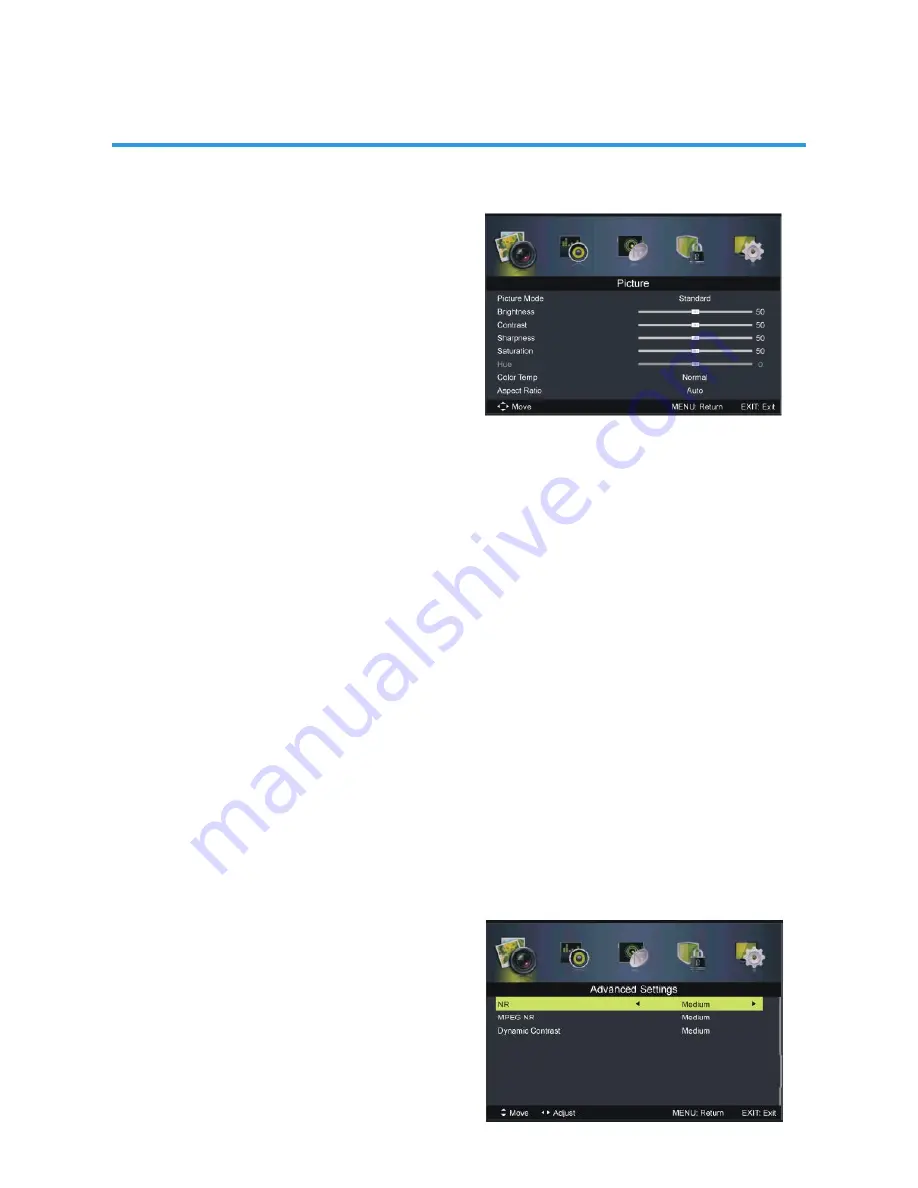
1. Picture
1.1 Picture Mode
Available options: Standard, Mild, Personal,
Dynamic.
1.2 Brightness
The brightness value of picture can be
adjusted from 0-100.
1.3 Contrast
The contrast value of picture can be adjusted from 0-100.
1.4 Sharpness
The sharpness value of picture can be adjusted from 0-100.
1.5 Saturation
The colour saturation value of picture can be adjusted from 0-100.
NOTE: If the value of Brightness, Contrast, Sharpness or Saturation has been changed,
Picture Mode will turn to Personal automatically.
1.6 Hue
This item is used to adjust the tone of colour in NTSC system from -50 to 50.
1.7 Colour Temp
This item is used to adjust the optimum colour temperature for suitable viewing.
Available options: Normal, Cool, Warm.
1.8 Aspect Ratio
This item is used to adjust the video size.
Available options: Auto, 4:3, 16:9, Zoom1, Zoom2.
NOTE: If there’s no signal, pressing ASPECT button on remote control will not work. 

And the available video size may be different in different input source.
1.9 Advanced Settings
1.91 NR (Noise Reduction)
This item is used to adjust the NR level.
Available options: Off, Weak, Medium,
Strong.

Summary of Contents for GVA22GLED

Page 1: ...INSTRUCTION MANUAL GVA22GLEDC 21 5 54 6cm FHD LED TV with Built in DVD Player ...

Page 2: ...trol 11 Remote control preparation 13 Basic installation 14 Connecting to AC power source 14 Connect external antenna to unit 14 Composite video cvbs connection 15 Component YPbPr connection 15 HDMI Connection 16 PC VGA Connection 16 Coaxial connection 17 Connect earphone to the unit 17 USB Connection 17 DVD 18 JPEG playback 20 Display 22 General 23 Operating the menu dtv 24 Photo 28 Music 29 Movi...

Page 3: ...CONTENTS Main menu 32 Dtv mode 33 Sound 34 Channel 35 Lock system 36 Setup 39 PC mode 41 Maintenance 43 Wall mounting 44 Stand installation 45 Specifications 46 General troubleshooting 47 ...

Page 4: ...t in hazardous Radiation exposure Do not open covers and repair yourself Refer servicing to Qualified personnel WARNING To prevent fire or shock hazard Do not use this power cord with An extension cord receptacle or other outlet unless the blades Can be fully inserted to prevent blade exposure To prevent fire or shock hazard Do not expose this appliance to Rain or moisture CAUTION laser radiation ...

Page 5: ...t no objects filled with liquids such as vases shall be placed on the product Do not place in or expose the product to direct sunlight extreme heat humid or dusty locations Never operate this product if it has a damaged power cord or plug do not work properly has been dropped damaged or exposed to moisture water or other liquids Do not attempt to examine or repair this product yourself take the pr...

Page 6: ...he disc Do not install more than 1 disc on the disc compartment Do not try to close the disc cover when the disc is not installed properly Be sure to store the disc in its exclusive case when not in use If the surface is soiled Wipe gently with a soft damp water only cloth When wiping discs always move the cloth from the center hole toward the outside which will not cause distortion If you wipe th...

Page 7: ...7 ACCESSORIES All the pictures in this manual are just for your reference appearance and display Quick Guide Quick Guide ...

Page 8: ...r detailed operations please refer to the guide on Page 24 Support TELETEXT Function NOTE For detailed operations please refer to the guide on Page 25 Support USB Multimedia Playback NOTE For detailed operations please refer to the guide on Page 27 Support PVR Function NOTE For detailed operations please refer to the guide on Page 26 Support TIME SHIFT Function NOTE For detailed operations please ...

Page 9: ...sor 4 Stand holder 5 Disc slot To insert a disc according to the silk screen on the side of this slot 6 To play or pause playing DVD 7 To open or close the disc compart ment 8 VOLUME button To increase decrease the volume level or move left right 9 CHANNEL button To select next previous channel or move up down 10 MENU button To enter menu setting page 11 SOURCE button To select the input source 12...

Page 10: ...terminal 3 VGA input terminal 4 Y Pb Pr input terminals 5 COAXIAL output terminal 6 RF input terminal To connect the external antenna 7 AUDIO R L input terminals 8 CVBS Video input terminal 9 USB input terminal For multimedia files playback 10 HDMI input terminals 11 Built in speakers ...

Page 11: ...11 REMOTE CONTROL ...

Page 12: ...12 REMOTE CONTROL ...

Page 13: ...op step on or otherwise impact the remote control This may damage the parts or lead to malfunction If the remote control is not going to be used for a long time remove the batteries REMOTE CONTROL OPERATION Point the remote control from no more than about 6m from the remote control Sensor and within about 60 of the front of the player Fig2 NOTES The operating distance may vary according to the bri...

Page 14: ...ad through the instructions before connecting other equipment Connecting to AC power source Main unit To power outlet Connect external antenna to unit Install external antenna into antenna jack for best picture Power plug of antenna amplifier Indoor antenna amplifier Outdoor antenna amplifier Antenna 75 OHM antenna plug ...

Page 15: ...BASIC INSTALLATION AV cable Not included For basic connection use the composite Audio L R white red and CVBS yellow cable to connect the unit with other devices Component YPbPr connection AUDIO cable Not included YPbPr cable Not included ...

Page 16: ... Use HDMI cable to connect the unit with other devices to receive high definition multimedia signal PC VGA Connection VGA cable Not included Audio cable Not included Use VGA cable and Audio cable to connect the unit with TV or PC and use this product as a monitor ...

Page 17: ...Use coaxial cable to connect the unit with amplifier or other audio decoding devices for coaxial audio signal output Coaxial cable is not included Connect earphone to the unit USB Connection EARPHONE cable Not included USB device Not included ...

Page 18: ... remote control to enter the disc into the disc compartment b Once the disc is in the disc compartment the player starts to read the disc immediately c When a menu screen appears on the unit press the navigation buttons or press the number buttons to select preferred track number then press OK button to confirm d To stop playing and return to the menu screen press TITLE or D MENU button 2 Stopping...

Page 19: ...n press the or OK button to start playback d In file selecting page press or button to turn to next or previous page e Press REPEAT button on remote control to change play mode SINGLE play one file only REPEAT ONE repeat one file REPEAT FOLDER all the files in the folder will be played repeatedly FOLDER all the files in the folder will be played NOTE The available repeat modes may vary for differe...

Page 20: ...bnail of picture will be displayed while you scrolling across the file name Then press the or OK button to start playback NOTE The time of loading and displaying a picture depends on its size During playback press D MENU button to return to file selecting page Press REPEAT button to change play mode SINGLE play one file only REPEAT ONE repeat one file REPEAT FOLDER all the files in the folder will...

Page 21: ...switch to track 9 Track 15 press and 5 several seconds later it will automatically switch to track 15 d Press or button the player will play the next or previous track 10 Viewing from different angle DVD only Some DVDs may contain scenes which have been shot simultaneously from a number of different angles For these discs the same scene can be viewed from each of these different angles using the A...

Page 22: ...track language DVD VCD CD disc It is possible to change the audio sound track language to a different language from the one selected at the initial settings This operation works only with discs on which multiple audio sound track languages are recorded When playing a disc press LANG button to select desired and available sound track language NOTE When no sound track languages are recorded pressing...

Page 23: ... select desired audio output mode Options a LT RT Left Right mix mode b STEREO 3 PREFERENCE 3 1 TV TYPE Select desired TV system 3 2 AUDIO Select desired audio language if your disc contains multiple audio languages 3 3 SUBTITLE Select desired subtitle language if your disc contains multiple subtitle languages 3 4 DISC MENU Select desired language of your disc menu if your disc menu contains multi...

Page 24: ...ut source and then press OK button to confirm selection Available options DTV ATV AV YPbPr HDMI PC USB DVD PICTURE MODE Press P MODE button on remote control repeatedly to select desired PICTURE mode directly Available options Standard Mild Personal Dynamic SOUND MODE Press S MODE button on remote control repeatedly to select SOUND mode directly Available options Standard Music Personal Movie SLEE...

Page 25: ...ation of current program TV GUIDE FOR DTV MODE ONLY Press EPG button on remote control to enter EPG menu page Press UP DOWN navigation button to select preferred program Press LEFT RIGHT navigation button to switch between left column and right column Press RED button to display the TV guide of previous day Press GREEN button to display the TV guide of next day Press YELLOW button to enter schedul...

Page 26: ... Press UP or DOWN navigation button to select preferred channel Press OK button to confirm selection TELETEXT Press TEXT button on remote control to display the available teletext information and press it repeatedly to stop playing the teletext TV RADIO FOR DTV MODE ONLY Press TV RADIO button on remote control to switch the unit between TV and radio mode SUBTITLE Press SUBTITLE button on remote co...

Page 27: ...Then press UP DOWN navigation button to select recorded files and press OK button to start playback TIME SHIFT FOR DTV MODE ONLY Insert your USB memory device into USB slot first When watching a digital program If you don t want to miss any programs when left press button on remote control to enter TIME SHIFT mode Press button again when you re back to display the tool bar Press LEFT RIGHT navigat...

Page 28: ...enu and press OK button to enter it Use navigation buttons to select desired folder or file and press OK button to start playing When playing Photo files Press DISPLAY button on remote control to hide display the indication tool bar Press OK button repeatedly to switch between Slide Show and Single View Press LEFT RIGHT navigation button to play previous next file Press UP DOWN navigation button t...

Page 29: ... mode Slideshow Effect Select desired slide show effect Background Music Turn on off background music 2 Music Press LEFT RIGHT navigation button to select Music in the main menu and press OK button to enter it Use navigation buttons to select desired folder or file and press OK button to start playing ...

Page 30: ...art playing When playing Movie files Press DISPLAY button on remote control to hide display the indication tool bar Press LEFT RIGHT navigation button to select preferred option and press OK button to confirm it 4 Text Press LEFT RIGHT navigation button to select Text in the main menu and press OK button to enter it Use navigation buttons to select desired folder or file and press OK button to sta...

Page 31: ...rol to stop playing Press button on remote control to move fast backward Press button on remote control to move fast forward Press button on remote control to play previous file Press button on remote control to play next file NOTE To play your multimedia files make sure you have selected correct icon in the main menu of MEDIA PLAYBACK That is to say you can only play Photo files in PHOTO item Mus...

Page 32: ...gation button to enter submenu page Press UP or DOWN navigation button to select preferred option Press LEFT or RIGHT navigation button to adjust the value Press MENU button to return to previous menu page Press EXIT button to exit menu page First Time Setup Connect to power source and turn on this TV then below setup page will display on the screen OSD Language Press LEFT RIGHT navigation button ...

Page 33: ...ontrast Sharpness or Saturation has been changed Picture Mode will turn to Personal automatically 1 6 Hue This item is used to adjust the tone of colour in NTSC system from 50 to 50 1 7 Colour Temp This item is used to adjust the optimum colour temperature for suitable viewing Available options Normal Cool Warm 1 8 Aspect Ratio This item is used to adjust the video size Available options Auto 4 3 ...

Page 34: ...sed to adjust the audio output between left and right speaker from 50 to 50 2 5 Surround Sound This item is used to turn on off Surround Sound function 2 6 EQ Setting This item is used to set the equalizer Available EQ Mode Off Rock Pop Jazz User 2 7 AVL Auto Volume Level This item is used to turn on off AVL function 2 8 S PDIF This item is used to select desired S PDIF audio output type Available...

Page 35: ... RIGHT navigation button to enter it Digital Scan Select the channel Start Start scanning Frequency For this TV it s not user adjustable Strength Display the signal strength of current program and it s not user adjustable 3 22 Analog Manual Scan Press OK or RIGHT navigation button to enter it Analog Scan Use LEFT RIGHT navigation button to fine tune it Channel to Save Select the channel number to ...

Page 36: ...ss OK or RIGHT navigation button to enter it Input the factory default password 0000 using number buttons on remote control Press UP DOWN navigation button to select preferred item NOTE If you forget the password please use the universal password 4711 4 1 Enable This item is used to enable disable Lock System 4 2 Channel Locks Press OK or RIGHT navigation button to enter it Press UP DOWN navigatio...

Page 37: ...ource Set the default source Default Dtv program Set the default digital program Default Atv program Set the default analog program Backup to USB Backup the data to USB memory device Restore from USB Restore data from USB memory device and then your TV will turn to STANDBY mode Recall Recall the default settings of Hotel Mode NOTE We strongly advise that you use Hotel Mode in hotels and you should...

Page 38: ...e Screen This item is used to turn on off Blue Screen The screen background will turn blue at very weak or no signal condition if Blue Screen is ON 5 6 Time Settings Press OK or RIGHT navigation button to enter it Press UP DOWN navigation button to select desired item Press LEFT RIGHT navigation button to adjust the value 5 61 OSD Time This item is used to select desired OSD menu duration Availabl...

Page 39: ...C function Make sure the HDMI device Amplifier etc is connected correctly Press SOURCE button on the unit or remote control to select HDMI input source 5 71 HDMI CEC Control This item is used to turn on off HDMI CEC Consumer Electronic Control 5 72 ARC This item is used to turn on off Audio Return Channel When ARC is on the TV can return the audio to connected HDMI device Amplifier etc 5 73 CEC Me...

Page 40: ...corded files Press BLUE button on remote control to zoom in out 5 82 Device List In this part you can check the available space and file system of your USB memory device Press RED button on remote control to format your USB memory device 5 83 Scheduled Record Press GREEN button on remote control to delete highlighted option Press YELLOW button on remote control to delete all Press UP DOWN navigati...

Page 41: ...ry device ATV AND OTHER MODES Press SOURCE button on the unit or remote control to select desired input source For menu operations in these modes please refer to the menu operations of DTV mode PC MODE Connect a personal computer to this unit Power on your computer and this unit Press SOURCE button on the unit or remote control to select PC input source Press MENU button to display the main menu a...

Page 42: ...ilable range 30 to 30 4 Phase This item is used to adjust the picture apply to the TV available range 0 to 31 5 Clock This item is used to adjust the signals transfer speed available range 30 to 30 NOTE For other menu operations in PC mode please refer to the menu operations of DTV mode ...

Page 43: ...the player Wipe the player with a dry soft cloth If the surface is extremely dirty wipe clean with a cloth which has been dipped in a weak soap water solution and wrung out thoroughly and then wipe again with a dry cloth Never use alcohol benzene thinner cleaning fluid or other chemicals And do not use compressed air to remove dust ...

Page 44: ...ting your TV We are not responsible for any damage to the product or injury to yourself if you mount the TV on your own Do not wall mount the TV while TV is turned on It may cause personal injury due to electric shock Use standard M4 10mm screws 4 pieces to mount this TV ...

Page 45: ...p 1 Place the TV faced down on a soft cloth or cushion to prevent the panel from being damaged Step 2 Align the stand and the bottom of this TV Step 3 Tighten the included screws with a screw driver NOTES Unplug the power plug first when installing or removing the TV Stand To avoid any damage to this TV contact one or more partner for assistance when installing or removing the TV stand ...

Page 46: ...gion code setting Region coding All DVD discs are coded by the sales territory Please note the player is set to region 4 coding by the factory which cannot be changed This is in compliance with the DVD patent requirements ...

Page 47: ...47 GENERAL TROUBLESHOOTING Check the following points before assuming malfunctions of this unit ...

Page 48: ...48 GENERAL TROUBLESHOOTING ...

Page 49: ...M E W Australia Pty Ltd 15 Vaughan St Essendon Fields VIC 3041 ACN 152 719 036 www gvaproducts com au ...

Reviews: