Gunter & Hauer FN 315 ID User Manual Download Page 24

'DLO\8VH

'DLO\8VH

y

the maximum quantity of food which can be frozen in 24 hrs. is shown on the rating plate;

y

the freezing process takes 24 hours. No further food to be frozen should be added during this period;

y

only freeze top quality, fresh and thoroughly cleaned, foodstuffs;

y

prepare food in small portions to enable it to be rapidly and completely frozen and to make it possible

subsequently to thaw only the quantity required;

y

wrap up the food in aluminium foil or polythene and make sure that the packages are airtight;

y

do not allow fresh, unfrozen food to touch food which is already frozen, thus avoiding a rise in

temperature of the latter;

y

lean foods store better and longer than fatty ones; salt reduces the storage life of food;

y

water ices, if consumed immediately after removal from the freezer compartment, can possibly cause

the skin to be freeze burnt;

y

it is advisable to show the freezing in date on each individual pack to enable you removal from the

freezer compartment, can possibly cause the skin to be freeze burnt;

y

it is advisable to show the freezing in date on each individual pack to enable you to keep tab of the

storage time.

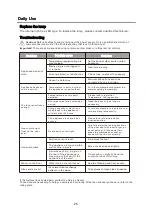
Helpful hints and tips

Hints for freezing

To help you make the most of the freezing process, here are some important hints:


?;

,

#;

2

#+

#

"

>

+

#


#

##;

,

!

"

#

,

Door balconies can be disassembled for cleaning. To make the disassembling


as follows: gradually pull the balcony in the direction of the arrows until it 

comes free, after cleaning, reposition it.

Disassemble the bottom drawer

1.

Pull out the bottom drawer to stopper position.

2.Lift up

 the front of drawer.

3.

Pull out the bottom drawer.

23

Summary of Contents for FN 315 ID

Page 1: ...G nter Hauer ENG Combi Fridge Freezer FN 315 ID FN 315 IDX FN 342 ID FN 342 IDX www gunter hauer eu User Manual...

Page 2: ...1...

Page 3: ...2...

Page 4: ...0 0 0 5 3...

Page 5: ...3 4 3 4 6 7 1 1 7 8 4...

Page 6: ...2 9 0 5...

Page 7: ...2 2 9 6...

Page 8: ...1 5 7 1 0 0 7 0 7...

Page 9: ...0 1 0 0 0 1 1 All accessories such as drawers shelves balconies should be kept there for lower energy consumption 8...

Page 10: ...ay attention to symbol as left side which is located on rear of appliance rear panel or compressor It s risk of fire warning ymbol There are flammable materials in refrigerant pipes and compressor Ple...

Page 11: ...2YHUYLHZ Note Above picture is for reference only Real appliance probably is different FridgeShelves Fridge Balconies Crisper Crisper Cover Fresh convertible box Freezer Drawers Leveling Feet 10...

Page 12: ...ing 9 for refrigerating appliances with climate class extended temperate this refrigerating appliance is intended to be used at ambient temperatures ranging from 10 C to 32 C SN temperate this refrige...

Page 13: ...pper Door x 1 Left Aid Closer on Lower Door x 1 nscrew top hinge cover and disconnect connectors of door switch and harness 2 Unscrew top hinge 3 Remove the pin with a screwdriver and filp the hinge b...

Page 14: ...side to left side then replace the cover 6 Move top left cover to right side 7 Take off the upper door take out the screw from the middle hinge by cross screwdriver then take off the lower door 4 Mov...

Page 15: ...QVWDOODWLRQ 8 9 Unscrew bottom hinge Then remove the adjustable feet from both side 10 Unscrew and remove the bottom hinge pin turn the bracket over and replace it unscrew screw 14...

Page 16: ...skets and then attach them after rotating 11 Refit the bracket fitting the bottom hinge pin Replace both adjustable feet 12 Remove aid closers from bottom of upper and lower doors then take new aid cl...

Page 17: ...r gasket seal the cabinet tightly Then connect door with cabinet by tightly fixed top hinge 16 Connect harnesses from door and cabinet Then replace top hinge cover Before screw the cover connect termi...

Page 18: ...least 50mm gap at two sides and back Levelling the unit To do this adjust the two levelling feet at front of the unit If the unit is not level the doors and magnetic seal alignments will not be cover...

Page 19: ...cking status short touching this key to select running mode ECO mode VACATION mode SUPER mode user definded mode LVSOD 2 Setting temperature display of freezer compartment This area will display setti...

Page 20: ...ntrol panel will be lit up once short touching operation keys There will be a prompt beep for any key operation 2 2 Temperature setting of fridge compartment In user defined mode or SUPER mode short t...

Page 21: ...freezer temperature will be set automatically to 5 18 In ECO mode if you set fridge or freezer temperature by manual ECO mode indicator will flash for 3s fridge and freezer temperature setting operati...

Page 22: ...UPER mode indicator are all light off user defined mode is activated In user defined mode users can set fridge temperature and freezer temperature by manual 2 10 Door opening alarm function If fridge...

Page 23: ...on the time available for this operation Small pieces may even be cooked still frozen directly from the freezer In this case cooking will take longer Refrigerator compartments Type of food Door or ba...

Page 24: ...reduces the storage life of food y water ices if consumed immediately after removal from the freezer compartment can possibly cause the skin to be freeze burnt y it is advisable to show the freezing...

Page 25: ...into service Hints for storage of frozen food To obtain the best performance from this appliance you should make sure that the commercially frozen foodstuffs were adequately stored by the retailer be...

Page 26: ...ut of the way Possible cause Appliance does not work Temperature regulation knob is set at coldest Set the knob at other switch on the appliance Water drain hole is blocked Water on the floor See the...

Page 27: ...G nter Hauer M hlenstrasse 8a Berlin 14167 Germany www gunter hauer eu e mail info gunter hauer de...

Reviews: