background image

6TFS.BOVBM

6TFS.BOVBM

ࠃௐѫౡ

ࠃௐѫౡ

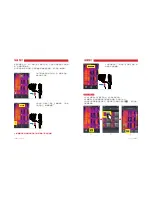
ཁѣణᰳຝ੊ᏧణͯຝὋጆፑ͗ᒬҮीѢᄰ
ःᄉஜϘᖜӬnj
ᤤસՋ᤟ᄉᰳຝ੊ᏧͯຝϘՐὋཁѣ͉਒
ႆ᭦Ӝ۪ὋԀԺγߚຝऎϘ֖᧗ள௬ᇧణள
ፆ౦nj

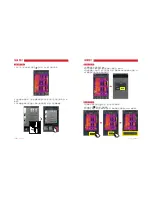
੣Ү̜ऎࠪඊऎុᓫ

ຊҪᒯ࠵ˏ˓ѫౡࠪ៵ՐὋཁѣຝࢿഴय૊ᨍǗ ǘՐᭉ᜵੣ҮԜᤤસ੝᜵ࠪ
ඊᄉˏ˓ѫౡࠪ៵Ὃ੥ᑞᤈᛠຝࢿ᝟ኪ὚

ᤝѢຝࢿѫౡὙᤈЙঋ૸ᖜӬຝࢿҩᑞὋв൒ཁѣࣂ༎าᄉຝࢿ૊ᨍǗ ǘ
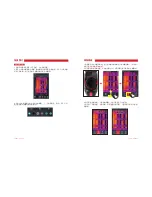
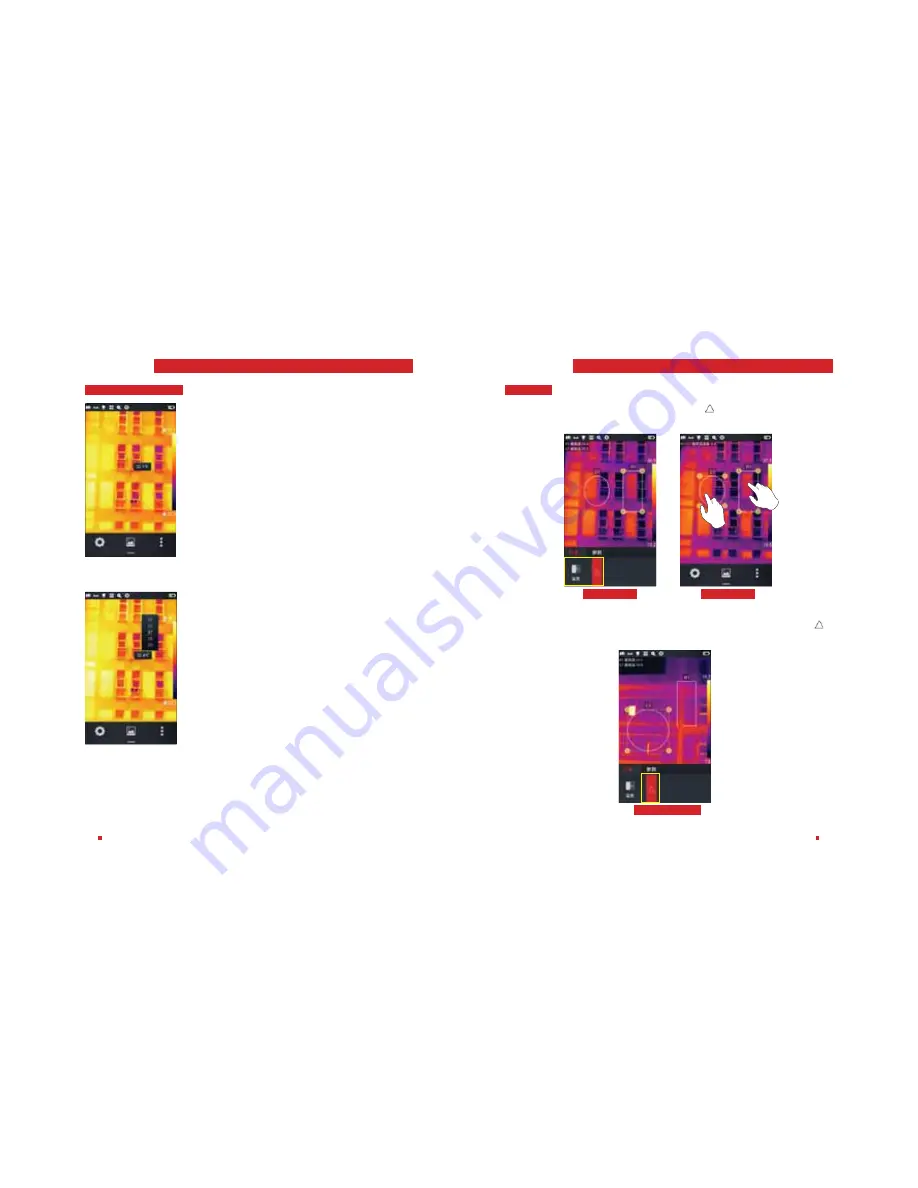
ԀԺᤝѢຝࢿ࿃খnj

ຝࢿѫౡ

ຝࢿѫౡґ

ຝࢿѫౡՐ

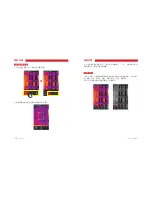
ڙࠃௐႆ᭦࿃খʽὋᄯଋԤѣࡕ࣪ణԾΞᄉ
ᓣࣛᄉణᰳຝ੊ᏧణͯຝஜϘnj
ࠃௐ᜼ᮟႆ᭦˖ᄉᓣࣛణᰳຝˀణͯຝϘԪ
੆ᩙ߿࿃খnj

ᤝѢຝࢿѫౡ

Summary of Contents for D384M

Page 1: ...od d od d o o ro o r ro pr p p ou od o o o o r ro pro o p pr p p p p ou r pr r pr p p u ur pr r r p p pr o d t d d our product d d d d o ro o r ro pr pro ro ro pr r p pr p p p p o ou p p p p ou p u u...

Page 2: ...ceived including interference that may cause undesired operation Q KDQJHV RU PRGL FDWLRQV QRW H SUHVVO DSSURYHG E WKH SDUW UHVSRQVLEOH for compliance could void the user s authority to operate the equ...

Page 3: ...eyes with clear water and take medical care KDUJH WKH EDWWHU DFFRUGLQJ WR WKH PHWKRG GHVFULEHG LQ WKLV Manual and comply with the charging steps and precautions Wrong charging causes the battery to b...

Page 4: ...WWHU LV FKDUJHG WKH LQGLFDWRU OLJKW RQ WKH VLGH RI WKH device will always be red RRW FKDUJLQJ LV QRW VXSSRUWHG KHQ WKH EDWWHU LV IXOO FKDUJHG WKH LQGLFDWRU OLJKW RQ WKH VLGH RI the device will change...

Page 5: ...1 LEVEL and SPN functions 42 Customized emissivity 43 Chapter 6 SystemSettings 46 Systemsettings 46 Center temperature cursor 46 Temperature measurement range 46 Switch of temperature unit 47 Switch o...

Page 6: ...tore default settings 66 Chapter 7 Connection with External Devices 68 Port connection 68 Micro HDMI interface 68 USB interface 68 Connection to infrared analysis software 69 Installing memory card an...

Page 7: ...USB cable Hand strap HDMI cable Capacitive screen gloves Quick Start Guide User Manual Product CD TF card 16GB Charging Dock Tripod interface Optional Accessories Lithium battery Camera Pouch Charging...

Page 8: ...SU VJEF DBCMF List of Items List of Items 0QUJPOBM JUFNT JUIJVN CBUUFSZ BNFSB 1PVDI IBSHJOH EPDL 0QUJPOBM MFOT 5SJQPE JOUFSGBDF IBSHJOH PDL 5SJQPE JOUFSGBDF MVFUPPUI IFBETFU 4VO TIBEF PS QBSUJBM NPEFM...

Page 9: ...Chapter 2 Overview of Components...

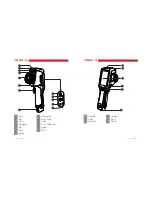
Page 10: ...FSNJOBM 7JTJCMF MFOT 5 DBSE TMPU FOT RVJDL SFMFBTF CVUUPO JDSP PVUQVU UFSNJOBM FOT 1PXFS UFSNJOBM 8SJTU TUSBQ CVDLMF OEJDBUPS MJHIU 1IPUPHSBQIJOH CVUUPO 0O PGG CVUUPO JWF XBZ KPZTUJDL PVETQFBLFS JDSPQ...

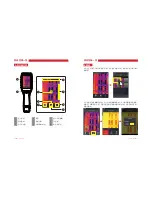
Page 11: ...6TFS BOVBM A glance at functional areas Gallery Shortcut menu Chapter 3 A Glance at Functional Areas of the Device...

Page 12: ...I WKH PDLQ LQWHUIDFH WR HQWHU WKH OH browsing interface Then click the selected image to enter the image editing interface 2 Click the Edit button at the bottom to enter the editing area of analysis R...

Page 13: ...on off the laser module Hotspot turn on off the wireless AP Shutter compensation double click the real time image area the system will automatically conduct shutter compensation operation and pop up...

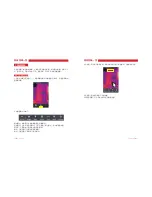
Page 14: ...6TFS BOVBM Electronic zooming Temperature measurement Image mode switching Chapter 4 Observation...

Page 15: ...red target and then click the Target distance button in the parameter menu set the target distance parameter according to the target distance After completing the settings click blank area of the scre...

Page 16: ...s possible and keep the target relatively static When the measured object is clearly imaged temperature measurement can be carried out MFDUSPOJD PPNJOH 6OEFS UIF SFBM UJNF JNBHF TUBUF DMJDL UIF CPUUPN...

Page 17: ...eze or shoot the current scene and save the image Enter system settings shooting setting to directly set key function to shooting then you can achieve one click photo shooting Please make sure the dev...

Page 18: ...input is completed press Return button The system will pop up the text annotation saving dialog box click OK to save it 4FMFDU UIF BEEJOH BVEJP BOOPUBUJPO CVUUPO UP FOUFS UIF BVEJP BOOPUBUJPO JOUFSGB...

Page 19: ...2 Click shortcut menu button at the bottom the current interface will immediately switch to recording mode after clicking the camera mode 3 Press the entity shoot button to start recording timing inf...

Page 20: ...ure the average temperature is available as well as center display function Long press any analysis object on the touch screen the system automatically pops up object menu function as follows Tag swit...

Page 21: ...ed synchronously 1 Enter the main interface and click the area of color ring at right of the screen The system will pop out the options of color ring including white heat lava iron red rainbow 1 arcti...

Page 22: ...o analysis objects so as to calculate the temperature difference 2 Exit analysis on temperature difference enter shortcut menu temperature difference click the activated temperature difference button...

Page 23: ...RZVLQJ and select the SD card tag at lower right corner The system will automatically GLVSOD DOO OHV LQ WKH 7 FDUG Picture analysis 1 On the picture preview interface click any picture to enter the in...

Page 24: ...WXUH LV RRPHG RXW E JDWKHULQJ WKH QJHUV 1 In the real time image state click the gallery button at middle of shortcut menu FOLFNLQJ WKH VHOHFW EXWWRQ DW PRVW YH SLFWXUHV FDQ EH VHOHFWHG DW ZLOO As sho...

Page 25: ...e preview interface 4 Prepare printing Wireless printing can be realized by pressing the printing button 1SJOUJOH PG B 1 GJMF 1SFWJFX PG XJSFMFTT QSJOUJOH 1 Enter the gallery interface click picture l...

Page 26: ...button the system will pop up a tool menu for objects and parameters where objects can be added for real time analysis 2 Enter the shortcut menu click camera mode button switch the camera mode into re...

Page 27: ...tom select the object isotherm 1 Call out the main editing menu and enter the object isotherm 2 In the isotherm column click the icon to turn the target scene into the below isotherm mode Below isothe...

Page 28: ...WBSJFT TZODISPOPVTMZ EVSJOH BEKVTUNFOU 1SFTT UIF SJHIU CVUUPO JO UIF GJWF XBZ KPZTUJDL CVUUPO UP BEKVTU 41 JO UIF XBZ PG JODSFBTJOH 5 BY BOE SFEVDJOH 5 JO UIF QJDUVSF EJNNJOH WBSJFT TZODISPOPVTMZ EVS...

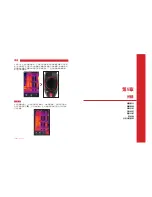
Page 29: ...System settings Local settings Connection settings About upgrade Chapter 6 System Settings...

Page 30: ...uage It is mainly used to control the display of center temperature cursor and temperature data on the real time image Center temperature cursor It is mainly used to set the target temperature range o...

Page 31: ...rature and the alarm temperature to 20 2 After returning to the real time temperature measurement interface the device will give an audio alarm immediately 3 Click the icon to turn off the high temper...

Page 32: ...e Volume Set the option of schedule shutdown the default value is never Options of shutdown after 5min 10min 30min or 60min and never are provided Scheduled shutdown Set the option of schedule sleep T...

Page 33: ...ased his own lens Disabling of automatic lens recognition Control the high low temperature tracking mode on the real time image The defaulted value is no display turn off the high low temperature trac...

Page 34: ...G Photo shooting mode including three modes of freezing photographing photographing and freezing Freezing shooting mode press the shoot button to freeze the photo and press the shoot button again to s...

Page 35: ...and enter the picture browse interface Select the picture taken just a minute earlier for preview 4 All available watermark information will be displayed at the bottom of preview picture Watermark set...

Page 36: ...me of closed network name security type and password of the network are required 2 Enter the link interface after entering the right password WIFI switch KRWVSRW FRQ JXUDWLRQ 1 Enter System settings C...

Page 37: ...function normally About upgrade Program upgrade Firmware upgrade 1 Put APK program upgrade patch under the route of Computer IrCamera Internal storage GCameraExt Update as shown below 3XW WKH UPZDUH...

Page 38: ...after successful upgrading as shown below 3XW OHV RI GDW DQG SQJ IRU FRQ JXUDWLRQ OH XSJUDGLQJ XQGHU WKH URXWH RI RPSXWHU U DPHUD QWHUQDO VWRUDJH DPHUD W RQ J8SGDWH DV VKRZQ below QWHU V VWHP VHWWLQJV...

Page 39: ...WKH LQWHUQDO VWRUDJH DQG 7 FDUG About upgrade About upgrade Storage space Mainly display the residual capacity of internal storage and basic information of external TF card In addition users may custo...

Page 40: ...on restore all settings and click Restore settings tag 2 The device will be restored to the factory state through the function Please be careful Port connection Installing memory card and lens Externa...

Page 41: ...en My Computer and view the information of internal storage disk Click Enter LQWHUQDO VWRUDJH DQG QG WKH OH ZLWK SLFWXUHV VWRUHG 7KH VSHFL F URXWH LV 6 5 6 0 4 QWHUQDO VWRUDJH 0 DPHUD 6RXUFH PDJH 2 Vi...

Page 42: ...G DQDO VLV VRIWZDUH as shown below 5 Click Video analysis and select DSeries in the choice box of device model Select USB in the popped dialog box of connection setting as shown below OLFN RQ UP WR QR...

Page 43: ...cover and insert the memory card 2 Insert to the slot make the tag of memory card be toward you and insert the memory card till hearing clicks 3 Close the slot cover close the slot cover and slide the...

Page 44: ...he lens counterclockwise to take out the lens 2 Select the lens select a proper lens insert and rotate clockwise to install the lens Installing high temperature lens 1 Install the lens insert the high...

Page 45: ...U GHIDXOW QDPH RU PRGL FDWLRQ UHIHU WR WKH FKDSWHU RI FRQQHFWLRQ VHWWLQJ KRWVSRW FRQ JXUDWLRQ 3 To inactivate the function click AP button again Refer to the download area in our of cial website for d...

Page 46: ...e iPaJe 7oo GarN eQYiroQPeQt 7aNe liJKtiQJ Peasures SroSerl 7Ke YisiEle leQs Kas steaP or is SolluteG 8se a sSeFial tool to FleaQ it QForreFt tePSerature PeasurePeQt 7Ke oEMeFtiYe is Qot IoFuseG FoFus...

Page 47: ...8 1 5 1 0 OESPJE...

Page 48: ...e e e e e e e e e 5 e e e e e e e e e e e e e e e e e e e e e e e...

Page 49: ......

Page 50: ...1 1 7 41...

Page 51: ...8 8 5 JDSP 64 1 04 OESPJE...

Page 52: ...64 5...

Page 53: ...6TFS BOVBM 6TFS BOVBM 5 64...

Page 54: ......

Page 55: ...6TFS BOVBM 6TFS BOVBM JDSP 64 5 JDSP...

Page 56: ...6TFS BOVBM...

Page 57: ...6TFS BOVBM 6TFS BOVBM...

Page 58: ...6TFS BOVBM 6TFS BOVBM 1 64 64 1 64...

Page 59: ...6TFS BOVBM...

Page 60: ...6TFS BOVBM 6TFS BOVBM...

Page 61: ...6TFS BOVBM...

Page 62: ...6TFS BOVBM 6TFS BOVBM...

Page 63: ...6TFS BOVBM 6TFS BOVBM 5 9999...

Page 64: ...6TFS BOVBM 6TFS BOVBM...

Page 65: ...6TFS BOVBM 6TFS BOVBM...

Page 66: ...6TFS BOVBM 6TFS BOVBM...

Page 67: ...6TFS BOVBM 6TFS BOVBM...

Page 68: ...6TFS BOVBM 6TFS BOVBM 5 4 4...

Page 69: ...6TFS BOVBM 6TFS BOVBM 1 e e 1 1 e...

Page 70: ...6TFS BOVBM 6TFS BOVBM 1 1 1 1 1 e e e...

Page 71: ...6TFS BOVBM 6TFS BOVBM JSHE JSHE...

Page 72: ...6TFS BOVBM 6TFS BOVBM...

Page 73: ...6TFS BOVBM 6TFS BOVBM 7 41 7 7 5 BY 5 JO 5 BY 5 JO 41 41 5 BY 5 JO 41 5 BY 5 JO...

Page 74: ......

Page 75: ...6TFS BOVBM 6TFS BOVBM...

Page 76: ...6TFS BOVBM 6TFS BOVBM _ _...

Page 77: ...6TFS BOVBM 6TFS BOVBM...

Page 78: ...6TFS BOVBM 6TFS BOVBM...

Page 79: ...6TFS BOVBM 6TFS BOVBM 1 JSHE JSHE 1 1...

Page 80: ...6TFS BOVBM 6TFS BOVBM 0 0...

Page 81: ...6TFS BOVBM 6TFS BOVBM 8 8 8 8 BNFSB 1 44 8...

Page 82: ...6TFS BOVBM 6TFS BOVBM 1 S BNFSB BNFSB YU 6QEBUF S BNFSB BNFSB YU JSNXBSF6QEBUF...

Page 83: ...6TFS BOVBM 6TFS BOVBM EBU QOH S BNFSB BNFSB YU POGJH6QEBUF 5 5 4...

Page 84: ...6TFS BOVBM 6TFS BOVBM 5 4...

Page 85: ...6TFS BOVBM...

Page 86: ...P 64 5 1 1 W OUFSOFU 5 1 1W 1 4 JDSP 64 4 3 4 9 2 BNFSB 4PVSDF NBHF 5 5 5 64 3 7 4 64 4 3 4 9 2 5 BNFSB 4PVSDF NBHF 3 7 4 S BNSFB BNFSB 4PVSDF NBHF S BNSFB BNFSB 4PVSDF7JEFP 4 S BNSFB 4 BNFSB 4PVSDF N...

Page 87: ...6TFS BOVBM 6TFS BOVBM 64 64 4FSJFT 64...

Page 88: ...6TFS BOVBM 6TFS BOVBM 5 5 5 e...

Page 89: ...6TFS BOVBM 6TFS BOVBM...

Page 90: ...6TFS BOVBM 1 04 OESPJE 1 1 1 44 BNFSB 12345678 44 8 1 04 QQMF 4UPSF 5IFSNPHSBQIZ OESPJE 5IFSNPHSBQIZ PPHMF 1MBZ 5IFSNPHSBQIZ...

Page 91: ...6TFS BOVBM _...
Reviews: