Grundig VISION 4 37-4820 Manual Download Page 17

EN

GLISH

17

Changing the picture format

The television automatically switches to the 16:9 format if this 
format is detected via the Euro-AV socket.

1

Select the picture format with »

E

«. The selected picture 

format, for example »16:9«, appears on the screen.
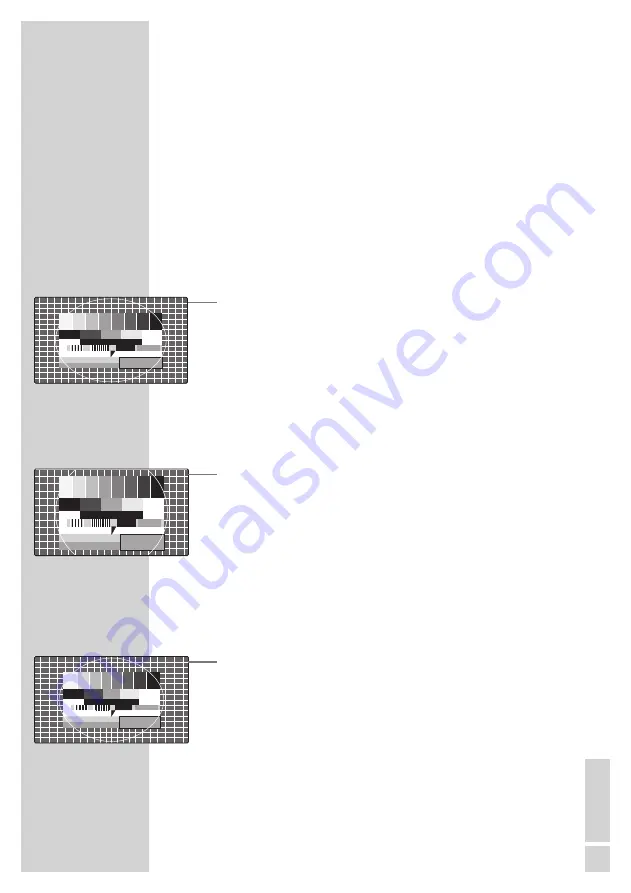
– You can choose between the following picture formats:

»AUTOMATIC« format

The picture format is automatically switched to »16:9« for 16:9 
programmes.
For programmes in 4:3 format, the picture automatically fills the
screen.

»FORMAT 16:9« and »FORMAT 14:9« formats

During programmes in 4:3 format, the picture is stretched horizon-
tally if »16:9« or »14:9« is selected.
The picture geometry is stretched horizontally.
With actual 16:9 signal sources (from a set-top box on the Euro-AV
socket) the picture fills the screen completely and with the correct
geometry.

»FORMAT 4:3« format

The picture is shown in 4:3 format.

»CINEMA« format 

The letterbox setting is especially suitable for programmes in 16:9 
format.
The black borders which are usually at the top and bottom of the
screen are eliminated, 4:3 pictures fill the screen.
The transmitted pictures are enlarged, but are slightly cropped at the
top and bottom. The picture geometry remains unchanged.

»SKY TOP« format

If you cannot read the subtitles which appear on the bottom of the
screen, then select »SUBTITLE«.

»PANORAMA« format 

This setting is suited to films with a large width/height ratio.
During programmes in 4:3 format the picture is stretched horizon-
tally if the »PANORAMA« function is selected. The picture geometry
is stretched horizontally.

TELEVISION OPERATION

------------------------------------------

Summary of Contents for VISION 4 37-4820

Page 1: ...COLOR TELEVISION VISION 4 37 4820 VISION 4 42 4820...

Page 2: ...9 FLOF text and normal text mode 19 Additional functions 21 CONVENIENCE FUNCTIONS 21 Convenience functions with the Features menu 23 USING EXTERNAL DEVICES 23 DVD player DVD recorder video recorder or...

Page 3: ...e Do not place any objects such as newspapers on the television set or cloth or similar items beneath it Do not place the television set close to heating units or in direct sun light as this will impa...

Page 4: ...they are within the thresholds speci ed by the DIN norm pixel faults of this kind cannot be regarded as a defect as de ned by the warranty Notes Do not connect any other equipment while the device is...

Page 5: ...elevision 3 Plug the mains cable into the wall socket Note Only plug the device into the mains socket after you have connected the external devices and the antenna Only connect the television using th...

Page 6: ...television no longer reacts properly to remote control commands the batteries may be at Be sure to remove used batteries The manufacturer accepts no liability for damage resulting from used batteries...

Page 7: ...video signal input for PC COMPONENT INPUT Y Pb Pr Video signal input YUV signal AUDIO IN LR Audio signal input YUV signal SPDIF OUT Audio output sockets coaxial for PCM signals For connecting to a dig...

Page 8: ...the volume Select menu functions MENU Opens the MAIN MENU menu Press P or P to select an item Press V or V to activate a function Press V or V to set a function Press MENU to close the menu Opens the...

Page 9: ...hen selection with P or P d Sound on o mute i Calls up the MAIN MENU Z Zap function page stop in teletext mode P P Switches the television on from standby selects stations step by step moves the curso...

Page 10: ...iver remote control level 1 The DVD button has been programmed for operating a GRUNDIG DVD player You can change this programming see AUX button The functions available depend on the model of the devi...

Page 11: ...may last a few minutes depending on the number of television stations found After the search the television switches to channel position 1 and the PROGRAM TABLE menu appears Changing stored channels...

Page 12: ...ditional channel names repeat steps 1 to 4 Skipping television channels You can mark television channels which should be skipped during se lection with P or P A selection with the number keys is also...

Page 13: ...1 Press i to open the MAIN MENU The MAIN MENU appears 2 Select SOUND with P or P and con rm with OK The SOUND menu appears Volume 1 Select Volume with P or P and adjust the setting with 4 or 3 Balance...

Page 14: ...then select On with 4 or 3 Equaliser The equaliser o ers you four preset sound settings Music Sport Cinema and Speech and one which you can create yourself User 1 Select EQUALIZER with P or P and con...

Page 15: ...2 Select the desired AV channel position with P or P and press OK to con rm 3 Switch back to the television channel with 1 0 Adjusting the volume 1 Adjust the volume with 4 or 3 Muting 1 Use p to swi...

Page 16: ...n allows you to save the television channel which you are currently watching and switch to other channels zapping 1 Select the channel you want to save in the zap memory with 1 0 or P P e g channel 1...

Page 17: ...al sources from a set top box on the Euro AV socket the picture lls the screen completely and with the correct geometry FORMAT 4 3 format The picture is shown in 4 3 format CINEMA format The letterbox...

Page 18: ...to each other Selecting the channels for the inset picture and the left side of the screen double window 1 Press P or P to move up and down channel positions one at a time Selecting the channels for t...

Page 19: ...r mation line 4 Press TXT to switch o teletext mode Additional functions Skipping the waiting time While a page is being searched for you can switch to the television channel 1 Enter the teletext page...

Page 20: ...answer Certain teletext pages contain hidden answers or information which can be called up 1 Display information with 2 Conceal information with Split screen Split Screen With this function you can s...

Page 21: ...he TIMER menu After this time has elapsed the television switches to standby mode or switches on from standby mode Enter the TV station in the channel number item and the television switches on to it...

Page 22: ...tal lock with 4 or 3 On 6 Press i to nish the setting The selected channel position is now blocked Deactivating the parental lock 1 Select the blocked television channel with 1 0 2 To open the MAIN ME...

Page 23: ...he mains socket after you have connected the external devices High de nition HD ready Your television can playback high de nition television signals HDTV You can connect the input sources HDTV set top...

Page 24: ...V1 or AV2 socket on the television and the corresponding socket on the external device using a EURO AV cable video and audio signal Using the EURO AV socket S Video signal Video signal Y C Audio signa...

Page 25: ...top box and se lect the function you wish to use 2 Press AV select the input signal channel with P or P AV1 AV2 AV2 Y C AV3 S Video HDMI1 HDMI2 or YPbPr and press OK to con rm Headphones Connecting he...

Page 26: ...g a decoder or satellite receiver 1 Connect the AV1 socket on the television set and the appro priate socket on the decoder using a EURO AV cable Using a decoder or satellite receiver 1 Switch on the...

Page 27: ...nd the corresponding sockets on the camcorder with a cinch cable audio signal Note There must not be video signals at VIDEO and S VHS sockets at the same time This could lead to picture disturbances O...

Page 28: ...channel with P or P and press OK to con rm Settings for the PC 1 Press i to open the INFO menu The INFO menu appears 2 Select SETUP with P or P and press OK to con rm 3 Select the function or setting...

Page 29: ...the search is interrupted and the picture appears Repeat the search until the channel you want appears on the screen Note The current system is automatically displayed in the System line Select Syste...

Page 30: ...4 or 3 4 Select Channel with P or P 5 Press OK to choose between S special channel and C channel 6 Press 4 or 3 to switch up and down channels or use 1 0 to enter the channel number directly Note The...

Page 31: ...he COUNTRY menu appears 5 Press P P 4 or 3 to select the country 6 Press OK to start the search The search begins It may last a few minutes depending on the number of television stations found The aut...

Page 32: ...such as foam 2 Unscrew the four screws A 3 Remove the stand B 4 Attach the cover C provided and fasten with two screws Caution Follow the assembly instructions for the wall bracket carefully or have...

Page 33: ...directive for electrical equipment to be used within de ned voltage ranges 2004 108 EG directive on electromag netic compatibility The device complies with the following standards EN 60065 EN 55013 E...

Page 34: ...setting if setting option is available Problem at station Volume set to minimum Problem at station Television station has no tele text or antenna system Station signal too weak No optical connection R...

Page 35: ...g is used it must be protected by a 5A fuse either in the plug or at the distribution board If this type of plug becomes defec tive ensure that the fuse is removed before disposal to eliminate poten t...

Page 36: ...Grundig Multimedia B V Atrium Strawinskylaan 3105 NL 1077 ZX Amsterdam http www grundig com 08 11...

Reviews: