


15
ENGLISH
OPERATION _________________________________
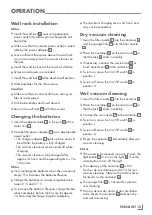
Wall rack installation
Notes
7
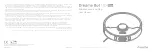
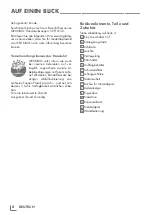
Install the wall rack
Q
near an appropriate
power outlet, this allows you to charge the unit
hassle-free.
7
Make sure that the nearest power outlet is reach-
able by the power adapter
P
.
7
Leave sufficient free space above the wall rack
so you can easily place the vacuum cleaner on
the rack.
7
Install the wall rack out of the reach of children.
7
Screws and dowels are included.
1
Install the wall rack
Q
at the desired wall position.
2
Mark boreholes for the three screws.
Caution
7
Make sure that you do not drill over wiring, ca-
bles or water pipes!
3
Drill the boreholes and insert dowels.
4
Secure the wall rack
Q
with three screws.
Charging the batteries
1
Insert the adapter cable
P
in the port
K
of the
motor unit
J
.
2
Connect the power adapter
P
to an appropriate
power outlet.
– The charge indicator
L
lights up blue and will
be off after the battery is fully charged.
– The vacuum cleaner must be turned off while
charging.
– The vacuum cleaner is fully charged after
approx 14 hours and the operating time is 7 to
10 minutes.
Notes
7
Only recharge the batteries when they are nearly
empty. This increases the batteries lifespan.
7
Charge the batteries at a room temperature be-
tween 0°C and 37°C.
7
To increase the battery’s lifespan, charge the bat-
teries completely before the first use for approx
.16 hours and discharge it again completely.
7
The maximum charging time is 24 hours and
may not be exceeded.
Dry vacuum cleaning
1
Insert the filter nozzle
F
into the container
G
and the sponge filter
H
into the filter nozzle
F
.
2
Place the container
G
on the motor unit
J
so
that the lock
E
clicks in audibly.
3
If necessary, connect the crevice tool
M
or
brush attachment
O
to the container
G
.
4
To turn on, move the On/Off switch
A
in
position I.
5
To turn off, move the On/Off switch
A
in
position 0.
Wet vacuum cleaning
1
Insert the filter nozzle
F
into the container
G
.
2
Place the container
G
on the motor unit
J
so
that the lock
E
clicks in audibly.
3
Connect the wet nozzle
N
to the container
G
.
4
To turn on, move the On/Off switch
A
in
position I.
5
To turn off, move the On/Off switch
A
in
position 0.
6
Empty the container
G
immediately after wet
vacuum cleaning.
Notes
7
If the area to be cleaned is poorly lit, push the
light button
C
to turn on the light
D
. Use the
same button to turn off the light.
7
The capacity of the container
G
is 0.5L
for dry vacuum cleaning and 0.15L for wet
vacuum cleaning. Observe the MAX marker
for liquids on the container
G
.
7
The sponge filter
H
is not used for wet vac-
uum cleaning.
7
Do not vacuum dry and wet dust simultane-
ously. Empty the container
G
between dry
and wet vacuuming.