background image

8

ENGLISH

OPERATION________________________________

Notes

  Check the appliance for damage caused by 

delivery/transportation and for lacking parts.

Caution

  Keep the package material out of the reach 

of children.

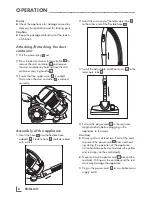
Attaching/Detaching_the_dust_

container

1__

Pull the power plug 

H

 out.

2__

Press the dust container release button 

E

 to 

remove the dust container 

A

 and remove 

the dust container by holding from the dust 

container carrying handle 

B

.

3__

Ensure that the upper cover 

C

 is seated 

firmly when the dust container 

A

 is placed 

correctly.

Assembly_of_the_appliance

1__

Insert the hose 

Q

 into the flexible hose 

adapter 

L

. Flexible hose 

Q

 shall be seated 

with a click.

2__

Insert the wide end of the telescopic tube 

O


to the other end of the flexible hose 

Q

.

3__

Install the adjustable multi-floor brush 

N

 to the 

telescopic tube 

O

.

4__

Pull out the power cord 

H

 in the required 

length carefully before plugging in the 

appliance to the mains. 

Caution

  Always pull out at least two thirds of the cord 

to prevent the power cord 

H

 from overheat-

ing during the operation of the appliance. 

Cord should be pulled out between the yellow 
and red signs on the cord ideally.

  Never pull out the power cord 

H

 beyond the 

red mark. Pulling out the cord beyond the red 

mark may damage the appliance.

5__

Plug in the power cord 

H

 to a suitable mains 

supply outlet.

Summary of Contents for VCC 6270 C

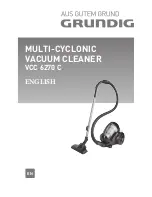
Page 1: ...MULTI CYCLONIC VACUUM CLEANER VCC 6270 C ENGLISH EN...

Page 2: ......

Page 3: ...3 ________________________________________________________ A O P B C D D E F F G G H I J K L M N Q R S T U V W...

Page 4: ...ects Do not use the appliance in wet surroundings Do not use the appliance with wet hands This appliance is designed for vacuuming dust and dust par ticles Do not attempt to use it on large objects wh...

Page 5: ...Please contact your specialist dealer if this is the case SAFETY_____________________________________ Our GRUNDIG Household Ap pliances meet all the applicable safety standards thus if the ap pliance...

Page 6: ...ly dry before inserting back into the vacuum cleaner SAFETY_____________________________________ Caution The motor is equipped with a thermal cut out If for any rea son the vacuum cleaner should over...

Page 7: ...inual waste reduction of several tonnes of plastic each year and availability of at least 5 years for all accessories For a future worth living For a good reason Grundig Controls and parts See the fig...

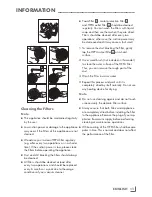
Page 8: ...nsert the hose Q into the flexible hose adapter L Flexible hose Q shall be seated with a click 2 Insert the wide end of the telescopic tube O to the other end of the flexible hose Q 3 Install the adju...

Page 9: ...h an indicator for carpet and hard surfaces You can adjust the brush to a suitable position to the surface to be vacuumed with the adjusting mechanism Use your brush at normal position hair brushes co...

Page 10: ...components to the appliance and switching on the appliance 8 Replace the cyclone assembly V foam filter T and motor protection filter U in their places and close the upper cover C so that it is seated...

Page 11: ...del to clean the outer surface of the HEPA filter Thus you can remove the rough part of the dust 3 Wash the filter in warm water 4 Repeat this process and wait until it is completely dried by itself n...

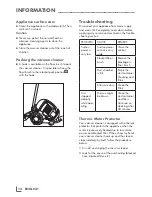
Page 12: ...ing section PROBLEM CAUSE REMEDY Suction power is very low Suction power control is very wide Close the control Blocked floor brush Remove the blockage in floor brush Dust chamber is full Empty the du...

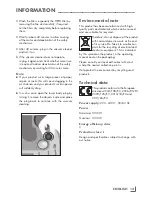
Page 13: ...remove the objects inside and place the plug back to continue with the vacuum cleaning Environmental note This product has been manufactured with high quality parts and materials which can be re used...

Page 14: ...Grundig Intermedia GmbH Beuthener Strasse 41 D 90471 N rnberg www grundig com 72011 908 8300 14 30...

Reviews: