background image

12

»Easy Dialog System« – the interactive operating
manual

Your television features the »Easy Dialog System« – a kind of inter-
active operating manual.
This interactive operating manual has menus, a user guide and a
help function to show you how to operate the television and the
many numerous feature it offers.
The printed operating manual only shows you how to set up the
television and provides a general overview, and is therefore very
concise.

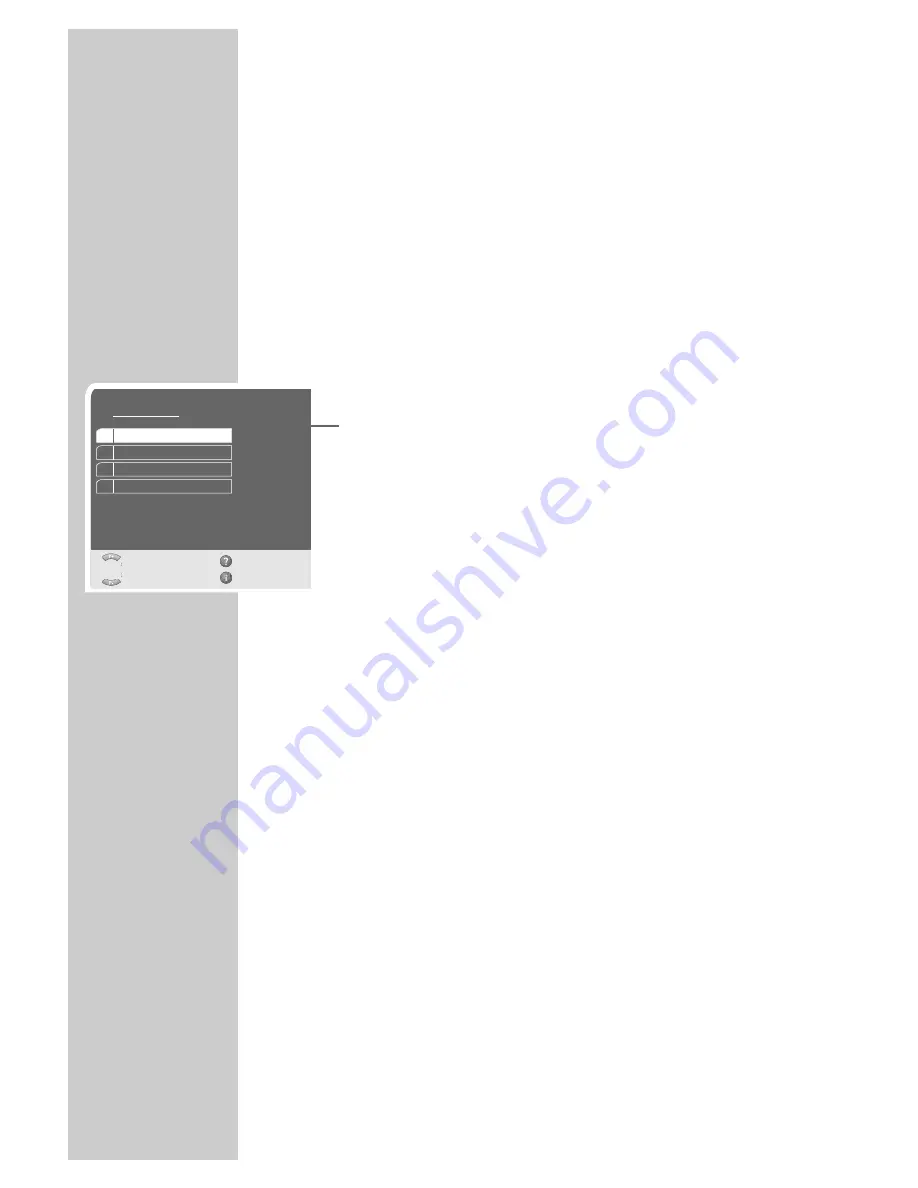
How the »Easy Dialog System« works

The main »Easy Dialog« menu is your television’s control centre. 

This main menu is the contents page of the »Easy Dialog Systems«. 
Press »

i

« to open it. 

You can select each menu item directly by pressing »

1…0

«. 

Alternatively you can select by pressing »

P +

«, »

P -

« and then

»

OK

« to confirm.

The user guide at the bottom of the menus shows you what functions
each button performs.

If you want an explanation of a function, just press »

D

«.

What happens if you accidentally select the wrong menu item? No
problem – just press »

F

« to return to the previous menu.

Once you have made all your settings or have finished reading the
interactive operating manual, press »

i

« to return to TV mode.

Just try it out. You can’t go wrong.

EASY DIALOG SYSTEM

_______________________

1 Settings

2 Preset list

3 Installation

4 Remote control

ǵ

Ń

EASY DIALOG

Help

Exit

Select
and open

OK

Summary of Contents for LXW 68-9740 Dolby

Page 1: ...COLOR TELEVISION VISION 26 LXW 68 9740 Dolby VISION 32 LXW 82 9740 Dolby ...

Page 2: ...ide 16 Setting up the TV Guide 16 Sorting TV programmes 17 TV Guide settings 18 19 Teletext mode 18 TOP text or FLOF text mode 18 Normal text mode 18 19 Additional functions 20 25 Using external devices 20 22 Connecting external devices 22 Changing the AV settings 23 Video recorder DVD player or set top box 23 Headphones 24 Decoder or satellite receiver 24 Digital multi channel amplifier AV receiv...

Page 3: ... vision For reasons of safety have a repairman remove any dirt in the set from time to time Never open the television under any circumstances No warranty claims are accepted for damage caused by incorrect handling Make sure the power cord or the power supply unit if provided are not damaged The television set may only be operated with the mains cable adapter supplied Thunderstorms are a danger to ...

Page 4: ...ring it is technically impossi ble to guarantee that some pixels will not be defective Provided they are within the thresholds specified by the DIN norm pixel faults of this kind cannot be regarded as a defect as defined by the warranty Caution If you want to use a wall bracket for your television make sure you read the assembly instructions for the wall bracket carefully or have your spe cialist ...

Page 5: ...power cord of your device until you have connected the external equipment and the antenna Only connect the television using the power cord supplied to a suitable earthed safety socket Do not use an adapter plug or extension lead which does not meet the applicable safety standards Do not tamper with the power cord AC IN LINE OUT AV 2 AV 1 SP DIF OPTICAL OUT DVI AUDIO IN DVI I HDMI SERVICE G BUS COM...

Page 6: ...ompartment by taking off the lid 2 Put in the batteries AA 2 x1 5 V Make sure the polarity is correct 3 Close the battery compartment Note If the television no longer reacts properly to remote control com mands the batteries may be flat Always remove used batter ies The manufacturer accepts no liability for damage caused by leaking batteries Environmental note Batteries including those which conta...

Page 7: ...dio input DVI signal DVI I DVI I socket video input DVI signal HDMI HDMI socket audio video input HDMI SERVICE G BUS Service socket for dealers Controlling external modules DVB T DVB S AC IN Power cord socket L AUDIO R Audio input for camcorder red and white socket VIDEO Video input for camcorder yellow socket S VIDEO Video output for S Video camcorder OVERVIEW_____________________________________...

Page 8: ...on off mute i Opens the EASY DIALOG menu Z Zapping function P P Switch the television on from standby Select channels step by step Move the cursor in the menus up and down Ǹ Ƿ Adjust the volume Move the cursor left right OK Opens the channel list Activates various functions TXT Switches between teletext and TV modes TV G Opens the TV Guide electronic programme guide TV Guide providers are not avai...

Page 9: ...ontrol level 1 The DVD button has been programmed for operat ing a GRUNDIG DVD player You can change this programming see AUX button The functions available depend on the model of the device you are using Just try it out AUX Programming the remote control for the operation of external devices Press AUX and hold it down and press three number buttons to enter the code 1 2 3 for a GRUNDIG DVD player...

Page 10: ...ext page P Scrolls back a page TXT Switches between teletext and TV modes z z red Scrolls back a page Ȅ Ȅ green Scrolls to the next page Ƿ Ƿ yellow Selects the next chapter F F blue Selects the next topic SCAN Overriding wait time S Calling up a sub page directly P Page stop Reveal answer OVERVIEW____________________________________________ ...

Page 11: ...bsequently You can find more detailed instructions in the Easy Dialog System interactive operating manual The Easy Dialog System is described on page 12 Picture and sound settings 1 Select the Picture menu by pressing z or the Sound menu by pressing F 2 Select the item with P or P and press OK to confirm 3 Change the setting with Ǹ Ƿ P or P 4 Exit the Picture menu or the Sound menu by pressing i N...

Page 12: ...is the contents page of the Easy Dialog Systems Press i to open it You can select each menu item directly by pressing 1 0 Alternatively you can select by pressing P P and then OK to confirm The user guide at the bottom of the menus shows you what functions each button performs If you want an explanation of a function just press D What happens if you accidentally select the wrong menu item No probl...

Page 13: ...s 1 Press 1 0 to select channels directly 2 Press P or P to move up and down presets one at a time 3 Open the channel list by pressing OK select the station with P or P and press OK to confirm Selecting AV channels 1 To select AV channels press AV to open the AV menu press P or P to select the AV preset and OK to confirm Adjusting the volume 1 Press Ǹ or Ƿ to change the volume Muting 1 Press p to ...

Page 14: ...on by pressing PAT Zapping function This function remembers the channel you are currently watching while you switch over to other channels zapping 1 Press 1 0 or P P to select the channel to be stored in the zapping memory e g Channel 7 PRO7 and press Z to save it The channel name appears on the screen e g Z 7 PRO7 2 Press 1 0 or P P to switch over to another channel 3 Each time you press Z the te...

Page 15: ...time Who provides TV Guide Certain stations provide a TV Guide for almost all programmes The programme information is available for several days How TV Guide works First you need to find a TV Guide provider and then activate the TV Guide Select a preset for the TV Guide provider and the information is imported This information is stored even if you switch off and then on again It takes between 20 ...

Page 16: ...Guide with TV G The TV Guide appears on the television screen with the topic menu All programmes Feature films Sport TV series Children s programmes Shows and entertainment News 2 To sort programmes according to the station press F blue or to sort programmes according to time and day press Ȅ green In the overview menu you can see the day NOW for current programmes NEXT for the next programmes and ...

Page 17: ...ect the setting and press OK to confirm 5 Press P or P to change the setting and press OK to confirm Note If you want an explanation of the setting just press D 6 Press i to conclude the setting THE GRUNDIG TV GUIDE __________ Installation TV Guide 1 TV Guide 2 Update in standby mode 3 Automatic restriction 4 Show station name 5 TV Guide Provider List Help Select and open OK Back Exit Yes Yes Off ...

Page 18: ... blue to select a topic 7 Press TXT to switch off teletext Normal text mode 1 Press TXT to switch on teletext 2 You can select teletext pages directly by pressing 1 0 3 Scroll back a page with P 4 Press P to scroll to the next page 5 Press TXT to switch off teletext Additional functions Overriding wait time 1 Press SCAN The television returns to television mode the teletext page numbers are displa...

Page 19: ...sub pages with P 2 Press P to quit the function Calling up a sub page directly If the selected teletext page contains further pages the number of the current sub page as well as the total number of pages is displayed 1 Call up the sub pages with S 2 Select the sub pages with z red or Ȅ green 3 End this sub page function with S Reveal answer Certain teletext pages contain hidden answers or informat...

Page 20: ...cket after you have connected the external devices High definition HD ready Your television can playback high definition television signals HDTV You can connect the input sources HDTV set top box or High Definition DVD player to the HDMI or DVI I socket digital HDTV signal This ensures that you can view digital HDTV programmes even if they are copy protected HDCP High Bandwidth Digital Content Pro...

Page 21: ...h an analogue video signal progressive Video signal YUV resolution standard 480p 576p HDTV 720p 1080i Audio signal stereo analogue Preset YPbPr 1 Connect the COMPONENT INPUT VIDEO Y Pb Pr sockets on the television to the corresponding sockets of the external device with RCA cables video signal 2 Connect the COMPONENT INPUT AUDIO IN L R sock ets on the television to the corresponding sockets of the...

Page 22: ...menu you can adjust the AV sockets to the signals from the devices connected to them 1 Open the EASY DIALOG menu by pressing i The EASY DIALOG menu appears 2 Select Installation with P or P and press OK to confirm The Installation menu appears 3 Select Devices with P or P and press OK to con firm The Devices menu appears 4 Select the AV socket with P or P and press OK to confirm The menu for the s...

Page 23: ... confirm Headphones Connecting the headphones 1 Plug the headphones 3 5 mm jack plug into the headphone socket on the back of the device Selecting audio settings for the headphones 1 Open the Sound menu by pressing F 2 Select Headphone sound settings or Headphone volume with P or P and press Ǹ or Ƿ to make the setting 3 Press i to conclude the setting USING EXTERNAL DEVICES_______________ LINE OUT...

Page 24: ... and press OK to confirm Digital multi channel amplifier AV receiver 1 Plug a standard optical digital cable into the SP DIF OPTI CAL OUT socket on the digital receiver and the correspond ing input socket on the digital multi channel amplifier AV receiver USING EXTERNAL DEVICES_______________ AC IN LINE OUT AV 2 AV 1 SP DIF OPTICAL OUT DVI AUDIO IN DVI I HDMI SERVICE G BUS COMPONENT INPUT Y Pb Pr ...

Page 25: ...t sockets of the camcorder using RCA cables audio signal Note In the Devices menu you may have to select the video signal see Changing the AV settings on page 22 There must not be video signals at VIDEO and S VHS sockets at the same time This could lead to picture disturbances Operation with a camera recorder 1 Press AV press P or P to select the C AV preset and press OK to confirm 2 Switch on the...

Page 26: ...esolution 1024 x 768 picture frequency 60 Hz In the Devices menu you may have to select the DVI audio signal see Changing the AV settings on page 22 Selecting the preset for the PC 1 Press AV then use P or P to select the DVI Analog preset analogue video signal or DVI Digital digital video signal and press OK to confirm OPERATION AS A PC MONITOR______ AC IN LINE OUT AV 2 AV 1 SP DIF OPTICAL OUT DV...

Page 27: ...wer sup ply for the receiver will then no longer be needed Connecting the communication line to the receiver 1 Plug the communication line into the IR remote and 12 VDC sockets Note The communication line is supplied with the television Connecting the communication line to the television set 1 Plug the communication line into the SERVICE G BUS socket on the television Note The remote control the i...

Page 28: ...elect the Euro AV socket with P or P and press OK to confirm 8 Select Install external module with P or P and start the installation with OK Note When the installation has been successfully completed the First Time Installation page appears You can find further settings in the digital receiver user guide RETROFITTING A DIGITAL RECEIVER 1 Settings 2 Rreset list 3 Installation 4 Remote control ǵ ŃEA...

Page 29: ...e the selection PIP Displays an inset picture Returns to normal picture AV Opens the pre selection for AV channels Then select with P or P d Sound on off mute i Opens the television EASY DIALOG menu main menu You can find the main menu of the digital receiver in the EASY DIALOG menu Z Switches back one menu level in the receiver P P Switch the television on from standby Select stations step by ste...

Page 30: ...button Note The DR button has been programmed for operating a GRUNDIG digital receiver remote control level 1 The DVD button has been programmed for operat ing a GRUNDIG DVD player You can change this programming see the AUX button The functions available depend on the model of the device you are using Just try it out AUX Programmes the remote control for the operation of external devices Press AU...

Page 31: ...23 EEC directive on electrical equipment for use within certain voltage limits 89 336 EEC 2006 95 EG directive on electro magnetic compatibility The device complies with the following standards EN 60065 EN 55013 EN 55020 Environmental note This product has been made from high quality parts and materials which can be re used and recycled Therefore do not throw the product away with normal household...

Page 32: ...na cable connected Check antenna Adjust the brightness con trast or colour setting Test with a different channel Turn up the colour Select the correct colour standard Test with a different channel Correct the sound setting Automatic or manual tun ing fine tuning Have antenna cable or sys tem checked Turn up or switch on the vol ume Select sound output via loudspeaker Test with a different channel ...

Page 33: ... must be protected by a 5A fuse either in the plug or at the distribution board If this type of plug becomes defective ensure that the fuse is removed before disposal to eliminate potential shock hazard If it is necessary to change the fuse in the non rewireable plug the correct type and rating 5A ASTA or BSI approved BS1362 must be used and the fuse cover must be refitted If the fuse cover is los...

Page 34: ...Grundig Multimedia B V Atrium Strawinskylaan 3105 NL 1077 ZX Amsterdam http www grundig com 07 24 ...

Reviews: