background image

86

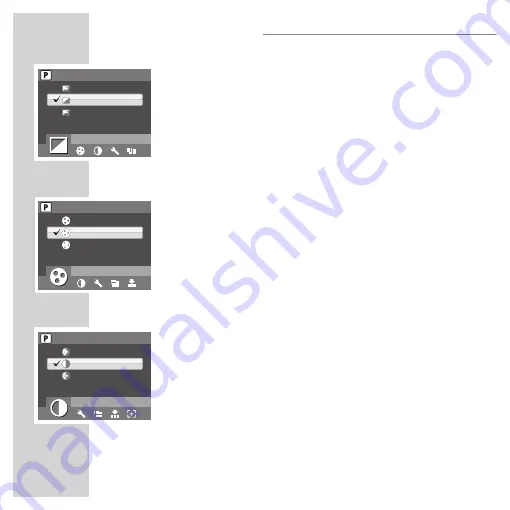
Sharpness

The Sharpness setting allows you to enhance the finer details of your photos. Use 
a higher setting for very sharp photos and a lower setting for a soft-toned photo. 
Use the Up/Down navigation buttons to select from the options. Three sharpness 
settings are available:

HIGH 


NORMAL (default)


LOW


Saturation

The Saturation setting allows you to adjust the saturation of the colors in your 
photos. Use a high saturation setting for rich colors and a lower saturation setting 
for more natural tones. Use the Up/Down navigation buttons to select from the 
options.Three saturation settings are available:

HIGH 


NORMAL (default)


LOW


Contrast

The Contrast setting allows you to adjust the contrast of your photos.
Use the Up/Down navigation buttons to select from the options.Three
contrast settings are available:

HIGH 


NORMAL (default)


LOW


Setup

See “The Setup Menu” on page 99 for more details on the setup menu
options.

CAPTURE SETTINGS

SHARPNESS

HIGH

NORMAL

LOW

SATURATION

HIGH

NORMAL

LOW

CONTRAST

HIGH

NORMAL

LOW

Summary of Contents for GSC 110

Page 1: ...DİJİTAL FOTOĞRAF MAKİNESİ KULLANIM KILAVUZU GSC 110 tr en ...

Page 2: ...eri 8 Fotoğaf Makinesi Düğmeleri 16 FOTOĞRAF MAKİNESİ KURULUMU 16 Bilek Askısının Takılması 16 Pillerin Takılması 17 SD SDHC Bellek Kartı Takılması 18 Açma 18 İlk Kullanım 19 BAŞLARKEN 19 Fotoğraf Çekme 25 Frame Composite Çerçeve Modunun Kullanılması 25 Video Kaydetme 26 Ses Dosyalarının Kaydedilmesi 26 Sesli Kısa Not Kaydetme 27 FOTOĞRAF ÇEKME AYARLARI 27 Capture Fotoğraf Çekme Menüsü 32 Video Ca...

Page 3: ...Bakılması 36 Fotoğraf Videolara TV de Bakılması 36 Oynatma Sırasında Büyütme Küçültme 36 Fotoğraf Video Ses Silinmesi 37 Playback Oynatma Menüsünün Kullanılması 43 Fotoğraf Videoların PC ye Aktarılması 44 FOTOĞRAF MAKİNESİ AYARLARI 44 Setup Ayar Menüsü 50 PictBridge Print PTP PictBridge Yazdırma 54 ÖZELLİKLER 56 SORUN GİDERME ...

Page 4: ...jektifin temizliği için hava pompası ile tozu uzaklaştirdiktan sonra bu iş için yapılmıs mikro fiber bez veya lens temi zleme kalemini kullanabilirsiniz Objektifi uzun süre doğrudan güneş ışığına maruz bırakmayın Ürünü temizlemek için aşındırıcı kimyasallar temizlik çözeltileri veya güçlü deterjanlar kullanmayın Ürünü nemli yumuşak bir bezle hafifçe silin Pil Bilgileri Pili takmadan veya çıkartmad...

Page 5: ...ya ambalajda bulunan yanda görünen sembol ile belirtilir Bu toplama yerlerini lütfen bulunduğunuz yöredeki yerel yönetime sorunuzEski cihazları geri kazanıma vererek çevre korumasına önemli bir katkıda bulunursunuz Yasaklı Madde Kullanımının Kısıtlanmasına Uyum EEE Yönetmeliğine Uygundur Aldığınız ürün T C Çevre ve Orman Bakanlığı tarafından 30 05 2008 tarih ve 26891 sayılı Resmi Gazete de yayımla...

Page 6: ...ta Bellek 128 MB veya üstü HDD alanı 40 MB veya üstü USB bağlantı noktası Ambalaj Kutusunda Bulunan Parçalar Fotoğraf makinesi ambalajında bulunan parçaları kontrol edin Kutuda şu parçalar bulunmalıdır Dijital fotoğraf makinesi USB AV 3 ü 1 arada kablo Bilek askısı Kullanım Kılavuzu CD ROM Ana Özellikler 12 0 Mega piksel çözünürlük 15x yakınlaştırma 3x optik yakınlaştırma ve 5x dijital yakınlaştır...

Page 7: ...n PC AV bağlantı noktası Arka Görünüş LCD ekran Çoklu menü yön düğmesi OK düğmesi Oynatma düğmesi Zoom düğmesi Hoparlör Tripod soketi Pil SD kart yuvası MENU MENÜ düğmesi SCENE SAHNE düğmesi Bilek askısı ilmeği DİJİTAL FOTOĞRAF MAKİNENİZİ TANIYIN Fotoğraf Makinesi Görünümleri A H B I G N R F M Q E L P D K O C J ...

Page 8: ...ın Ses çalmayı başlatıp duraklatmak için basın Sesli kısa not çalmayı durdurmak için basın 5 USB modunda MSDC YOK PTP Seçimi onaylamak için basın DİJİTAL FOTOĞRAF MAKİNENİZİ TANIYIN LED LED Durumu Fotoğraf Makinesi Durumu Zamanlayıcı LED i Off Kapalı Zamanlayıcı kapalı Kırmızı yanıp sönen 10 sn Zamanlayıcı geri sayar 10 saniye sonra flaş çalışır Kırmızı yanıp sönen 2 sn Zamanlayıcı geri sayar 2 sa...

Page 9: ...dunda MSDC Yok PTP Bir menüde yukarı kaymak için basın Sağ Kendinden Zamanlayıcı Seri Çekim modu 1 OSD menülerinde sağa doğru gidin 2 Capture Fotoğraf Çekme modunda Self timer Burst Multi Burst Zamanlayıcı Seri Çekim Çoklu Seri Çekim modları arasında gezinmek için basın AF alan seçiminde sağa kaydırmak için basın 3 Video modunda Self timer Zamanlayıcı seçenekleri arasında gezinmek için basın 4 Pla...

Page 10: ...ekrar basın 4 Oynatma modunda Yakınlaştırma modunda aşağı kaydırmak için basın Küçük resim ekranında aşağı gitmek için basın Dosya bilgisini göstermek için basın 5 USB modunda MSDC Yok PTP Bir menüde aşağı kaymak için basın Sol Makro 1 OSD menülerinde sola doğru gidin 2 OSD menülerinde önceki üst seviyeye gidin 3 Fotoğraf Çekme modunda Macro Makro modunu etkinleştirmek için basın LCD ekranda Makro...

Page 11: ...elerini istenilen moda geçmek ve OK düğmesini seçim yapmak için kullanın SAHNE düğmesini aşağıdakiler için kullanın DİJİTAL FOTOĞRAF MAKİNENİZİ TANIYIN Mod Tipi Simge Mod Tipi Simge Otomatik Havai fişek gösterisi Program Modu Plaj Spor Parti Manzara Yaprak Gece Manzarası Akvaryum Portre Çocuk ve Evcil Hayvanlar Kendi Portren Kopyalama Gece Portresi Arka ışık Müze Çerçeve Oluşturma Kar Ses Günbatım...

Page 12: ...eyi küçültmek için basın Oynatma modunda Kaydedilmiş fotoğrafları küçültmek için basın Kaydedilmiş tüm geçerli ortam küçük resimlerin görmek için basın LCD Ekran 2 7 inç TFT ekran fotoğraf veya videonuzun görsel görüntüsünün yanında fotoğraf makinesi ayarları ile ilgili tüm önemli bilgileri gösterir SCENE SAHNE düğmesini ekran modları arasında geçiş yapmak için kullanın Histogramlı ve histogramsız...

Page 13: ...Modu Spor Manzara Gece Manzarası Portre Kendi Portren Gece Portresi Müze Kar Günbatımı Havai Fişek Plaj Parti Yaprak Akvaryum Çocuk ve Evcil Hayvanlar Kopyalama Arka ışık Çerçeve Oluşturma Ses Video 2 Fotoğraf Çözünürlüğü 12M 8M 5M 3M 2 1M 16 9 2M VGA 3 Fotoğraf Kalitesi En iyi Daha iyi İyi 4 Flaş Otomatik Flaş Flaş Kapalı Flaşı Doldur Kırmızı Göz Giderme Fotoğraf Çekme Video Modu Ekranı DİJİTAL F...

Page 14: ... Çekim Modu 6 Makro göstergesi Makro Modu 7 Fotoğraf Sayacı Fotoğraf Çekme Modu Miktar 9999 Video Modu Saat 00 00 8 Hafıza Arabirim SD Kart Dahili Bellek 9 Tarih Etiketi 10 Sallanmaya Karşı Koruma 11 Yakınlaştırma Çubuğu 12 Pozometre 2 0EV 2 0EV 13 Diyafram Değeri F2 9 F5 2 14 Deklanşör Hızı 2 1 2000 15 Pil Göstergesi Pil Dolu Pil Yarım Pil Zayıf Pil Yetersiz 16 AF Çerçevesi DİJİTAL FOTOĞRAF MAKİN...

Page 15: ...O 400 ISO 800 ISO 1600 ISO 3200 18 Odak Alanı Çoklu Alanı Merkez Seçili Alan 19 Sürekli Otomatik Odak 20 Keskinlik Yüksek Normal Düşük 21 Kontrast Yüksek Normal Düşük 22 Doygunluk Yüksek Normal Düşük 23 Beyaz Dengesi Otomatik Güneşli Sarı Işık Floresan Bulutlu 24 AE Ölçümü Matris Merkez Ağırlıklı Spot 25 Fotoğraf Makinesini Sarsmayın Uyarısı DİJİTAL FOTOĞRAF MAKİNENİZİ TANIYIN Fotoğraf Çekme Modu ...

Page 16: ...af Makinesine takmak için askının uzun ilmeğini kısa ilmekten geçirin ve sıkıca çekin Pillerin Takılması Pilleri pil bölmesine takmak için bu talimatları izleyin 1 Fotoğraf makinesinin alt tarafındaki pil bölmesini açın 2 Kutuplarına dikkat ederek pilleri bölmeye yerleştirin 3 Pil bölmesini kapatın Not Bu fotoğraf makinesi iki AA alkalin AA lityum veya AA Ni MH pil kullanır Burada belirtilenler dı...

Page 17: ...ildiği şekilde takın Etiketli taraf yukarı gelir 3 Pil bölmesini kapatın SD SDHC Kartı çıkartmak için yerinden çıkıncaya kadar hafifçe itin Kartı dikkatle çekip çıkartın Not İlk kullanımdan önce bellek kartlarını Fotoğraf Makinesi ni kullanarak biçimlendirin başka bir bilgisayar veya cihazda kullandıktan sonra tekrar biçimlendirdiğinizden emin olun Cihazınız piyasadaki bazı oem firmaların üretmiş ...

Page 18: ...ranı görülür Fotoğraf makinesi ilk kez açıldığında Dil menüsü otomatik olarak açılır OK düğmesine basıp Çoklu menü yön düğmeleri ile Yukarı Aşağı istenen dili seçin daha sonra onaylamak için OK düğmesine basın İstenen dil seçildikten Tarih ve Saat sonra menüsü açılır OK SAHNE düğmesine basın Çoklu menü yön tularıyla yukarı aşağı düğmelerini kulla narak geçerli tarih ve saati ayarlaynız Onaylamak i...

Page 19: ...rı simgesi belirdiğinde pozun gerektirdiği kadar fotoğraf makinesini olabildiğince sabit tutun Sallanmaya Karşı Koruma Fonksiyonu Bu fonksiyon Otomatik ve Video çekme modlarında geçerlidir Sallanmaya karşı koruma fonksiyonunu etkinleştirmek veya devre dışı bırakmak için OK düğmesine basın Fonksiyon etkinleştirildiğinde LCD ekranda Anti Shake Sallanmaya Karşı Koruma simgesi görülür Makro Modunun Ku...

Page 20: ...noktasının daha büyük aralıklarda otomatik olarak belirlenmesidir Bununla birlikte daha geniş bir alanın taranmasına bağlı olarak daha uzun tarama zamanı gerekebileceğini de unutmayın Flaş Modu Ayarı Farklı ışıklandırma şartlarına uygun dört flaş modu arasında seçim yapabilirs iniz LCD ekran üzerindeki Çoklu menü yön tuşunu Yukarı Flaş Sil yön düğmesine basın Yukarda açıklandığı şekilde siz değişt...

Page 21: ...ekim fotoğraf özelliği Deklanşör düğmesine bir kez basılarak birden çok 16 ardışık VGA fotoğraf çekilmesini sağlar Zamanlayıcı seri çekim modunu ayarlamak için 1 LCD ekran üzerindeki zamanlayıcı veya ve seri çekim fotoğraf seçenekleri veya arasında gezinmek için Sağ Zamanlayıcı Seri çekim modu çoklu yön düğmesine basın 2 Seçim yaptıktan sonra fotoğrafınızı çekin Zamanlayıcı modunda simge süre biti...

Page 22: ...1 Menü seçeneklerini göstermek için MENU MENÜ düğmesine basın 2 AEB ayarını seçmek için Sol Sağ çoklu menü yön düğmelerine basın 3 Geçerli seçeneklerden seçim yapmak için Yukarı Aşağı çoklu menü yön düğmelerine basın AEB AEB fonksiyonunu etkinleştirmek için AÇIK ı devre dışı bırakmak için KAPALI yı seçin ARALIK Braket aralık değerini 0 30 2 0 EV veya 0 3 0 4 EV artışlarında ayarlamak için seçin ÇI...

Page 23: ...in Sahne menüsü seçeneklerini gösteren SAHNE menüsüne ulaşmak için SCENE düğmesine basın 1 Modlar arasında geçiş yapmak ve istenilen moda geçmek için çoklu menü yön düğmelerini kullanın 2 Seçimi onaylamak için OK düğmesine basın BAŞLARKEN Otomatik Havai fişek P Modu Plaj Spor Parti Manzara Yaprak Gece Manzarası Akvaryum Portre Çocuk ve Evcil Hayvanlar Kendi Portren Kopyalama Gece Portresi Arka ışı...

Page 24: ...enizin objektifini resmi çekilecek yüze doğru çevirin 3 Yüz algılandığında ekranda beyaz çerçeve görüntülenecektir 4 Gülümseme algılandığında ise fotoğraf makineniz otomatik olrak resim çeker Deklanşör otomatik olarak çalıştığı için düğmeye basılmasına gerek yoktur Not Gülümseme modu Algılanan yüzün belirgin olarak gülümsemesi ile orantılı çalışır ayrıca ortamdaki ışık koşulları bu fonksiyonun kar...

Page 25: ... kullanılabilir 2 Beyaz odak çerçevesi yalnızca etkili sarı çerçeve içinde çalışır Çerçeve Oluşturma Modunun Kullanılması Çerçeve Oluşturma Modunu seçmek için SCENE düğmesine basın ve çoklu menü yön düğmelerine basarak çerçeveleri seçin Daha sonra seçimi onaylamak ve Çerçeve Oluşturma canlı görünüm ekranına geçmek için OK düğmesine basın Video Kaydetme Fotoğraf makinesi ile video klipleri de kayde...

Page 26: ...nşör düğmesine basın Ses kaydı sırasında bir zaman sayacı gösterilir 3 Kaydı durdurmak ve bir sonraki kayda hazır olmak için Deklanşör düğmesine tekrar basın 4 Oynatma modunda düğmesine basın sesi çalmak için OK düğmesine basın Gerektiğinde kaydı silmek için çoklu menü yön Yukarı Flaş Sil düğmesine basın Sesli Not Kaydetme Sesli not kaydetme başlangıçta AYAR menüsünün alt menüsü SESLİ NOT menüsünd...

Page 27: ...rmek için MENÜ düğmesine ve ihtiyacınız olan fonksiyonu seçmek için Sol Sağ yön düğmelerine basıp seçili fonksiyonu girmek için OK düğmesine basın 3 Bir seçeneği vurgulamak için gezinme Yukarı Aşağı yön düğmelerine basın ve OK düğmesine basarak onaylayın Her ayarın daha ayrıntılı bilgisi için aşağıdaki bölümlere başvurun Not Bu bölümde gösterilen seçenekler seçili moda göre değişebilir Fotoğraf Çö...

Page 28: ...ullanın Odak belgesi için üç ayar geçerlidir ÇOKLU ALAN varsayılan Merkez SEÇİLİ ALAN Odaklanma alanını AF alan noktalarından birine ayarlar Not Otomatik Modda Seçili Alan öğesi yoktur Pozometre Pozometre menüsü fotoğraf veya video çekerken pozu veya objektife girecek ışık miktarını ayarlamanızı sağlar Bu özelliği bilinçli olarak fazla veya az pozlu resimler çekmek istediğinizde kullanın Değeri de...

Page 29: ...nizi onaylamadan önce ayarı seçip ekranda ön izleme yapabilirsiniz Seçim yapmak için Yukarı Aşağı yön düğmelerini kullanın Beyaz dengesi için beş ayar geçerlidir OTOMATİK varsayılan GÜNEŞLİ SARI IŞIK FLÜORESAN BULUTLU ISO Hızı ISO Hızı Ayarı CCD ışık hassaslığını ayarlamanızı sağlar Seçim yapmak için Yukarı Aşağı yön düğmelerini kullanın Sekiz ISO ayarı geçerlidir OTOMATİK varsayılan ISO 80 Parlak...

Page 30: ...in Yukarı Aşağı yön düğmelerini kullanın AE ölçümü için üç ayar geçerlidir MATRİS varsayılan Fotoğraf makinesi ölçümü değerlendirme için çerçeve içindeki akıllı ağırlık ölçümlü 16 nesne bölgesine ayarlanmıştır MERKEZ AĞIRLIKLI Ölçüm tüm sahneye bakarken resim merkezine daha fazla vurgu yapar TEK NOKTALI Fotoğraf makinesi ölçümü çerçevenin merkezindeki tek bir nesnenin parlaklığına ayarlanmıştır Re...

Page 31: ...gin renkler için yüksek bir doygunluk ve daha doğal tonlar için daha düşük bir doygunluk ayarı kullanın Yukarı Aşağı yön düğmelerini seçim yapmak için kullanın Üç doygunluk ayarı geçerlidir YÜKSEK NORMAL varsayılan DÜŞÜK Kontrast Kontrast ayarı fotoğraflarınızın kontrastını ayarlamanızı sağlar Yukarı Aşağı yön düğmelerini seçim yapmak için kullanın Üç kontrast ayarı geçerlidir YÜKSEK NORMAL varsay...

Page 32: ...aşvurun Video Çözünürlüğü Video Çözünürlüğü ayarı videolarınızın kaydedileceği çözünürlüğü ayarlamanızı sağlar İki video büyüklüğü ayarı geçerlidir 640X480 varsayılan 320X240 Beyaz Dengesi Ayar menüsü seçenekleri hakkında daha fazla ayrıntı için bkz Sayfa 29 Beyaz Dengesi Renk Ayar menüsü seçenekleri hakkında daha fazla ayrıntı için bkz Sayfa 30 Renk Doygunluk Ayar menüsü seçenekleri hakkında daha...

Page 33: ... bellek 9 Histogram 10 Dosya Adı Fotoğraf modu ALIM0123 JPG Video modu ALIM0124 AVI 11 Tarih ve Saat 2009 06 01 00 00 00 12 Sonraki Bir sonraki resme gidin 13 Pil durumu 1 140 1 140 ALIM0123 JPG ALIM0123 JPG 2009 06 01 2009 06 01 00 00 00 00 00 00 12M 1 0EV F2 9 1 125 1 2 3 5 6 4 8 9 10 11 12 13 14 15 16 19 20 18 21 22 23 24 25 7 17 ALIM0124 AVI 2 30 2 30 00 00 37 00 00 37 00 00 00 00 00 00 2008 0...

Page 34: ... arasında kaymak için Sol Sağ yön düğmelerini kullanın 3 Bir video klipin oynatılması için OK düğmesine basın 4 Çalma sırasında herhangi bir anda sonraki önceki fotoğraf veya video ya geçmek için Sol Sağ yön düğmelerine basın 5 Video oynatma sırasında önce OK düğmesine sonra Sol Sağ yön düğmelerine basarak ileri geri sarın SES FOTOĞRAF VE VIDEO OYNATILMASI 1 140 1 140 ALIM0123 JPG ALIM0123 JPG 200...

Page 35: ...e geçin Ses Dosyalarının Dinlenmesi Ses dosyalarını dinlemek için 1 Oynatma düğmesine basın En son fotoğraf veya video klip gösterilir 2 Dosyalar arasında geçiş için Sol Sağ yön düğmelerini kullanın 3 Bir dosyasının çalınması için OK düğmesine basın 4 Çalma sırasında herhangi bir anda sonraki önceki ses dosyasına geçmek için Sol Sağ yön düğmelerine basın 5 Ses oynatma sırasında önce OK düğmesine s...

Page 36: ...ı izleyin Oynatma Sırasında Büyütme Küçültme Fotoğraf makinesinin büyütme özelliği oynatma sırasında da kullanılabilir Bu özellik fotoğrafları daha ayrıntılı görüntülemenizi sağlar Kaydedilmiş fotoğrafları büyütüp küçültmek için 1 Fotoğrafı büyütmek için Zoom düğmesinin T sağ tarafına ve küçült mek içinde Zoom düğmesinin W sol yanına basın 2 Resmi kaydırmak için çoklu menü yön düğmelerine basın 3 ...

Page 37: ...ön düğmelerine basın ve OK düğmesine basarak onaylayın DPOF DPOF Dijital Yazdırma Sıra Formatı daha sonraki bir tarihte yazdırmak istediğiniz belirli bir resmin kopya sayısını belirlemenizi sağlar Bu fonksiyonu bellek kartınıza kaydedilmiş resimleri yazdırma bilgisiyle etiketlemek için kullanın Tüm resimleri veya yalnızca geçerli resmi etiketleyebilirsiniz Ayrıca kaç kopya yazdırabileceğinizi de s...

Page 38: ...i saniye olarak ayarlayın Varsayılan ayar 5 saniyedir DÖNGÜ Slayt gösterisi sürekli döngüsünü etkinleştirmek geçersiz kılmak için seçin Alt menüden AÇIK veya KAPALI varsayılan seçin ÇIKIŞ Ana menüye çıkmak için seçin Tekrar Boyutlandırma Tekrar boyutlandırma fonksiyonu resim çözünürlüğünü değiştirmenizi sağlar Bir resim boyutunu değiştirmek için 1 Menüden TEKRAR BOYUTLANDIRMA yı seçmek için MENU d...

Page 39: ...iden boyutlandırılamaz SD SDHC kart kilitliyse fotoğraflar yeniden boyutlandırılamaz VGA fotoğraflar tekrar boyutlandırılamaz Döndür Döndür fonksiyonu kaydedilen bir fotoğrafın yönünü değiştirmenizi sağlar Bir resmi döndürmek için 1 Menüden DÖNDÜR ü seçmek için MENU düğmesine basın Giriş için OK düğmesine basın 2 Seçili resmi döndürmek için Sol Sağ yön düğmesine basın 3 OK veya simgelerini seçmek ...

Page 40: ...ydedilmiş bir fotoğrafta kırmızı göz düzeltme işlemini sağlar Bir fotoğraftaki kırmızı gözü gidermek için 1 Menüden Kırmızı Göz Giderme seçmek için MENU düğmesine basın giriş yapmak için OK düğmesine basın 2 Sol Sağ yön düğmelerini resim seçmek için kullanın ve dengeleme işlemini başlatmak için Yes i seçin 3 Geçerli üç seçenek arasında seçim yapmak için Yukarı Aşağı yön düğmelerine ve OK düğmesine...

Page 41: ...URMA yı seçmek için tekrar MENU düğmesine basın ve Sol Sağ yön düğmelerini kullanın onaylamak için OK düğmesine basın 4 Çoklu menü yön düğmesini hoşlandığınız çerçeve tipini seçmek için kullanın ve OK düğmesine basın 5 Fooğrafı YENİ DOSYA olarak kaydetmek için veya orijinal dosya üz erine yazmak için ÜZERİNE YAZ düğmesine basıp tekrar OK düğmesine basın 6 İşlem sırasında önceki menüye dönmek için ...

Page 42: ... bir SD kart takılmışsa geçerlidir Bölme Bölme Fonksiyonu bir videonun gereksiz bölümlerini kesmenizi sağlar Bu özellik bellek kapasitesi yetersiz veya kullanıcı video klipleri kırpmak isterse yararlıdır Bir videoyu bölmek için 1 Menüden BÖLME yi seçmek için MENU düğmesine basın 2 Düzenleme moduna giriş için OK düğmesine basın 3 Yukarı Aşağı yön düğmelerini kullanarak videonun silmek istediğiniz b...

Page 43: ... PC ye Aktarılması Fotoğraf ve videolarınızı PC ye aktarmak için önce USB modunu MSDC olarak ayarlamanız gerekir Kurulumu tamamlamak için ekrandaki talimatları izleyin Fotoğraf makinesinin PC AV bağlantı noktasını USB kabloyu kullanarak PC nizdekiboş bir USB bağlantı noktasına takın Fotoğraf makinesinin dahili belleği ve veya SD SDHC bellek kartı dosya yöneticisinde çıkartılabilir sürücüler olarak...

Page 44: ...çin OK düğmesine basın Her ayar için daha ayrıntılı bilgi için aşağıdaki bölümlere başvurun LCD Parlaklığı LCD Parlaklığı ayarı LCD arka ışığını aydınlatıp ve karartmanızı sağlar Giriş için OK düğmesine basın Sağ Sol gezinme düğmelerini parlaklığı artırmak veya azaltmak için kullanın Dosya Numarası Dosya Numarası ayarı fotoğraf makinesi yeni bir dizin yarattığında dosya numarasını 0001 e sıfırlama...

Page 45: ...emen silmek için seçeneğine basabilirsiniz Onaylamak için OK düğmesine basın Fonksiyonu etkinleştirmek için AÇIK ı varsayılan veya devreden çıkarmak için KAPALI yı seçin Not Hızlı Bakış fonksiyonu Çoklu Seri Çekim modlarında kullanılamaz Sürekli Otomatik Odak Sürekli Otomatik Odak ayarı sürekli otomatik odaklama fonksiyonunu AÇIK veya KAPALI olarak ayarlamanızı sağlar Giriş yapmak için OK düğmesin...

Page 46: ...çıkmak için seçin Güç Tasarrufu Güç Tasarrufu ayarı LCD ekranın pil gücünü korumak için sönükleşeceği za man uzunluğunu ayarlamanızı sağlar Dört seçenek mevcuttur Kapalı 15 SN varsayılan 30 SN 2 DK Otomatik Kapanma Otomatik Kapanma ayarı aktif olmadığında fotoğraf makinesinin kapanacağı zaman uzunluğunu ayarlamanızı sağlar Menüde seçenekler arasında seçim yapmak için Yukarı Aşağı yön düğmelerini k...

Page 47: ...ictBridge Yazdırma PTP MSDC varsayılan Fotoğraf makinesi yalnızca fotoğraf makineniz ve PC niz arasında dosya aktarımına izin veren yığın depolama cihazı olarak ayarlanmıştır Tarih Damgası Tarih Damgası ayarı her fotoğraf üzerinde çıkacak olan tarih formatını ayarlamanızı sağlar İstemeniz halinde bu fonksiyonu kapatabilirsiniz Tarih etiketi ayarlamak kolay sıralamayı sağlar ve yazdırıldığında foto...

Page 48: ...kullanın Fotoğraf Depolama Fotoğraf Depolama ayarı fotoğraf ve video kliplerin nereye kaydedileceğini belirtmenizi sağlar Fotoğraf makinesi Yaklaşık 11 MB dahili bellek içerir fakat siz de bir SD SDHC kart takabilirsiniz daha fazla ayrıntı için bkz sayfa 17 SD SDHC Bellek Kartı Takılması İki seçenek mevcuttur OTOMATİK varsayılan Seçildiğinde fotoğraf makinesi saklama ortamını otomatik olarak seçer...

Page 49: ...af makinesi ayarlarında yaptığınız tüm değişikliklerin silineceği anlamına gelir Seçildiğinde Reset Sıfırlama ekranı bir onay mesajı gösterir Seçim fonksi yonuna girmek için OK düğmesine SIFIRLAMA ile devam etmek için EVET düğmesine veya iptal etmek için ÇIKIŞ düğmesine basın Sesli Not SESLİ NOT ayarı bir fotoğraf çekildiğinde veya oynatma modunda iken sesli kısa not kaydetmenizi sağlar Sesli Not ...

Page 50: ...ayarlanmamışsa LCD ekranda bir hata mesajı görülür Fotoğraf makinesine PTP uyumlu bir yazıcı takıldığında LCD ekranda Yazıcı bağlanıyor görülür Yazdırma menüsü otomatik olarak açılır Bir seçeneği seçmek için Sol Sağ yön düğmelerine basın ve giriş için OK düğmesine basın Not DPOF resmin seçilebilmesi için DPOF ayarları yapılmalıdır Ayrıntılı bilgi için bkz sayfa 37 DPOF Resmi Fotoğraf Depolama Ayrı...

Page 51: ... Boyutu ekranına geçmek için OK düğmesine basın 2 Kağıt boyutunu seçmek için Yukarı Aşağı yön düğmelerine tekrar basın STANDART BOYUT varsayılan 4 x 6 MEKTUP A4 3 İşlemi sürdürmek veya iptal etmek için Yukarı Aşağı yön düğmelerine tekrar basın Dizin Yazdırma Bu fonksiyonu tüm resimleri dizin formatında yazdırmak için kullanın BU RESİM 1 140 1 140 2 Kopya Adeti 4 X 6 A4 STANDART BOYUT MEKTUP KAĞITB...

Page 52: ...e geçmek için DPOF FOTOĞRAF seçimini onaylamak için OK düğmesine basın Bellekte seçilmiş DPOF FOTOĞRAFI yoksa DPOF FOTOĞRAFI öğesi kaybolur 1 Kağıt boyutunu seçmek için Yukarı Aşağı yön düğmelerine basın STANDART BOYUT 4 x 6 MEKTUP A4 Sonra Yazıcı Onay ekranına geçmek için OK düğmesine basın DİZİN YAZDIRMA 1 140 1 140 STANDART BOYUT MEKTUP A4 DEVAM İPTAL Kopya Baskılar Boyut 1 6 STANDART BOYUT 1 1...

Page 53: ...seçim yapmak için Sol Sağ yön düğmelerine basın ve onaylamak için OK düğmesine basın Kopya sayısını ayarlamak için Yukarı Aşağı yön düğmelerine basın Kağıt boyutu ekranına geçmek için OK düğmesine basın 2 Kağıt boyutunu ayarlamak için Yukarı Aşağı yön düğmelerine basın Yazıcı Onaylama Ekranı geçmek için OK düğmesine basın STANDART BOYUT varsayılan 4 x 6 MEKTUP A4 3 İşlemi sürdürmek veya iptal etme...

Page 54: ...kinesi Özellikleri Otomatik Kapanma Süresi Var ISO Eşdeğeri Otomatik ISO 80 100 200 400 800 1600 3200 Harici bellek 32 MB tan 16 GB a SD SDHC desteği Flaş Modu Otomatik Kapalı Dolu Kırmızı göz Sahne Modu Otomatik P Modu Spor Manzara Gece Manzarası Portre Kendi Portren Gece Portresi Müze Kar Günbatımı Havai Fişek Plaj Parti Bitki Akvaryum Çocuklar ve Evcil Hayvanlar Arka ışık Çerçeve Kompozit Ses V...

Page 55: ...ntüleme Var Zamanlayıcı 2 10 saniye Oynatma Büyütme 6X e kadar 0 5 adım Beyaz Dengesi Otomatik Bulutlu Ampul Sarı ışık Flüoresan Beyaz Işık Video Video Çıkışı PAL NTSC Hoparlör Mono Film Dosya Formatı AVI Sesli Film JPEG Film Uzunluğu 80 dk ya yakın En büyük dosya boyu 4G Mikrofon Mono Ses Kaydı Dalga formatı Güç Pil AA x 2 Pil Ömrü CIPA 100 resim Bağlantı Fotoğraf Makinesi Arabirimi USB 2 0 yükse...

Page 56: ...ış Hafıza kartını yeniden formatlayın LCD ekran Card is Full Kart Dolu gösteriyor Bellek kartı doludur Bellek kartını yenisiyle değiştirin veya mevcut karttaki gereksiz resimleri silin LCD ekran Card is Locked Kart Kilitli gösteriyor Kart bir anahtar mekanizmasıyla korunmuştur Anahtarı açık konumuna getirin İsteği yerine getirmek için yetersiz bellek alanı Bir resmi döndürmek veya videoyu bölmek i...

Page 57: ... Views 63 LED Indicators 63 Camera Buttons 71 CAMERA SETUP 71 Attaching the Wrist Strap 71 Inserting the Batteries 72 Inserting an SD SDHC Memory Card 72 Turning On 73 First Time Use 74 GETTING STARTED 74 Taking Photos 80 Using Frame Composite Mode 80 Recording Videos 81 Recording Audio Files 81 Recording Voice Memos 82 CAPTURE SETTINGS 82 The Capture Menu 87 Video Capture Menu ...

Page 58: ...s on the LCD Screen 91 Viewing Photos Videos on your TV 91 Zooming In Out During Playback 91 Deleting Photos Videos Audios 92 Using the Playback Menu 98 Transferring Photos Videos to your PC 99 CAMERA SETTINGS 99 The Setup Menu 105 PictBridge Print PTP 109 SPECIFICATIONS 111 TROUBLESHOOTING ...

Page 59: ...ed by any mechanical electronic or other means in any form without prior written permission of the manufacturer Copyright 2009 Trademark Recognition Windows 2000 XP Vista are registered trademarks of Microsoft Corporation in the United States and or other countries Windows is an abbreviated term referring to the Microsoft Windows Operation System Adobe is a trademark of Adobe Corporation ArcSoft i...

Page 60: ...ing solvents or strong detergents to clean the product Wipe the product with a slightly damp soft cloth Battery Information Turn off the camera before installing or removing the battery Use the AA alkaline AA lithium or AA Ni MH batteries are recom mended Using other types of battery may damage the equipment and invalidate the warranty Ensure that the battery is inserted into the product with corr...

Page 61: ...indows 2000 XP Vista Memory 128 MB or above HDD space 40 MB or above USB port Package Contents Check the contents of your camera package It should contain Digital camera USB AV 3 in 1 cable Wrist strap User Manual CD ROM Main Features 12 0 mega pixels resolution 15x zoom Up to 3x optical zoom and 5x digital zoom 1 2 33 inch CCD image sensor 2 7 inch TFT LCD monitor 16MB internal flash memory suppo...

Page 62: ...wer button Zoom Lens Microphone PC AV port Rear View LCD screen 4 way navigation buttons OK button Playback button Zoom button Speaker Tripod mount Battery SD card compartment MENU button SCENE button Wrist strap loop Camera Views A B G F E D C H I N R M Q L P K O J ...

Page 63: ...e the video playback Press to play and pause the audio playback Press to stop the voice memo playback INTRODUCTION LED LED STATUS CAMERA STATUS Self timer LED Off Self timer off Red blinking 10 sec Timer count down flash after 10 seconds Red blinking 2 sec Timer count down flash after 2 seconds Camera Buttons Navigation Buttons The 4 way navigation buttons and the OK button allow you to access the...

Page 64: ...ode Press to move up in the thumbnail display Press to delete images Right Selftimer Burst mode 1 Move right in the OSD menus 2 In Capture mode Press to scroll through the Self timer Burst Multi Burst mode Press move focus frame pan right in AF area selection 3 In Video mode Press to scroll through the Self timer options 4 In Playback mode Press to pan right in zoom in mode Press to navigate to ne...

Page 65: ...um and Video modes 3 In Video mode Press to turn off extra icons on the LCD screen press again to turn all icons back on the LCD screen 4 In Playback mode Press to pan down in zoom in mode Press to move down in the thumbnail display Press to show the file information Left Macro 1 Move left in the OSD menus 2 Go up to the previous level in the OSD menus 3 In Capture mode Press to enable Macro mode ...

Page 66: ...scene options Use the Left Right Up Down navigation buttons to scroll and use the OK button to select Use the SCENE button to INTRODUCTION Mode Type Icon Mode Type Icon Auto Fireworks P Mode Program Mode Beach Sport Party Landscape Foliage Night Landscape Aquarium Portrait Kids Pets Self Portrait Copy Night Portrait Backlight Museum Frame Composite Snow Audio Sunset Video ...

Page 67: ...om the subject to be taken In Playback mode Press to zoom out of saved photos Press to view thumbnails of all current saved media LCD screen The 2 7 TFT LCD screen shows all important information regarding camera settings as well as the visual image for your photo or video Use the SCENE button to switch between screen modes Press the Down Screen Face detection Smile detection button to switch amon...

Page 68: ... Sport Landscape Night Landscape Portrait Self Portrait Night Portrait Museum Snow Sunset Fireworks Beach Party Foliage Aquarium Kids Pets Copy Backlight Frame Composite Audio Video 2 Image Resolution 12M 8M 5M 3M 2 1M 16 9 2M VGA 3 Image Quality Best Better Good 4 Flash Auto Flash Flash Off Force Flash Red eye Reduction Capture Video Mode Display INTRODUCTION Capture Mode Video Mode ...

Page 69: ... M burst Mode 6 Macro indicator Macro Mode 7 Image Counter Capture Mode Quantity 9999 Video Mode Time 00 00 8 Memory Interface SD Card Internal Memory 9 Date Stamp 10 Anti Shake 11 Zoom Bar 12 EV Compensation 2 0EV 2 0EV 13 Aperture Value F2 9 F5 2 14 Shutter Speed 2 1 2000 15 Battery Indicator Battery Full Battery Medium Battery Low Battery Insufficient 16 AF Frame 17 ISO Speed Auto ISO 80 ISO 10...

Page 70: ...5 8 10 11 15 21 22 23 7 Capture Mode Video Mode 18 Focus Zone Multi Zone Center Selected Area 19 Continuous AF 20 Sharpness High Normal Low 21 Contrast High Normal Low 22 Saturation High Normal Low 23 White Balance Auto Sunny Tungsten Fluorescent Cloudy 24 AE Metering Matrix Center Weighted Spot 25 Camera Steady Warning INTRODUCTION ...

Page 71: ...er loop of the strap through the short loop and pull tight to attach the strap to the camera Inserting the Batteries 1 Open the battery compartment on the bottom of the camera 2 Insert the batteries into the compartment observing the correct polarity 3 Close the battery compartment Note This camera uses two AA alkaline AA lithium or AA Ni MH batteries Do not use batteries other than those specifie...

Page 72: ... SDHC card into the memory card slot as shown Label side up 3 Close the battery compartment To remove the SD SDHC card gently push the card until it pops out Pull out the card carefully Note Format memory cards via CAMERA before first use and be sure to reformat all memory cards after using them in a computer or other device For more information on formatting memory cards see on page 104 Turning O...

Page 73: ...on buttons then press the OK button to confirm After the desired language is selected the Date and Time menu pops up Press the OK button Select each field and adjust the value using the navigation buttons Press the OK button to confirm Note If the Date and Time is reset when the batteries die or are removed and the camera is not used for a long period the Date and Time setup screen displays automa...

Page 74: ...ke Function This function is available in Auto and Video capture mode Press the OK button to enable the Anti Shake function and press again to disable it An Anti Shake icon displays on the LCD screen when the function is activated Using Macro Mode Macro mode is designed for close up photography and can capture all detail even when your subject is very close to the camera Press the Left Macro navig...

Page 75: ... conditions Press the Up Flash Delete navigation button to scroll through the four modes on the LCD screen The flash setting remains the same for subse quent photos until you change it as described above GETTING STARTED Auto flash The flash fires automatically when needed Flash off The flash is turned off Force flash The flash always fires Red eye Reduction The flash fires twice so as to reduce th...

Page 76: ...t Self timer Burst mode navigation button to cycle through the selftimer or and burst photography op tions or on the LCD screen 2 Once you have selected an option frame and take your shot In self timer mode the icon will flash until the time expires and the photo is taken 3 After taking a photo the Self timer automatically switches off If you want to use these functions for the next photo press th...

Page 77: ...nd P Mode modes To set the AEB mode 1 Press the MENU button to display menu options 2 Press the Left Right navigation buttons to select AEB setting 3 Press the Up Down navigation buttons to select from the available options AEB Select to enable ON or disable OFF the AEB function BRACKET Select to set the bracket interval value ranging from 0 3 to 2 0 EV in 0 3 or 0 4 EV increments EXIT Select to a...

Page 78: ...the SCENE button to access the SCENE menu which displays the Scene menu options 1 Use the Left Right Up Down navigation buttons to scroll through the modes 2 Press OK to confirm your selection GETTING STARTED Auto Fireworks P Mode Beach Sport Party Landscape Foliage Night Landscape Aquarium Portrait Kids Pets Self Portrait Copy Night Portrait Backlight Museum Frame Composite Snow Audio Sunset Vide...

Page 79: ...tomatically fires However when the camera fails to detect your subject s face a white focus frame will be displayed according to the selected focus mode To disable the face and smile detection function press the Down Screen navigation button again Using the Self Portrait Mode The up to date Self Portrait function allows you to take self portrait shots When enabling the Self Portrait function a whi...

Page 80: ... and move to Frame Composite live view screen Recording Videos You can also record video clips with the camera To record a video clip 1 Turn the camera on and press the SCENE button Use the 4 way naviga tion buttons to locate Video mode Press the OK button to select 2 Frame your subject using the LCD screen and press the Shutter button to start recording The selftimer LED is steady on to indicate ...

Page 81: ...Voice Memos The voice memo should be activated ON on the VOICE MEMO submenu of SETUP menu at first In Capture mode You can add a 20 sec voice memo to an image right after it s taken 1 Press shutter button to start recording and re press shutter to stop recording 2 While recording the captured image and the elapsed time are shown on the LCD screen 3 For the playback press the button and the playbac...

Page 82: ... navigation buttons to highlight an option and press the OK button to confirm Refer to the following sections for more detailed information about each setting Note The displayed options in this section may vary according to the mode selected Image Resolution The Image Resolution setting refers to the size of the image in pixels Use the Up Down navigation buttons to select from the options Seven se...

Page 83: ...Sets the focusing area to one of points in the AF area Note In Auto Mode there is no Selected Area item EV Compensation The EV Compensation menu allows you to adjust the exposure or amount of light that enters the lens while capturing photos or videos Use this feature to take pictures that are intentionally overexposed or underexposed Use the Up Down navigation buttons to modify the value To brigh...

Page 84: ...l You can select the setting and preview it on screen before confirming your choice Use the Up Down navigation buttons to select from the options Five white balance settings are available AUTO default SUNNY TUNGSTEN FLUORESCENT CLOUDY ISO Speed The ISO Speed setting allows you to adjust the CCD light sensitivity Use the Up Down navigation buttons to select from the options Eight ISO settings are a...

Page 85: ...re available MATRIX default Camera metering is set for evaluating 16 zones of objects with intelligent weighting in the frame CENTER WEIGHTED The metering puts more emphasis on the center of the image while still looking at the entire scene SPOT Camera metering is set for the brightness of a single object in the center of the frame Color The Color setting allows you to take photos and apply differ...

Page 86: ...Use a high saturation setting for rich colors and a lower saturation setting for more natural tones Use the Up Down navigation buttons to select from the options Three saturation settings are available HIGH NORMAL default LOW Contrast The Contrast setting allows you to adjust the contrast of your photos Use the Up Down navigation buttons to select from the options Three contrast settings are avail...

Page 87: ...ws you to adjust the resolution at which your videos are recorded Two video size settings are available 640X480 default 320X240 White Balance See White Balance on page 84 for more details on the setup menu options Color See Color on page 85 for more details on the setup menu options Saturation See Saturation on page 86 for more details on the setup menu options Contrast See Contrast on page 86 for...

Page 88: ... memory 9 Histogram 10 File Name Photo mode ALIM0123 JPG Video mode ALIM0124 AVI 11 Date and Time 2009 06 01 00 00 00 12 Next Move to next image 13 Battery status 1 140 1 140 ALIM0123 JPG ALIM0123 JPG 2009 06 01 2009 06 01 00 00 00 00 00 00 12M 1 0EV F2 9 1 125 1 2 3 5 6 4 8 9 10 11 12 13 14 15 16 19 20 18 21 22 23 24 25 7 17 ALIM0124 AVI 2 30 2 30 00 00 37 00 00 37 00 00 00 00 00 00 2008 01 01 20...

Page 89: ...ft Right navigation buttons to scroll through photos and video clips 3 Press the OK button to begin playback of a video clip 4 Press the Left Right navigation buttons at any time during playback to skip to the previous next photo or video 5 Press the OK button then press the Left Right navigation buttons to fast rewind fast forward during video playback 1 140 1 140 ALIM0123 JPG ALIM0123 JPG 2009 0...

Page 90: ...ess the Left Right navigation buttons and skip to theprevious next image Listening to Audio Files To listen to audio files 1 Press the Playback button The most recent photo or video clip is displayed 2 Use the Left Right navigation buttons to scroll through the files 3 Press the OK button to begin playback of an audio file 4 Press the Left Right navigation buttons at any time during playback to th...

Page 91: ...ng In Out During Playback The camera s zoom feature can also be used during playback This allows you to view photos in greater detail T zoom in out on saved photos 1 Press on the right side of the Zoom button T to zoom in and on the left side of the Zoom button W to zoom out of the photo 2 Use the 4 way navigation buttons to pan across the image 3 To crop an image press the OK button when zoomed i...

Page 92: ...e Left Right navigation to select the function from the menu and press the OK button to enter 3 Use the Up Down navigation buttons to highlight an option and press the OK button to confirm DPOF DPOF Digital Print Order Format allows you to specify the number of copies of a certain image that you want to print at a later date Use this function to tag pictures stored in your memory card with print i...

Page 93: ...o start the slideshow INTERVAL Select to set the interval time between each photo during the slideshow Use the Left Right navigation buttons to set a value in seconds The default setting is 5 seconds LOOP Select to enable disable a continuous loop of the slideshow Select ON or OFF default from the submenu EXIT Select to exit to the main menu Resize The Resize function allows you to change the imag...

Page 94: ...zed If the SD SDHC card is locked images cannot be resized VGA images cannot be resized Rotate The Rotate function allows you to change the orientation of a saved photo To rotate an image 1 Press the MENU button to select ROTATE from the menu Press the OK button to enter 2 Press Left Right navigation button to rotate the selected image 3 Use the Up Down navigation buttons to select OK or OK Confir...

Page 95: ...photo To remove red eye from a photo 1 Press the MENU button to select RED EYE REMOVAL from the menu and press the OK button to enter 2 Use the Left Right navigation buttons to select an image and select YES to start compensation process 3 Press the Up Down navigation buttons and the OK button to select from the three available options NEW FILE Select to save the fixed image to a new file OVERWRIT...

Page 96: ...ation buttons to select the FRAME COMPOSITE from the menu and then press the OK button to confirm 4 Use the 4 way navigation Left Right Up Down button to select the frame type you like and press the OK button 5 Press the OK button to save the picture as NEW FILE or OVERWRITE the original one and then press the OK button again 6 You may press the MENU button to return to the previous menu during th...

Page 97: ...you to cut unnecessary portions of a video This feature is useful when the memory capacity is insufficient or when users want to trim video clips To divide a video 1 Press the MENU button to select DIVIDE from the menu 2 Press the OK button to enter the edit mode 3 Use the Up Down navigation buttons to select the portion of the video you want to delete Beginning of the new video clip End of the ne...

Page 98: ...transfer photos and videos to your PC you need to set the USB mode as MSDC first Follow the onscreen instructions to complete the installation Connect the camera s PC AV port to a free USB port on your PC using the USB cable The camera s internal memory and or SD SDHC card appear as removable drives in the file manager Copy the files from the drives to the directory on your PC Use ArcSoft PhotoImp...

Page 99: ...urther submenus and to confirm your selection Refer to the following sections for more detailed information about each setting LCD Brightness The LCD Brightness setting allows you to brighten or darken the LCD backlight Press the OK button to enter Use the Right Left navigation buttons to increase or decrease the brightness File Number The File No setting allows you to reset the file number to 000...

Page 100: ... you are not satisfied with the result you can press the button to delete the photo immediately Press the OK button to confirm Select ON default to enable the function or OFF to disable it Note The Quick View function is not available in M Burst modes Continuous AF Continuous Auto Focus The Continuous AF setting allows you to turn the continuous auto focus function ON or OFF Press the OK button to...

Page 101: ... main menu Power Saving The Power Saving setting allows you to adjust the length of time that LCD screen turn dim to save battery power Four options are available OFF 15 SEC default 30 SEC 1 MIN Auto Power Off The Auto Power Off setting allows you to adjust the length of time after which the camera will power down when inactive Use the Up Down navigation buttons to select from the menu options Two...

Page 102: ...dge Print PTP on page 105 MSDC default The camera is set up to act as a mass storage device allowing only for transfer of files between your camera and PC Date Stamp The Date Stamp setting allows you to adjust the format in which the date will appear on each photo You can also deactivate this function if you wish Setting a date stamp allows for easy sorting and the date will appear on the photo wh...

Page 103: ...select from the menu options Image Storage The Image Storage setting allows you to specify where photos and video clips will be stored The camera features Approx 11 MB internal memory but you can also insert an SD SDHC card See Inserting an SD SDHC Memory Card on page 72 for more details Two options are available AUTO default When selected the camera chooses the storage medium automatically If an ...

Page 104: ...uage and video out format This means all modifications you have made to the camera settings will be cleared Once selected the Reset screen displays a confirmation message Press the OK button to enter the selection function select YES to proceed with the RESET or EXIT default to cancel Voice Memo The Voice Memo setting allows you to record a voice memo when a photo is taken or in playback mode Sele...

Page 105: ...an error message displays on the LCD screen When a PTP compliant printer is connected to the camera the Printer Connecting screen displays on the LCD screen The Print menu pops up automatically Use the Left Right navigation buttons to select an option and press the OK button to enter Note The DPOF settings have to be made to select DPOF image See DPOF Image on page 107 for detailed information Ima...

Page 106: ...umber of copies are selected press the OK button to enter the Paper Size screen 2 Press the Up Down navigation buttons again to select the paper size DEFAULT SIZE default 4 x 6 LETTER A4 3 Press the Up Down navigation buttons to Continue or Cancel the action Index Print Use this function to print all images in index format CAMERA SETTINGS THIS IMAGE 1 140 1 140 2 Number of copies DEFAULT SIZE 4 X ...

Page 107: ...o confirm DPOF IMAGE selection to enter Paper Size selection submenu If there is no selected DPOF image in memory the DPOF Image item will be gone 1 Press Up Down navigation buttons to select the paper size DEFAULT SIZE 4 x 6 LETTER MEKTUP A4 Then press OK button to move to the Printer Confirmation screen CAMERA SETTINGS INDEX PRINT 1 140 1 140 DEFAULT SIZE LETTER A4 CONTINUE CANCEL Copies Prints ...

Page 108: ...OK button to confirm Press the Up Down naviga tion buttons to set the number of copies Then press the OK button to enter the Paper Size screen 2 Press the Up Down navigation buttons to set the Paper Size Press the OK button to enter the Printer Confirmation Screen DEFAULT SIZE 4 x 6 LETTER A4 3 Press the Up Down navigation buttons again to continue or cancel this action CAMERA SETTINGS CONTINUE CA...

Page 109: ...Camera Features Auto Power Off Time Out Yes ISO Sensitivitiy Auto ISO 80 100 200 400 800 1600 3200 External Memory Support SD SDHC card from 32MB to 16GB Flash Modes Auto Off Force Red eye SCENE Mode Auto P Mode Sport Landscape Night Landscape Portrait Self Portrait Night Portrait Museum Snow Sunset Fireworks Beach Party Foliage Aquarium Kids Pets Copy Backlight Frame Composite Audio Video Tripod ...

Page 110: ...layback Magnify Up to 6X 0 5 steps White Balance Auto Sunny Tungsten Fluorescent Cloudy Video Video Out PAL NTSC Speaker Mono Movie File Format AVI Motion JPEG with sound Movie Length Close to 80 min Max file size is 4G Microphone Mono Audio Recording Wave format Power Battery AA x 2 Battery Life CIPA 100 images Connectivity Camera Interface USB 2 0 high speed Host Platform Windows 2000 XP Vista S...

Page 111: ...d Charge or replace the batteries LCD screen displays Card Requires Formatting Memory card format not recognized Reformat the memory card LCD ekran Card is Full Memory card is full Replace the memory card with a new one or delete unnecessary images from the existing card LCD ekran Card is Locked The card is protected by a protect switch mechanism Move the switch to the unlock position Insufficient...

Page 112: ......

Page 113: ...ayabilirsiniz Grundig Hizmet Merkezi 444 9 888 Sabit telefonlardan veya cep telefonlarından alan kodu çevirmeden Diğer numara 0 216 423 22 07 Sabit telefonlardan yapılan aramalarda şehir içi arama tarifesi üzerinden cep telefonu ile yapılan aramalarda ise GSM GSM tarifesi üzerinden ücretlendirme yapılmaktadır Hizmet Merkezimize ayrıca www grundig com tr adresinden 0216 423 22 07 nolu telefonu aray...

Page 114: ...inin kullanımına tahsis etmesi zorunludur Arızanın giderilmesi konusunda uygulanacak teknik yöntemlerin tespiti ile değiştirilecek parçaların saptanması tamamen firmamıza aittir Arızanın giderilmesi ürünün bulunduğu yerde veya yetkili servis atölyelerinde yapılabilir Bu konuda müşteri onayı alınması zorunludur Ancak Ürünün teslim tarihinden itibaren garanti süresi içinde kalmak kaydıyla bir yıl iç...

Reviews: