background image


11


7.4.


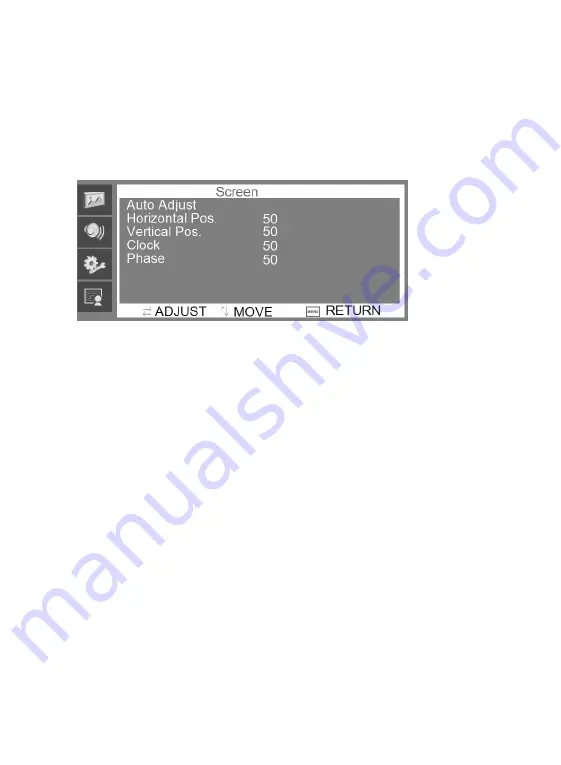
Screen


Menu


The


Screen


menu


can


adjust


the


H

position,


V

position,


clock,


phase


and


auto

adjust


the


position


of


the


image


within


the


display.


Press


the


/\


or


\/


button


to


adjust


the


value


when


an


item


is


selected.


Press


the


MENU


button


to


exit.


7.5.


Source


Menu


The


Source


menu


can


select


the


channel


(input).


The


options


include


VGA,


HDMI


and


so


on.


Press


the


/\


or


\/


button


to


adjust


the


value


when


an


item


is


selected.


Press


the


MENU


button


to


exit.


8.


Frequently


Asked


Questions


The


Power


button


does


not


respond:


‐ 

Check


the


power


cord


to


ensure


that


it


is


securely


plugged


into


the


monitor


base


and


also


into


the


electrical


outlet.


‐ 

Ensure


that


there


is


electrical


power


coming


from


the


AC


outlet.


Use


another


device


to


check


the


power.


‐ 

Unplug


the


power


cord


of


the


monitor


from


the


AC


outlet,


wait


a


few


minutes,


then


plug


the


power


cord


into


the


AC


outlet


again.


Summary of Contents for GD-ML-AP2830UHD

Page 1: ...____________________________________________________ User Guide Monitors GD ML AP2830UHD English ______________________________________________________ UG GD ML AP2830UHD 2018 03 16 V1 EN Abetechs Gmb...

Page 2: ...2...

Page 3: ...lation Instructions 5 3 Package Content 7 4 Connections 7 5 How To Connect And Turn On Your Monitor 8 6 OSD Menu Configuration 9 7 OSD Menu 9 8 Frequently Asked Questions 11 __________________________...

Page 4: ...cause fire or electric shocks or other physical injuries Do not push or insert any sharp items or any objects into the device as this may cause damage to the product fire electric shocks and or physi...

Page 5: ...hot temperatures please refer to the working temperature specified in the specification sheet of the product dusty dirty or damp environment Never touch the screen directly with your fingers The acid...

Page 6: ...loth can be used Do not use any cleaning materials with abrasive surfaces like scrub pads to clean your monitor To clean the display a slightly damp cloth may be used to clean off fingerprints or smud...

Page 7: ...nect a monitor with an HDMI cable the cable is not included in the package NOTE HDMI includes not only the image transfer but also the ability to transmit audio VGA IN Connect the monitor with a VGA c...

Page 8: ...ways turn off the device before connecting or disconnecting any device 2 Example of cable connection Connect one end of the VGA cable to the VGA connector on the monitor Connect the other end to your...

Page 9: ...s of this item To go to another menu press the MENU button again to return to the previous menu and go with the button to the desired menu Press the MENU button to exit the OSD Menu 7 OSD Menu 7 1 Pic...

Page 10: ...ress the MENU button to exit 7 3 Option Menu The Option menu can adjust the OSD language setting restore the monitor back to factory defaults trigger a software update when a USB is present with new f...

Page 11: ...VGA HDMI and so on Press the or button to adjust the value when an item is selected Press the MENU button to exit 8 Frequently Asked Questions The Power button does not respond Check the power cord to...

Page 12: ...nitor and power supply The Power LED is blinking with no image on the screen Check the video signal cable HDMI DB 15 CVBS to ensure that it is properly attached to the graphics display card Check the...

Reviews: