Grundig GCA-B2357T Owner'S Manual Download Page 6

6. OSD Menu

1. Press the SET UP stick to access the menu mode.
2. Select the desired feature by using UP/DOWN. 
3. If there is a setting for this feature on the right side of the screen, use LEFT/RIGHT to 
switch between the settings and confirm your choice by pressing the stick. If an ENTER 
arrow (

) is displayed, press the stick to access the according submenu.

4. In the sub-menus, please press with the stick on RETURN to return to the previous 
menu.
5. To exit the menu, please press the stick on EXIT in the main menu.

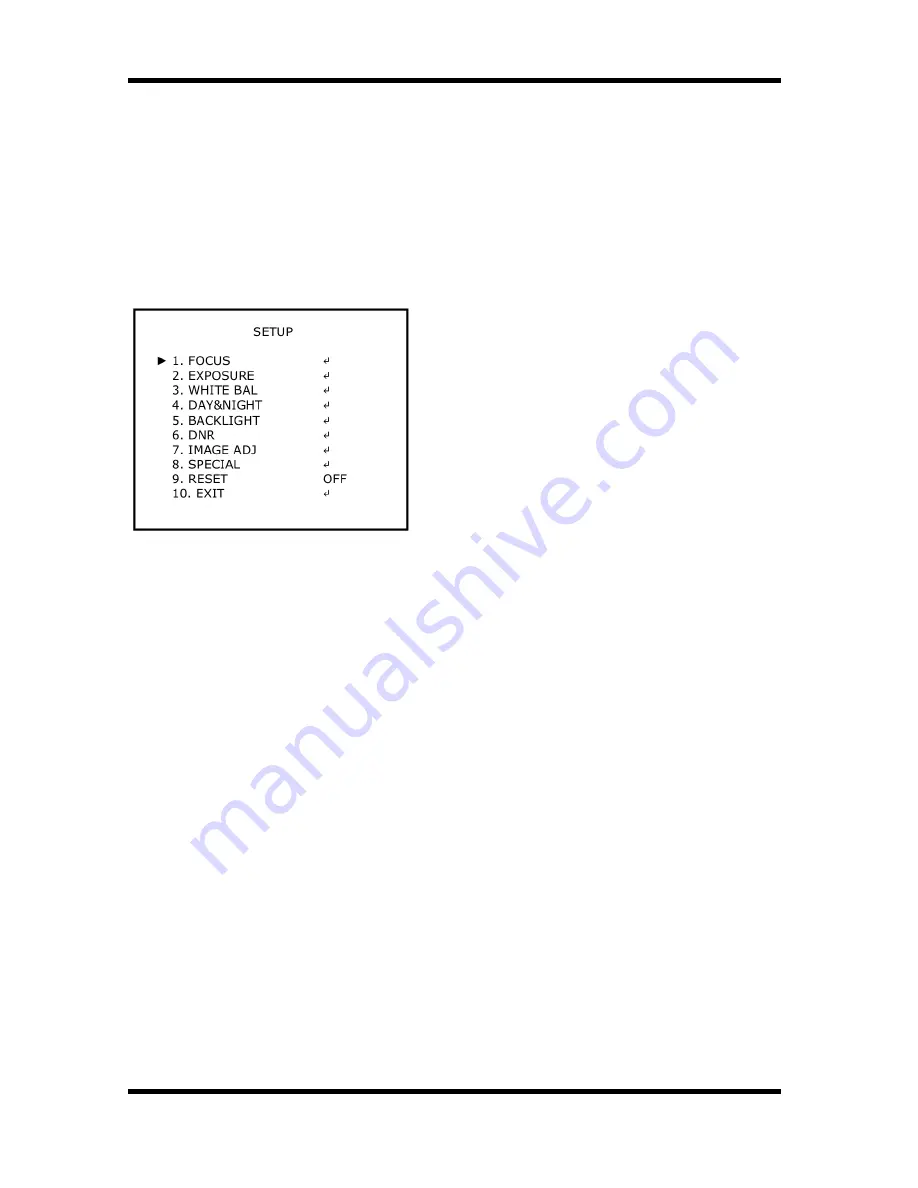
FOCUS: Here you can configure the focus 
and zoom setting.

EXPOSURE: This function is used to 
control the light exposure.

WHITE BAL: You can control the white 
balance under different lighting conditions 
here.

DAY&NIGHT: This function is used to improve the camera's sensitivity at night or when 
the brightness level of the ambient environment is low.

BACKLIGHT: You can control the highlight and backlight compensation here.

DNR: This noise reduction function is to decrease the noise which can be generated 
under low light conditions.

IMAGE ADJ: You can set different picture related settings like mirroring, sharpness, hue 
and gain.

SPECIAL: Configures camera related functions and data.

RESET: This function is for resetting the camera to factory default.

EXIT: Here you can exit the menu.

6.1. FOCUS

Here you can configure the focus and zoom setting.

4

English

Summary of Contents for GCA-B2357T

Page 1: ...GCA B2357T 94 1 20 06 2013 Owner s Manual EN ASP AG Analogue Cameras GCA B2357T 1 4 CCD Bullet Camera AFZ 3 8 38 mm ICR 35 IR LED 700L ext adj...

Page 2: ......

Page 3: ...andard adapter that is specified in the specification sheet Using any other adapter could cause fire electrical shock or damage to the product Incorrectly connecting the power supply may cause explosi...

Page 4: ...ide of this device to rain or moisture 2 Package Contents These parts are included 3 Installation Do not install this product in a location subject to high temperature over 55 C low temperature below...

Page 5: ...he SET UP stick Accesses the menu mode or confirms the setting UP DOWN Chooses the desired menu LEFT RIGHT Sets up the value of the selected menu and changes the settings 5 2 Zoom Focus Adjustment UP...

Page 6: ...is function is used to control the light exposure WHITE BAL You can control the white balance under different lighting conditions here DAY NIGHT This function is used to improve the camera s sensitivi...

Page 7: ...UAL Increase or decrease the optical zoom ZOOM or the digital zoom D ZOOM using the UP and DOWN directions of the SET UP stick Press the SET UP stick once the desired image quality is obtained The foc...

Page 8: ...nder MANUAL AGC 3dB 28dB OFF Disabled LOW Narrow range gain value adjustment MEDIUM Medium range gain value adjustment IRIS AUTO MANUAL AUTO The iris is automatically activated upon illumination MANUA...

Page 9: ...switch to MANUAL mode fine tune the White Balance and then press the SET UP stick NOTE The White Balance may not work properly under the following conditions If that is the case select the AWC mode au...

Page 10: ...ST In BW mode you can turn the BURST signal ON or OFF SMART IR This option controls the IR LED bright portion base saturation is not expected When selecting the following submenu will appear MODE ON O...

Page 11: ...erent levels here For BLC Mode you can choose a compensation level from LOW MIDDLE or HIGH For HSBLC mode you can set the sensitivity trigger level between 0 and 100 For D WDR mode you can set the WDR...

Page 12: ...bright light conditions You can set different levels here 3DNR MODE OFF ON SMART OFF Deactivated ON The compensation proportion will be adjustable from 0 to 255 under 3DNR LEVEL SMART The DNR level w...

Page 13: ...l be but a ghost effect may also occurr 6 7 IMAGE ADJ This function is used to adjust the picture that is displayed on the screen FREEZE OFF ON The FREEZE function allows to hold the image of the came...

Page 14: ...onfiguring various camera settings To enter the submenus of the functions select on the right 6 8 1 CAM TITLE This menu is used to assign a unique name to a camera You can enter up to 20 alphanumeric...

Page 15: ...Choose a desired value for the baudrate 6 8 3 LANGUAGE The language is set to ENG English 6 8 4 MOTION This function is used to detect moving objects in the monitored area AREA MODE OFF ON Select ON...

Page 16: ...etection area will be displaying the motion on the screen by a flickering yellow block AREA When motion is detected the detection area will be displaying the motion on the screen by a flickering yello...

Page 17: ...RESET ON OFF When choosing ON the mask will be minimised to a certain size and will be dragged to the middle of the screen COLOR 0 15 Choose one of the 16 colours for the mask areas TRANSPARENCY 0 3...

Page 18: ...om 0 to 255 H CENTER 128 127 Choose the horizontal center level for the lens shading compensation If you change the value of H CENTER and V CENTER the center point will be moved V CENTER 128 127 Choos...

Page 19: ...reset mode are loaded SAVE ON OFF When CUSTOM is selected under POSITION you can make the settings for your own customised mode and then you can save here your settings when you select ON CLEAR ON OFF...

Page 20: ...DC Iris F Number F 1 8 3 5 IR LED 35 pcs Optical Wavelength 850 nm Max IR Distance 30 45 m according to scene reflexion Digital Zoom Off 1 12x Sens Up Off x256 auto Motion Detection On Off Sensitivit...

Page 21: ...Dimensions 19 English...

Page 22: ...ucts meet the standards in the following relevant provisions EC EMC Directive 2004 108 EC Applied harmonised standards and technical specifications EN 55022 2010 EN 61000 3 2 2006 A1 2009 A2 2009 EN 6...

Reviews: