background image

11

Bedienung

DE


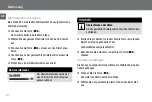
x

Drücken Sie die Taste »

e

/

f

« erneut, um das Diktat anzu-

hören.


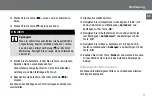
x

Drücken Sie die Taste » « (Sprung ans Ende).

Sprungziel

Wenn im Diktat Infos oder Indizes (siehe ausführliche 
Langanleitung, Kapitel „Info/Index-Funktion“) vorhan

-

den sind, dann erfolgt der Sprung ( ) zur nächsten 
Markierung. Springen Sie so lange, bis das Diktatende 
erreicht ist.


x

Starten Sie die Aufnahme, indem Sie die Taste »

g

« drücken. 

Sprechen Sie den anzuhängenden Text.
Die Aufnahmeanzeige leuchtet rot. Der Fortschrittsbalken 
wird länger und die Diktatlänge erhöht sich.


x

Beenden Sie die Aufnahme, indem Sie die Taste »

e

/

f

« 

drücken.

Sie können das Anhängen auch für alle folgenden Aufnahmen 
voreinstellen.


x

Drücken Sie die Menü-Taste.


x

Navigieren Sie im Hauptmenü (siehe Kapitel „Profile“) mit 
den Auf-Ab-Tasten zum Menüpunkt „

Aufnahme

“ und 

bestätigen mit der Taste „

OK

“.


x

Navigieren Sie im Aufnahmemenü mit den Auf-Ab-Tasten 
zum Menüpunkt „

Aufnahmeart

“ und bestätigen mit der 

Taste „

OK

“.


x

Navigieren Sie im Menü „Aufnahmeart“ mit den Auf-Ab-
Tasten zum Menüpunkt „

Anhängen

“ und bestätigen mit der 

Taste „

OK

“.


x

Beenden Sie mit der Taste „

Sichern

“ und wechseln Sie dann 

mit der Menü-Taste zurück in den Aufnahme-Wiedergabe-
Betrieb.

Diktateigenschaften ändern

Sie können die Diktateigenschaften von vorhandenen Diktaten 
nachträglich bearbeiten.

HinWEiS

Summary of Contents for Digta 7 Push

Page 1: ...PUSH Kurzanleitung Quick Reference Guide Notice abr g e...

Page 2: ...unction button you will find a short description of the enabled functions FR REMARQUE Vous trouverez la notice d utilisation d taill e de votre appareil Digta 7 Push sur notre site internet www grundi...

Page 3: ...Fig 4 Fig 1 Fig 3 Fig 2 16 20 19 18 17 21 22 Fig 5 30 39 31 28 29 27 38 32 33 34 35 37 36 5 7 6 14 3 13 10 9 8 12 4 1 11 23 24 26 25 2 15...

Page 4: ...tensperre ein ausschalten Nr Bezeichnung Bedeutung 14 Obere Funktionstaste Kurz dr cken Display Beleuchtung ein und ausschalten auch wenn das Ger t in der Docking Station steht Lang dr cken EOL wenn E...

Page 5: ...ile Ordnername Dateiformat Aufnahmequalit t f r neue Diktate Verschl sselung Ladezustand in Nr Bezeichnung Bedeutung 34 Tastenfunktionen Aktuelle Funktion der Tasten im Tastenblock gAufnahme ll Aufnah...

Page 6: ...se unbedingt um Unf lle und Sch den am Ger t zu vermeiden GEFAHR Weist auf m gliche Lebensgefahr hin WARNUNG Weist auf m gliche Verletzungsgefahr hin VORSICHT Weist auf m gliche Gef hrdungen f r das G...

Page 7: ...t als nicht bestimmungsgem und ist untersagt Halten Sie das Ger t und dessen Zubeh r von Kindern fern Sch tzen Sie das Ger t vor Regen und Spritzwasser Legen Sie das Ger t nicht in unmittelbare N he d...

Page 8: ...mit der Spannung Ihrer Steckdose bereinstimmt Eine falsche Spannung kann das Ger t st ren Zubeh r Besch digungen Verwendung von nicht freigegebenem Zubeh r kann zur Besch digung des Ger tes f hren Ak...

Page 9: ...ch wenigen Sekunden in den Haupt bildschirm und ist betriebsbereit Ausschalten x x Dr cken Sie die Taste MENU bis das Ger t ausgeschal tet ist Tastensperre Mit der Tastensperre k nnen Sie verhindern d...

Page 10: ...nen zus tzliche Informationen angezeigt x x Dr cken Sie kurz die untere Funktionstaste bis im Display der Kurzhilfetext angezeigt wird x x Zum Beenden der Hilfe dr cken Sie erneut die untere Funktions...

Page 11: ...Taste NEW Das Ger t schaltet in die Aufnahmepause ll die Aufnahme anzeige blinkt rot x x Starten Sie die Aufnahme indem Sie die Taste g dr cken Sprechen Sie den neuen Text Die Aufnahmeanzeige leuchtet...

Page 12: ...rke einstellen x x Dr cken Sie w hrend der Wiedergabe die Auf Ab Tasten Die Lautst rkeanzeige wird eingeblendet Gefahr einer Geh rsch digung Halten Sie das Diktierger t bei lauter Wiedergabe insbeson...

Page 13: ...t schaltet in Aufnahme Stopp x x W hlen Sie das gew nschte Diktat mit den Auf Ab Tasten aus x x Dr cken Sie die Taste e f um das Diktat anzuh ren x x Dr cken Sie an der gew nschten Diktatposition ern...

Page 14: ...modus aktiv ist Der berschreibmodus wird durch einen Strich im Fortschrittsbalken gekennzeichnet berschreiben der Daten Ab der gew hlten Diktatposition wird das Diktat ber schrieben x x Starten Sie di...

Page 15: ...n Sie die Aufnahme indem Sie die Taste e f dr cken Sie k nnen das Anh ngen auch f r alle folgenden Aufnahmen voreinstellen x x Dr cken Sie die Men Taste x x Navigieren Sie im Hauptmen siehe Kapitel Pr...

Page 16: ...hlen werden die gew hlten Eigenschaften mit unterschiedlichen Bedienabl ufen aufgerufen In der Hilfefunktion unte re Funktionstaste finden Sie eine kurze Erkl rung der Diktateigenschaften Info Index...

Page 17: ...eil Ordner Die Liste der l schbaren Elemente ist nur im Menu Mode verf gbar x x Pr fen Sie ob Diktat l schen ausgew hlt ist und best tigen Sie indem Sie die Taste OK dr cken Es erscheint eine Sicherhe...

Page 18: ...p for the current On Off setting of functions Long pressing Keylock On Off switch No Description Meaning 14 Upper function button Press button briefly Display illumination On Off Press button long EOL...

Page 19: ...Folder name File format recording quality of the next recording Encryption Charge level in No Description Meaning 34 Key functions Current function of the keys on the keypad g Recording ll Record paus...

Page 20: ...art as well as our many years of in house experience The manufacturer assumes no liability for damages due to Failure to comply with the instructions in this operating manual Improper use misuse Willf...

Page 21: ...event accidents personal injury or property damage Indicates a hazardous situation which if not avoided will result in death or serious injury Indicates a hazardous situation which if not avoided coul...

Page 22: ...es and functions which are not available for all product or equipment lines are marked in this manual with a star Registration in customer center Please register your Digta 7 on http www grundig gbs c...

Page 23: ...siness Systems cannot accept liability for lacks caused through the utilization of accessories which are not Grundig Business Systems genuine accessories This also applies to accessories which are nei...

Page 24: ...dify the device Special hazards Electrical Voltage Danger of life due to electric shock The power supply operates with 230 V alternating current Improper utilization may result in injury due to electr...

Page 25: ...fferent plugs Do not place heavy objects on the power supply or connection cable and do not cover the power supply Use the power supply only in a dry indoor environment Protect the power supply from m...

Page 26: ...in the dictation machine The attempt to charge a rechargeable battery beyond its electrical capacity may lead to explosion Disregarding these precautions means risking explosions and burns Traffic Da...

Page 27: ...tions may lead to a stumbling hazard Electronic components Risk of damage and void warranty Protect the device from moisture such as rain or water spray Do not place the device near a heater nor in di...

Page 28: ...use the device to be damaged Disposal Electronic waste is not allowed to be disposed of with the domestic waste Electronic waste has to be returned to collecting points at public recycling authorities...

Page 29: ...onnect the power supply from the socket and the USB plug from the USB connection of your device Switching off on Switching on x x Press the MENU button until the initial display view appears on the di...

Page 30: ...hed on the message Device locked is displayed You can remove this lock by pressing the lower function button until the main screen is fully visible The buttons are now unlocked If you do not deactivat...

Page 31: ...f help texts are displayed x x Press the lower function button again or the OK button in order to close the help texts You will be resetted to the initial situation screen Profiles The Easy Mode and t...

Page 32: ...e The progress bar increases as well as the dictation length x x Pause the recording by clicking the g button once again The dictation machine switches over to the recording pause ll the LED indicator...

Page 33: ...back x x Press the e f button The device turns to recording stop If the device is already in stop mode play back of the current dictation starts immediately x x Press the e f button again to listen to...

Page 34: ...ed The recording indicator blinks orange The progress bar increases as well as the dictation length x x Stop the recording by pressing the e f button Overwrite dictation parts You can overwrite a dict...

Page 35: ...o the end The cursor skips to the next mark when dictation infos or indices exist see the comprehensive manual chapter Info Index function Skip until the dictation end is reached x x Start the recordi...

Page 36: ...etails button The menu for changing the dictation features appears on the display The cursor is placed on the feature chosen last The selected features which imply different operating pro cedures are...

Page 37: ...ble elements list is only available in the Menu Mode x x Control if Delete dictation has been selected and confirm it by pressing the OK button A security question prompts to prevent deleting dictatio...

Page 38: ...no WAV Stereo 200 5 500 Hz 200 7 500 Hz 200 20 000 Hz depending on the sample rate selected Microphone socket 3 5 mm jack stereo Earphone jack 3 5 mm jack stereo mono earphone can be used Connections...

Page 39: ...keylock is deactivated There is no sound or too quiet The microphone sensitivity or the play back volume are not set correctly Set the microphone sensitivity in the menu recording to conference or hol...

Page 40: ...velle dict e 11 Touches de naviga tion gauche droite Navigation N D signation Signification 12 Afficheur Visualisation de l tat de service et des fonc tions de menu r glables d tails sur la Fig 5 13 T...

Page 41: ...ct e Lire la dict e et terminer la lecture 27 Heure Indiqu e en heures et en minutes 28 Voice Activation Marche arr t de l activation vocale 29 Temps de mise en m moire restant La capacit de m morisat...

Page 42: ...Barre de progression Indique l tat d avancement actuel de la dict e et caract rise l insertion l crasement les informations l index 38 Zone d affichage de la dict e D signe la dict e nom num ro d ord...

Page 43: ...de l appareil DANGER Indique un risque potentiel d accident mortel AVERTISSE MENT Indique un risque potentiel de blessure ATTENTION Indique des risques potentiels d endommage ment de l appareil des co...

Page 44: ...comme d rogeant aux prescriptions et il est donc proscrit Tenez l appareil et ses accessoires l cart des enfants Prot gez l appareil de la pluie et des aspersions d eau Ne posez pas l appareil tout p...

Page 45: ...limentation Une tension erron e risque de perturber la bonne marche de l appareil Accessoires D t riorations L utilisation d accessoires non autoris s risque d endommager l appareil Les tout derniers...

Page 46: ...secteur de la prise de connexion USB de la machine dicter Mise en marche Arr t Mise en marche x x Pressez la touche MENU jusqu ce que le premier indica teur soit incrust sur l afficheur La machine di...

Page 47: ...il est rang dans votre porte documents Lorsque vous allumez l appareil le message Utilisation impossible s affiche Pour d verrouiller les touches appuyez sur la touche de fonction inf rieure jusqu ce...

Page 48: ...enregistrement de dict es ou dans le menu x x Pressez bri vement la touche fonctionnelle inf rieure jusqu ce que le texte d assistance court soit visualis sur l afficheur x x Pour achever l aide r ap...

Page 49: ...areil bascule sur la pause d enregistrement ll et l indicateur d enregistrement clignote en rouge x x D marrez l enregistrement en appuyant sur la touche g Dictez le nouveau texte L indicateur d enreg...

Page 50: ...age du volume sonore x x Appuyez sur la touches de mont e descente durant la lecture L indicateur du volume sonore est incrust sur l afficheur Risque d atteintes de la fonction auditive Ne tenez pas l...

Page 51: ...yez sur la touche e f afin d couter la dict e x x Appuyez nouveau sur la touche e f la position de dict e souhait e x x Appuyez sur la touche Ins rer x x Si cette touche d affichage n est pas affich e...

Page 52: ...position choisie x x D marrez l enregistrement en appuyant sur la touche g Dictez le texte modifier L indicateur d enregistrement s allume en rouge x x Terminez l enregistrement en appuyant sur la to...

Page 53: ...en appuyant sur la touche e f Vous pouvez galement pr d finir l ajout pour tous les enregistrements suivants x x Appuyez sur la touche Menu x x Naviguez dans le menu principal voir chapitre Profils a...

Page 54: ...seur est positionn sur la derni re propri t utilis e Menu D tails Suivant l option de menu choisie les propri t s s lec tionn es sont appel es par diff rents processus de commande Vous trouverez dans...

Page 55: ...vant tre effac s dict e index ou informations fragment de dict e dossiers appara t sur l afficheur Liste des l ments effa ables x x V rifier que l option Supprimer la dict e est s lectionn e et valide...

Page 56: ...com The CE mark confirms that the device corresponds to the relevant guidelines of the European Union FR Pour plus d informations sur la garantie du fabricant de Grundig Business Systems visitez notre...

Page 57: ...mful interference to radio communications However there is no guarantee that interference will not occur in a particular installation If this equipment does cause harmful interference to radio or tele...

Reviews: