


ENGLISH
11
Setting television channels automatically
The television set is equipped with an automatic channel search
system.
You start the search and can then sort the television channels into
your order of preference.
99 preset positions are provided, to which you can assign television
channels from the antenna or from the cable connection.
1
Switch on the television with »
IO
« on the television set, then
press
»
P+
«
on the remote control.
– The »Sprache« (Menu language) menu appears when the
television is first switched on.
Hint:
If the »Sprache« (Menu language) menu does not appear on
the screen, then set it in accordance with the chapter on reset-
ting all television channels on page 30.
2
Select language with »
P+
«, »
P-
«, »
Ǹ
« or »
Ƿ
« and press
»
OK
« to confirm.
– The »Country« menu appears.
3
Press »
P+
«, »
P-
«, »
Ǹ
« or »
Ƿ
« to select the country and
»
OK
« to confirm.
– The search begins. It may last a few minutes, depending on
the number of television stations found.
– After the search the television switches to channel position 1
and the »Program table« menu appears.
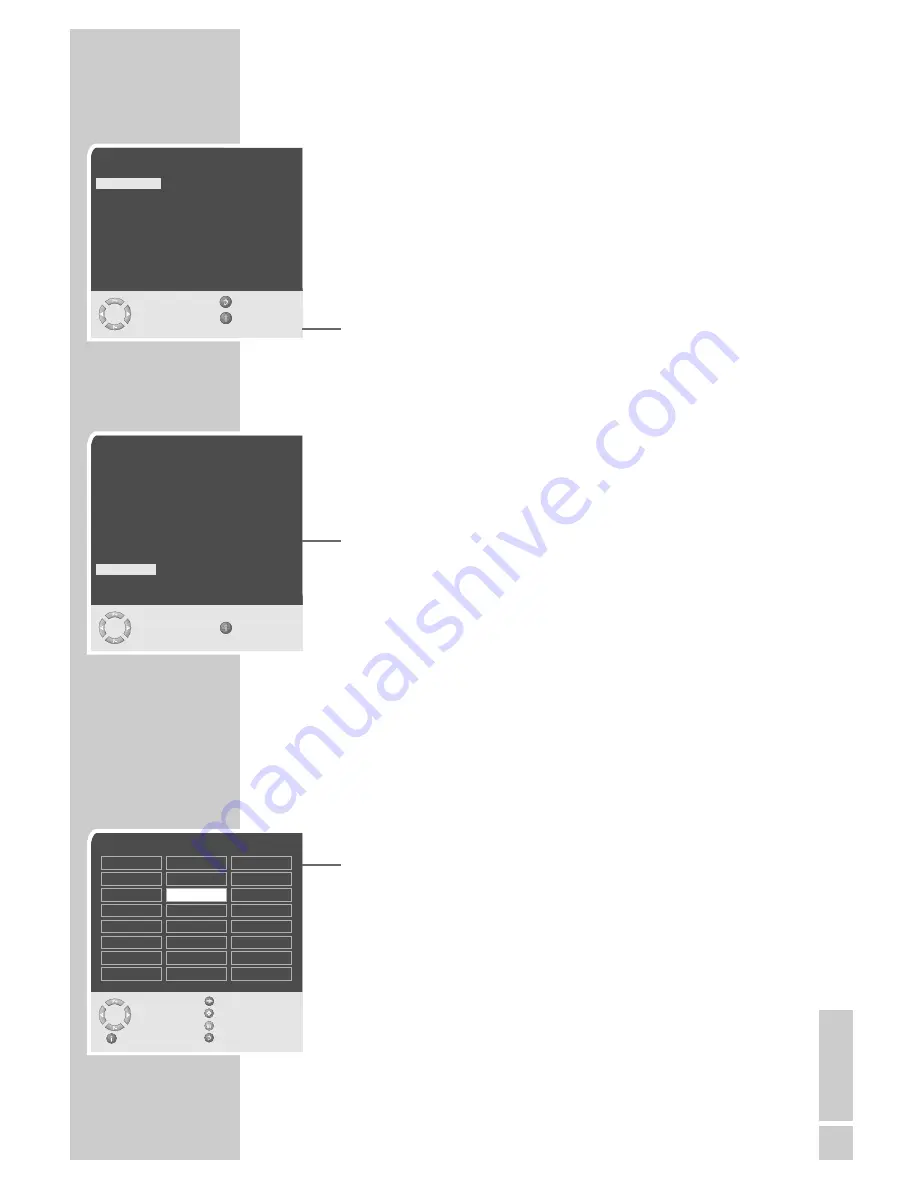
Changing stored channels
You can delete channels that have been stored more than once
during the automatic search. You can also store channels in a diffe-
rent preset position, change or enter the name of a channel as well
as skip channels.
Deleting channels
1
In the »Program table« menu, select the station to be deleted
with »
P+
«, »
P-
«, »
Ǹ
« or »
Ƿ
«.
2
Highlight the channel with »
ǷǷ
« (yellow).
3
Press »
ǷǷ
« (yellow) to delete the channel.
Note:
To delete other stations, repeat steps
1
and
3
.
SETTINGS
______________________________________________
Program table
Skip
Select
Move
Delete
Exit
Name
01 ARD
02 ZDF
03 BR
04 RTL
05 SAT 1
06 PRO 7
07 BR
08 TEL5
09
10
11
S
12 ----
S
13 ----
S
14 ----
S
15 ----
S
16 ----
S
17 ----
S
18 ----
S
19 ----
S
20 ----
S
21 ----
S
22 ----
S
23 ----
S
24 ----
S
Sprache
Deutsch
Português
Türkçe
Dansk
Svenska
E
λληvικά
Español
Suomi
Hrvatski
Français
âesky
Pycc
к
English
Sloven‰cina
Româna
Italiano
Slovensko
C
ск
Norsk
Magyar
Б лг
ap
ск
Dutch
Polski
Auswählen
Zurück
und bestätigen
Ende
●
OK
Country
Germany
Greece
Romania
Austria
Hungary
Slovakia
Belgium
Iceland
Slovenia
Bulgaria
Ireland
Spain
Croatia
Italy
Sweden
Czech
Luxembourg
Switzerland
Denmark
Netherlands
Turkey
England
Norway
Yugoslavia
Finland
Poland
France
Portugal
Select
and confirm
Exit
●
OK


