-2-
T26858/T26859 Hand Winch
Mounting
The Model T26858/T26859 has holes in the base
for mounting to most flat surfaces. The winch
must be mounted for safe and effective operation.
Before drilling into a frame or bumper component,
verify that the opposite side of the drilling area is
clear of wires, tubing, or brake lines.
To mount winch:
1. Place winch in desired position and mark
locations of mounting holes.
2. Remove winch and drill
7
⁄
16
" holes in locations
you marked in
Step 1. For safe operation, at
least three bolts should be used to secure
winch.
3. Use
3
⁄
8
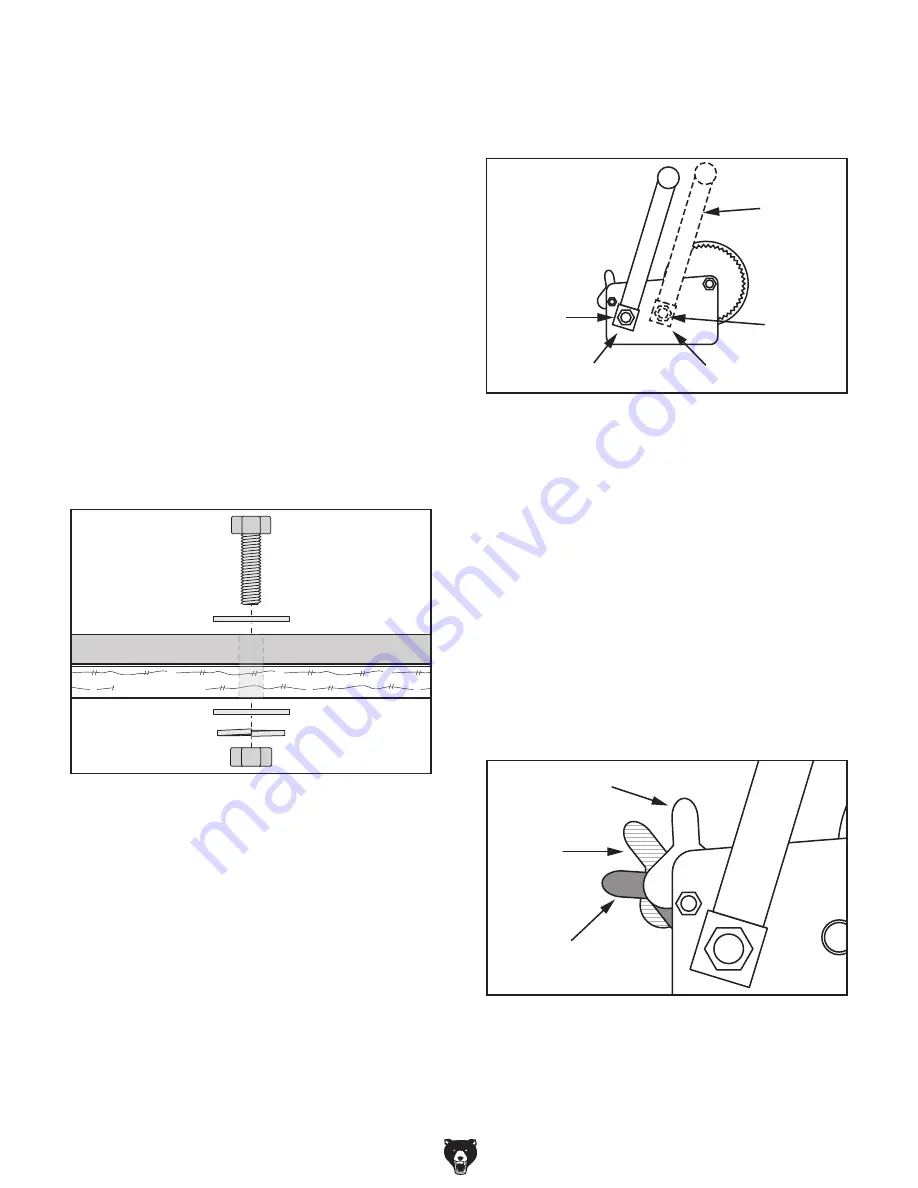
" diameter mounting hardware to
secure winch to mounting surface, as shown
in
Figure 2.
Ratchet Settings
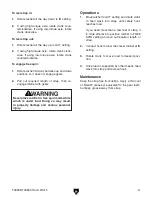
The rachet has three settings that determine
which direction the drum turns—IN, OUT, and
FREE SPIN (see
Figure 4).
Winch Base
Mounting Surface
Bolt
Flat Washer
Flat Washer
Lock Washer
Hex Nut
Figure 2. Example of a "Through-Mount" setup.
Crank Attachment
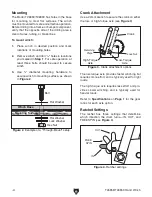
Use a 22mm wrench to secure the crank on either
the low- or high-torque axle (see
Figure 3).
Crank
High-Torque
Axle
Low-Torque
Axle
Retaining
Plate
Lock Nut
Figure 3. Crank attachment options.
OUT
IN
FREE
SPIN
Figure 4. Ratchet settings.
The low-torque axle provides faster winching but
requires more effort, and is typically used for light
loads.
The high-torque axle requires less effort and pro-
vides slower winching, and is typically used for
heavier loads.
Refer to
Specifications on Page 1 for the gear
ratios for each axle option.


